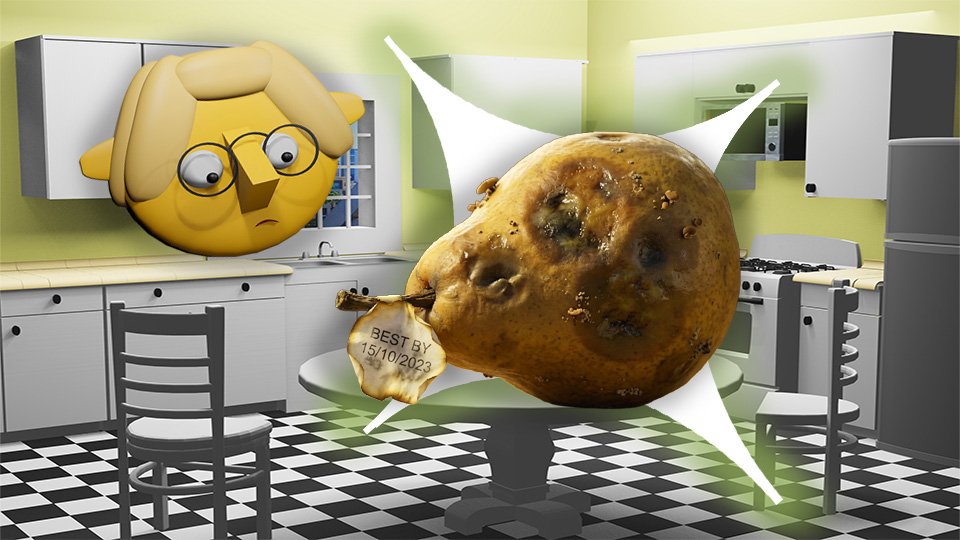
The “Expired” vs. “Best By” Myth

Most food that’s past its printed date is not expired. The date on the package is almost never a safety date — it’s a quality date, a manufacturer preference, or a retail inventory tool. Here’s what the dates actually mean, which ones to take seriously, and the enormous amount of perfectly good food that gets thrown away every year because of a misunderstood label.

Americans throw away an estimated 30–40% of the food supply. A significant portion of this waste is driven by misreading food date labels — tossing food that is perfectly safe and often perfectly good because the printed date has passed.

The critical thing to know: in the United States, with the exception of infant formula, there is no federal law requiring food expiration dates. The dates you see on food packaging are not regulated safety standards. They are manufacturer estimates of peak quality — and “past peak quality” is very different from “unsafe.”


The Date Types and What They Actually Mean

“Best By” / “Best If Used By”: A manufacturer’s estimate of when the product will be at peak quality — flavor, texture, appearance. The product is almost certainly still safe after this date; it may just be slightly less fresh or vibrant than the manufacturer prefers.

“Sell By”: An inventory management date for retailers, not consumers. It tells the store when to pull the product from shelves to ensure customers have reasonable time to use it after purchase. The food is still safe and often still at peak quality on this date and significantly beyond.

“Use By”: The manufacturer’s recommended last date for peak quality. Slightly more conservative than “Best By” but still not a safety date for most products. The exception: “Use By” on highly perishable ready-to-eat products (deli meats, prepared salads) should be taken more seriously.

“Freeze By”: A recommendation for when to freeze the product to maintain best quality — not an indication that it will be unsafe if you don’t.

“Packed On”: When the product was manufactured or packaged. Most useful for calculating freshness from the pack date rather than from an arbitrary printed cutoff.


Products Where the Date Doesn’t Matter Much

Canned goods: The USDA says most canned foods are safe indefinitely. Quality degrades over years — textures soften, flavors mellow — but properly stored canned goods with intact seals are safe well past any printed date. The “best by” date on a can of tomatoes is about flavor peak, not safety.

Dried pasta, rice, and grains: Shelf-stable almost indefinitely when stored properly (airtight, cool, dry). A two-year-old box of pasta is fine.

Dried beans and lentils: Safe indefinitely; become harder to rehydrate over time and require longer cooking. An “expired” bag of dried lentils is not dangerous.

Honey: Does not expire. Honey found in ancient Egyptian tombs was still edible. Crystallization is normal and reversible (warm gently).

Hard liquor: Doesn’t expire. Wine and beer degrade in quality after opening but are not unsafe.

Vinegar: The USDA considers vinegar to have an indefinite shelf life. Quality stays consistent for years.

Soy sauce, fish sauce, hot sauce: Very high salt and acid content makes these shelf-stable well beyond any printed date once opened.

Salt and sugar: No expiration. These are minerals and simple carbohydrates that don’t degrade.

White vinegar, apple cider vinegar: Indefinitely shelf-stable.

Spices: Don’t go bad in a safety sense; do go stale in a flavor sense. See the spice freshness section.


Products Where the Date Matters More

Ready-to-eat deli meats and prepared foods: These are the products where date labels are most meaningful, because listeria can grow at refrigerator temperatures in high-moisture, ready-to-eat environments. Follow “Use By” dates on these more carefully.

Fresh meat, poultry, and seafood: Buy close to the sell-by date only if cooking immediately; otherwise freeze. Fresh fish is particularly time-sensitive.

Soft cheeses: Higher moisture content and lower acidity make soft cheeses (ricotta, brie, fresh mozzarella) more time-sensitive than hard cheeses.

Eggs: See the dedicated egg post for the float test. But eggs in the shell last 3–5 weeks refrigerated past the pack date.

Milk: Usually safe for 7–10 days past the sell-by date when refrigerated properly. Use your nose — it will tell you.


The Sensory Test (Better Than Any Date)

For most foods, your senses are better expiration detectors than any printed date.

Smell it: Most food that has gone genuinely bad smells wrong. (The exception: the foodborne pathogens discussed in the SAVES nose post — Salmonella and listeria don’t have a smell. For these, the date and proper storage matter more than the nose.)

Look at it: Mold, unusual discoloration, liquefied texture — these are visible signs of genuine spoilage.

Taste a small amount: Off flavors are usually obvious.

The combination of smell + look + taste is more reliable for most foods than the date stamp.


The Waste Calculation

The average American household throws away $1,500–2,000 worth of food per year. A significant portion of this is date-driven — food that was thrown away because the date passed, not because the food was actually bad. This is money directly in the trash.

Understanding what dates mean — and that most of them are quality estimates, not safety deadlines — is one of the most immediately useful pieces of food knowledge available.


🛒 Gear Worth Having

  • Refrigerator Thermometer — Proper refrigeration (at or below 40°F) is the most important variable in food longevity. Know what yours is actually running at.
  • OXO Airtight Food Storage Containers — Proper storage extends safe food life significantly beyond what the printed date assumes.
  • Dry-Erase Refrigerator Labels — Date your own food when you open or prepare it. A more accurate signal than the manufacturer’s date.
  • USDA FoodKeeper App — The official resource for how long foods remain safe under different storage conditions.
  • Vacuum Sealer Food Bags — For extending the life of opened products significantly. Removes the air that drives oxidation and mold.

As an Amazon affiliate, I earn from qualifying purchases. Thank you for supporting TumbleBump.


Related Reads


TumbleBump is part of the WhistleBump group – find the rest of the family at WhistleBump.com.

27004

©2026 John D Reinhart/TumbleBump.com – all rights reserved
How to Become a Foodie (Even If You’d Rather Not)

You don’t have to love food to eat better. Here’s how regular people accidentally become foodies — and why it’s worth the trip.

Let’s get one thing straight: there is nothing wrong with you.

You’ve been eating the same seven things for a decade. You know what you like. You’ve optimized your lunch situation to the point of near-scientific precision. A bean and cheese burrito is a complete food group. So is tuna salad. The drive-through exists for a reason and that reason is efficiency.

The rest of the world, meanwhile, is over there gasping about “umami” and arguing about whether the risotto was “reduced enough.” You have watched this from a comfortable distance and felt exactly nothing.

Here’s the thing though. The foodies aren’t wrong. They’re just addicted. And the good news is, the addiction is extremely low-risk and the side effects are mostly “better dinners.”

This is not a post about shaming your current food life. It’s a post about what happens when you let a little curiosity sneak through the door. Because once it does, your taste buds start doing things you didn’t sign up for. In the best way.

🤔 Why Some People Just Don’t Care About Food

First: completely valid. Food-as-fuel is a legitimate life philosophy. Plenty of brilliant, functional, well-adjusted humans have eaten the same three meals on rotation since college and never once felt the loss.

But here’s what the science actually says: a lot of “I don’t care about food” is less about preference and more about exposure. You never learned to taste the difference between a good tomato and a bad one. Nobody showed you. Why would they? Tomatoes come in a can. They’re red. Moving on.

Your palate, it turns out, is trainable. Like a dog. A dog who currently only knows “sit” but is quietly capable of learning “roll over” and “fetch the aged Manchego.”

😄 The Accidental Foodie Pipeline

Almost nobody wakes up one morning and decides to become a foodie. It happens in stages, like a slow-motion ambush.

  • Stage 1 — The Trigger: Someone makes you something homemade. It tastes nothing like the version you’ve been eating from a box. You say nothing, but you notice.
  • Stage 2 — The Curiosity: You Google “why does homemade [thing] taste better.” You fall into a rabbit hole about fresh ingredients, technique, and something called the Maillard reaction. You close the tab. But it stays with you.
  • Stage 3 — The Experiment: You try one thing. Just one. Maybe you buy actual garlic instead of the powder. Maybe you add lemon to something that never had lemon before. The result is unreasonably good.
  • Stage 4 — The Slide: You are now texting people about garlic. You are a foodie. Welcome.

The pipeline is fast. It catches a lot of people who thought they were immune.

🍳 Where to Actually Start (Low Commitment, High Payoff)

You don’t have to love cooking to start appreciating food. Those are two different things. Here’s where to poke at the edges without overhauling your entire personality:

  • Eat one thing slowly. Not forever. Just once. Pick something you eat regularly and actually pay attention to it. What’s in there? What’s hitting first? What’s showing up at the end? This is not meditation. It’s just tasting.
  • Upgrade one ingredient. You’re still making the same thing. Just use better olive oil. Or real Parmesan instead of the green can. One swap. See if you notice.
  • Try one thing you think you hate. Texture complaints are real (mushrooms, we see you). But sometimes a bad preparation is the culprit, not the food itself. Roasted versus raw is a completely different universe.
  • Watch someone who loves food cook. You don’t have to take notes. Just watch. YouTube is full of people who are genuinely delighted by what’s happening in the pan. Some of it is contagious.

None of this requires equipment you don’t have. None of it requires opinions about wine. You’re just taking a tiny tourist trip into someone else’s obsession.

🛒 A Few Things That Help the Transition

If you’re feeling even a little curious, these are worth having. None of them require a culinary degree.

  • A good chef’s knife — The single biggest upgrade in any kitchen. A sharp knife makes prep faster, easier, and weirdly more fun. (Yes, fun. We’re surprised too.)
  • A cast iron skillet — This is where the Maillard reaction lives. Brown things in this pan. Brown things taste better. Science.
  • A decent salt cellar with kosher or flaky salt — Not table salt. The difference is real. This is not snobbery. This is chemistry.
  • An instant-read thermometer — Takes the guesswork out of meat. If you’ve ever served dry chicken, this is why. Ten seconds, no more dry chicken.

As an Amazon affiliate, I earn from qualified purchases. Thank you for supporting TumbleBump.

✨ The Real Secret

Foodies aren’t people who were born caring about food. They’re people who accidentally tasted something that made them ask “why does that taste like that?” and then went looking for the answer.

That’s it. That’s the whole origin story. One good bite. One curious question.

You’ve almost certainly already had that bite. You just didn’t follow the thread.

You don’t have to become a person who talks about food at parties. You just have to be willing to notice, once in a while, that something tastes really good. The rest has a way of following on its own.

📚 Related Reads


TumbleBump is part of the WhistleBump group – find the rest of the family at WhistleBump.com.

21018

©2026 John D Reinhart/TumbleBump.com – all rights reserved
How to Easily Step Away from Fast Food and Instantly Make Your Life Better

Fast food isn’t the enemy — it’s just a habit. Here’s how to quietly, painlessly step away and start eating like someone who has their life loosely together.

The drive-through didn’t trick you. Let’s be fair about this. You went there because it was fast, it was cheap enough, it was right there, and you were hungry right now. Those are four completely legitimate reasons. Nobody ends up at a drive-through window by accident.

But here’s the thing about fast food: it’s not really food-food. It’s a system. A very well-engineered, heavily optimized system designed to make sure you come back tomorrow. The salt, the fat, the portion size, the smell — all of it tuned like a piano to keep you in the loop.

Stepping away from it isn’t a moral victory. It’s just opting out of someone else’s system and building a slightly better one of your own. Which, it turns out, is not that hard. Annoying to start. Not hard.

🚪 The Door Is Already Unlocked

The biggest myth about cooking at home is that it requires some kind of skill you don’t have yet. It doesn’t. What it requires is a plan, and a plan is just a list of decisions you make in advance so you don’t have to make them at 6 PM when you’re starving and your judgment is completely gone.

Most home meals are not complicated. They’re a protein, something next to it, and maybe something green if you’re feeling ambitious. The drive-through has trained you to think of food as a production. It’s not. It’s just dinner.

The “Ahhhh” moment — when cooking clicks — usually happens the first time you make something and think: wait, that was … fine. That was completely fine. And I know exactly what’s in it. That’s the moment. It’s not dramatic. It’s just quiet and useful.

🗓️ The Plan Is the Whole Game

Fast food wins because it requires zero planning. Home cooking loses because it requires some. The gap is smaller than it feels.

You don’t need a meal plan that looks like a spreadsheet. You need three things:

  • A rotating short list. Five to seven meals you actually like and can make without a tutorial. That’s your whole rotation. You’re done planning.
  • A shopping day. One day a week. Not a long trip — you know what you need because you have a list. In and out.
  • Something already in the fridge. The drive-through beats you on the days there’s nothing at home. Stock a few fallback ingredients and the drive-through loses its best argument.

That’s it. Nutrition meets a calendar. Your dad was right. Deeply annoying, but right.

🔪 The Toolkit (Shorter Than You Think)

You don’t need a gadget for every vegetable. You need a few things that do actual work and stay out of the way the rest of the time. The shiny aisle at the kitchen store is a trap. Walk past it.

The short list of things worth owning:

  • A chef’s knife that’s actually sharp — A dull knife is slower and more dangerous than a sharp one. This is the upgrade that changes everything.
  • A 10-inch skillet, preferably cast iron — This pan does 80% of the work in most home kitchens. Learn to use it well and you barely need anything else.
  • A sheet pan — Protein plus vegetables, olive oil, salt, 400 degrees, 25 minutes. That’s a meal. The sheet pan is the most underrated object in the kitchen.
  • A decent cutting board — Big enough that food doesn’t fall off the edge. Wood or plastic. Not glass. Never glass.

That’s the toolkit. Everything else is optional.

As an Amazon affiliate, I earn from qualifying purchases. Thank you for supporting TumbleBump.

🤭 When Things Go Wrong (They Will)

The eggs will stick. The toast will smoke. Something will come out underseasoned and sad. This is not a sign that you should go back to the drive-through. This is just Tuesday.

Food waste is almost always a planning problem, not a cooking problem. If something’s going bad in the fridge, it’s because it didn’t have a job. Give your groceries jobs before you buy them. “This chicken is for Wednesday.” Done. It has a purpose. It will be eaten.

When something burns or sticks or collapses: ask what happened, file it away, move on. Every bad meal is a lesson that costs about four dollars and takes twelve minutes. That’s a bargain.

🧹 The Cleanup Problem (Solved)

Everyone says their biggest objection to cooking at home is the cleanup. This is at least partially true and also at least partially an excuse. Let’s split the difference.

The secret to kitchen cleanup is doing it in layers while you cook. Pot on to boil? Wipe the counter. Waiting for the oven? Wash the prep bowls. By the time dinner is on the table, half the mess is already gone. The after-dinner cleanup is then genuinely fast — fast enough that it stops being the reason you didn’t cook.

A clean workspace, it turns out, is also a calmer workspace. There’s something about a clear counter that lowers the stress level of the whole operation. It’s not magic. It’s just less chaos.

✨ The Actual Point

Nobody’s asking you to become a person who makes stock from scratch on Sundays and has opinions about olive oil. (Though, fair warning: that person might be closer than you think.)

Stepping away from fast food just means building a slightly better system than the one someone else built for you. A short list of meals. A shopping day. A couple of good pans. That’s all it takes to opt out of the loop.

The door has been unlocked the whole time. You just didn’t need to open it until now.

📚 Related Reads


TumbleBump is part of the WhistleBump group – find the rest of the family at WhistleBump.com.

21011

©2026 John D Reinhart/TumbleBump.com – all rights reserved
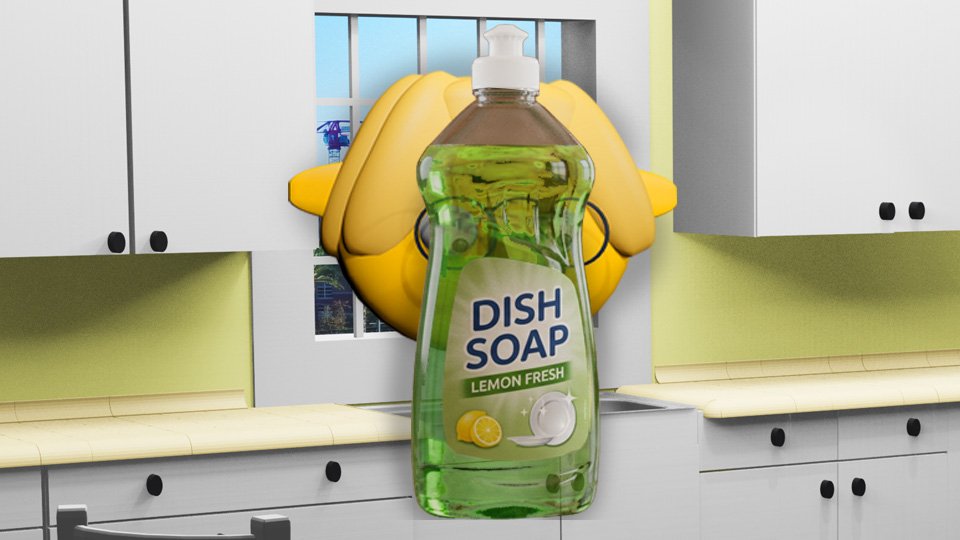
Chemistry in the Sink: Why Hot Water Isn’t Enough

Hot water is great. Hot water plus soap is much better. But why? And when is soap not enough either? A brief, friendly tour of what’s actually happening in your sink — and why the right cleaner for the right job matters more than temperature alone.

Hot water feels like it should be cleaning things. It’s hot. Bacteria don’t like heat. It must be doing something.

And it is doing something — just not as much as you might think, and not for the reasons most people assume.

Here’s what’s actually happening in your sink, and why the combination of hot water, soap, and the right chemistry beats hot water alone by a wide margin.


What Hot Water Actually Does

Hot water helps in several ways:

It increases solubility. Many substances dissolve more readily in hot water than cold — sugars, some proteins, starch residues. Hot water softens and loosens food residue that cold water would leave sitting there.

It speeds up chemical reactions. Every cleaning reaction — whether soap, baking soda, vinegar, or a commercial cleaner — works faster at higher temperatures. Heat is a catalyst.

It has some antimicrobial effect. Above 140°F (60°C), hot water starts killing some bacteria. However: the hot water from most home faucets maxes out around 120°F, which is well below the threshold for reliable sanitization. Your hot water is cleaning your dishes, not sanitizing them.

It helps rinse. Lower viscosity means water at higher temperatures flows off surfaces and carries debris more efficiently than cold water.

What hot water cannot do: break down grease and oil. Oil and water famously don’t mix. No amount of heat changes this fundamental chemistry.


Why Grease Needs Soap

Grease is hydrophobic — it repels water. A greasy pan rinsed with even very hot water comes out still greasy, because the grease and water simply don’t interact.

Dish soap solves this through a molecule called a surfactant. Surfactant molecules have a dual nature: one end is hydrophilic (water-loving) and one end is hydrophobic (water-hating, grease-loving). When you add soap to greasy water, these molecules orient themselves between the water and the grease — the greasy end latches onto the fat, the watery end stays in the water. As you rinse, the grease is encapsulated in tiny spheres called micelles and rinses away with the water.

This is why soap works and hot water alone doesn’t for grease. It’s not about temperature. It’s about molecular chemistry.


The Cleaning Toolkit: What Else to Know

Baking soda (sodium bicarbonate): A mild abrasive and a base. Useful for physical scrubbing without scratching, and for neutralizing acids. Good for scrubbing food residue, baked-on grease, and deodorizing. Not a sanitizer.

White vinegar (acetic acid): An acid that dissolves mineral deposits (hard water scale, calcium buildup), cuts through some greases, and has mild antimicrobial properties. The classic pair with baking soda produces a fizzing reaction that’s more dramatic than functional — the neutralization is the reaction, and neutralizing both the acid and the base leaves you with mostly water and sodium acetate. The fizz looks impressive; the chemistry is somewhat self-defeating. Use them separately for best results.

Hydrogen peroxide (3%, drugstore variety): An oxidizer with real antimicrobial properties. Used after soap washing to sanitize surfaces. It breaks down into water and oxygen — no harmful residue. Excellent for cutting boards and surfaces that touched raw meat.

Bleach (sodium hypochlorite): The heavy hitter. One tablespoon per gallon of water creates an effective sanitizing solution for surfaces, cutting boards, and anything that needs actual disinfection. Not a cleaner for food residue — it’s a sanitizer to use after cleaning. Rinse after application.


The Cleaning vs. Sanitizing Distinction

These two words are often used interchangeably and mean different things.

Cleaning removes dirt, food, grease, and visible residue. Soap and water clean.

Sanitizing reduces microbial populations (bacteria, viruses) to safe levels. Bleach solution, hydrogen peroxide, and certain commercial sanitizers sanitize.

For most home kitchen use, cleaning is enough. You don’t need to sanitize every dish after every meal. You do want to sanitize surfaces and boards that have contacted raw meat, fish, or poultry, and anything that will touch food without further cooking.

The protocol: clean first, sanitize after. Sanitizing something with visible food on it is much less effective — the food residue protects microbes from the sanitizer.


The Temperature Sweet Spot

For washing dishes: as hot as is comfortable for your hands. Hotter is more effective at loosening and removing food residue, but you’re working with your hands in this water. The soap is doing the heavy lifting regardless.

For rinsing: hot works, but cold rinse is perfectly adequate. The soap has already done its job.

For sanitizing: follow the product directions. Most sanitizing solutions work at room temperature.


🛒 Gear Worth Having

As an Amazon affiliate, I earn from qualifying purchases. Thank you for supporting TumbleBump.


Recommended Reads


TumbleBump is part of the WhistleBump group – find the rest of the family at WhistleBump.com.

23008

©2026 John D Reinhart/TumbleBump.com – all rights reserved
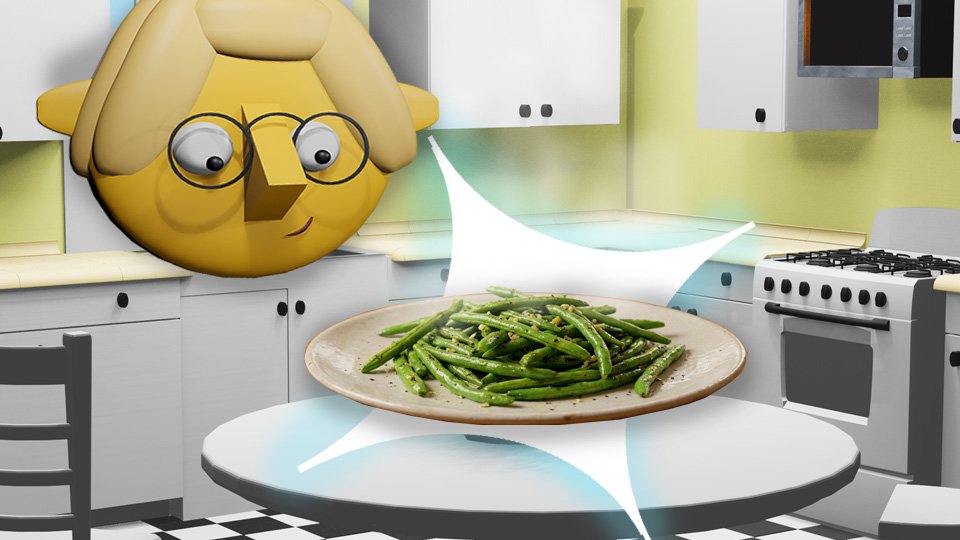
Cooking Vegetables Everyone Will Eat

If the vegetables in your life have been watery, bland, or aggressively healthy-tasting, the problem isn’t the vegetables — it’s the method. Here’s how to cook vegetables so good that even the people who “don’t like vegetables” come back for seconds.

There is a great injustice that has been done to vegetables.

For decades, they were boiled until pale and soft, served as reluctant side dishes, and presented as the joyless nutritional obligation you had to eat before the real food. They tasted watery and vague because they were watery and vague — all the flavor steamed out of them into the cooking water and down the drain.

The vegetables were never the problem. The cooking method was the problem.

Properly cooked vegetables are one of the best things you can eat. Roasted carrots are sweet and caramelized and almost candy-like. Sautéed green beans are snappy and bright and deeply savory. Roasted broccoli develops crispy edges that people fight over. We’ve just been doing it wrong.

Here’s how to do it right.


Method One: Roasting (The Greatest Method)

High heat + fat + time = the best vegetables you’ve ever made. Roasting caramelizes the natural sugars in vegetables and creates browned edges that concentrate flavor in a way nothing else does.

The method:

  1. Preheat your oven to 400–425°F (hot — this is the whole game).
  2. Cut vegetables into even-sized pieces so they cook at the same rate.
  3. Toss with enough olive oil to coat everything lightly (about 2–3 tablespoons per sheet pan of vegetables). Season generously with salt.
  4. Spread in a single layer on a sheet pan. This is crucial — don’t pile them up. Crowded vegetables steam instead of roasting. Use two pans if you need to.
  5. Roast, turning once halfway through, until tender and golden at the edges.

Timing guide: – Broccoli/cauliflower florets: 20–25 minutes – Brussels sprouts (halved): 25–30 minutes – Carrots/parsnips (chunks): 30–35 minutes – Asparagus: 12–15 minutes – Bell peppers (strips): 20–25 minutes – Zucchini/summer squash: 15–20 minutes – Sweet potato (cubes): 30–35 minutes

Optional but excellent: – A squeeze of lemon at the end brightens everything – Fresh or dried herbs in the last 5 minutes – Grated parmesan over the top right before they come out – A drizzle of balsamic reduction for sweetness and depth


Method Two: Sautéing (Fast and Excellent)

Sautéing is high-heat cooking in a small amount of fat, with movement. It’s fast, it keeps vegetables crisp and bright, and it’s perfect for weeknight cooking.

The method:

  1. Heat a pan (not nonstick — you want it to get very hot) over medium-high heat. Add oil or butter and let it get hot — it should shimmer for oil, foam for butter.
  2. Add vegetables. Don’t touch them for 1–2 minutes. Let them develop some color on the bottom before you start moving them.
  3. Toss or stir, then let them sit again. The goal is some browning, not constant agitation.
  4. Season with salt. Finish with garlic (added near the end so it doesn’t burn), lemon, herbs, or whatever sounds good.

Best vegetables for sautéing: Green beans, snap peas, spinach, mushrooms, asparagus, corn, peppers, cherry tomatoes, kale (slightly wilted with oil and garlic is magnificent).

Time: Most sautéed vegetables are done in 5–10 minutes.


Method Three: Blanching and Shocking (For Salads, Meal Prep, and Perfection)

Blanching briefly boils vegetables, then immediately plunges them into ice water. The result: vivid green color, crisp-tender texture, bright flavor. This is how restaurants get their vegetables so visually perfect.

The method:

  1. Bring a large pot of heavily salted water to a full rolling boil.
  2. Drop vegetables in. Cook just until they turn bright and vibrant — usually 1–3 minutes.
  3. Immediately transfer to a bowl of ice water. Let them sit for a minute or two.
  4. Drain. Serve, or store in the fridge for up to 3 days.

Blanched vegetables can then be finished with butter in a pan, dressed in vinaigrette for a salad, or eaten as-is.

Best for: Broccoli, green beans, asparagus, peas, snow peas, edamame.


The Flavor Combinations That Always Work

Broccoli: Roasted + lemon + parmesan. Always works. Always eaten.

Brussels sprouts: Roasted with a little bit of bacon or pancetta. Even people who hate Brussels sprouts eat these.

Carrots: Roasted with honey and a little butter and thyme. Sweet, tender, deeply good.

Green beans: Sautéed with garlic and a handful of toasted almonds. Bright, snappy, sophisticated.

Asparagus: Roasted with olive oil, salt, and pepper, finished with a squeeze of lemon. Done in 12 minutes and consistently excellent.

Mushrooms: Sautéed in butter over high heat with garlic and thyme. Do not crowd them — let them brown. Crowded mushrooms steam and go rubbery. Browned mushrooms are revelatory.

Spinach or kale: Sautéed in olive oil and garlic until just wilted. Season with salt and a tiny bit of lemon or red pepper flakes.


One More Thing: Salt Your Vegetables

Season vegetables before they go in the oven or pan, and taste them again when they come out. Undersalted vegetables taste flat and green and healthy in the wrong way. Properly salted vegetables taste like themselves — rich, sweet, complex, and satisfying.

This is genuinely the whole secret.


🛒 Gear Worth Having

As an Amazon affiliate, I earn with each qualifying purchase. Than you supporting TumbleBump.


Recommended Reads


TumbleBump is part of the WhistleBump group – find the rest of the family at WhistleBump.com.

21002

©2026 John D Reinhart/TumbleBump.com – all rights reserved
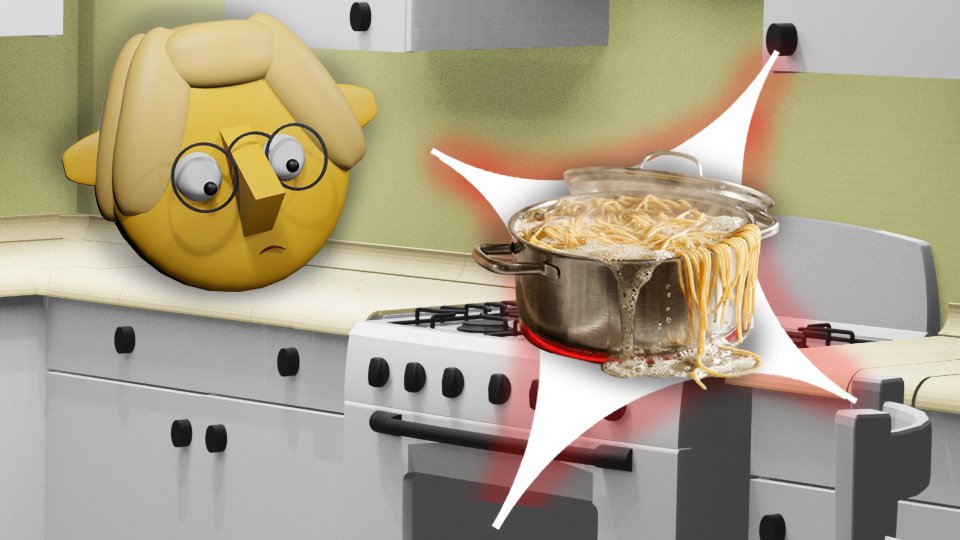
Why the Spaghetti Water Is Running All Over the Stove

The pot boils over. The starchy water is on the burner, on the counter, possibly on you. This is annoying, avoidable, and has a simple physics explanation — plus three fixes that take zero extra effort.

Pasta water boiling over is one of those small kitchen disasters that happens with enough regularity to feel like a personal failing. It isn’t. It’s a physics phenomenon with a specific cause and specific, simple preventions.

Why It Happens

When water boils, steam bubbles form at the bottom of the pot and rise to the surface, where they burst. This is the rolling boil you’re aiming for when cooking pasta. On its own, water bubbles and boils without drama.

But pasta releases starch into the water as it cooks. Starch dramatically increases the water’s surface tension and viscosity. When a starchy bubble of pasta water reaches the surface, instead of bursting cleanly, it stretches — forming a thick, stable foam that doesn’t immediately collapse. The foam builds on itself, rises to the rim, and then, with the confidence of something that has nothing to lose, goes over the edge.

The more pasta you’re cooking, the more starch in the water, the more foam. Smaller pots with less headroom provide less buffer. High heat maintains continuous vigorous boiling that generates foam faster. These are the conditions for a stovetop flood.


Fix One: Use a Bigger Pot

The single most effective prevention is a pot with more volume and more headroom above the water level. A pasta boilover almost never happens in a 10-quart pot with six quarts of water — there’s simply too much room for the foam to build before it reaches the rim.

A 6-quart pot with five quarts of water is at much higher risk. Fill it less, or get a bigger pot.


Fix Two: Lower the Heat Once Boiling

Boilover requires vigorous, sustained boiling to generate foam faster than it can disperse. The moment you add pasta and the water returns to a boil, you can reduce the heat slightly — from high to medium-high — and maintain an active, rolling boil without the maximum foam generation of full-blast heat.

The pasta cooks at essentially the same rate. The foam risk drops significantly.


Fix Three: The Wooden Spoon Trick (And Why It Works)

Place a wooden spoon across the top of the pot. When the foam rises and contacts the wood, it breaks the surface tension of the bubbles and collapses the foam. This actually works, and the reason is interesting: the dry wood provides a high surface-energy surface that preferentially attracts the surfactant molecules in the foam, disrupting their ability to hold the bubble structure together.

The spoon doesn’t prevent boiling — it interrupts the foam before it goes over the edge.

A silicone spoon works less well (too smooth). A wooden spoon with a slightly rough, absorbent surface works best.

Alternative: A boilover preventer disc — a perforated or ridged metal disc placed in the bottom of the pot that creates convection patterns that prevent foam buildup. A low-tech but effective tool for chronic boilover sufferers.


Fix Four: A Little Oil (Minimal Effect, Widely Believed)

Many people add olive oil to pasta water to prevent boiling over. The oil does disrupt foam bubbles at the surface — so it has a small preventive effect. However, the amount of oil you’d need to add to reliably prevent a boilover would be impractical, and more importantly, it coats the pasta and prevents sauce from adhering.

The oil in pasta water is mostly a myth as a boilover prevention and is actively counterproductive for sauce adhesion. Skip it.


When It Happens Anyway

Turn down the heat immediately. The foam collapses almost instantly when the vigorous boiling stops, and the spilled water can be wiped from the burner quickly while the pasta continues cooking at reduced heat.

The burner grates and drip pans: these collect the spilled starch water and, once it dries, become a baked-on mess that is annoying to clean. The fix: wipe or rinse immediately while it’s still liquid. Dried starchy residue requires soaking and scrubbing. Wet starchy residue requires a paper towel.


🛒 Gear Worth Having

As an Amazon affiliate, I earn with each qualified purchase. Thank you for supporting TumbleBump. 


Recommended Reads


TumbleBump is part of the WhistleBump group – find the rest of the family at WhistleBump.com.

26001

©2026 John D Reinhart/TumbleBump.com – all rights reserved
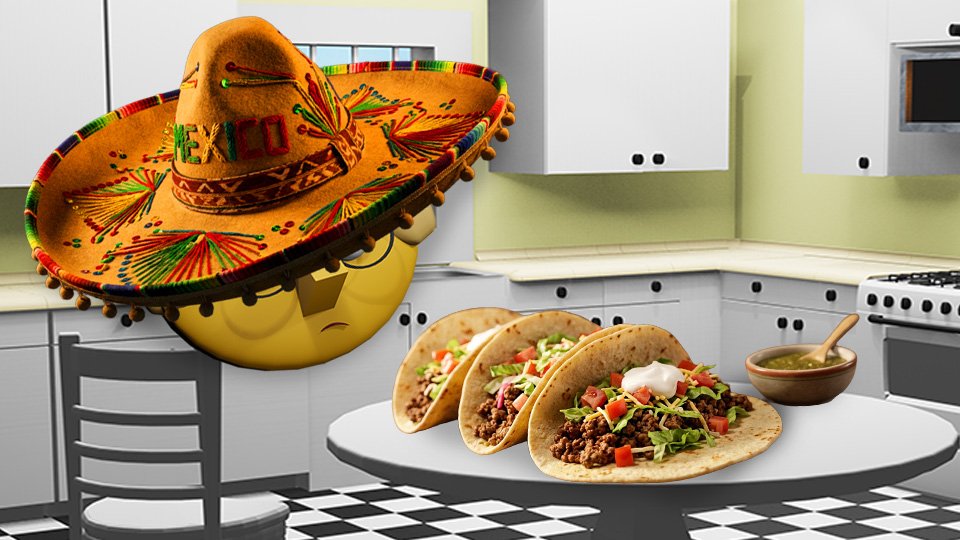
Theme Nights: The Laziest, Smartest Thing You Can Do for Dinner

You make 200+ food decisions a day. By dinner, your brain is gone. Theme nights fix this — here’s how to build a simple weekly system that actually sticks.

🗓️

You make over 200 food-related decisions every single day. That’s on top of every other decision your job, your relationships, and your general existence are busy demanding of you.

By 5:30pm, your decision-making brain is not tired. It is done. It has left the building. It is sitting in the car with its coat on.

This is not weakness. This is neuroscience. Decision fatigue is real, it accumulates all day long, and it is the entire reason ‘I don’t know, what do you want?’ has been the most common — and most maddening — dinner conversation since the invention of dinner.

Theme nights are the answer. Not a clever answer, not a trendy answer. A boring, reliable, works-every-time answer that families have been using for generations, and that you are going to start using immediately.

🧠 What a Theme Night Actually Does

A theme night doesn’t tell you what to make. It narrows the universe of options from ‘literally anything on earth’ to ‘something in this general category.’ That’s the whole trick.

‘What’s for dinner?’ answered with ‘I don’t know, anything goes’ → paralysis → DoorDash → mild shame.

‘What’s for dinner?’ answered with ‘It’s pasta night’ → you know the category → you check the pantry → you pick a pasta → decision made in 30 seconds. Done.

The theme kills the hardest part of the decision before you even sit down. Everything after that is just cooking.

📅 Building Your Theme Calendar

Assign a broad category to each weeknight. Keep the themes loose — that’s the whole secret, and we’ll come back to it.

Here’s a classic five-night setup to steal:

🥗 Monday: Soup or Salad

The reset meal. After a weekend of eating like you’re celebrating something, Monday is a big bowl of something lighter. Rotate through chicken soup, lentil, minestrone, a grain salad, or a wedge with some protein. Simple. Easy. Your body will thank you, and it almost never thanks you.

🌮 Tuesday: Mexican or Latin-Inspired

Tacos, obviously. But also: enchiladas, burrito bowls, quesadillas, arroz con pollo, tostadas, or anything else that involves cumin and happiness. This theme has enormous range. Taco Tuesday is just the beginning.

🍗 Wednesday: Protein + Vegetable

The simple plate. Chicken and roasted broccoli. Pork chop and sweet potato. Fish and sautéed greens. This is the plate method in its most basic, least fussy form. Easy to plan, quick to cook, zero drama.

🍝 Thursday: Pasta or Grains

Mid-to-late-week carbohydrate comfort. Pasta with a simple sauce. A grain bowl. Fried rice from the leftover rice that’s been sitting in your fridge since Tuesday. Farro with roasted vegetables. Your call.

🎉 Friday: Treat Yourself

Order in without guilt. Cook something that actually takes time and feels special. Pull together a charcuterie situation from whatever’s in the fridge. Friday has earned flexibility, and so have you.

🔑 Why ‘Loose’ Beats ‘Specific’ Every Time

Here is where theme nights fail: when people make them too rigid. ‘Spaghetti Bolognese every Tuesday’ is not a theme. It’s a sentence. Boredom follows. Abandonment follows boredom. The whole system collapses and you’re back on DoorDash by March.

‘Pasta night every Tuesday’ means this week it’s spaghetti with jarred sauce because you’re busy, next week it’s homemade carbonara because you have a free afternoon, the week after it’s pasta with zucchini because the fridge has a lot of zucchini and someone needs to deal with it.

Same theme. Completely different meals. Zero boredom.

The theme is a container. What goes in it can rotate forever.

🛠️ Making It Actually Yours

The calendar above is a starting point, not a mandate. Build around what you actually eat:

  • Love Asian food? One night is ‘Asian-inspired’ — stir-fry, ramen, fried rice, dumplings, teriyaki, whatever you feel like.
  • Want one meatless night? Meatless Monday has endured for a reason. It works.
  • Big breakfast-for-dinner household? That is a completely legitimate and beloved theme with zero apologies needed.
  • Trying to cook new things? ‘Wild Card Wednesday’ — one new recipe per week, controlled and contained, so the novelty doesn’t eat your whole life.

The themes should reflect the actual you — not the aspirational version of you who loves spending Saturday afternoons making elaborate things. That person is lovely, but they don’t show up on Wednesday at 5:45.

🚨 When the Theme Isn’t Happening

The theme is a suggestion. It is not a contract, a covenant, or a binding legal document.

If it’s pasta night and you genuinely want a salad, eat the salad. If it’s Mexican night and the avocados aren’t ripe and you physically cannot face tacos without guacamole — pivot. Make something else. Nobody is grading you.

Theme nights eliminate the decision about 80% of the time. That is an exceptional performance for a kitchen heuristic. Give it the credit it deserves and don’t expect perfection.

🛒 Gear Worth Having

As an Amazon Associate, I earn from qualifying purchases. Links above support TumbleBump — thank you!

📖 Related Reads


TumbleBump is part of the WhistleBump group – find the rest of the family at WhistleBump.com.

22008

©2026 John D Reinhart/TumbleBump.com – all rights reserved

Eggs: Nature’s Stickiest Oops

You dropped an egg. Now what? TumbleBump walks you through the cleanup — before it dries, after it dries, and the horror of eggshell archaeology.

You didn’t mean to drop it. Nobody means to drop it. One second it’s in your hand, the next it’s on the floor — and somehow also on the cabinet door, the side of the stove, and your left sock. Eggs are not just food. They are a cleanup event waiting to happen.

The good news: egg mess is very manageable. The bad news: only if you know the rules. Break the rules and you’re cementing that yolk to your hardwood floor for the foreseeable future.

🚨 Rule One: Cold Water Only

This is the one that gets people. Hot water feels right — it’s how you clean everything else. But egg white is protein, and protein sets with heat. Pour hot water on a fresh egg mess and you’ve just cooked it onto your floor. Congratulations, you’ve made a very flat, very stuck omelet.

Cold water keeps the proteins loose and easy to wipe. Always start cold.

⚡ Fresh Egg: Act Fast

Fresh egg is your best-case scenario. Scoop up the bulk of it with a paper towel or — pro move — a spatula. Then cold water and a wipe. Done in under a minute if you’re on it. The enemy is distraction. The egg does not wait for you to finish your coffee.

😬 Dried Egg: Now You’ve Done It

Dried egg is a different creature entirely. It bonds to surfaces with impressive commitment. Your move: rehydrate it. Lay a cold, damp cloth over the area and let it sit for a few minutes to soften the proteins back up. Then scrape gently — a plastic scraper or the edge of a credit card, not metal — and wipe clean. Repeat if needed.

On dishes and pans: soak in cold water first, always. A dried-egg pan that went straight into a hot rinse is a pan you’ll be scrubbing for a while.

🔍 The Shell Fragment Situation

Shell in the bowl is its own challenge. Chasing a slippery fragment around a bowl of raw egg with a spoon is a test of patience and humility. The trick: use a larger piece of the shell itself to scoop it out. Shell attracts shell. It sounds like folk wisdom but it actually works — the jagged edge catches the fragment cleanly where a smooth spoon just nudges it around.

🍳 Cast Iron: Special Mention

If you drop egg on a seasoned cast iron pan, do not panic and do not reach for soap. Wipe it out while it’s still warm with a paper towel. If it’s dried, a brief soak — cold water, two minutes max — and a gentle scrub with a stiff brush. Soap only as a last resort, and re-season immediately after. Your grandmother’s cast iron has survived worse than this.

🛒 Gear Worth Having

As an Amazon affiliate, I earn from qualifying purchases. Thank you for supporting Tumblebump.

Related Reads


TumbleBump is part of the WhistleBump group – find the rest of the family at WhistleBump.com.

26000

©2026 John D Reinhart/TumbleBump.com – all rights reserved
How to Wash That Cast Iron Skillet

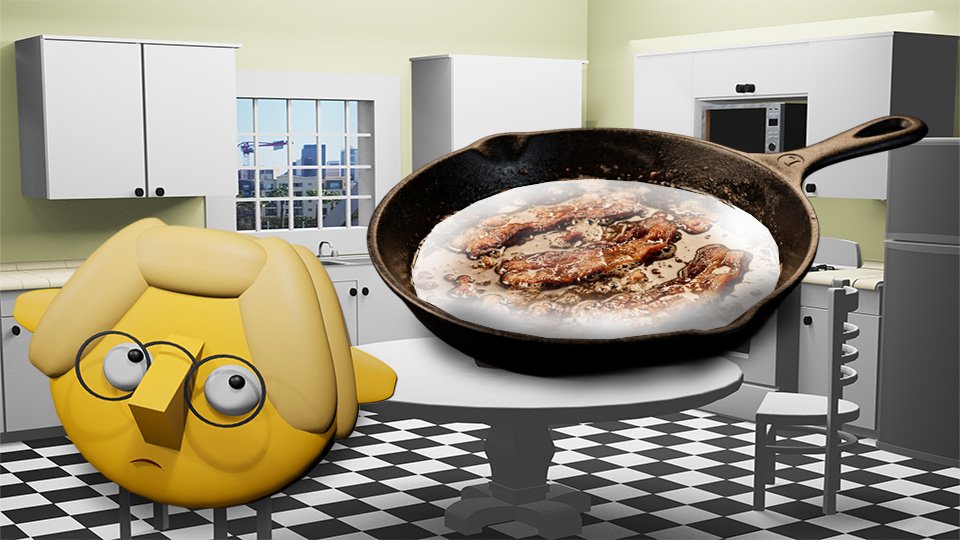
Everyone knows cast iron is “different” to clean — but the actual step-by-step gets surprisingly vague. Here’s the complete, practical washing routine for cast iron after every kind of cooking situation, from a simple egg to a baked-on disaster.

Cast iron’s reputation for being finicky is earned but overstated. Yes, it needs different treatment from your stainless and non-stick pans. No, it’s not so delicate that a wrong move ruins everything.

The Post on Cast Iron: The Exception to the Rule covered the principles. This one is the practical playbook — specifically what to do with the pan in your hand, after each type of cooking situation you’ll actually encounter.


After Light Cooking (Eggs, Sautéed Vegetables, Most Everyday Use)

Time required: 2–3 minutes.

  1. While the pan is still warm (not hot enough to steam you, but not cold), use a folded paper towel or dish cloth to wipe out any food residue.
  2. If the food debris comes out cleanly: you’re done. Dry completely over low heat for 1–2 minutes on the stove, apply a whisper-thin coat of neutral oil, store.
  3. If there’s light residue remaining: rinse with hot water. Wipe again with a cloth or the salt method below if needed. Back to the stove to dry. Oil. Store.

The key here: Light use doesn’t need more than light cleaning. The instinct to “really wash” a pan that barely got dirty is counterproductive with cast iron.


After Cooking Proteins (Chicken, Steak, Fish)

Time required: 3–5 minutes.

Proteins leave more fond (browned residue) and sometimes some stuck bits.

  1. While the pan is still warm or over low heat, add ¼ cup of water. It will sizzle. This is the cleaning deglaze — the steam loosens stuck material. Scrape with a wooden spoon or spatula.
  2. Pour the liquid out.
  3. If there’s still residue: use the chain mail scrubber or the salt method. Sprinkle coarse salt into the pan, scrub with a paper towel using some pressure.
  4. Rinse with hot water.
  5. Dry on the stove over low heat until completely dry.
  6. Apply a very thin layer of neutral oil (flaxseed, canola, vegetable) while still warm. Wipe off any visible excess — you want a sheen, not a coating.
  7. Store.

After Cooking Acidic Foods (Tomatoes, Wine-Based Sauces, Citrus)

Time required: 4–5 minutes, plus a note.

Acidic foods can interact with cast iron’s seasoning and strip it over time, and can also leach small amounts of iron into the food (generally not harmful, but worth knowing). Cooking acidic foods briefly in cast iron is usually fine. Extended simmering of tomato sauce for 45 minutes — less so.

After cooking with acid:

  1. Clean as normal — deglaze, rinse, salt-scrub if needed.
  2. Dry completely on the stove.
  3. Apply oil generously this time — two light coats instead of one whisper-coat. You’ve earned the extra seasoning step.

If the pan looks dull, stripped, or less non-stick than usual after an acidic cook, do a mini re-seasoning: heat the pan over medium heat until very hot, apply a thin layer of oil, let it smoke briefly, wipe out excess. This restores the seasoning.


After Baking (Cornbread, Frittata, Oven Use)

Cast iron handles oven use beautifully — the whole pan including the handle goes in (assuming no rubber or wooden handles). After oven cooking:

  1. Let the pan cool enough to handle without oven mitts.
  2. Use a stiff spatula or chain mail scrubber to remove any stuck baked goods or egg.
  3. Rinse with hot water. If needed, brief soak of 5 minutes (not longer) to loosen baked-on material.
  4. Dry on the stove over low heat.
  5. Oil and store.

After a Real Mess (Burned-On, Stuck Hard, Genuine Disaster)

Time required: 10–15 minutes.

  1. Fill the pan with water and put it on the stove over medium heat. Bring to a simmer. The simmering water does the deglazing and soaking work simultaneously — very effective for stubborn material.
  2. With the water still in the pan (carefully — it’s hot), scrape with a stiff spatula. Most material releases.
  3. Pour out the water. If there’s still residue, sprinkle coarse salt and scrub with a paper towel while the pan is warm.
  4. For truly extreme situations only: a brief, targeted scrub with steel wool on the affected area. This will remove the seasoning from that spot. That’s fine — you’ll re-season.
  5. Rinse, dry completely on the stove, apply oil, and consider a re-seasoning pass if needed (see the cast iron care post for the full re-seasoning protocol).

The Three Never-Dos (Repeated Because They Bear Repeating)

  1. Never soak. Even a 20-minute soak can start rust. In, clean, dry, out.
  2. Never put in the dishwasher. It will strip the seasoning completely and invite rust. Every time.
  3. Never store wet. If you skip the stovetop drying step and put the pan away with any moisture, you will find rust. Dry. Every time.

The One Rule That Beats All Others

Dry it on the stove after every wash. This single step prevents the one thing that actually damages cast iron: rust. You can do almost everything else imperfectly, and a well-dried, lightly oiled cast iron pan will survive and thrive.


🛒 Gear Worth Having

As an Amazon affiliate, I earn from each qualifying purchase. Thank you for supporting TumbleBump.


Recommended Reads


TumbleBump is part of the WhistleBump group – find the rest of the family at WhistleBump.com.

23004

©2026 John D Reinhart/TumbleBump.com – all rights reserved
Cast Iron: The Exception to the Rule

Cast iron plays by its own rules — no soap (mostly), no soaking (ever), no dishwasher (absolutely not). But it’s not as fussy as its reputation suggests. Here’s the actual cleaning protocol that keeps cast iron in fighting shape for decades.

Cast iron is the one piece of cookware that gets a completely different set of care instructions from everything else in your kitchen. And people treat those instructions with a mixture of reverence and anxiety that is, frankly, a little more intense than the situation requires.

Yes, cast iron is different. Yes, it has specific needs. No, it is not fragile. It is, in fact, one of the most durable things you own, and it will survive a reasonable amount of imperfect cleaning without complaint.

Here’s what it actually needs, what it absolutely cannot tolerate, and how to handle the full range of cleaning situations you’ll encounter.


First: What “Seasoning” Actually Is

Cast iron’s surface — the dark, somewhat nonstick layer that develops over time — is called seasoning. It is not rust. It is not dirt. It is polymerized fat: layers of oil that have been heated past their smoke point and bonded chemically to the iron, forming a durable, low-stick coating.

This is why the cleaning rules for cast iron are different. Every cleaning instruction below exists to protect this layer.


The Standard Clean: After Most Uses

For everyday cooking (eggs, sautéed vegetables, most stovetop work):

  1. While the pan is still warm (not blazing hot, but warm — never plunge a hot cast iron into cold water), wipe it out with a folded paper towel or dish cloth. Get out the food debris.
  2. If needed, rinse with hot water. That’s it. Rinse, not soak. In and out.
  3. Return the pan to the stove over low heat for 1–2 minutes to fully evaporate any water. Water left on cast iron causes rust. This step takes seconds and prevents the only real threat.
  4. While still warm, apply a very thin layer of neutral oil (flaxseed oil, vegetable oil, canola — not olive oil, which has too low a smoke point for this) to the cooking surface with a paper towel. Wipe off any excess — you want a ghost of oil, not a coating.
  5. Store in a dry place.

That’s the whole routine. It takes about three minutes and becomes automatic quickly.


The Soap Question: Let’s Settle This

Old lye-based soaps were harsh enough to strip seasoning from cast iron with a single wash — hence the “never use soap” rule that has been passed down through generations like a kitchen commandment.

Modern dish soap (Dawn, Palmolive, etc.) is not lye soap. A small amount of mild dish soap, used occasionally, will not ruin your seasoning. If there’s something stuck or if you’ve cooked something strongly flavored that you’d rather rinse out, a brief wash with a drop of soap, rinsed thoroughly, followed by the dry-and-oil step, is perfectly fine.

What you cannot do: soak it in soapy water. Prolonged exposure breaks down seasoning and invites rust. Brief wash, yes. Soak, never.


For Stuck-On Food

Method One: Salt and a paper towel. Coarse kosher salt is a natural abrasive that won’t damage seasoning. Sprinkle a generous amount into the still-warm (or room temperature) pan and scrub with a folded paper towel. The salt grabs the stuck bits physically. Rinse, dry, oil.

Method Two: Hot water and a scraper. Add a little hot water to the warm pan on the stove, let it loosen the stuck material (30 seconds over low heat), and scrape with a flat wooden or silicone spatula or a chain mail scrubber. Rinse, dry, oil.

Method Three: Chain mail scrubber. Specifically designed for cast iron. Stainless steel rings that clean off stuck food without damaging seasoning. Works better than any other physical scrubber for cast iron. A genuine revelation if you cook with cast iron regularly.


What to Never Do

Dishwasher: The sustained heat, harsh detergent, and prolonged water exposure will strip your seasoning completely and invite rust. Cast iron and dishwashers are incompatible. Full stop.

Soaking in water: Even 30 minutes of soaking can start rust formation. Cast iron and standing water are enemies.

Abrasive steel wool (uncoated): Will remove seasoning and potentially scratch the cooking surface. Use chain mail or salt instead.

Storing wet: Always dry completely before storing. A minute over heat, then a wipe of oil.


What If It Rusts?

Cast iron that develops surface rust has not been destroyed. It has been temporarily neglected.

To restore it: scrub the rust off with steel wool (yes, in this case, steel wool is correct — you’re removing rust, not seasoning, because the seasoning is already gone), wash, dry completely on the stove, then re-season.

Re-seasoning: Apply a thin layer of neutral oil all over the pan — inside, outside, handle. Put it upside down in a 450–500°F oven for an hour (put foil on the rack below to catch any drips). Turn the oven off and let the pan cool inside. Repeat this process 2–3 times for a solid new layer of seasoning.


The Truth About Cast Iron Care

The people who treat cast iron like a family heirloom requiring elaborate rituals are not wrong — it can be a family heirloom, and it does reward care. But it’s also fundamentally a piece of iron, and iron is tough. If you forget the oil step sometimes, it’s fine. If you give it a brief soap wash once in a while, it’s fine. If it gets a small rust spot, you can fix it in an afternoon.

Respect the basic rules — no soaking, dry before storing, oil occasionally — and your cast iron will outlast every other piece of cookware you own.


🛒 Gear Worth Having

As an Amazon affiliate, I earn from each qualifying purchase. Thank you for supporting TumbleBump.


Recommended Reads


TumbleBump is part of the WhistleBump group – find the rest of the family at WhistleBump.com.

23012

©2026 John D Reinhart/TumbleBump.com – all rights reserved