How Baking Actually Works (And Why It’s Not as Scary as Advertised)

Baking has a reputation for being unforgiving. It isn’t — once you understand what’s actually happening in the bowl. Here’s the logic, the terms, and the map.

Baking has a reputation. Precise. Unforgiving. The kind of cooking where one wrong measurement produces a flat, dense, sad result and the recipe shrugs at you from the counter.

The reputation is partly earned and mostly overstated.

Yes, baking is more precise than cooking. Ratios matter. Order sometimes matters.

But baking becomes much easier, and much more fun, once you understand the basic logic of what’s happening in the bowl and in the oven. It stops being mysterious and starts being predictable. Predictable things can be troubleshot. Troubleshot things can be fixed.

Here’s the map. And at the end, a glossary of the terms that recipes throw around without explanation — because nobody should have to Google “what is a bain Marie” in the middle of making a cheesecake.

🌟 Start Here

These best first baking projects have a small margin for error and a fast feedback loop:

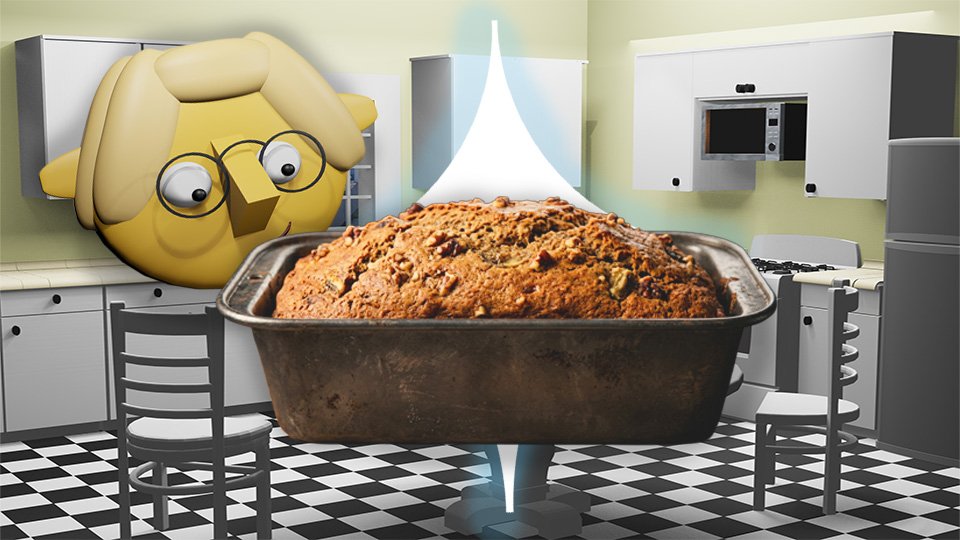
  • Banana bread — naturally forgiving, uses the bananas you were about to throw out, tastes good even when slightly imperfect.
  • Chocolate chip cookies — fast turnaround, immediate results, never truly bad.
  • Muffins — simple method, quick bake, endlessly variable once you have the basic ratio.

Save croissants, macarons, and choux pastry for after you have opinions. Those are fine but they require confidence that comes from making the forgiving things first.

Before you rush into the kitchen to start cranking these out, let’s review some of the things that will make your bake a success.

⚖️ Make Accurate Measurements

Where cooking is flexible because heat and flavor compounds are broadly forgiving, baking only works if the ingredients are measured correctly. If those measurements are off, the chemistry doesn’t work and the result tells you about it.

Why flour is the main culprit: Scooping a measuring cup directly into a bag of flour compacts it. You can end up with 20-30% more flour than the recipe intended, which makes the result dense and dry and leaves you blaming yourself when the bag was the problem.

The fix: spoon flour into the measuring cup and level it off with a straight edge. Better yet, use a kitchen scale and measure in grams. Weight is always more accurate than volume for baking. This one change fixes more baking problems than any other single adjustment.

Everything else is considerably more forgiving than the reputation suggests.

🧑‍🔬 What Each Ingredient Is Actually Doing

Every ingredient in a baking recipe has a job. Understanding the job means understanding what goes wrong when something is missing, mis-measured, or substituted.

  • Flour — structure. Flour provides gluten, which forms a network that holds things together. More mixing means more gluten means chewier results. Good for bread. Bad for tender muffins. This is why muffin recipes say “don’t overmix” and mean it.
  • Fat (butter, oil) — tenderness and flavor. Fat coats gluten strands and prevents them from forming tough networks. It’s literally interrupting the structure, which is why fat makes things tender. Cold butter in biscuits creates pockets that steam in the oven and produce flaky layers. Melted butter in brownies produces a denser, fudgier result. Same ingredient, different behavior depending on temperature.
  • Sugar — sweetness, browning, and moisture. Sugar also helps baked goods stay moist longer. Things baked with more sugar go stale slower. This is chemistry, not magic.
  • Eggs — structure, richness, and binding. Yolks add fat and flavor. Whites add structure when beaten — whipped egg whites trap air, which is how soufflés and angel food cakes get their lift. Whole eggs bind everything together.
  • Leaveners — the rise. Baking soda needs an acid to activate and reacts immediately. Baking powder contains its own acid and works in two stages. Yeast is alive, eats sugar, produces carbon dioxide slowly, and requires time and warmth. They are not interchangeable.
  • Liquid — activation. Liquid activates gluten and leaveners. Water produces a leaner result. Milk produces richer. Buttermilk produces tender and tangy. The type of liquid is a flavor and texture decision, not an arbitrary one.

⚠️ The Mistakes Worth Knowing About

  • Opening the oven too early. Cold air rushes in before structure has set. Cakes collapse. Soufflés have opinions about this. Wait until at least 80% of the bake time has passed before opening the door.
  • Not preheating. Baking relies on consistent heat from the moment something enters the oven. A cold oven produces uneven, unpredictable results. Always preheat fully.
  • Cold ingredients when room temperature is specified. Cold butter won’t cream properly. Cold eggs in warm batter can make it seize. Room temperature usually means 30-60 minutes on the counter. Plan for it. The linked post tells you about other recipe sticking-points to watch out for.
  • Overbaking. The single most common mistake. Usually, you stick a toothpick into the cake to see if it’s done. A toothpick with a few moist crumbs means it’s cooked. A completely clean toothpick often means it’s slightly overdone. Try to pull things out of the oven while there are still a few moist crumbs and let the carryover heat inside the baked goods finish the job.
  • Confusing baking soda and baking powder. They are completely different things that happen to live next to each other. Be very careful not to mix them up.

📚 The Baking Terms Glossary

Baking recipes are full of terms that get used without explanation, presumably because the author forgot they weren’t obvious. They are not obvious. Here they are.

  • Blind baking — baking a pie or tart shell before adding the filling. The shell goes into the oven weighted down with parchment and dried beans or pie weights so it doesn’t puff up. It produces a fully cooked crust that won’t go soggy when filled. Recipes sometimes call this par-baking – same thing, different term.
  • Bain Marie — a water bath. The delicate thing you’re making sits in a pan of hot water in the oven, which keeps the heat gentle and even. Cheesecakes use this to prevent cracking. Custards use it to prevent curdling. The French name makes it sound fancier than “pan of water.”
  • Folding — gently combining ingredients without knocking out air. The spatula goes under the batter and over the top, rotating the bowl as you go. Not stirring. Not beating. The goal is incorporation without deflation. Do this when whipped eggs or cream are involved.
  • Creaming — beating butter and sugar together until pale, fluffy, and significantly increased in volume. This builds air into the batter before anything else goes in. It takes longer than you think — usually 3-5 minutes. Under-creamed butter looks less fluffy and produces dense results.
  • Proofing — letting yeast dough rise. The first proof develops flavor and volume. The second proof comes after you’ve shaped the dough and produces the final structure. The dough is ready when it’s roughly doubled in size and a finger poke leaves an indent that springs back slowly.
  • Docking — poking holes in pastry dough with a fork before baking. Steam escapes through the holes instead of puffing the dough into bubbles. Used for pie shells, tart bases, and flatbreads.
  • Tempering — bringing ingredients to similar temperatures before combining. Adding cold eggs to warm melted butter can scramble them. Adding cold milk to hot chocolate mixture can seize it. Tempering means adding a little of the warm mixture to the cold ingredient first, raising its temperature gradually, then combining everything.
  • Par-baking — partially baking something before finishing it later. Pizza dough gets par-baked before the toppings go on. Pie shells get par-baked before filling. Finishes the cooking at the right moment without overcooking the components.
  • Resting — leaving baked goods alone after they come out of the oven. Cakes need time to set before turning out of the pan. Bread needs time for the crumb to stabilize. Cookies finish cooking on the hot pan for a few minutes. Resting is not optional — it’s the last step.

A note: when any of these terms appear in a recipe and you’re not sure what you’re looking at, YouTube has a video of exactly that technique performed by someone who clearly enjoys explaining it. Watch the whole thing once before you start. Baking terms make considerably more sense in motion than on paper.

🛒 The Gear Worth Having

  • Digital kitchen scale — The single most impactful baking purchase. Weight beats volume every time. Fixes the flour problem permanently and makes every recipe more reliable.
  • Stainless steel mixing bowls — The right sizes for almost every recipe. Nesting, stable, and they don’t absorb smells or stains.
  • Nonstick baking sheet — Even heat distribution, durable, and the surface cookies actually want to live on.
  • BraveTart by Stella Parks — The best baking science book written for real people. Parks explains not just what to do but why — which means you understand enough to fix things when they go sideways.

As an Amazon affiliate, I earn from qualifying purchases. Thank you for supporting TumbleBump.

✨ The Short Version

Baking is chemistry with an oven. The ingredients have jobs. The measurements matter more than in cooking but less than the reputation suggests. The terms are learnable. The mistakes are fixable.

Start with the forgiving recipes. Learn the terms. Measure the flour by weight. Don’t open the oven early.

The soggy bottom, the flat cake, the dense muffin — these are not failures. They’re lessons with frosting on top.

📚 Related Reads

TumbleBump is part of the John D Reinhart content family. Writer, illustrator, videographer, and accidental filmmaker — find the whole story at JohnDReinhart.com.

21004

©2026 John D. Reinhart / TumbleBump.com. All rights reserved.
The Egg and You: A Relationship Worth Fixing

Eggs are the most forgiving food on the planet — and the most abused. Here’s why they go wrong, and what to know before you crack another one.

You have been eating eggs your entire life. You have also, statistically speaking, been cooking them wrong for most of it. This is not an insult. It’s just math.

Eggs are the most democratic food in existence. Cheap, fast, endlessly versatile, available at every grocery store on the planet, and capable of being breakfast, lunch, dinner, or a snack depending entirely on your mood and what’s left in the fridge. They are also, somehow, one of the most consistently botched items in the home kitchen.

Rubbery scrambled eggs. Fried eggs with that weird white film over the yolk. Boiled eggs with the greenish ring of shame. Poached eggs that dissolved into the water like a sad little ghost. We’ve all been there. Most of us are still there.

The good news: eggs are extraordinarily forgiving once you understand what’s actually happening in the pan. And what’s happening is mostly about heat. Almost entirely about heat.

🔥 The Heat Problem (It’s Always the Heat)

Eggs are protein. Protein reacts to heat. Too much heat, too fast, and the proteins seize up, squeeze out moisture, and turn into something closer to a pencil eraser than food. This is why your scrambled eggs are rubbery. This is why your fried eggs have that leathery white with the still-cold yolk. You’re not a bad cook. You’re just running too hot.

The egg’s entire personality changes based on temperature. Low and slow produces something creamy and rich. High and fast produces something tight and dry. Neither is wrong if that’s what you wanted — but most people shooting for creamy are accidentally making dry, and then wondering why eggs aren’t their thing.

This is the one thing to carry into the kitchen: eggs want less heat than you think. Start there and everything else follows.

🍳 The Four Eggs and What They’re Actually About

There are four ways most people cook eggs at home. Each has its own logic, its own failure mode, and its own completely achievable version of right.

  • Scrambled. The failure mode is speed. Most people cook them like they’re in a hurry, which produces the rubbery result nobody wanted. The fix is patience and lower heat. YouTube will show you exactly what “slow fold” means in practice — it’s one of those techniques that makes no sense in words and total sense the second you see it.
  • Fried. The failure mode is uneven cooking — white still translucent, yolk already overdone, or vice versa. Heat management and knowing your yolk preference in advance fixes this. Sunny side up, over easy, over medium, over hard: these aren’t just restaurant terms, they’re a temperature map. Know where you’re going before you crack the egg.
  • Boiled. The failure mode is the green ring — that slightly sulfurous, grey-green halo around an overcooked yolk. It’s harmless but it means you went too long. Boiled eggs are a timing game, and the timer starts the moment the egg hits the water. Six minutes is a different universe from twelve. An ice bath immediately after stops the cooking. This is non-negotiable.
  • Poached. The failure mode is the egg dissolving into a sad white cloud. Fresh eggs hold together better than older ones — this is genuinely important and almost nobody knows it. Watch someone do it once on video and the mystery evaporates entirely.

💡 The Things Nobody Tells You

A few egg truths that make an immediate difference:

  • Salt early for scrambled, late for fried. Salt draws out moisture. For scrambled eggs, seasoning before cooking is fine — the moisture gets incorporated. For fried eggs, salting too early can make the whites weep and turn watery. Salt after plating.
  • Room temperature eggs behave better. Cold eggs straight from the fridge hit a hot pan unevenly. Ten minutes on the counter before cooking makes a noticeable difference, especially for frying and poaching.
  • Pull them off the heat early. Eggs keep cooking after they leave the pan. What looks slightly underdone is actually done. What looks done is already overdone. Trust the residual heat.
  • Fresh eggs for poaching, older eggs for boiling. Fresh eggs are harder to peel when boiled because the membrane clings. Eggs that have been in the fridge a week or more peel cleanly. This feels backwards and is completely true.

One universal truth above all: eat them immediately. Eggs do not improve with waiting. They are not a dish that gets better sitting on the counter while you finish your coffee. Eggs are the most impatient food in the kitchen. Respect the urgency.

🛒 The Gear That Actually Matters

Eggs don’t need much. But a couple of things make a real difference:

  • A good nonstick skillet — The difference between an egg that slides out and one you chisel out is entirely the pan. A quality nonstick is the one piece of egg equipment worth spending money on.
  • A silicone spatula — Flexible, gentle, and the right tool for scrambled egg folds. Also protects your nonstick surface from the scratches that end its useful life.
  • A slotted spoon — Essential for poaching and for pulling boiled eggs out of hot water without burning yourself or dropping them.
  • An egg timer — Boiled eggs live and die by timing. Your phone works fine. A dedicated egg timer is charming and slightly more satisfying for reasons that are hard to explain.

As an Amazon affiliate, I earn from qualifying purchases. Thank you for supporting TumbleBump.

✨ Go Watch Someone Do It

Eggs are a visual skill. The difference between the right scramble and the wrong one is something you see in the pan, not something you read in a description. The moment the curds start to form, the moment to pull them off heat — these things make sense instantly on video and take paragraphs to explain in words.

YouTube has approximately eleven million egg videos. Search “perfect scrambled eggs,” “how to fry an egg,” or “jammy soft boiled egg” and pick someone whose kitchen you like the look of. Watch the whole thing once without doing anything. Then do it.

You’ve been eating eggs your whole life. Time to actually nail them.

📚 Related Reads

TumbleBump is part of the John D Reinhart content family. Writer, illustrator, videographer, and accidental filmmaker — find the whole story at JohnDReinhart.com.

21007

©2026 John D Reinhart/TumbleBump.com – all rights reserved

How to Become a Foodie (Even If You’d Rather Not)

You don’t have to love food to eat better. Here’s how regular people accidentally become foodies — and why it’s worth the trip.

Let’s get one thing straight: there is nothing wrong with you.

You’ve been eating the same seven things for a decade. You know what you like. You’ve optimized your lunch situation to the point of near-scientific precision. A bean and cheese burrito is a complete food group. So is tuna salad. The drive-through exists for a reason and that reason is efficiency.

The rest of the world, meanwhile, is over there gasping about “umami” and arguing about whether the risotto was “reduced enough.” You have watched this from a comfortable distance and felt exactly nothing.

Here’s the thing though. The foodies aren’t wrong. They’re just addicted. And the good news is, the addiction is extremely low-risk and the side effects are mostly “better dinners.”

This is not a post about shaming your current food life. It’s a post about what happens when you let a little curiosity sneak through the door. Because once it does, your taste buds start doing things you didn’t sign up for. In the best way.

🤔 Why Some People Just Don’t Care About Food

First: completely valid. Food-as-fuel is a legitimate life philosophy. Plenty of brilliant, functional, well-adjusted humans have eaten the same three meals on rotation since college and never once felt the loss.

But here’s what the science actually says: a lot of “I don’t care about food” is less about preference and more about exposure. You never learned to taste the difference between a good tomato and a bad one. Nobody showed you. Why would they? Tomatoes come in a can. They’re red. Moving on.

Your palate, it turns out, is trainable. Like a dog. A dog who currently only knows “sit” but is quietly capable of learning “roll over” and “fetch the aged Manchego.”

😄 The Accidental Foodie Pipeline

Almost nobody wakes up one morning and decides to become a foodie. It happens in stages, like a slow-motion ambush.

  • Stage 1 — The Trigger: Someone makes you something homemade. It tastes nothing like the version you’ve been eating from a box. You say nothing, but you notice.
  • Stage 2 — The Curiosity: You Google “why does homemade [thing] taste better.” You fall into a rabbit hole about fresh ingredients, technique, and something called the Maillard reaction. You close the tab. But it stays with you.
  • Stage 3 — The Experiment: You try one thing. Just one. Maybe you buy actual garlic instead of the powder. Maybe you add lemon to something that never had lemon before. The result is unreasonably good.
  • Stage 4 — The Slide: You are now texting people about garlic. You are a foodie. Welcome.

The pipeline is fast. It catches a lot of people who thought they were immune.

🍳 Where to Actually Start (Low Commitment, High Payoff)

You don’t have to love cooking to start appreciating food. Those are two different things. Here’s where to poke at the edges without overhauling your entire personality:

  • Eat one thing slowly. Not forever. Just once. Pick something you eat regularly and actually pay attention to it. What’s in there? What’s hitting first? What’s showing up at the end? This is not meditation. It’s just tasting.
  • Upgrade one ingredient. You’re still making the same thing. Just use better olive oil. Or real Parmesan instead of the green can. One swap. See if you notice.
  • Try one thing you think you hate. Texture complaints are real (mushrooms, we see you). But sometimes a bad preparation is the culprit, not the food itself. Roasted versus raw is a completely different universe.
  • Watch someone who loves food cook. You don’t have to take notes. Just watch. YouTube is full of people who are genuinely delighted by what’s happening in the pan. Some of it is contagious.

None of this requires equipment you don’t have. None of it requires opinions about wine. You’re just taking a tiny tourist trip into someone else’s obsession.

🛒 A Few Things That Help the Transition

If you’re feeling even a little curious, these are worth having. None of them require a culinary degree.

  • A good chef’s knife — The single biggest upgrade in any kitchen. A sharp knife makes prep faster, easier, and weirdly more fun. (Yes, fun. We’re surprised too.)
  • A cast iron skillet — This is where the Maillard reaction lives. Brown things in this pan. Brown things taste better. Science.
  • A decent salt cellar with kosher or flaky salt — Not table salt. The difference is real. This is not snobbery. This is chemistry.
  • An instant-read thermometer — Takes the guesswork out of meat. If you’ve ever served dry chicken, this is why. Ten seconds, no more dry chicken.

As an Amazon affiliate, I earn from qualified purchases. Thank you for supporting TumbleBump.

✨ The Real Secret

Foodies aren’t people who were born caring about food. They’re people who accidentally tasted something that made them ask “why does that taste like that?” and then went looking for the answer.

That’s it. That’s the whole origin story. One good bite. One curious question.

You’ve almost certainly already had that bite. You just didn’t follow the thread.

You don’t have to become a person who talks about food at parties. You just have to be willing to notice, once in a while, that something tastes really good. The rest has a way of following on its own.

📚 Related Reads

TumbleBump is part of the John D Reinhart content family. Writer, illustrator, videographer, and accidental filmmaker — find the whole story at JohnDReinhart.com.

21018

©2026 John D Reinhart/TumbleBump.com – all rights reserved

How to Easily Step Away from Fast Food and Instantly Make Your Life Better

Fast food isn’t the enemy — it’s just a habit. Here’s how to quietly, painlessly step away and start eating like someone who has their life loosely together.

The drive-through didn’t trick you. Let’s be fair about this. You went there because it was fast, it was cheap enough, it was right there, and you were hungry right now. Those are four completely legitimate reasons. Nobody ends up at a drive-through window by accident.

But here’s the thing about fast food: it’s not really food-food. It’s a system. A very well-engineered, heavily optimized system designed to make sure you come back tomorrow. The salt, the fat, the portion size, the smell — all of it tuned like a piano to keep you in the loop.

Stepping away from it isn’t a moral victory. It’s just opting out of someone else’s system and building a slightly better one of your own. Which, it turns out, is not that hard. Annoying to start. Not hard.

🚪 The Door Is Already Unlocked

The biggest myth about cooking at home is that it requires some kind of skill you don’t have yet. It doesn’t. What it requires is a plan, and a plan is just a list of decisions you make in advance so you don’t have to make them at 6 PM when you’re starving and your judgment is completely gone.

Most home meals are not complicated. They’re a protein, something next to it, and maybe something green if you’re feeling ambitious. The drive-through has trained you to think of food as a production. It’s not. It’s just dinner.

The “Ahhhh” moment — when cooking clicks — usually happens the first time you make something and think: wait, that was … fine. That was completely fine. And I know exactly what’s in it. That’s the moment. It’s not dramatic. It’s just quiet and useful.

🗓️ The Plan Is the Whole Game

Fast food wins because it requires zero planning. Home cooking loses because it requires some. The gap is smaller than it feels.

You don’t need a meal plan that looks like a spreadsheet. You need three things:

  • A rotating short list. Five to seven meals you actually like and can make without a tutorial. That’s your whole rotation. You’re done planning.
  • A shopping day. One day a week. Not a long trip — you know what you need because you have a list. In and out.
  • Something already in the fridge. The drive-through beats you on the days there’s nothing at home. Stock a few fallback ingredients and the drive-through loses its best argument.

That’s it. Nutrition meets a calendar. Your dad was right. Deeply annoying, but right.

🔪 The Toolkit (Shorter Than You Think)

You don’t need a gadget for every vegetable. You need a few things that do actual work and stay out of the way the rest of the time. The shiny aisle at the kitchen store is a trap. Walk past it.

The short list of things worth owning:

  • A chef’s knife that’s actually sharp — A dull knife is slower and more dangerous than a sharp one. This is the upgrade that changes everything.
  • A 10-inch skillet, preferably cast iron — This pan does 80% of the work in most home kitchens. Learn to use it well and you barely need anything else.
  • A sheet pan — Protein plus vegetables, olive oil, salt, 400 degrees, 25 minutes. That’s a meal. The sheet pan is the most underrated object in the kitchen.
  • A decent cutting board — Big enough that food doesn’t fall off the edge. Wood or plastic. Not glass. Never glass.

That’s the toolkit. Everything else is optional.

As an Amazon affiliate, I earn from qualifying purchases. Thank you for supporting TumbleBump.

🤭 When Things Go Wrong (They Will)

The eggs will stick. The toast will smoke. Something will come out underseasoned and sad. This is not a sign that you should go back to the drive-through. This is just Tuesday.

Food waste is almost always a planning problem, not a cooking problem. If something’s going bad in the fridge, it’s because it didn’t have a job. Give your groceries jobs before you buy them. “This chicken is for Wednesday.” Done. It has a purpose. It will be eaten.

When something burns or sticks or collapses: ask what happened, file it away, move on. Every bad meal is a lesson that costs about four dollars and takes twelve minutes. That’s a bargain.

🧹 The Cleanup Problem (Solved)

Everyone says their biggest objection to cooking at home is the cleanup. This is at least partially true and also at least partially an excuse. Let’s split the difference.

The secret to kitchen cleanup is doing it in layers while you cook. Pot on to boil? Wipe the counter. Waiting for the oven? Wash the prep bowls. By the time dinner is on the table, half the mess is already gone. The after-dinner cleanup is then genuinely fast — fast enough that it stops being the reason you didn’t cook.

A clean workspace, it turns out, is also a calmer workspace. There’s something about a clear counter that lowers the stress level of the whole operation. It’s not magic. It’s just less chaos.

✨ The Actual Point

Nobody’s asking you to become a person who makes stock from scratch on Sundays and has opinions about olive oil. (Though, fair warning: that person might be closer than you think.)

Stepping away from fast food just means building a slightly better system than the one someone else built for you. A short list of meals. A shopping day. A couple of good pans. That’s all it takes to opt out of the loop.

The door has been unlocked the whole time. You just didn’t need to open it until now.

📚 Related Reads

TumbleBump is part of the John D Reinhart content family. Writer, illustrator, videographer, and accidental filmmaker — find the whole story at JohnDReinhart.com.

21011

©2026 John D Reinhart/TumbleBump.com – all rights reserved

Cooking Vegetables Everyone Will Eat

If the vegetables in your life have been watery, bland, or aggressively healthy-tasting, the problem isn’t the vegetables — it’s the method. Here’s how to cook vegetables so good that even the people who “don’t like vegetables” come back for seconds.

There is a great injustice that has been done to vegetables.

For decades, they were boiled until pale and soft, served as reluctant side dishes, and presented as the joyless nutritional obligation you had to eat before the real food. They tasted watery and vague because they were watery and vague — all the flavor steamed out of them into the cooking water and down the drain.

The vegetables were never the problem. The cooking method was the problem.

Properly cooked vegetables are one of the best things you can eat. Roasted carrots are sweet and caramelized and almost candy-like. Sautéed green beans are snappy and bright and deeply savory. Roasted broccoli develops crispy edges that people fight over. We’ve just been doing it wrong.

Here’s how to do it right.


Method One: Roasting (The Greatest Method)

High heat + fat + time = the best vegetables you’ve ever made. Roasting caramelizes the natural sugars in vegetables and creates browned edges that concentrate flavor in a way nothing else does.

The method:

  1. Preheat your oven to 400–425°F (hot — this is the whole game).
  2. Cut vegetables into even-sized pieces so they cook at the same rate.
  3. Toss with enough olive oil to coat everything lightly (about 2–3 tablespoons per sheet pan of vegetables). Season generously with salt.
  4. Spread in a single layer on a sheet pan. This is crucial — don’t pile them up. Crowded vegetables steam instead of roasting. Use two pans if you need to.
  5. Roast, turning once halfway through, until tender and golden at the edges.

Timing guide: – Broccoli/cauliflower florets: 20–25 minutes – Brussels sprouts (halved): 25–30 minutes – Carrots/parsnips (chunks): 30–35 minutes – Asparagus: 12–15 minutes – Bell peppers (strips): 20–25 minutes – Zucchini/summer squash: 15–20 minutes – Sweet potato (cubes): 30–35 minutes

Optional but excellent: – A squeeze of lemon at the end brightens everything – Fresh or dried herbs in the last 5 minutes – Grated parmesan over the top right before they come out – A drizzle of balsamic reduction for sweetness and depth


Method Two: Sautéing (Fast and Excellent)

Sautéing is high-heat cooking in a small amount of fat, with movement. It’s fast, it keeps vegetables crisp and bright, and it’s perfect for weeknight cooking.

The method:

  1. Heat a pan (not nonstick — you want it to get very hot) over medium-high heat. Add oil or butter and let it get hot — it should shimmer for oil, foam for butter.
  2. Add vegetables. Don’t touch them for 1–2 minutes. Let them develop some color on the bottom before you start moving them.
  3. Toss or stir, then let them sit again. The goal is some browning, not constant agitation.
  4. Season with salt. Finish with garlic (added near the end so it doesn’t burn), lemon, herbs, or whatever sounds good.

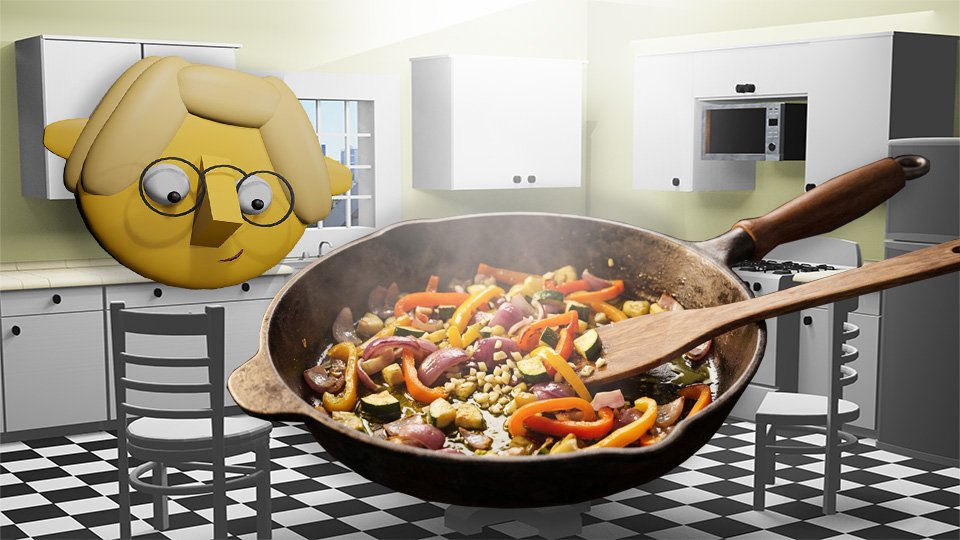
Best vegetables for sautéing: Green beans, snap peas, spinach, mushrooms, asparagus, corn, peppers, cherry tomatoes, kale (slightly wilted with oil and garlic is magnificent).

Time: Most sautéed vegetables are done in 5–10 minutes.


Method Three: Blanching and Shocking (For Salads, Meal Prep, and Perfection)

Blanching briefly boils vegetables, then immediately plunges them into ice water. The result: vivid green color, crisp-tender texture, bright flavor. This is how restaurants get their vegetables so visually perfect.

The method:

  1. Bring a large pot of heavily salted water to a full rolling boil.
  2. Drop vegetables in. Cook just until they turn bright and vibrant — usually 1–3 minutes.
  3. Immediately transfer to a bowl of ice water. Let them sit for a minute or two.
  4. Drain. Serve, or store in the fridge for up to 3 days.

Blanched vegetables can then be finished with butter in a pan, dressed in vinaigrette for a salad, or eaten as-is.

Best for: Broccoli, green beans, asparagus, peas, snow peas, edamame.


The Flavor Combinations That Always Work

Broccoli: Roasted + lemon + parmesan. Always works. Always eaten.

Brussels sprouts: Roasted with a little bit of bacon or pancetta. Even people who hate Brussels sprouts eat these.

Carrots: Roasted with honey and a little butter and thyme. Sweet, tender, deeply good.

Green beans: Sautéed with garlic and a handful of toasted almonds. Bright, snappy, sophisticated.

Asparagus: Roasted with olive oil, salt, and pepper, finished with a squeeze of lemon. Done in 12 minutes and consistently excellent.

Mushrooms: Sautéed in butter over high heat with garlic and thyme. Do not crowd them — let them brown. Crowded mushrooms steam and go rubbery. Browned mushrooms are revelatory.

Spinach or kale: Sautéed in olive oil and garlic until just wilted. Season with salt and a tiny bit of lemon or red pepper flakes.


One More Thing: Salt Your Vegetables

Season vegetables before they go in the oven or pan, and taste them again when they come out. Undersalted vegetables taste flat and green and healthy in the wrong way. Properly salted vegetables taste like themselves — rich, sweet, complex, and satisfying.

This is genuinely the whole secret.


🛒 Gear Worth Having

As an Amazon affiliate, I earn with each qualifying purchase. Than you supporting TumbleBump.


Recommended Reads

Posted on TumbleBump | COOKS Category

TumbleBump is part of the John D Reinhart content family. Writer, illustrator, videographer, and accidental filmmaker — find the whole story at JohnDReinhart.com.

21002

©2026 John D Reinhart/TumbleBump.com – all rights reserved

Garlic, Onions, and Other Things the Recipes Gloss Over

The recipes mention garlic and onions like they’re nothing. They are not nothing. Here’s what’s actually happening in your kitchen — and why it’s all completely worth it.

Meta Description:

The recipe said “peel and mince three cloves of garlic.”

It did not mention that garlic skin is papery and clingy and will stick to your fingers and the knife and the cutting board and somehow also the cabinet door behind you. It did not mention that your hands will smell like garlic for the rest of the day regardless of how many times you wash them. It did not mention any of this because the recipe was written by someone who has peeled ten thousand cloves of garlic and has completely forgotten that it was ever strange.

This is the gap TumbleBump exists to fill.

Cooking is wonderful. It is also, in places: sticky, tearful, smelly, and mildly alarming if nobody warned you what was coming. Consider yourself warned — and reassured. This is all completely normal, it happens to everyone, and there are ways to make most of it easier.

There are approximately 7 gazillion YouTube videos showing you exactly how to handle each of these things step by step. We wholeheartedly encourage you to go watch them. We’re here for the why — the part that makes all the how make sense.

🧄 Garlic: The Fragrant Menace

The peeling problem

A garlic clove sits inside two layers of skin — a papery outer layer that belongs to the whole head, and a thinner inner skin that clings to the individual clove like it has a personal grudge. Getting that inner skin off is the part recipes breeze past with the word “peel.”

Here’s why it clings: garlic skin is dry and light, which means it generates static electricity the moment you touch it. It sticks to your fingers. It sticks to the knife. It drifts across the counter. This is not a sign that you’re doing it wrong. This is just garlic being garlic.

The microwave trick — and why it works

Ten to fifteen seconds in the microwave (for a whole head) or about five seconds per clove causes the moisture inside the garlic to expand very slightly, which loosens the skin from the flesh underneath. The clove essentially slides right out. It works because heat and steam are doing the peeling work instead of your fingers.

The tradeoff: microwaved garlic is very slightly softer than raw, which matters if you’re using it raw in a dressing or salsa. For cooking — sautéing, roasting, adding to a sauce — it makes absolutely no difference whatsoever.

🧄  The smash method is equally fast and requires no microwave: lay the flat side of a knife on the clove and press down firmly with the heel of your hand. The skin splits and the clove pops right out. Bonus: the smashed clove is already partially broken down and will mince much more easily.

The smell problem

Garlic contains sulfur compounds — the same family of chemicals responsible for its flavor and its staying power on your hands. When you cut or crush garlic, those compounds are released and bond readily with the proteins in your skin.

Soap and water alone won’t fully remove them because the compounds aren’t water-soluble. What works better: rubbing your hands on stainless steel under cold water (a stainless steel soap bar is a real product and it actually works), washing with lemon juice, or simply accepting that you cooked with garlic today and your hands are going to tell that story for a while.

💡  Professional cooks smell like garlic. It’s a badge of honor, not a hygiene failure. Welcome to the club.

🧅 Onions: The Tearful Truth

Why your eyes water

When you cut an onion, you rupture its cells and release enzymes that react with each other to produce a sulfur-based gas. That gas rises, hits the moisture on your eyes, and converts into a mild sulfuric acid. Your eyes respond the way any reasonable eyes would respond to sulfuric acid: they water, urgently and without apology.

This is not a flaw in the onion. This is the onion doing exactly what it evolved to do — discouraging things from eating it. You are being chemically discouraged. Cook the onion anyway.

What actually helps

  • A sharp knife. A dull knife crushes the onion cells rather than slicing cleanly through them, releasing far more of the irritating compounds. The sharper the knife, the fewer tears.
  • Cold onion. Chilling the onion in the refrigerator for thirty minutes before cutting slows the chemical reaction. Less gas, fewer tears.
  • Good ventilation. Cut near an open window or under a running exhaust fan. The gas disperses before it reaches your eyes.
  • Contact lenses. Contact lens wearers are frequently immune to onion tears because the lenses physically block the gas from reaching the eye surface. An unexpected benefit of imperfect vision.

😢  Goggles work perfectly. Nobody wears them. Onion-cutting goggles are a real product, they are completely effective, and they will make you look absolutely unhinged in your own kitchen. Worth knowing they exist.

The smell

Onion smell on hands is the same sulfur-compound situation as garlic, and responds to the same remedies. Stainless steel, lemon juice, time. The cutting board will smell too — a quick rub with half a lemon, then a wash, sorts it right out.

🍗 Raw Chicken: Just Breathe

Raw chicken makes a lot of people deeply uncomfortable, and understandably so. It’s cold, it’s slippery, it smells faintly of itself, and everything you’ve ever heard about food safety is playing on a loop in the back of your mind.

Here’s the reassuring truth: raw chicken is safe to handle. It just requires a little protocol.

  • Keep it cold until you’re ready to cook it. Bacteria multiply at room temperature. Straight from the fridge to the pan is the right move.
  • Don’t wash it. Rinsing raw chicken in the sink spreads bacteria to the sink, the counter, and anything nearby via water droplets. Cooking to 165°F kills everything. Skip the rinse.
  • Use a dedicated cutting board for raw meat, or wash your board thoroughly with hot soapy water before using it for anything else.
  • Wash your hands immediately after handling raw chicken and before touching anything else in the kitchen. This is the whole protocol. It’s not complicated.

🍗  The slipperiness is just moisture. Pat chicken dry with a paper towel before cooking and it handles much more easily — and browns better in the pan. Two problems solved at once.

🐟 Fish: The Smell Situation

Fresh fish should smell like the ocean — clean, briny, pleasant even. Fish that smells powerfully of fish is fish that is past its prime. That’s the first thing to know.

The second thing to know is that cooking fish fills the kitchen with a smell that lingers considerably longer than the cooking itself. This is simply the nature of fish. Open a window. Run the exhaust fan. Accept it as the price of a genuinely excellent dinner.

Fish smell on hands and pans

  • Hands: lemon juice or white vinegar cuts fish smell more effectively than soap alone. Rub, rinse, done.
  • Pans: a quick wash with hot soapy water immediately after cooking prevents the smell from setting in. Don’t let a fish pan sit.
  • The kitchen: simmer a small pot of water with lemon slices and a splash of vanilla extract after cooking fish. It neutralizes the smell remarkably quickly and makes the kitchen smell like a bakery, which is a significant upgrade.

🌶️ Pepper Seeds and Other Small Chaos

Hot pepper hands

The capsaicin in hot peppers — the compound responsible for heat — bonds to your skin and does not come off with soap and water. If you touch your eyes after handling hot peppers, you will have a very bad few minutes.

Wear disposable gloves when working with hot peppers. This is not overcautious. This is just correct. If you’ve already made the mistake, wash your hands with dish soap (which cuts oils better than hand soap), then rub with vegetable oil, then wash again. It helps. Somewhat.

Sticky dough

Bread and pastry dough sticks to hands, counters, rolling pins, and ambition. Flour is the answer — a light dusting on your hands and the work surface keeps things moving. The instinct is to add more and more flour, but too much changes the dough. Just enough to prevent sticking is the goal.

The general chaos of a busy stovetop

Oil spits. Sauce bubbles over. Steam burns are sneaky and arrive without warning. A kitchen in action is a mildly hazardous environment, and experienced cooks navigate it with a combination of awareness and respect rather than fearlessness.

Keep a kitchen towel on your shoulder. Use it for everything — pan handles, spills, your hands. Don’t reach over open flames. Turn pot handles inward so they can’t be bumped. These habits become automatic within a few weeks and make the kitchen feel safe and manageable rather than chaotic.

✅  Every cook has burned themselves on a pan handle, splattered sauce on a clean shirt, and dropped something at the worst possible moment. Every single one. You are not uniquely clumsy. You are just learning, which is exactly the right thing to be doing.

🛒 What to Get

The Essentials

  • Stainless Steel Soap Bar — Removes garlic, onion, and fish smell from hands better than regular soap. Sounds implausible, works completely.
  • Sharp Chef’s Knife (8-Inch) — A sharp knife is the single best solution to onion tears, garlic frustration, and most other prep problems. Dull knives make everything harder and more dangerous.
  • Nitrile Disposable Gloves — For hot peppers, raw chicken, beets, or anything else you’d rather not have on your hands. Keep a box in the kitchen.
  • Plastic Cutting Board Set — Color-coded boards for meat, vegetables, and fish keep cross-contamination from becoming a concern. Simple and effective.
  • Kitchen Exhaust Fan (Under-Cabinet) — For fish nights and anything else that produces strong smells. Ventilation is the most underrated kitchen upgrade.

Nice to Have

  • Knife Sharpener (Pull-Through) — Keeps your chef’s knife sharp between professional sharpenings. Sharp knives are safer and more pleasant to use.
  • Lemon Squeezer — Lemon juice is the remedy for garlic hands, fish smell, cutting board odor, and about a dozen other kitchen realities. Keep lemons on hand.
  • Kitchen Towels (Set of 6) — Keep one on your shoulder while you cook. Use it for everything. Replace them often. The most useful thing in the kitchen after the knife.

As an Amazon Associate, I earn from qualifying purchases. Thank you for supporting TumbleBump.

🔗 Related Reads

TumbleBump is part of the John D Reinhart content family. Writer, illustrator, videographer, and accidental filmmaker — find the whole story at JohnDReinhart.com.

21017

©2026 John D Reinhart/TumbleBump.com – all rights reserved

Sauté: The One Word Every Recipe Uses and Nobody Ever Explains

Every recipe tells you to sauté something. Nobody tells you what that actually means. Here’s the whole story — why it works, what it does to food, and why it’s the technique that unlocks everything else.

There it is again.

“Sauté the onions.” “Sauté the garlic.” “Sauté the vegetables until softened.” Every recipe in the world assumes you know what this means, then moves cheerfully along to the next instruction while you stand at the stove wondering exactly what you’re supposed to be doing.

Here’s what you’re supposed to be doing.

Sautéing is cooking food quickly in a small amount of fat over relatively high heat, moving it around occasionally so it cooks evenly without burning. That’s the whole definition. It’s fast, it’s simple, and once you understand why it works, you’ll recognize it as the foundation of roughly half of all cooking.

There are approximately 7 gazillion YouTube videos that will show you the step-by-step of sautéing specific ingredients. We encourage you to go watch them — that’s exactly what they’re there for. We’re here to explain the why, which is the part that makes everything else make sense.

🔥 Why High Heat?

Heat is what transforms food. Raw onion is sharp and eye-watering. A properly sautéed onion is soft, sweet, and fragrant — something chemically different from what went into the pan. That transformation happens because of heat, and specifically because of two processes working together.

The Maillard Reaction

When food hits a hot pan, proteins and sugars on the surface react with each other and produce hundreds of new flavor compounds. This is called the Maillard Reaction, and it’s responsible for the golden color and the deeply savory smell that makes a kitchen smell like someone who knows what they’re doing lives there.

High heat gets the surface of the food hot enough to trigger this reaction quickly, before the inside overcooks. That’s the sweet spot sautéing is designed to hit.

💡  Low heat in a sauté pan doesn’t sauté — it steams. The food releases its moisture, sits in a puddle of its own liquid, and turns gray and limp instead of golden and flavorful. If the pan isn’t sizzling when the food goes in, the heat isn’t high enough.

The Fat

A small amount of fat — olive oil, butter, or both — serves several purposes at once. It conducts heat evenly across the pan surface, prevents sticking, adds its own flavor, and helps the Maillard Reaction happen by keeping the surface of the food in consistent contact with the heat.

A small amount means enough to coat the bottom of the pan with a thin, even layer. Not a pool. Not a dry pan. Just enough.

🍳 The Pan Matters

Not every pan sautés equally. The right pan makes everything easier.

What You Want

  • A wide, flat bottom — so food has room to spread out and make contact with the heat rather than piling up and steaming each other.
  • A pan that holds heat well — cast iron and stainless steel are the workhorses. They get hot, stay hot, and recover quickly when cold food goes in.
  • The right size — too small and the food crowds together and steams. Too large and the fat burns in the empty spaces. A 10 or 12-inch skillet handles most sauté jobs comfortably.

What You Don’t Want

  • A cold pan. Always heat the pan before adding fat, and heat the fat before adding food.
  • A crowded pan. If food is piled on top of itself, it steams instead of sautés. Cook in batches if needed.
  • A nonstick pan for high-heat sautéing. Nonstick coatings don’t like very high heat and won’t give you the same browning results.

🍳  A cast iron skillet is the ideal sauté pan for most home kitchens. It gets screaming hot, holds that heat beautifully, goes from stovetop to oven without complaint, and lasts approximately forever. If you only own one pan, make it this one.

🧅 What Sautéing Does to Different Foods

Onions

Raw onion is pungent and sharp. Sautéed onion becomes soft, translucent, and gently sweet as its sugars develop. This is why nearly every savory recipe starts with sautéed onion — it builds a flavor foundation that everything else sits on top of.

A few minutes over medium-high heat produces softened onion. Longer over medium heat produces caramelized onion, which is a different and deeply wonderful thing.

Garlic

Garlic sautés faster than almost anything else — thirty seconds to a minute in a hot pan is usually enough. It goes from raw and sharp to golden and fragrant remarkably quickly, and from golden and fragrant to burned and bitter just as quickly. Watch it. Don’t walk away.

Vegetables

Most vegetables benefit enormously from a quick sauté. Zucchini, peppers, mushrooms, spinach, green beans — high heat, a little oil, keep them moving, and they go from raw to tender-with-a-little-color in just a few minutes. Each vegetable has its own timing, which is where those YouTube videos become your friend.

Protein

Chicken, shrimp, thin-sliced beef, scallops — sautéing gives protein a golden, flavorful crust on the outside while cooking it through quickly. The key is not moving it too soon. Let it sit in contact with the pan long enough to release naturally, then turn it. If it’s sticking, it’s not ready to flip.

✅  The food will tell you when it’s ready to move. If it resists, wait. If it releases cleanly, turn it. This applies to almost everything you’ll ever sauté.

🌡️ The Heat Question

Recipes that say “medium-high heat” are giving you a starting point, not a law. Every stove is different. Electric, gas, induction — they all behave differently, and the same dial setting produces different results on different equipment.

The real signal is the pan and the food, not the dial:

  • Fat should shimmer and move easily when the pan is ready — not smoke, not sit still
  • Food should sizzle immediately when it hits the pan — not silence, not violent spitting
  • The pan should stay hot when food goes in — if it goes quiet and cold, the heat is too low or the pan is too crowded

🔥  If nothing is sizzling, something is steaming. Turn up the heat, give the pan a moment to recover, and try again. A little sizzle is your friend. Silence is the enemy of a good sauté.

🛒 What to Get

The Essentials

  • Lodge 10-Inch Cast Iron Skillet — The gold standard sauté pan for home cooks. Gets hot, stays hot, and produces better browning than almost anything else at any price.
  • Lodge 12-Inch Cast Iron Skillet — For larger batches. More room means less crowding, which means better sautéing results across the board.
  • Stainless Steel Skillet 10-Inch — A lighter alternative to cast iron with excellent heat distribution. All-Clad and Made In are the benchmarks.
  • Wooden Spoon Set — For moving food around the pan without scratching it. A good wooden spoon is one of the most useful tools in the kitchen.
  • Splatter Screen — High-heat cooking with fat produces splatter. A splatter screen keeps it in the pan and off your stovetop. Underrated kitchen purchase.

Nice to Have

  • Tongs (Locking, 12-Inch) — For turning proteins and tossing vegetables without losing control of them. The most useful tool you’ll reach for constantly.
  • Instant-Read Thermometer — For proteins especially — takes the guesswork out of done vs. not done. Worth every penny.

As an Amazon Associate, I earn from qualifying purchases. Thank you for supporting TumbleBump.

🔗 Related Reads

TumbleBump is part of the John D Reinhart content family. Writer, illustrator, videographer, and accidental filmmaker — find the whole story at JohnDReinhart.com.

21016

©2026 John D Reinhart/TumbleBump.com – all rights reserved

Seven Dishes Every Beginning Cook Should Make First

Seven dishes that taste great even when you’re still figuring things out — and smell absolutely wonderful while they’re at it These seven forgiving dishes will build your confidence, fill your kitchen with good smells, and actually taste great — every time.

Here is a truth about cooking that nobody puts on the box: the recipe matters less than the dish.

Some dishes are genuinely unforgiving. A soufflé will collapse if someone opens the oven door wrong. A béarnaise sauce will break if you look at it sideways. A perfectly seared scallop requires confidence, timing, and a pan hot enough to make you reconsider your life choices.

Other dishes are built for humans. They have wide margins, generous timing, and the kind of flavors that cover a multitude of small errors. Make a mistake and dinner is still good. Make a slightly bigger mistake and dinner is still pretty good. These are the dishes you start with.

Master the forgiving ones first. The tricky ones will wait.

There are approximately 7 gazillion YouTube videos that will show the nitty-gritty low down, the step-by-step blow-by-blow of actually preparing these dishes. Please don’t think we’ll be offended if you go look. In fact, we encourage you. We’re here to provide the why, not the how!

🍗 One-Pan Roasted Chicken Thighs

Why it’s your new best friend

The chicken thigh is the most forgiving protein in the known universe. It has enough fat to stay juicy even if you overcook it, enough surface area to go golden and crispy without any special technique, and enough flavor to taste genuinely satisfying with nothing more than salt, pepper, and a hot oven.

If you have never cooked a piece of meat in your life, start here.

The technique

  • Season generously with salt, pepper, garlic powder, paprika — whatever sounds good
  • Place skin-side up in an oven-safe pan or baking dish
  • Roast at 425°F for 35–45 minutes until the skin is deep golden
  • Internal temperature should hit 165°F — a meat thermometer removes all doubt

✅  You can over-season these and they’re still good. You can leave them five extra minutes and they’re still juicy. You can make them with olive oil, butter, or nothing at all in a pinch. Chicken thighs simply refuse to fail.

🍝 Pasta with Simple Tomato Sauce

Why it’s your new best friend

Pasta is almost impossible to truly ruin. A can of good crushed tomatoes is already halfway to dinner before you’ve done anything. The whole business comes together in twenty minutes and tastes like someone tried — because you did, and it was easy.

The technique

  • Boil well-salted water in a saucepan. Cook pasta until al dente — taste it, it should have just a little resistance
  • Meanwhile, in another saucepan, warm a can of crushed tomatoes in a pan with olive oil, a clove or two of garlic, and salt
  • Combine pasta and sauce. Add parmesan and black pepper. Eat immediately.

✅  The timing is gentle, the flavors are robust, and even slightly overcooked pasta in a good sauce is entirely acceptable. This is weeknight dinner, not a competition.

Here are the nuts and bolts of making pasta, if you’re curious.

🍲 Lentil Soup

Why it’s your new best friend

Lentils may be the single most forgiving ingredient in the entire kitchen. Unlike dried beans, they need no soaking. They cook in under thirty minutes. They absorb flavor like a sponge. And overcooked lentils don’t become a disaster — they become creamier, which is actually delicious.

The technique

  • In a saucepan, soften diced onion, carrot, and celery in olive oil — this is a mirepoix, the flavor foundation of most soups, and it smells wonderful
  • Add garlic, cumin, a can of diced tomatoes, a cup of dried lentils, and broth or water
  • Simmer 25–30 minutes. Season with salt and a squeeze of lemon juice.

✅  Once everything is in the pot, the soup takes care of itself. The leftovers are arguably better than the first serving. Make a double batch without a second thought.

Lentils make a great foundational staple for a week’s worth of dishes. Here’s a way to plan that out.

🍳 Fried Rice

Why it’s your new best friend

Fried rice was invented to use up what you already have. Day-old rice (actually better than fresh for this), eggs, whatever vegetables are in the freezer, soy sauce — the dish has infinite variation and is genuinely hard to mess up even on a bad day.

The technique

  • High heat in a wok or your trusty cast-iron skillet, a little oil, garlic and ginger if you have them
  • Add vegetables and stir until hot
  • Add rice and press flat for a minute before stirring — this creates a small, satisfying crust
  • Scramble an egg or two directly into the pan, stir to combine
  • Season with soy sauce. Taste. Adjust. Eat.

✅  Too little soy? Add more. Too dry? Splash of broth. Missing a vegetable? Swap something else in. The dish adjusts to you, not the other way around.

🍌 Banana Bread

Why it’s your new best friend

Banana bread is the gateway baking project for excellent reasons. It uses over-ripe bananas — the blacker, the better, because more brown means more sugar means more flavor. It requires no special equipment. And the flavor is robust enough to survive small measurement errors without blinking.

The technique

  • Mash three very ripe bananas thoroughly in a large bowl
  • Mix in melted butter, sugar, one egg, a splash of vanilla, a pinch of salt, baking soda, and flour
  • Pour into a greased loaf pan. Bake at 350°F for 55–65 minutes.
  • A toothpick in the center should come out clean. Let it cool — if you can stand it.

✅  The margin for error is wide, the result is reliably wonderful, and your kitchen will smell like the inside of a hug. This one wins every time.

🥚 Frittata

Why it’s your new best friend

A frittata is a baked omelette, and it’s infinitely less stressful than a French omelette — which requires precise heat, specific technique, and a certain philosophical acceptance that it may slide onto the floor. A frittata you don’t fold. The oven does the work. There’s nothing to panic about.

The technique

  • Whisk eggs in a bowl with salt and a splash of milk or cream
  • In an oven-safe pan, sauté whatever vegetables or protein you like in olive oil
  • Pour in the eggs. Don’t stir. Let the bottom set for 2–3 minutes.
  • Transfer the pan to a 375°F oven for 10–12 minutes until the top is just set

✅  The oven handles the hard part. The dish accepts almost any filling. And it looks far more impressive than the effort required — which is exactly what you want.

If you’re new to the concept of sautéing, this post has helpful information: Sauté: The One Word Every Recipe Uses and Nobody Ever Explains

🥦 Sheet Pan Vegetables with Anything

Why it’s your new best friend

Roasting vegetables is the most forgiving cooking method in existence. You toss things in oil and salt, spread them on a sheet pan, and put them in a hot oven. They will become good. Every single time. No technique required, no timing anxiety, no special skills.

The technique

  • Cut any vegetable into roughly even pieces
  • Toss with olive oil and salt. Spread in a single layer on a sheet pan — don’t crowd them.
  • Roast at 400–425°F for 20–35 minutes depending on the vegetable, tossed once halfway through

✅  Slightly undercooked: pleasantly crunchy. Slightly overcooked: caramelized and sweeter. Either direction from perfect is still a good result. Roast everything. Roast it often.

🛒 Gear Worth Having

The Essentials

  • Lodge 10-Inch Cast Iron Skillet — Stovetop to oven in one pan. Essential for frittatas, chicken thighs, and a lifetime of cooking. Virtually indestructible.
  • Nordic Ware Half Sheet Pans (2-Pack) — The roasting pan every kitchen needs. Two of them means more room and better results on sheet pan night.
  • 9×5 Loaf Pan — For banana bread, and eventually everything else you’ll want to bake in a loaf. A good one releases cleanly every time.
  • Instant-Read Meat Thermometer — Removes all guesswork from chicken. If it reads 165°F, dinner is done. Worth every penny.

Books Worth Reading

As an Amazon Associate, I earn from qualifying purchases. Thank you for supporting TumbleBump.

🔗 Related Reads

TumbleBump is part of the John D Reinhart content family. Writer, illustrator, videographer, and accidental filmmaker — find the whole story at JohnDReinhart.com.

21015

©2026 John D Reinhart/TumbleBump.com – all rights reserved

The 1-2-3s of Cooking Meat

Meat is the ingredient that makes most beginning cooks nervous — too raw, too dry, too tough, too something. Here’s the three-part framework that makes cooking any meat less scary and more delicious, every single time.

Cooking meat well is one of those skills that sounds complicated but is really just a handful of concepts stacked on each other. Once you have the concepts, everything else follows — chicken, steak, pork chops, ground meat, roasts, all of it — because the same logic applies across the board.

The framework is three steps: preparation, heat, and rest. Let’s walk through each.


Step 1: Preparation

What you do before the meat hits the pan matters as much as what you do during cooking.

Dry It

Pat meat dry with paper towels before cooking. This sounds minor and isn’t. Wet meat steams in the pan instead of browning. You’ve had perfectly good chicken turn grayish and watery? Wet meat. Pat it dry and the same chicken turns golden and beautiful.

Salt It — and Early

Salt your meat at least 30 minutes before cooking, ideally longer (1–24 hours for thicker cuts). This is called dry brining, and it does something remarkable: the salt initially draws moisture out of the meat, then that moisture dissolves the salt and gets reabsorbed. The result is meat that is seasoned all the way through, not just on the surface, and that has better moisture retention during cooking.

For quick weeknight cooking, even 30 minutes makes a difference. For a thick steak or pork chop, salting the night before is transformative.

Bring to Room Temperature

Take large or thick cuts of meat out of the refrigerator 20–30 minutes before cooking. Cold meat hitting a hot pan lowers the pan temperature and produces uneven cooking — raw in the center, overdone on the outside. Room temperature meat cooks more evenly.

(Note: For food safety, don’t leave meat out more than 1–2 hours, and never in a very warm environment.)


Step 2: Heat

This is where the cooking happens, and the most important concept is: match the heat level to the thickness and tenderness of the cut.

Thin Cuts: High Heat, Fast

Thin chicken cutlets, fish fillets, pork chops under ½ inch, thin steaks, ground meat — these cook fast and hot. High heat creates browning (flavor) before the inside overcooks.

  • Get the pan very hot before the meat goes in
  • Don’t move the meat for the first 2–3 minutes — let the crust develop
  • Flip once when it releases easily from the pan (it sticks at first, then releases when properly seared)
  • Cook the second side, then check internal temperature.

Thick Cuts: Sear Then Finish in Oven

A thick steak or pork chop or chicken breast needs to be cooked through without burning the outside. The technique:

  1. Sear in a hot, oven-safe pan (cast iron is ideal) for 2–3 minutes per side until well browned
  2. Transfer the pan directly to a 375°F oven and cook until internal temp is reached

This is called the “reverse sear” when done in the opposite order (oven first, sear last) — that version produces even more consistent results.

Tough Cuts: Low Heat, Long Time

Brisket, short ribs, pork shoulder, lamb shanks — these are cuts with a lot of connective tissue and muscle. High heat makes them tough. Low, slow heat (275–325°F for hours, or low and slow in a braising liquid) breaks down collagen into gelatin, producing meat that is tender to the point of falling apart.

These cuts are forgiving precisely because time is the variable, not precision — they’re done “when they’re done,” which you’ll know because a fork or spoon pressed into them meets no resistance.


The Temperature Guide (Because This Is Everything)

Get a meat thermometer. Use it every time until temperatures are second nature.

MeatSafe TemperatureNotes
Chicken (whole/parts)165°FPull at 160°F — it coasts up
Ground beef/pork160°FNo exceptions
Beef steak (medium rare)130–135°FRed center, warm
Beef steak (medium)140–145°FPink center
Pork chops/loin145°FA little pink is fine and correct
Fish (most types)130–140°FFlakes easily, opaque

Step 3: Rest

When you take meat off heat, let it rest before cutting. This is not optional.

Why: When meat cooks, the heat drives moisture toward the center of the cut. When you let it rest, that moisture redistributes throughout the meat. Cut immediately and the moisture rushes out onto the cutting board. Let it rest and it stays in the meat.

How long to rest: – Thin cuts (chicken breast, pork chop, steak): 5 minutes – Thick roasts: 10–20 minutes – Large roasts (whole chicken, turkey breast): 20–30 minutes

Tent loosely with aluminum foil to keep it warm during resting. Don’t wrap tightly — you’ll trap steam and soften the crust.


A Few Specific Notes by Meat Type

Chicken thighs vs. breasts: Thighs have more fat and connective tissue. They’re more forgiving — harder to overcook, more flavorful when cooked properly. If you’re a beginning cook, start with thighs. Breasts are leaner and can go from done to dry very quickly.

Pork: Modern pork is safe to eat at 145°F, which means a little pink in the center is totally fine. You don’t need to cook pork until it’s white all the way through. Overcooked pork chops are unfortunately common.

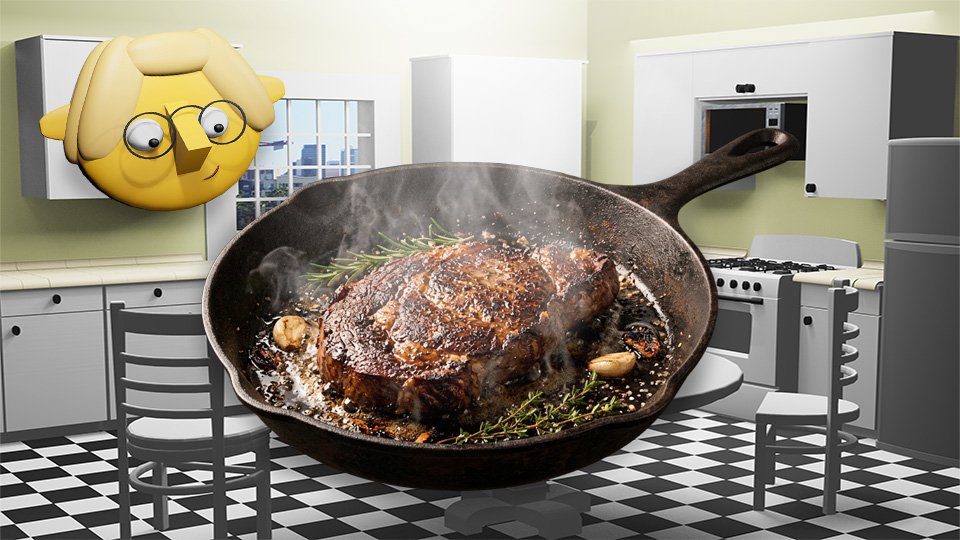
Steak: The quality of the steak matters. A well-cooked choice-grade ribeye will always be more satisfying than a poorly cooked filet. Buy the best you can afford, keep it simple.

Ground meat: Cook to 160°F without exceptions. Ground meat has more surface area and exposure than whole cuts, which changes the safety calculus.


🛒 Gear Worth Having


As an Amazon affiliate, I earn from qualifying purchases. Thank you for supporting TumbleBump.


Recommended Reads

Posted on Skippity | COOKS Category

TumbleBump is part of the John D Reinhart content family. Writer, illustrator, videographer, and accidental filmmaker — find the whole story at JohnDReinhart.com.

21001

©2026 John D Reinhart/TumbleBump.com – all rights reserved

Salt, Fat, and Flame: The Three Knobs of Flavor

Every flavor problem in your kitchen — flat, bland, greasy, dull, somehow wrong — can be traced back to three things: salt, fat, and heat. Learn how these three knobs work and you’ll never follow a recipe blindly again.

Here is a secret that culinary school charges a lot of money to teach you:

Most cooking problems are caused by not enough salt, not enough fat, or wrong heat. And most great dishes are great because someone understood how to use all three.

That’s the whole game. Let’s play it.


Knob One: Salt

Salt is not seasoning. Salt is a fundamental force in cooking. It doesn’t just make things taste salty — it wakes up flavors that were already there, suppresses bitterness, and brings everything into focus. A dish without enough salt tastes vague and flat. The same dish with the right amount of salt tastes like itself.

When to add it: Earlier than you think. Salting at the end just makes things taste salty. Salting as you go — on the raw vegetable, into the pasta water, on the meat before it hits the pan — lets the salt become part of the food rather than sitting on top of it.

How much: Enough that nothing tastes flat, but not so much that salt is the thing you notice. The goal is for salt to disappear — for the food to just taste good without you being able to identify why.

Tasting for salt: Take a small spoonful of whatever you’re making. Chew it, swallow it, wait a moment. If it tastes flat or muted, add salt, stir, taste again. Keep going until it tastes like a full, complete version of itself.

Types of salt:

  •  Kosher salt — the everyday workhorse. Coarser grain, easier to pinch and apply evenly. Most professional kitchens use this.
  • Table salt — fine grain, very common, but saltier by volume than kosher. If a recipe says “kosher salt” and you use table salt, use about half as much.
  • Flaky sea salt — finishing salt. Sprinkle on top of a dish just before serving for texture and a bright, clean pop of salinity.

Knob Two: Fat

Fat does several things that nothing else can do.

It carries flavor. Many flavor compounds are fat-soluble, meaning they need fat to reach your taste buds fully. Herbs bloomed in butter taste more herby than herbs added to water. Garlic cooked in oil infuses the oil with flavor that distributes through the whole dish.

It conducts heat. Fat in a pan gets much hotter than water, which is why sautéing creates browning and roasting creates crust, while boiling can’t. That browning (the Maillard reaction) is flavor.

It adds richness and texture. A sauce with a pat of butter melted in at the end tastes rounder and fuller. A dressing with good olive oil feels silkier. A biscuit made with cold butter has distinct flaky layers.

Common cooking fats and their strengths: 

  • Butter — flavor, browning, richness. Burns at relatively low temp (use clarified butter for high-heat cooking).
  • Olive oil — flavor, Mediterranean character, good for medium heat. Don’t cook it at very high heat — it smokes and turns bitter.
  • Neutral oils (canola, vegetable, avocado) — for high-heat cooking where you want fat without flavor. Avocado oil has the highest smoke point.
  • Bacon fat / lard — incredible flavor. Old-fashioned and underrated.

Not enough fat: Food sticks to the pan. Food tastes dry and flat. Flavors don’t develop.

Too much fat: Food feels greasy. Sauces break. Baked goods are dense.

The right amount is somewhere between “this seems like a lot” and “this seems like too much.”


Knob Three: Heat

Heat is where cooking actually happens. Fat is your medium. Salt is your tool. But heat is the engine.

The two modes of heat:

Dry heat — roasting, searing, sautéing, grilling — removes moisture and creates browning. This is where crust forms, caramelization happens, and flavor concentrates. Dry heat is flavor development.

Wet heat — simmering, braising, steaming, poaching — the food gently cooks in liquid, keeps things moist, and breaks down tough fibers over time. Wet heat is tenderness.

Most great dishes use both: sear the meat first (dry heat, flavor), then braise it low and slow (wet heat, tenderness).

The main heat mistakes:

  •  Too low, too short — things cook through but never brown. You’ve cooked food without actually cooking flavor.
  • Too high, too fast — the outside burns before the inside is done. Harsh, bitter, uneven.
  • Right heat — the outside caramelizes at roughly the same rate the inside cooks through. This is the sweet spot, and it’s different for every protein, vegetable, and dish.

How to know if your pan is hot enough: Add a drop of water or a single crumb. It should sizzle immediately and evaporate quickly. If it just sits there, not yet. If it instantly vaporizes, too hot.


How the Three Work Together

A great sear on a chicken thigh: dry pan, high heat, enough fat to coat the surface, salted meat. The heat triggers browning. The fat carries the heat evenly and conducts browning across the whole surface. The salt drew out a little surface moisture so you get crust instead of steam.

A perfect pasta sauce: medium heat, olive oil, garlic (fat carries the garlic flavor into the oil), tomatoes, salt added in stages. The heat concentrates the tomato. The fat enriches the sauce. The salt balances the acidity and wakes up the whole thing.

These three things are in every recipe. Now you can see them.


🛒 Gear Worth Having

As an Amazon affiliate, I earn from qualifying purchases. Thank you for supporting TumbleBump.


Recommended Reads: 


Posted on TumbleBump | COOKS Category

TumbleBump is part of the John D Reinhart content family. Writer, illustrator, videographer, and accidental filmmaker — find the whole story at JohnDReinhart.com.

21005

©2026 John D Reinhart/TumbleBump.com – all rights reserved