
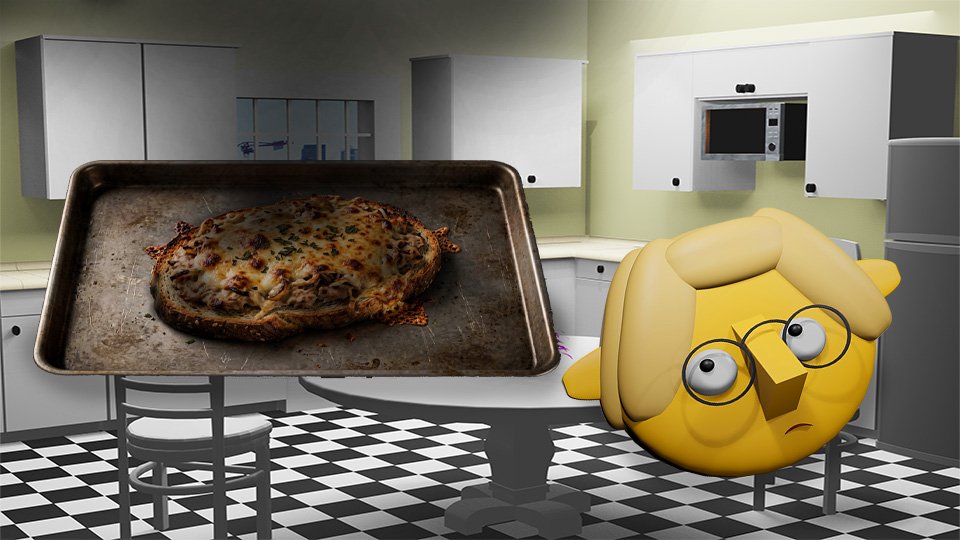
Cooking Vegetables Everyone Will Eat

If the vegetables in your life have been watery, bland, or aggressively healthy-tasting, the problem isn’t the vegetables — it’s the method. Here’s how to cook vegetables so good that even the people who “don’t like vegetables” come back for seconds.

There is a great injustice that has been done to vegetables.

For decades, they were boiled until pale and soft, served as reluctant side dishes, and presented as the joyless nutritional obligation you had to eat before the real food. They tasted watery and vague because they were watery and vague — all the flavor steamed out of them into the cooking water and down the drain.

The vegetables were never the problem. The cooking method was the problem.

Properly cooked vegetables are one of the best things you can eat. Roasted carrots are sweet and caramelized and almost candy-like. Sautéed green beans are snappy and bright and deeply savory. Roasted broccoli develops crispy edges that people fight over. We’ve just been doing it wrong.

Here’s how to do it right.


Method One: Roasting (The Greatest Method)

High heat + fat + time = the best vegetables you’ve ever made. Roasting caramelizes the natural sugars in vegetables and creates browned edges that concentrate flavor in a way nothing else does.

The method:

  1. Preheat your oven to 400–425°F (hot — this is the whole game).
  2. Cut vegetables into even-sized pieces so they cook at the same rate.
  3. Toss with enough olive oil to coat everything lightly (about 2–3 tablespoons per sheet pan of vegetables). Season generously with salt.
  4. Spread in a single layer on a sheet pan. This is crucial — don’t pile them up. Crowded vegetables steam instead of roasting. Use two pans if you need to.
  5. Roast, turning once halfway through, until tender and golden at the edges.

Timing guide: – Broccoli/cauliflower florets: 20–25 minutes – Brussels sprouts (halved): 25–30 minutes – Carrots/parsnips (chunks): 30–35 minutes – Asparagus: 12–15 minutes – Bell peppers (strips): 20–25 minutes – Zucchini/summer squash: 15–20 minutes – Sweet potato (cubes): 30–35 minutes

Optional but excellent: – A squeeze of lemon at the end brightens everything – Fresh or dried herbs in the last 5 minutes – Grated parmesan over the top right before they come out – A drizzle of balsamic reduction for sweetness and depth


Method Two: Sautéing (Fast and Excellent)

Sautéing is high-heat cooking in a small amount of fat, with movement. It’s fast, it keeps vegetables crisp and bright, and it’s perfect for weeknight cooking.

The method:

  1. Heat a pan (not nonstick — you want it to get very hot) over medium-high heat. Add oil or butter and let it get hot — it should shimmer for oil, foam for butter.
  2. Add vegetables. Don’t touch them for 1–2 minutes. Let them develop some color on the bottom before you start moving them.
  3. Toss or stir, then let them sit again. The goal is some browning, not constant agitation.
  4. Season with salt. Finish with garlic (added near the end so it doesn’t burn), lemon, herbs, or whatever sounds good.

Best vegetables for sautéing: Green beans, snap peas, spinach, mushrooms, asparagus, corn, peppers, cherry tomatoes, kale (slightly wilted with oil and garlic is magnificent).

Time: Most sautéed vegetables are done in 5–10 minutes.


Method Three: Blanching and Shocking (For Salads, Meal Prep, and Perfection)

Blanching briefly boils vegetables, then immediately plunges them into ice water. The result: vivid green color, crisp-tender texture, bright flavor. This is how restaurants get their vegetables so visually perfect.

The method:

  1. Bring a large pot of heavily salted water to a full rolling boil.
  2. Drop vegetables in. Cook just until they turn bright and vibrant — usually 1–3 minutes.
  3. Immediately transfer to a bowl of ice water. Let them sit for a minute or two.
  4. Drain. Serve, or store in the fridge for up to 3 days.

Blanched vegetables can then be finished with butter in a pan, dressed in vinaigrette for a salad, or eaten as-is.

Best for: Broccoli, green beans, asparagus, peas, snow peas, edamame.


The Flavor Combinations That Always Work

Broccoli: Roasted + lemon + parmesan. Always works. Always eaten.

Brussels sprouts: Roasted with a little bit of bacon or pancetta. Even people who hate Brussels sprouts eat these.

Carrots: Roasted with honey and a little butter and thyme. Sweet, tender, deeply good.

Green beans: Sautéed with garlic and a handful of toasted almonds. Bright, snappy, sophisticated.

Asparagus: Roasted with olive oil, salt, and pepper, finished with a squeeze of lemon. Done in 12 minutes and consistently excellent.

Mushrooms: Sautéed in butter over high heat with garlic and thyme. Do not crowd them — let them brown. Crowded mushrooms steam and go rubbery. Browned mushrooms are revelatory.

Spinach or kale: Sautéed in olive oil and garlic until just wilted. Season with salt and a tiny bit of lemon or red pepper flakes.


One More Thing: Salt Your Vegetables

Season vegetables before they go in the oven or pan, and taste them again when they come out. Undersalted vegetables taste flat and green and healthy in the wrong way. Properly salted vegetables taste like themselves — rich, sweet, complex, and satisfying.

This is genuinely the whole secret.


🛒 Gear Worth Having

As an Amazon affiliate, I earn with each qualifying purchase. Than you supporting TumbleBump.


Recommended Reads

Posted on TumbleBump | COOKS Category

TumbleBump is part of the John D Reinhart content family. Writer, illustrator, videographer, and accidental filmmaker — find the whole story at JohnDReinhart.com.

21002

©2026 John D Reinhart/TumbleBump.com – all rights reserved
Why the Spaghetti Water Is Running All Over the Stove

The pot boils over. The starchy water is on the burner, on the counter, possibly on you. This is annoying, avoidable, and has a simple physics explanation — plus three fixes that take zero extra effort.

Pasta water boiling over is one of those small kitchen disasters that happens with enough regularity to feel like a personal failing. It isn’t. It’s a physics phenomenon with a specific cause and specific, simple preventions.

Why It Happens

When water boils, steam bubbles form at the bottom of the pot and rise to the surface, where they burst. This is the rolling boil you’re aiming for when cooking pasta. On its own, water bubbles and boils without drama.

But pasta releases starch into the water as it cooks. Starch dramatically increases the water’s surface tension and viscosity. When a starchy bubble of pasta water reaches the surface, instead of bursting cleanly, it stretches — forming a thick, stable foam that doesn’t immediately collapse. The foam builds on itself, rises to the rim, and then, with the confidence of something that has nothing to lose, goes over the edge.

The more pasta you’re cooking, the more starch in the water, the more foam. Smaller pots with less headroom provide less buffer. High heat maintains continuous vigorous boiling that generates foam faster. These are the conditions for a stovetop flood.


Fix One: Use a Bigger Pot

The single most effective prevention is a pot with more volume and more headroom above the water level. A pasta boilover almost never happens in a 10-quart pot with six quarts of water — there’s simply too much room for the foam to build before it reaches the rim.

A 6-quart pot with five quarts of water is at much higher risk. Fill it less, or get a bigger pot.


Fix Two: Lower the Heat Once Boiling

Boilover requires vigorous, sustained boiling to generate foam faster than it can disperse. The moment you add pasta and the water returns to a boil, you can reduce the heat slightly — from high to medium-high — and maintain an active, rolling boil without the maximum foam generation of full-blast heat.

The pasta cooks at essentially the same rate. The foam risk drops significantly.


Fix Three: The Wooden Spoon Trick (And Why It Works)

Place a wooden spoon across the top of the pot. When the foam rises and contacts the wood, it breaks the surface tension of the bubbles and collapses the foam. This actually works, and the reason is interesting: the dry wood provides a high surface-energy surface that preferentially attracts the surfactant molecules in the foam, disrupting their ability to hold the bubble structure together.

The spoon doesn’t prevent boiling — it interrupts the foam before it goes over the edge.

A silicone spoon works less well (too smooth). A wooden spoon with a slightly rough, absorbent surface works best.

Alternative: A boilover preventer disc — a perforated or ridged metal disc placed in the bottom of the pot that creates convection patterns that prevent foam buildup. A low-tech but effective tool for chronic boilover sufferers.


Fix Four: A Little Oil (Minimal Effect, Widely Believed)

Many people add olive oil to pasta water to prevent boiling over. The oil does disrupt foam bubbles at the surface — so it has a small preventive effect. However, the amount of oil you’d need to add to reliably prevent a boilover would be impractical, and more importantly, it coats the pasta and prevents sauce from adhering.

The oil in pasta water is mostly a myth as a boilover prevention and is actively counterproductive for sauce adhesion. Skip it.


When It Happens Anyway

Turn down the heat immediately. The foam collapses almost instantly when the vigorous boiling stops, and the spilled water can be wiped from the burner quickly while the pasta continues cooking at reduced heat.

The burner grates and drip pans: these collect the spilled starch water and, once it dries, become a baked-on mess that is annoying to clean. The fix: wipe or rinse immediately while it’s still liquid. Dried starchy residue requires soaking and scrubbing. Wet starchy residue requires a paper towel.


🛒 Gear Worth Having

As an Amazon affiliate, I earn with each qualified purchase. Thank you for supporting TumbleBump. 


Recommended Reads


Posted on TumbleBump | OOPS Category

TumbleBump is part of the John D Reinhart content family. Writer, illustrator, videographer, and accidental filmmaker — find the whole story at JohnDReinhart.com.

26001

©2026 John D Reinhart/TumbleBump.com – all rights reserved
Theme Nights: The Laziest, Smartest Thing You Can Do for Dinner

You make 200+ food decisions a day. By dinner, your brain is gone. Theme nights fix this — here’s how to build a simple weekly system that actually sticks.

🗓️

You make over 200 food-related decisions every single day. That’s on top of every other decision your job, your relationships, and your general existence are busy demanding of you.

By 5:30pm, your decision-making brain is not tired. It is done. It has left the building. It is sitting in the car with its coat on.

This is not weakness. This is neuroscience. Decision fatigue is real, it accumulates all day long, and it is the entire reason ‘I don’t know, what do you want?’ has been the most common — and most maddening — dinner conversation since the invention of dinner.

Theme nights are the answer. Not a clever answer, not a trendy answer. A boring, reliable, works-every-time answer that families have been using for generations, and that you are going to start using immediately.

🧠 What a Theme Night Actually Does

A theme night doesn’t tell you what to make. It narrows the universe of options from ‘literally anything on earth’ to ‘something in this general category.’ That’s the whole trick.

‘What’s for dinner?’ answered with ‘I don’t know, anything goes’ → paralysis → DoorDash → mild shame.

‘What’s for dinner?’ answered with ‘It’s pasta night’ → you know the category → you check the pantry → you pick a pasta → decision made in 30 seconds. Done.

The theme kills the hardest part of the decision before you even sit down. Everything after that is just cooking.

📅 Building Your Theme Calendar

Assign a broad category to each weeknight. Keep the themes loose — that’s the whole secret, and we’ll come back to it.

Here’s a classic five-night setup to steal:

🥗 Monday: Soup or Salad

The reset meal. After a weekend of eating like you’re celebrating something, Monday is a big bowl of something lighter. Rotate through chicken soup, lentil, minestrone, a grain salad, or a wedge with some protein. Simple. Easy. Your body will thank you, and it almost never thanks you.

🌮 Tuesday: Mexican or Latin-Inspired

Tacos, obviously. But also: enchiladas, burrito bowls, quesadillas, arroz con pollo, tostadas, or anything else that involves cumin and happiness. This theme has enormous range. Taco Tuesday is just the beginning.

🍗 Wednesday: Protein + Vegetable

The simple plate. Chicken and roasted broccoli. Pork chop and sweet potato. Fish and sautéed greens. This is the plate method in its most basic, least fussy form. Easy to plan, quick to cook, zero drama.

🍝 Thursday: Pasta or Grains

Mid-to-late-week carbohydrate comfort. Pasta with a simple sauce. A grain bowl. Fried rice from the leftover rice that’s been sitting in your fridge since Tuesday. Farro with roasted vegetables. Your call.

🎉 Friday: Treat Yourself

Order in without guilt. Cook something that actually takes time and feels special. Pull together a charcuterie situation from whatever’s in the fridge. Friday has earned flexibility, and so have you.

🔑 Why ‘Loose’ Beats ‘Specific’ Every Time

Here is where theme nights fail: when people make them too rigid. ‘Spaghetti Bolognese every Tuesday’ is not a theme. It’s a sentence. Boredom follows. Abandonment follows boredom. The whole system collapses and you’re back on DoorDash by March.

‘Pasta night every Tuesday’ means this week it’s spaghetti with jarred sauce because you’re busy, next week it’s homemade carbonara because you have a free afternoon, the week after it’s pasta with zucchini because the fridge has a lot of zucchini and someone needs to deal with it.

Same theme. Completely different meals. Zero boredom.

The theme is a container. What goes in it can rotate forever.

🛠️ Making It Actually Yours

The calendar above is a starting point, not a mandate. Build around what you actually eat:

  • Love Asian food? One night is ‘Asian-inspired’ — stir-fry, ramen, fried rice, dumplings, teriyaki, whatever you feel like.
  • Want one meatless night? Meatless Monday has endured for a reason. It works.
  • Big breakfast-for-dinner household? That is a completely legitimate and beloved theme with zero apologies needed.
  • Trying to cook new things? ‘Wild Card Wednesday’ — one new recipe per week, controlled and contained, so the novelty doesn’t eat your whole life.

The themes should reflect the actual you — not the aspirational version of you who loves spending Saturday afternoons making elaborate things. That person is lovely, but they don’t show up on Wednesday at 5:45.

🚨 When the Theme Isn’t Happening

The theme is a suggestion. It is not a contract, a covenant, or a binding legal document.

If it’s pasta night and you genuinely want a salad, eat the salad. If it’s Mexican night and the avocados aren’t ripe and you physically cannot face tacos without guacamole — pivot. Make something else. Nobody is grading you.

Theme nights eliminate the decision about 80% of the time. That is an exceptional performance for a kitchen heuristic. Give it the credit it deserves and don’t expect perfection.

🛒 Gear Worth Having

As an Amazon Associate, I earn from qualifying purchases. Links above support TumbleBump — thank you!

📖 Related Reads

TumbleBump is part of the John D Reinhart content family. Writer, illustrator, videographer, and accidental filmmaker — find the whole story at JohnDReinhart.com.

22008

©2026 John D Reinhart/TumbleBump.com – all rights reserved
Eggs: Nature’s Stickiest Oops

You dropped an egg. Now what? TumbleBump walks you through the cleanup — before it dries, after it dries, and the horror of eggshell archaeology.

You didn’t mean to drop it. Nobody means to drop it. One second it’s in your hand, the next it’s on the floor — and somehow also on the cabinet door, the side of the stove, and your left sock. Eggs are not just food. They are a cleanup event waiting to happen.

The good news: egg mess is very manageable. The bad news: only if you know the rules. Break the rules and you’re cementing that yolk to your hardwood floor for the foreseeable future.

🚨 Rule One: Cold Water Only

This is the one that gets people. Hot water feels right — it’s how you clean everything else. But egg white is protein, and protein sets with heat. Pour hot water on a fresh egg mess and you’ve just cooked it onto your floor. Congratulations, you’ve made a very flat, very stuck omelet.

Cold water keeps the proteins loose and easy to wipe. Always start cold.

⚡ Fresh Egg: Act Fast

Fresh egg is your best-case scenario. Scoop up the bulk of it with a paper towel or — pro move — a spatula. Then cold water and a wipe. Done in under a minute if you’re on it. The enemy is distraction. The egg does not wait for you to finish your coffee.

😬 Dried Egg: Now You’ve Done It

Dried egg is a different creature entirely. It bonds to surfaces with impressive commitment. Your move: rehydrate it. Lay a cold, damp cloth over the area and let it sit for a few minutes to soften the proteins back up. Then scrape gently — a plastic scraper or the edge of a credit card, not metal — and wipe clean. Repeat if needed.

On dishes and pans: soak in cold water first, always. A dried-egg pan that went straight into a hot rinse is a pan you’ll be scrubbing for a while.

🔍 The Shell Fragment Situation

Shell in the bowl is its own challenge. Chasing a slippery fragment around a bowl of raw egg with a spoon is a test of patience and humility. The trick: use a larger piece of the shell itself to scoop it out. Shell attracts shell. It sounds like folk wisdom but it actually works — the jagged edge catches the fragment cleanly where a smooth spoon just nudges it around.

🍳 Cast Iron: Special Mention

If you drop egg on a seasoned cast iron pan, do not panic and do not reach for soap. Wipe it out while it’s still warm with a paper towel. If it’s dried, a brief soak — cold water, two minutes max — and a gentle scrub with a stiff brush. Soap only as a last resort, and re-season immediately after. Your grandmother’s cast iron has survived worse than this.

🛒 Gear Worth Having

As an Amazon affiliate, I earn from qualifying purchases. Thank you for supporting Tumblebump.

Related Reads

Posted on TumbleBump/Category: OOPS

TumbleBump is part of the John D Reinhart content family. Writer, illustrator, videographer, and accidental filmmaker — find the whole story at JohnDReinhart.com.

26000

©2026 John D Reinhart/TumbleBump.com – all rights reserved
How to Wash That Cast Iron Skillet

Everyone knows cast iron is “different” to clean — but the actual step-by-step gets surprisingly vague. Here’s the complete, practical washing routine for cast iron after every kind of cooking situation, from a simple egg to a baked-on disaster.

Cast iron’s reputation for being finicky is earned but overstated. Yes, it needs different treatment from your stainless and non-stick pans. No, it’s not so delicate that a wrong move ruins everything.

The Post on Cast Iron: The Exception to the Rule covered the principles. This one is the practical playbook — specifically what to do with the pan in your hand, after each type of cooking situation you’ll actually encounter.


After Light Cooking (Eggs, Sautéed Vegetables, Most Everyday Use)

Time required: 2–3 minutes.

  1. While the pan is still warm (not hot enough to steam you, but not cold), use a folded paper towel or dish cloth to wipe out any food residue.
  2. If the food debris comes out cleanly: you’re done. Dry completely over low heat for 1–2 minutes on the stove, apply a whisper-thin coat of neutral oil, store.
  3. If there’s light residue remaining: rinse with hot water. Wipe again with a cloth or the salt method below if needed. Back to the stove to dry. Oil. Store.

The key here: Light use doesn’t need more than light cleaning. The instinct to “really wash” a pan that barely got dirty is counterproductive with cast iron.


After Cooking Proteins (Chicken, Steak, Fish)

Time required: 3–5 minutes.

Proteins leave more fond (browned residue) and sometimes some stuck bits.

  1. While the pan is still warm or over low heat, add ¼ cup of water. It will sizzle. This is the cleaning deglaze — the steam loosens stuck material. Scrape with a wooden spoon or spatula.
  2. Pour the liquid out.
  3. If there’s still residue: use the chain mail scrubber or the salt method. Sprinkle coarse salt into the pan, scrub with a paper towel using some pressure.
  4. Rinse with hot water.
  5. Dry on the stove over low heat until completely dry.
  6. Apply a very thin layer of neutral oil (flaxseed, canola, vegetable) while still warm. Wipe off any visible excess — you want a sheen, not a coating.
  7. Store.

After Cooking Acidic Foods (Tomatoes, Wine-Based Sauces, Citrus)

Time required: 4–5 minutes, plus a note.

Acidic foods can interact with cast iron’s seasoning and strip it over time, and can also leach small amounts of iron into the food (generally not harmful, but worth knowing). Cooking acidic foods briefly in cast iron is usually fine. Extended simmering of tomato sauce for 45 minutes — less so.

After cooking with acid:

  1. Clean as normal — deglaze, rinse, salt-scrub if needed.
  2. Dry completely on the stove.
  3. Apply oil generously this time — two light coats instead of one whisper-coat. You’ve earned the extra seasoning step.

If the pan looks dull, stripped, or less non-stick than usual after an acidic cook, do a mini re-seasoning: heat the pan over medium heat until very hot, apply a thin layer of oil, let it smoke briefly, wipe out excess. This restores the seasoning.


After Baking (Cornbread, Frittata, Oven Use)

Cast iron handles oven use beautifully — the whole pan including the handle goes in (assuming no rubber or wooden handles). After oven cooking:

  1. Let the pan cool enough to handle without oven mitts.
  2. Use a stiff spatula or chain mail scrubber to remove any stuck baked goods or egg.
  3. Rinse with hot water. If needed, brief soak of 5 minutes (not longer) to loosen baked-on material.
  4. Dry on the stove over low heat.
  5. Oil and store.

After a Real Mess (Burned-On, Stuck Hard, Genuine Disaster)

Time required: 10–15 minutes.

  1. Fill the pan with water and put it on the stove over medium heat. Bring to a simmer. The simmering water does the deglazing and soaking work simultaneously — very effective for stubborn material.
  2. With the water still in the pan (carefully — it’s hot), scrape with a stiff spatula. Most material releases.
  3. Pour out the water. If there’s still residue, sprinkle coarse salt and scrub with a paper towel while the pan is warm.
  4. For truly extreme situations only: a brief, targeted scrub with steel wool on the affected area. This will remove the seasoning from that spot. That’s fine — you’ll re-season.
  5. Rinse, dry completely on the stove, apply oil, and consider a re-seasoning pass if needed (see the cast iron care post for the full re-seasoning protocol).

The Three Never-Dos (Repeated Because They Bear Repeating)

  1. Never soak. Even a 20-minute soak can start rust. In, clean, dry, out.
  2. Never put in the dishwasher. It will strip the seasoning completely and invite rust. Every time.
  3. Never store wet. If you skip the stovetop drying step and put the pan away with any moisture, you will find rust. Dry. Every time.

The One Rule That Beats All Others

Dry it on the stove after every wash. This single step prevents the one thing that actually damages cast iron: rust. You can do almost everything else imperfectly, and a well-dried, lightly oiled cast iron pan will survive and thrive.


🛒 Gear Worth Having


Recommended Reads


Posted on TumbleBump | CLEANS Category

TumbleBump is part of the John D Reinhart content family. Writer, illustrator, videographer, and accidental filmmaker — find the whole story at JohnDReinhart.com.

23004

©2026 John D Reinhart/TumbleBump.com – all rights reserved
Cast Iron: The Exception to the Rule

Cast iron plays by its own rules — no soap (mostly), no soaking (ever), no dishwasher (absolutely not). But it’s not as fussy as its reputation suggests. Here’s the actual cleaning protocol that keeps cast iron in fighting shape for decades.

Cast iron is the one piece of cookware that gets a completely different set of care instructions from everything else in your kitchen. And people treat those instructions with a mixture of reverence and anxiety that is, frankly, a little more intense than the situation requires.

Yes, cast iron is different. Yes, it has specific needs. No, it is not fragile. It is, in fact, one of the most durable things you own, and it will survive a reasonable amount of imperfect cleaning without complaint.

Here’s what it actually needs, what it absolutely cannot tolerate, and how to handle the full range of cleaning situations you’ll encounter.


First: What “Seasoning” Actually Is

Cast iron’s surface — the dark, somewhat nonstick layer that develops over time — is called seasoning. It is not rust. It is not dirt. It is polymerized fat: layers of oil that have been heated past their smoke point and bonded chemically to the iron, forming a durable, low-stick coating.

This is why the cleaning rules for cast iron are different. Every cleaning instruction below exists to protect this layer.


The Standard Clean: After Most Uses

For everyday cooking (eggs, sautéed vegetables, most stovetop work):

  1. While the pan is still warm (not blazing hot, but warm — never plunge a hot cast iron into cold water), wipe it out with a folded paper towel or dish cloth. Get out the food debris.
  2. If needed, rinse with hot water. That’s it. Rinse, not soak. In and out.
  3. Return the pan to the stove over low heat for 1–2 minutes to fully evaporate any water. Water left on cast iron causes rust. This step takes seconds and prevents the only real threat.
  4. While still warm, apply a very thin layer of neutral oil (flaxseed oil, vegetable oil, canola — not olive oil, which has too low a smoke point for this) to the cooking surface with a paper towel. Wipe off any excess — you want a ghost of oil, not a coating.
  5. Store in a dry place.

That’s the whole routine. It takes about three minutes and becomes automatic quickly.


The Soap Question: Let’s Settle This

Old lye-based soaps were harsh enough to strip seasoning from cast iron with a single wash — hence the “never use soap” rule that has been passed down through generations like a kitchen commandment.

Modern dish soap (Dawn, Palmolive, etc.) is not lye soap. A small amount of mild dish soap, used occasionally, will not ruin your seasoning. If there’s something stuck or if you’ve cooked something strongly flavored that you’d rather rinse out, a brief wash with a drop of soap, rinsed thoroughly, followed by the dry-and-oil step, is perfectly fine.

What you cannot do: soak it in soapy water. Prolonged exposure breaks down seasoning and invites rust. Brief wash, yes. Soak, never.


For Stuck-On Food

Method One: Salt and a paper towel. Coarse kosher salt is a natural abrasive that won’t damage seasoning. Sprinkle a generous amount into the still-warm (or room temperature) pan and scrub with a folded paper towel. The salt grabs the stuck bits physically. Rinse, dry, oil.

Method Two: Hot water and a scraper. Add a little hot water to the warm pan on the stove, let it loosen the stuck material (30 seconds over low heat), and scrape with a flat wooden or silicone spatula or a chain mail scrubber. Rinse, dry, oil.

Method Three: Chain mail scrubber. Specifically designed for cast iron. Stainless steel rings that clean off stuck food without damaging seasoning. Works better than any other physical scrubber for cast iron. A genuine revelation if you cook with cast iron regularly.


What to Never Do

Dishwasher: The sustained heat, harsh detergent, and prolonged water exposure will strip your seasoning completely and invite rust. Cast iron and dishwashers are incompatible. Full stop.

Soaking in water: Even 30 minutes of soaking can start rust formation. Cast iron and standing water are enemies.

Abrasive steel wool (uncoated): Will remove seasoning and potentially scratch the cooking surface. Use chain mail or salt instead.

Storing wet: Always dry completely before storing. A minute over heat, then a wipe of oil.


What If It Rusts?

Cast iron that develops surface rust has not been destroyed. It has been temporarily neglected.

To restore it: scrub the rust off with steel wool (yes, in this case, steel wool is correct — you’re removing rust, not seasoning, because the seasoning is already gone), wash, dry completely on the stove, then re-season.

Re-seasoning: Apply a thin layer of neutral oil all over the pan — inside, outside, handle. Put it upside down in a 450–500°F oven for an hour (put foil on the rack below to catch any drips). Turn the oven off and let the pan cool inside. Repeat this process 2–3 times for a solid new layer of seasoning.


The Truth About Cast Iron Care

The people who treat cast iron like a family heirloom requiring elaborate rituals are not wrong — it can be a family heirloom, and it does reward care. But it’s also fundamentally a piece of iron, and iron is tough. If you forget the oil step sometimes, it’s fine. If you give it a brief soap wash once in a while, it’s fine. If it gets a small rust spot, you can fix it in an afternoon.

Respect the basic rules — no soaking, dry before storing, oil occasionally — and your cast iron will outlast every other piece of cookware you own.


🛒 Gear Worth Having


Recommended Reads


Posted on TumbleBump | CLEANS Category

TumbleBump is part of the John D Reinhart content family. Writer, illustrator, videographer, and accidental filmmaker — find the whole story at JohnDReinhart.com.

23012

©2026 John D Reinhart/TumbleBump.com – all rights reserved
What to Do When It’s Really Baked On

You forgot the pan on the stove. Or the oven decided that “450 degrees for 30 minutes” was also an instruction for the baking sheet. Now something is very, very stuck. Here’s the full escalating response plan — from gentle persuasion to serious intervention.

You forgot the pan on the stove. Or the oven decided that “450 degrees for 30 minutes” was also an instruction for the baking sheet. Now something is very, very stuck.

The baked-on pan has defeated better people than you. It’s okay. It happens to everyone who cooks with any regularity, and the good news is that virtually any baked-on situation is recoverable with the right technique at the right escalation level.

The key is knowing that different levels of baked-on require different responses — and that escalating too quickly (going straight for steel wool and aggression) often damages the pan, while starting gently and working up solves the problem without casualties.

Here is the escalating response plan.


Level One: Soak and Wait (For Most Situations)

Before doing anything else, try patience.

Fill the pan with hot water (boiling if you can get it there safely). Add a small squirt of dish soap. Let it soak for at least 30 minutes, ideally 2–4 hours, ideally overnight for severe cases.

The water rehydrates the baked-on material, which initially stuck because it dried and hardened. Given enough time and hot water, most baked-on food will loosen to the point where a standard scrubber or wooden spatula removes it with minimal effort.

After soaking, try scraping and scrubbing before reaching for anything more aggressive. You’ll be surprised how often this is enough.

What it works on: Most food residue, including egg, pasta, starches, caramelized sugars. Less effective on pure oil/fat charring.


Level Two: The Boiling Water Method

When a soak wasn’t enough, apply heat.

Fill the pan with water (about an inch) and put it back on the stove over medium-high heat. Let it boil vigorously for 5–10 minutes. As it boils, use a flat wooden spoon or stiff spatula to scrape the bottom while the water is simmering.

The combination of sustained heat and the mechanical action of scraping in boiling water releases material that cold soaking couldn’t. This method works remarkably well for the stuck layer that survived overnight soaking.

Pour out the water carefully, then scrub what remains.

What it works on: Stubborn food residue, fond that survived soaking, stuck starches and proteins.


Level Three: Baking Soda and Dish Soap

For pans that still have stuck material after levels one and two:

Method: Return a small amount of water to the pan (enough to cover the bottom). Add 2–3 tablespoons of baking soda and a squirt of dish soap. Bring to a boil on the stove. Let it simmer for 10 minutes. The baking soda is mildly alkaline and helps break down greasy, carbonized material that soap alone can’t touch. Scrape and scrub while still warm.

This is the go-to for stainless steel pans with seriously stuck material. It’s also excellent for enamel-coated pots (Le Creuset, etc.) where you don’t want abrasive scrubbing.


Level Four: Barkeepers Friend

When the baking soda method isn’t enough for stainless or stainless-clad pans:

Wet the pan surface. Apply Barkeepers Friend powder, either dry or as a paste with a little water. Let it sit for 2–5 minutes. Scrub with a non-scratch pad.

The oxalic acid in Barkeepers Friend dissolves mineral-based and carbonized residue chemically, while the mild abrasive handles what the chemistry didn’t reach. This combination solves most stainless steel baked-on situations that survive everything else.

Do not use on: Non-stick, cast iron, aluminum.


Level Five: Dryer Sheet Soak (The Unexpected One)

This sounds implausible and works reliably. Place a dryer sheet in the pan, fill with hot water, let it soak overnight.

The fabric softening agents in the dryer sheet (similar to surfactants) penetrate and loosen baked-on food in a way that plain water can’t. By morning, what was immovably stuck wipes away.

Use this for any pan where you want a no-scrub solution. Works on stainless, enamel, and even some glass bakeware.


Level Six: Oven Cleaner (The Big Gun)

For truly extreme situations on surfaces that can tolerate it (stainless steel, oven interiors, cast iron being stripped for re-seasoning):

Commercial oven cleaners (Easy-Off, etc.) contain lye (sodium hydroxide), a powerful base that dissolves carbonized material. These are not casual cleaning products — they require gloves, ventilation, and careful application per product directions.

Apply to the affected area, let sit per instructions (often 30 minutes or overnight for the cold method), wipe clean, and rinse thoroughly.

Where this is appropriate: Oven interiors, stainless steel pans that have survived everything else, heavily carbonized baking sheets. Not for non-stick, not for aluminum without testing, not for delicate finishes.


By Pan Type: Which Escalation Path to Follow

Stainless steel: All six levels, in order.

Non-stick: Level 1 (soak) and Level 2 (boiling water only, gently). Stop there. If it survived gentle treatment, the coating may be compromised.

Cast iron: Level 2 (boiling water on the stove, scraping), Level 3 (baking soda simmer), then if the seasoning is gone, full strip with steel wool and re-season.

Enamel-coated (Le Creuset, etc.): Levels 1, 2, 3. Barkeepers Friend on enamel gently and occasionally. Avoid abrasive scrubbers that scratch the enamel surface.

Glass and ceramic bakeware: Levels 1–3. For really baked-on situations, a paste of baking soda and hydrogen peroxide, left for 30 minutes, usually handles the rest.

Baking sheets (aluminum): Levels 1–2. For carbonized edges, Bar Keepers Friend or a baking soda paste. Aluminum baking sheets with heavy carbonization are cheap enough that replacement is often the right answer.


🛒 Gear Worth Having


Recommended Reads


Posted on Skippity | CLEANS Category

TumbleBump is part of the John D Reinhart content family. Writer, illustrator, videographer, and accidental filmmaker — find the whole story at JohnDReinhart.com.

23002

©2026 John D Reinhart/TumbleBump.com – all rights reserved
What to Get to Make Sure You Always Have Something

A well-stocked kitchen isn’t about having everything — it’s about having the right things. This is the definitive starter list: the pantry, fridge, and freezer items that make “there’s nothing to eat” a lie you’ll never tell again.

“There’s nothing to eat” is rarely literally true.

What it usually means is: there’s nothing that is already a meal, ready to serve. No leftovers. No complete dish. Just ingredients — and not obviously the right ones.

The fix is not stocking more food. It’s stocking the right food. A kitchen stocked with the items on this list will produce a real meal, on demand, without a grocery trip, approximately 90% of the time.

Here’s the list.


The Pantry: The Long Game

These are the shelf-stable items that form the foundation of most quick meals. They cost relatively little, take up modest space, and have long shelf lives.

Grains and starchy bases: – Dried pasta (at least two shapes — a long one and a short one) – Rice (white or brown, your preference) – Rolled oats – One other grain if you like them — quinoa, farro, barley

Canned goods: – Crushed tomatoes (keep 2–3 cans) – Diced tomatoes – Chickpeas (keep 2 cans) – Black beans (keep 2 cans) – White beans (cannellini) – Lentils or a bag of dried lentils – Canned tuna or salmon – Coconut milk – Good chicken or vegetable broth (cartons are fine)

Oils and acids: – Olive oil — good enough to cook with and finish – A neutral oil (vegetable, canola, or avocado oil) for high-heat cooking – Red wine vinegar or apple cider vinegar – Soy sauce or tamari

Flavor builders: – Garlic (fresh is best; garlic powder is a legitimate backup) – Dried onion flakes or a couple of fresh onions (onions last weeks on the counter) – Dijon mustard (a tablespoon makes a vinaigrette, a sauce, a marinade) – Hot sauce (any kind you like) – Honey or maple syrup (small amounts create enormous flavor balance)

Spices (the essential dozen): Salt (always), black pepper, cumin, smoked paprika, chili powder or red pepper flakes, garlic powder, onion powder, dried oregano, turmeric, cinnamon, curry powder or garam masala, and one spice blend you actually use.

Baking basics (if you bake at all): All-purpose flour, baking soda, baking powder, sugar, vanilla extract.


The Refrigerator: The Near-Term Staples

These are the items that turn pantry ingredients into actual meals — the fresh components with moderate shelf lives that your kitchen should never be without.

Always have: – Eggs (the single most versatile food in existence) – Butter (real butter, always) – A hard cheese (parmesan, cheddar, or both — grate it yourself) – Plain Greek yogurt (protein, breakfast, sauce base, sour cream substitute) – Milk or a milk alternative – Lemons or limes (one or two; fresh acid transforms everything)

Almost always have: – Garlic (or keep it in the pantry if you go through it slowly) – Onions or shallots – Carrots (last 2–3 weeks, work in almost anything) – A container of salsa or hot sauce – Dijon mustard – Soy sauce (can live in the pantry but gets used faster from the fridge)

The “eat within the week” produce: This is flexible — whatever you bought with a plan. But as a backup, these last longer than most: cabbage, broccoli, bell peppers, hardy greens (kale over spinach for longevity).


The Freezer: The Time Machine

The freezer extends the life of almost anything and quietly saves you more times than you’ll count.

Always have: – Frozen vegetables (at least two kinds: a mix, peas, edamame, corn, or broccoli) – A protein: frozen chicken thighs, ground beef, salmon fillets, shrimp, or edamame – Bread or tortillas (freeze beautifully; thaw in minutes) – Leftover soups, sauces, or cooked grains in portions

Nice to have: – Frozen fruit (for smoothies, oatmeal, or a quick dessert) – A container of good stock if you make it – Cooked beans portioned and frozen


The Meals These Enable

When your pantry, fridge, and freezer look like the above, here’s what you can make without any additional shopping:

  • Pasta with garlic and olive oil + parmesan
  • Fried rice with frozen vegetables and egg
  • Black bean tacos (tortillas from the freezer, beans from the can)
  • Lentil soup with carrots and canned tomatoes
  • Egg scramble with whatever vegetables are around
  • Grain bowl (from the cooked grains in the freezer) with a fried egg and soy sauce
  • Chickpea and tomato stew over rice
  • Oatmeal for breakfast, every day, forever

That’s 8+ meals from what’s already there. “There’s nothing to eat” officially becomes a lie.


Building the List Over Time

You don’t need to buy all of this at once. Add a few pantry items to each grocery run until the list is complete. The goal is a well-stocked kitchen by end of month, not a $200 pantry-building trip this week.

Prioritize in this order: eggs, pasta, canned tomatoes, canned beans, olive oil, salt, garlic. Those seven things get you further than almost anything else.


🛒 Gear Worth Having

As an Amazon affiliate, I earn from qualifying purchases. Thank you for supporting TumbleBump.


Recommended Reads

Posted on TumbleBump | PLANS Category

TumbleBump is part of the John D Reinhart content family. Writer, illustrator, videographer, and accidental filmmaker — find the whole story at JohnDReinhart.com.

22001

©2026 John D Reinhart/TumbleBump.com – all rights reserved
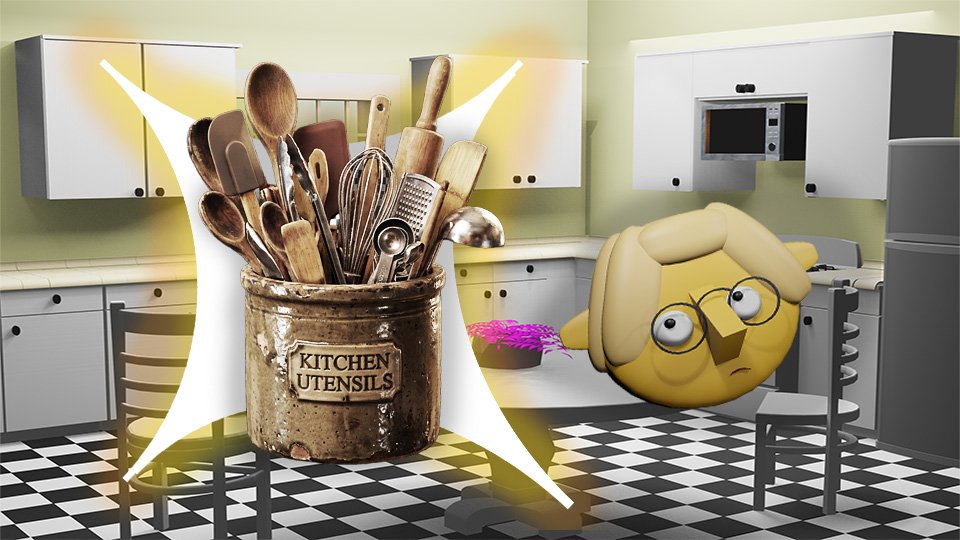
Garlic, Onions, and Other Things the Recipes Gloss Over

The recipes mention garlic and onions like they’re nothing. They are not nothing. Here’s what’s actually happening in your kitchen — and why it’s all completely worth it.

Meta Description:

The recipe said “peel and mince three cloves of garlic.”

It did not mention that garlic skin is papery and clingy and will stick to your fingers and the knife and the cutting board and somehow also the cabinet door behind you. It did not mention that your hands will smell like garlic for the rest of the day regardless of how many times you wash them. It did not mention any of this because the recipe was written by someone who has peeled ten thousand cloves of garlic and has completely forgotten that it was ever strange.

This is the gap TumbleBump exists to fill.

Cooking is wonderful. It is also, in places: sticky, tearful, smelly, and mildly alarming if nobody warned you what was coming. Consider yourself warned — and reassured. This is all completely normal, it happens to everyone, and there are ways to make most of it easier.

There are approximately 7 gazillion YouTube videos showing you exactly how to handle each of these things step by step. We wholeheartedly encourage you to go watch them. We’re here for the why — the part that makes all the how make sense.

🧄 Garlic: The Fragrant Menace

The peeling problem

A garlic clove sits inside two layers of skin — a papery outer layer that belongs to the whole head, and a thinner inner skin that clings to the individual clove like it has a personal grudge. Getting that inner skin off is the part recipes breeze past with the word “peel.”

Here’s why it clings: garlic skin is dry and light, which means it generates static electricity the moment you touch it. It sticks to your fingers. It sticks to the knife. It drifts across the counter. This is not a sign that you’re doing it wrong. This is just garlic being garlic.

The microwave trick — and why it works

Ten to fifteen seconds in the microwave (for a whole head) or about five seconds per clove causes the moisture inside the garlic to expand very slightly, which loosens the skin from the flesh underneath. The clove essentially slides right out. It works because heat and steam are doing the peeling work instead of your fingers.

The tradeoff: microwaved garlic is very slightly softer than raw, which matters if you’re using it raw in a dressing or salsa. For cooking — sautéing, roasting, adding to a sauce — it makes absolutely no difference whatsoever.

🧄  The smash method is equally fast and requires no microwave: lay the flat side of a knife on the clove and press down firmly with the heel of your hand. The skin splits and the clove pops right out. Bonus: the smashed clove is already partially broken down and will mince much more easily.

The smell problem

Garlic contains sulfur compounds — the same family of chemicals responsible for its flavor and its staying power on your hands. When you cut or crush garlic, those compounds are released and bond readily with the proteins in your skin.

Soap and water alone won’t fully remove them because the compounds aren’t water-soluble. What works better: rubbing your hands on stainless steel under cold water (a stainless steel soap bar is a real product and it actually works), washing with lemon juice, or simply accepting that you cooked with garlic today and your hands are going to tell that story for a while.

💡  Professional cooks smell like garlic. It’s a badge of honor, not a hygiene failure. Welcome to the club.

🧅 Onions: The Tearful Truth

Why your eyes water

When you cut an onion, you rupture its cells and release enzymes that react with each other to produce a sulfur-based gas. That gas rises, hits the moisture on your eyes, and converts into a mild sulfuric acid. Your eyes respond the way any reasonable eyes would respond to sulfuric acid: they water, urgently and without apology.

This is not a flaw in the onion. This is the onion doing exactly what it evolved to do — discouraging things from eating it. You are being chemically discouraged. Cook the onion anyway.

What actually helps

  • A sharp knife. A dull knife crushes the onion cells rather than slicing cleanly through them, releasing far more of the irritating compounds. The sharper the knife, the fewer tears.
  • Cold onion. Chilling the onion in the refrigerator for thirty minutes before cutting slows the chemical reaction. Less gas, fewer tears.
  • Good ventilation. Cut near an open window or under a running exhaust fan. The gas disperses before it reaches your eyes.
  • Contact lenses. Contact lens wearers are frequently immune to onion tears because the lenses physically block the gas from reaching the eye surface. An unexpected benefit of imperfect vision.

😢  Goggles work perfectly. Nobody wears them. Onion-cutting goggles are a real product, they are completely effective, and they will make you look absolutely unhinged in your own kitchen. Worth knowing they exist.

The smell

Onion smell on hands is the same sulfur-compound situation as garlic, and responds to the same remedies. Stainless steel, lemon juice, time. The cutting board will smell too — a quick rub with half a lemon, then a wash, sorts it right out.

🍗 Raw Chicken: Just Breathe

Raw chicken makes a lot of people deeply uncomfortable, and understandably so. It’s cold, it’s slippery, it smells faintly of itself, and everything you’ve ever heard about food safety is playing on a loop in the back of your mind.

Here’s the reassuring truth: raw chicken is safe to handle. It just requires a little protocol.

  • Keep it cold until you’re ready to cook it. Bacteria multiply at room temperature. Straight from the fridge to the pan is the right move.
  • Don’t wash it. Rinsing raw chicken in the sink spreads bacteria to the sink, the counter, and anything nearby via water droplets. Cooking to 165°F kills everything. Skip the rinse.
  • Use a dedicated cutting board for raw meat, or wash your board thoroughly with hot soapy water before using it for anything else.
  • Wash your hands immediately after handling raw chicken and before touching anything else in the kitchen. This is the whole protocol. It’s not complicated.

🍗  The slipperiness is just moisture. Pat chicken dry with a paper towel before cooking and it handles much more easily — and browns better in the pan. Two problems solved at once.

🐟 Fish: The Smell Situation

Fresh fish should smell like the ocean — clean, briny, pleasant even. Fish that smells powerfully of fish is fish that is past its prime. That’s the first thing to know.

The second thing to know is that cooking fish fills the kitchen with a smell that lingers considerably longer than the cooking itself. This is simply the nature of fish. Open a window. Run the exhaust fan. Accept it as the price of a genuinely excellent dinner.

Fish smell on hands and pans

  • Hands: lemon juice or white vinegar cuts fish smell more effectively than soap alone. Rub, rinse, done.
  • Pans: a quick wash with hot soapy water immediately after cooking prevents the smell from setting in. Don’t let a fish pan sit.
  • The kitchen: simmer a small pot of water with lemon slices and a splash of vanilla extract after cooking fish. It neutralizes the smell remarkably quickly and makes the kitchen smell like a bakery, which is a significant upgrade.

🌶️ Pepper Seeds and Other Small Chaos

Hot pepper hands

The capsaicin in hot peppers — the compound responsible for heat — bonds to your skin and does not come off with soap and water. If you touch your eyes after handling hot peppers, you will have a very bad few minutes.

Wear disposable gloves when working with hot peppers. This is not overcautious. This is just correct. If you’ve already made the mistake, wash your hands with dish soap (which cuts oils better than hand soap), then rub with vegetable oil, then wash again. It helps. Somewhat.

Sticky dough

Bread and pastry dough sticks to hands, counters, rolling pins, and ambition. Flour is the answer — a light dusting on your hands and the work surface keeps things moving. The instinct is to add more and more flour, but too much changes the dough. Just enough to prevent sticking is the goal.

The general chaos of a busy stovetop

Oil spits. Sauce bubbles over. Steam burns are sneaky and arrive without warning. A kitchen in action is a mildly hazardous environment, and experienced cooks navigate it with a combination of awareness and respect rather than fearlessness.

Keep a kitchen towel on your shoulder. Use it for everything — pan handles, spills, your hands. Don’t reach over open flames. Turn pot handles inward so they can’t be bumped. These habits become automatic within a few weeks and make the kitchen feel safe and manageable rather than chaotic.

✅  Every cook has burned themselves on a pan handle, splattered sauce on a clean shirt, and dropped something at the worst possible moment. Every single one. You are not uniquely clumsy. You are just learning, which is exactly the right thing to be doing.

🛒 What to Get

The Essentials

  • Stainless Steel Soap Bar — Removes garlic, onion, and fish smell from hands better than regular soap. Sounds implausible, works completely.
  • Sharp Chef’s Knife (8-Inch) — A sharp knife is the single best solution to onion tears, garlic frustration, and most other prep problems. Dull knives make everything harder and more dangerous.
  • Nitrile Disposable Gloves — For hot peppers, raw chicken, beets, or anything else you’d rather not have on your hands. Keep a box in the kitchen.
  • Plastic Cutting Board Set — Color-coded boards for meat, vegetables, and fish keep cross-contamination from becoming a concern. Simple and effective.
  • Kitchen Exhaust Fan (Under-Cabinet) — For fish nights and anything else that produces strong smells. Ventilation is the most underrated kitchen upgrade.

Nice to Have

  • Knife Sharpener (Pull-Through) — Keeps your chef’s knife sharp between professional sharpenings. Sharp knives are safer and more pleasant to use.
  • Lemon Squeezer — Lemon juice is the remedy for garlic hands, fish smell, cutting board odor, and about a dozen other kitchen realities. Keep lemons on hand.
  • Kitchen Towels (Set of 6) — Keep one on your shoulder while you cook. Use it for everything. Replace them often. The most useful thing in the kitchen after the knife.

As an Amazon Associate, I earn from qualifying purchases. Thank you for supporting TumbleBump.

🔗 Related Reads

TumbleBump is part of the John D Reinhart content family. Writer, illustrator, videographer, and accidental filmmaker — find the whole story at JohnDReinhart.com.

21017

©2026 John D Reinhart/TumbleBump.com – all rights reserved
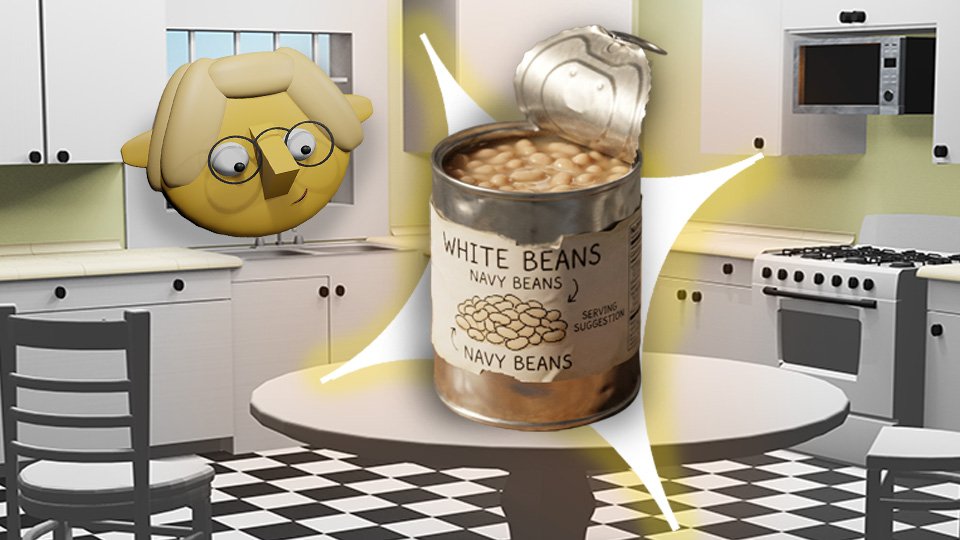
Sauté: The One Word Every Recipe Uses and Nobody Ever Explains

Every recipe tells you to sauté something. Nobody tells you what that actually means. Here’s the whole story — why it works, what it does to food, and why it’s the technique that unlocks everything else.

There it is again.

“Sauté the onions.” “Sauté the garlic.” “Sauté the vegetables until softened.” Every recipe in the world assumes you know what this means, then moves cheerfully along to the next instruction while you stand at the stove wondering exactly what you’re supposed to be doing.

Here’s what you’re supposed to be doing.

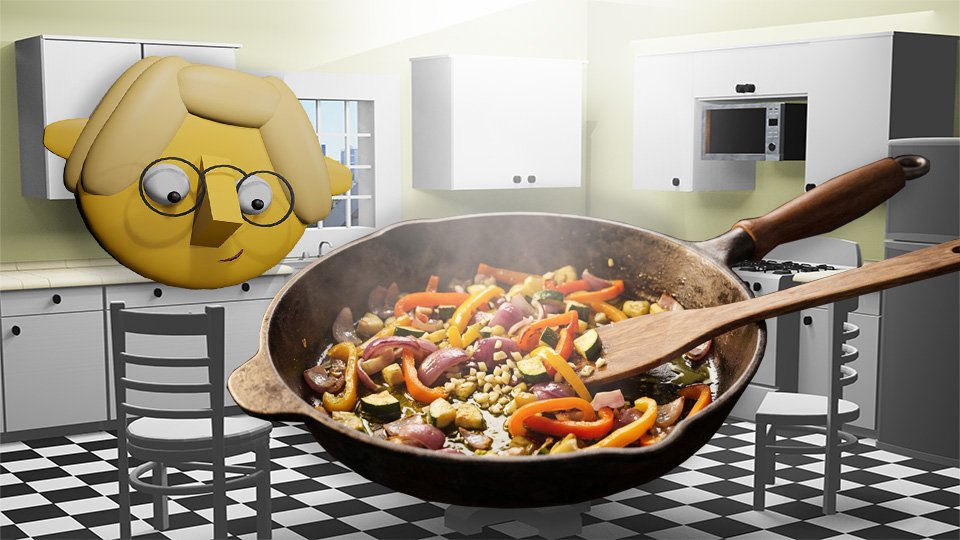
Sautéing is cooking food quickly in a small amount of fat over relatively high heat, moving it around occasionally so it cooks evenly without burning. That’s the whole definition. It’s fast, it’s simple, and once you understand why it works, you’ll recognize it as the foundation of roughly half of all cooking.

There are approximately 7 gazillion YouTube videos that will show you the step-by-step of sautéing specific ingredients. We encourage you to go watch them — that’s exactly what they’re there for. We’re here to explain the why, which is the part that makes everything else make sense.

🔥 Why High Heat?

Heat is what transforms food. Raw onion is sharp and eye-watering. A properly sautéed onion is soft, sweet, and fragrant — something chemically different from what went into the pan. That transformation happens because of heat, and specifically because of two processes working together.

The Maillard Reaction

When food hits a hot pan, proteins and sugars on the surface react with each other and produce hundreds of new flavor compounds. This is called the Maillard Reaction, and it’s responsible for the golden color and the deeply savory smell that makes a kitchen smell like someone who knows what they’re doing lives there.

High heat gets the surface of the food hot enough to trigger this reaction quickly, before the inside overcooks. That’s the sweet spot sautéing is designed to hit.

💡  Low heat in a sauté pan doesn’t sauté — it steams. The food releases its moisture, sits in a puddle of its own liquid, and turns gray and limp instead of golden and flavorful. If the pan isn’t sizzling when the food goes in, the heat isn’t high enough.

The Fat

A small amount of fat — olive oil, butter, or both — serves several purposes at once. It conducts heat evenly across the pan surface, prevents sticking, adds its own flavor, and helps the Maillard Reaction happen by keeping the surface of the food in consistent contact with the heat.

A small amount means enough to coat the bottom of the pan with a thin, even layer. Not a pool. Not a dry pan. Just enough.

🍳 The Pan Matters

Not every pan sautés equally. The right pan makes everything easier.

What You Want

  • A wide, flat bottom — so food has room to spread out and make contact with the heat rather than piling up and steaming each other.
  • A pan that holds heat well — cast iron and stainless steel are the workhorses. They get hot, stay hot, and recover quickly when cold food goes in.
  • The right size — too small and the food crowds together and steams. Too large and the fat burns in the empty spaces. A 10 or 12-inch skillet handles most sauté jobs comfortably.

What You Don’t Want

  • A cold pan. Always heat the pan before adding fat, and heat the fat before adding food.
  • A crowded pan. If food is piled on top of itself, it steams instead of sautés. Cook in batches if needed.
  • A nonstick pan for high-heat sautéing. Nonstick coatings don’t like very high heat and won’t give you the same browning results.

🍳  A cast iron skillet is the ideal sauté pan for most home kitchens. It gets screaming hot, holds that heat beautifully, goes from stovetop to oven without complaint, and lasts approximately forever. If you only own one pan, make it this one.

🧅 What Sautéing Does to Different Foods

Onions

Raw onion is pungent and sharp. Sautéed onion becomes soft, translucent, and gently sweet as its sugars develop. This is why nearly every savory recipe starts with sautéed onion — it builds a flavor foundation that everything else sits on top of.

A few minutes over medium-high heat produces softened onion. Longer over medium heat produces caramelized onion, which is a different and deeply wonderful thing.

Garlic

Garlic sautés faster than almost anything else — thirty seconds to a minute in a hot pan is usually enough. It goes from raw and sharp to golden and fragrant remarkably quickly, and from golden and fragrant to burned and bitter just as quickly. Watch it. Don’t walk away.

Vegetables

Most vegetables benefit enormously from a quick sauté. Zucchini, peppers, mushrooms, spinach, green beans — high heat, a little oil, keep them moving, and they go from raw to tender-with-a-little-color in just a few minutes. Each vegetable has its own timing, which is where those YouTube videos become your friend.

Protein

Chicken, shrimp, thin-sliced beef, scallops — sautéing gives protein a golden, flavorful crust on the outside while cooking it through quickly. The key is not moving it too soon. Let it sit in contact with the pan long enough to release naturally, then turn it. If it’s sticking, it’s not ready to flip.

✅  The food will tell you when it’s ready to move. If it resists, wait. If it releases cleanly, turn it. This applies to almost everything you’ll ever sauté.

🌡️ The Heat Question

Recipes that say “medium-high heat” are giving you a starting point, not a law. Every stove is different. Electric, gas, induction — they all behave differently, and the same dial setting produces different results on different equipment.

The real signal is the pan and the food, not the dial:

  • Fat should shimmer and move easily when the pan is ready — not smoke, not sit still
  • Food should sizzle immediately when it hits the pan — not silence, not violent spitting
  • The pan should stay hot when food goes in — if it goes quiet and cold, the heat is too low or the pan is too crowded

🔥  If nothing is sizzling, something is steaming. Turn up the heat, give the pan a moment to recover, and try again. A little sizzle is your friend. Silence is the enemy of a good sauté.

🛒 What to Get

The Essentials

  • Lodge 10-Inch Cast Iron Skillet — The gold standard sauté pan for home cooks. Gets hot, stays hot, and produces better browning than almost anything else at any price.
  • Lodge 12-Inch Cast Iron Skillet — For larger batches. More room means less crowding, which means better sautéing results across the board.
  • Stainless Steel Skillet 10-Inch — A lighter alternative to cast iron with excellent heat distribution. All-Clad and Made In are the benchmarks.
  • Wooden Spoon Set — For moving food around the pan without scratching it. A good wooden spoon is one of the most useful tools in the kitchen.
  • Splatter Screen — High-heat cooking with fat produces splatter. A splatter screen keeps it in the pan and off your stovetop. Underrated kitchen purchase.

Nice to Have

  • Tongs (Locking, 12-Inch) — For turning proteins and tossing vegetables without losing control of them. The most useful tool you’ll reach for constantly.
  • Instant-Read Thermometer — For proteins especially — takes the guesswork out of done vs. not done. Worth every penny.

As an Amazon Associate, I earn from qualifying purchases. Thank you for supporting TumbleBump.

🔗 Related Reads

TumbleBump is part of the John D Reinhart content family. Writer, illustrator, videographer, and accidental filmmaker — find the whole story at JohnDReinhart.com.

21016

©2026 John D Reinhart/TumbleBump.com – all rights reserved