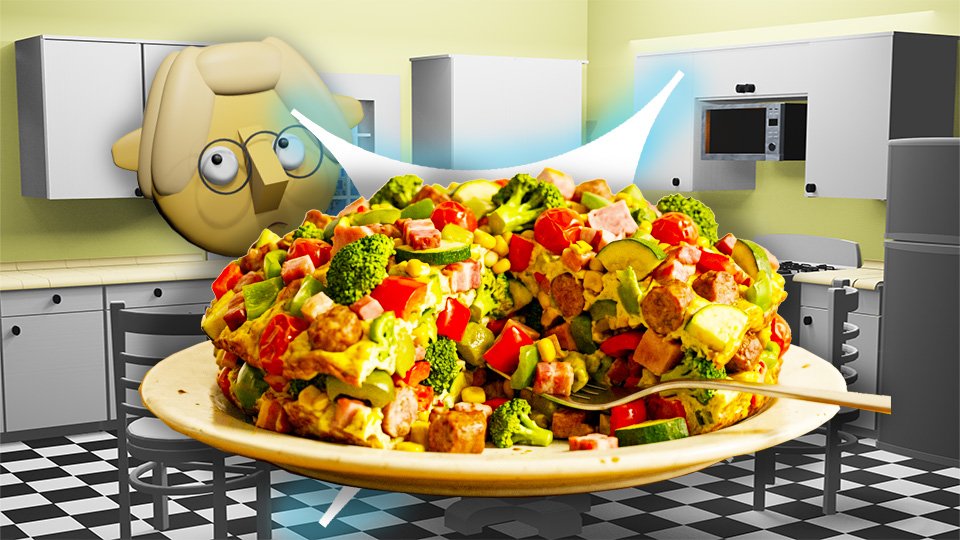
The Everything Frittata (Or: Why Your Sad Refrigerator Odds and Ends Are Actually Dinner)

Half an onion, some wilting spinach, and cheese from two different blocks aren’t the ingredients of defeat. They’re the ingredients of a frittata.

You know the moment. The refrigerator contains a collection of things that don’t obviously add up to a meal. Half an onion. Some wilting spinach. Three mushrooms. A bit of cheese from two different blocks. Some roasted vegetables from Tuesday, looking a little tired but not actually gone bad.

These are not the ingredients of defeat. These are the ingredients of a frittata.

The frittata is Italian in origin, egg-based in nature, and essentially unlimited in what it’ll accept. It’s the Everything Dish — the kitchen equivalent of a conversation with someone who’s genuinely interested in whatever you happen to bring up, no matter how random.

🍳 What a Frittata Actually Is

A frittata is an open-faced Italian egg dish — eggs mixed with fillings, cooked until set. It’s essentially an un-folded omelette, and that’s the whole secret to why it’s so much friendlier than an omelette to begin with. Folding an omelette at the right moment, with the right heat, is a genuine skill that takes practice to get right. A frittata skips that moment entirely. It just sets, top to bottom, and gets sliced into wedges once it’s done — no fold, no flip, no moment of truth.

🥚 Why Eggs Can Hold So Much

Eggs are a custard in disguise — proteins that, once heated, link together into a structure firm enough to suspend whatever’s sitting inside it. That’s the actual mechanism behind a frittata’s flexibility: it’s not that eggs happen to taste fine with almost anything, it’s that the protein structure they form is physically capable of holding vegetables, cheese, meat, even leftover pasta, all in place at once. A quiche does something similar with a crust involved; a frittata does it with nothing standing between the eggs and the pan at all, which is exactly why it’s the faster, lower-commitment version of the same idea.

🔥 Why the Pan Matters More Than the Recipe

A frittata’s defining move is starting on the stovetop and finishing in the oven or under the broiler — bottom sets first, top sets last, no stirring in between. That’s why an oven-safe skillet, cast iron especially, is the actual star of the process rather than any specific filling. The pan needs to survive the transition from direct stovetop heat to oven heat without missing a beat, and it needs to release the finished frittata cleanly once it’s done. Get the pan right, and the eggs mostly take care of themselves.

🧊 Why It’s the Fridge’s Best Friend

By midweek, most refrigerators accumulate a genuine assortment of things that are still perfectly good but no longer add up to an obvious meal on their own. A frittata doesn’t need them to add up to anything. It just needs them cooked if they need cooking, warmed if they’re already cooked, and folded into eggs. This is the frittata’s actual highest calling — not a recipe you plan around, but a plan you never had to make, built entirely out of what was already sitting there.

🌡️ Why It’s Just as Good Cold

Most egg dishes suffer the moment they cool — the texture tightens, the appeal drops. A frittata is a genuine exception, and it comes back to that same custard structure: once it’s set, it holds its shape and texture whether it’s fresh out of the oven or pulled cold from the fridge the next morning. That’s not a workaround or a compromise. A cold slice of frittata is a legitimately good breakfast, lunch, or picnic contribution on its own terms, not just leftovers being tolerated.

🎬 Where the Actual Steps Live

The technique itself — whisking, arranging fillings, timing the stovetop-to-oven handoff, judging when the center’s set instead of jiggly — is worth watching rather than reading. A few minutes of video showing someone’s hands managing that transition will teach the timing faster than any written instructions could. This post is about why the dish works and why it’s worth trusting with whatever’s in the fridge; the how is a quick search away.

🛒 Gear Worth Having

Lodge 10-Inch Cast Iron Skillet — Goes from stovetop to oven without a second thought, which is the entire mechanical trick a frittata depends on.

OXO Good Grips Flexible Turner Spatula — Slides cleanly under a set frittata to loosen it from the pan, which matters more than it sounds like it should.

Salt Fat Acid Heat by Samin Nosrat — Understanding the egg is understanding the frittata, and Nosrat explains eggs better than almost anyone writing about food today.

As an Amazon affiliate, I earn from qualifying purchases. Thank you for supporting TumbleBump.

📖 Related Reads


TumbleBump is part of the John D Reinhart content family. Writer, illustrator, videographer, and accidental filmmaker — find the whole story at JohnDReinhart.com.

24012

©2026 John D Reinhart/TumbleBump.com — All rights reserved
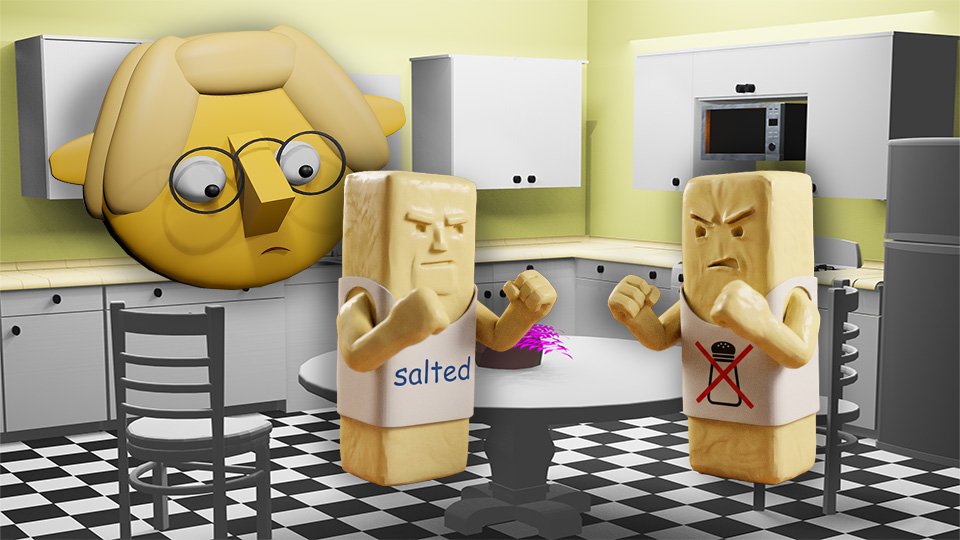
Butter: Salted vs. Unsalted (The Control Issue)

 The salted vs. unsalted butter debate is real, practical, and settled — but not in the way most people expect. It’s not about one being better than the other. It’s about control. Here’s when each one belongs in your kitchen, what the salt difference actually means, and why serious bakers keep both.

The grocery store dairy case offers salted and unsalted butter side by side, often at the same price, and most people pick one and use it for everything without thinking much about it. This works fine for casual cooking. For anyone who bakes with any regularity, understanding the distinction matters — because the two products are genuinely not interchangeable, for a specific and practical reason.


What the Difference Actually Is

Unsalted butter: Pure butterfat and water. Nothing else. The salt content is zero (or so close to zero it’s functionally irrelevant).

Salted butter: Butterfat, water, and added salt — typically about 1.5–2% salt by weight, which translates to roughly ¼ teaspoon of salt per half-cup (one stick) of butter.

That’s the whole distinction. Flavor and salt content.


The Baking Case for Unsalted

Baking recipes are precise. They specify salt amounts because salt affects gluten development, yeast activity, flavor balance, and the interaction of other ingredients. When a recipe calls for “1 cup unsalted butter” and “½ teaspoon salt,” it has been calibrated with those specific amounts.

If you substitute salted butter, you’re adding approximately an additional ½ teaspoon of salt from the butter alone (for two sticks), on top of whatever salt the recipe specifies. That extra salt is invisible — you can’t adjust for it because you don’t know the exact salt content of your specific salted butter (brands vary from 1.25% to 2% salt), and the recipe writer didn’t account for it.

The result: Baked goods made with salted butter can taste measurably saltier than intended, have subtly different texture (salt affects gluten behavior), and rise differently if yeast is involved. These effects are sometimes invisible, sometimes noticeable, and occasionally problematic.

The control argument: Unsalted butter lets the baker control all salt in the recipe independently. You add the precise amount the recipe specifies and know exactly what went in.


The Cooking Case (Where It Matters Less)

For stovetop cooking — sautéing, making pan sauces, scrambling eggs, making a roux — the salt in salted butter is often irrelevant. You’re seasoning to taste throughout the cooking process, and the small additional salt from the butter is easily adjusted for or completely inconsequential.

Many home cooks who never bake keep only salted butter and are entirely fine. The flavor of salted butter (the salt enhances the butter’s richness and makes it taste more complete) is pleasant on bread and in casual cooking. It’s a legitimate choice for the non-baker.


Freshness: The Other Difference

There’s a secondary reason professional bakers prefer unsalted butter: freshness.

Salt is a preservative. Salted butter has a longer shelf life, which means stores can turn it over more slowly. Unsalted butter, having no preservative, must be fresher. When you buy unsalted butter, you’re more likely to be buying a recently produced product.

Butter is surprisingly delicate — its flavor degrades with age and exposure to light, heat, and air (going rancid). Fresher butter tastes measurably better in applications where butter flavor is featured, like a compound butter, a simple pan sauce, or a high-quality croissant.


European Butter: The Third Category Worth Knowing

European-style butter (Kerrygold, Président, Plugrá, Vermont Creamery) has a higher butterfat content than standard American butter — typically 82–84% vs. 80%. The extra fat makes it richer, creamier, and more flavorful. In baked goods where butter is the star (croissants, shortbread, butter cake), European butter makes a perceptible difference.

European butter comes in salted and unsalted versions. The same rules apply — baking = unsalted, personal preference for everything else.


The Practical Recommendation

If you bake: Keep both. Unsalted in the refrigerator (or freezer in quantity) for baking. Salted on the counter for everyday use.

If you don’t bake: Keep salted. It tastes better on toast and performs identically in cooking. The extra expense and complexity of maintaining two butters isn’t warranted.

For both uses: Buy the freshest butter you can find (check the date), store extra in the freezer where it keeps for up to 12 months, and if butter quality matters to you in a specific application — a special bake, a compound butter — reach for the European variety.


🛒 Gear Worth Having

As an Amazon affiliated, I earn from each qualifying purchase. Thank you for supporting TumbleBump. 


Related Reads


TumbleBump is part of the John D Reinhart content family. Writer, illustrator, videographer, and accidental filmmaker — find the whole story at JohnDReinhart.com.

27001

©2026 John D Reinhart/TumbleBump.com – all rights reserved

The “Sink is the Finish Line” Philosophy

Kitchen cleanup feels endless because most people are doing it wrong — or rather, doing it all at once at the end, which is the hard way. The Sink is the Finish Line philosophy is a simple mental shift that makes cleanup feel like something that’s already mostly done.

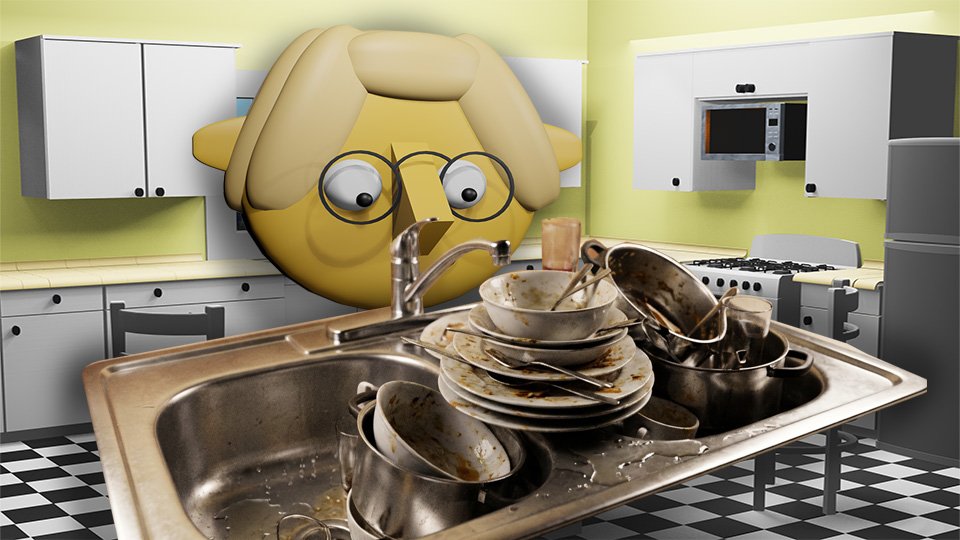
Here is the worst version of kitchen cleanup: you cook a meal, eat the meal, feel pleasantly full, turn around, and behold the disaster zone you’ve created. Every pan is dirty. Every surface has something on it. The sink is a geological formation of dishes. And now you have to deal with all of it while you’re full and tired and would like very much to not be in the kitchen right now.

This version of cleanup is a consequence of a specific approach to cooking — the approach where you do all the cooking, then all the eating, then all the cleaning, in three separate and sequential phases.

The Sink is the Finish Line philosophy changes the sequencing. And it changes everything.


The Philosophy

The Sink is the Finish Line means exactly this: getting something to the sink (or dishwasher) is the goal, not washing it. And you work toward that goal continuously, throughout cooking, rather than all at once at the end.

That’s it. That’s the whole idea.

Every time a bowl or utensil or cutting board is done being used, it goes to the sink immediately. You don’t set it “aside” — you move it. Not washed, necessarily. Just there. At the finish line.

At the end of cooking, the counter is clear. The sink has things in it, but they’re all there. The big job of washing is smaller because the big job of gathering and organizing is already done. And often, many of the things at the sink can be soaked or rinsed while you eat, making post-meal cleanup a 5-minute task instead of a 30-minute one.


Why This Works Psychologically

Cleanup feels overwhelming in proportion to its visual footprint. A counter covered in scattered dishes, bowls, and utensils looks like a project. The same mess concentrated in the sink looks like dishes. Dishes you can deal with.

Moving things to the sink continuously removes the visual overwhelm progressively, throughout the cooking session. You never arrive at the end of the meal facing the full horror of a scattered kitchen. You arrive facing a sink of dishes, which is a known and manageable quantity.


The Four Moves

Move One: The Bowl Drop Every time you finish using a mixing bowl, measuring cup, or prep container, walk it to the sink. Not the counter. The sink.

Move Two: The Utensil Round-Up Keep a narrow vessel (a tall glass, a small pitcher, a jar) near the stove for used utensils — spoons, spatulas, whisks. They collect there instead of all over the counter. At the end of cooking, the vessel goes to the sink.

Move Three: The Cutting Board Transit When you’re done with the cutting board, it goes to the sink or leans against it. The counter where it was sitting is now clear.

Move Four: The Pot and Pan Parking Finished using a pot or pan but it’s still hot? Set it on a cold burner or trivet. When it’s cool enough to handle, it moves to the sink. You don’t wash it mid-cook — you just relocate it out of the workspace.


The Soaking Strategy

Some things don’t need to be washed immediately — they need to soak. The Sink is the Finish Line philosophy pairs naturally with strategic soaking.

Any pan with baked-on or stuck food: fill it with hot water the moment you’re done using it (or done with dinner) and let it soak while you eat. By the time you return, what would have been a 10-minute scrubbing job is a 2-minute one.

Soaking while you eat is one of the most effective free productivity moves in domestic life.


The End-of-Meal State

When you sit down to eat, your kitchen should look like this: stove somewhat present, a few residual things on the counter, the sink containing essentially everything that’s been used. The workspace is mostly clear. The mess is contained.

When you finish eating, you return to a sink full of things that have been soaking, a counter that needs a quick wipe, and a kitchen that’s 80% done already.

The last 20% — washing the dishes, wiping down the stove and counters — takes 10–15 minutes. Not because dishes are easier to wash. Because the organizational work is already done.


The Counter Wipe as Punctuation

The final move of any cooking session is a single, deliberate counter wipe — one pass with a damp cloth or sponge across all surfaces, removing crumbs and spills. This takes 60 seconds and transforms the kitchen from “mostly clean” to “clean.”

The counter wipe is the period at the end of the cooking sentence. Do it every time, and the kitchen never gets away from you.


🛒 Gear Worth Having

As an Amazon affiliate, I earn from each qualifying purchase. Thank you for supporting TumbleBump.


Related Reads


TumbleBump is part of the John D Reinhart content family. Writer, illustrator, videographer, and accidental filmmaker — find the whole story at JohnDReinhart.com.

23013

©2026 John D Reinhart/TumbleBump.com – all rights reserved

The Logic of the Grocery Circuit

The grocery store is not trying to help you shop efficiently. The layout is engineered to make you wander, linger, and impulse-buy. Here’s how to reverse-engineer the circuit and get in, get out, and get exactly what you came for.

The modern grocery store is a masterpiece of retail psychology.

The entrance almost never opens directly into produce — it opens into a sensory experience. Flowers. Warm bread smells piped strategically. Bright lighting. The produce section, full of colorful things that make us feel virtuous, is usually the first real stop, positioned to put you in a generous, optimistic spending mood before you reach anything else.

The essentials — milk, eggs, bread — are almost always at the back or far corners, forcing you to walk past everything else to reach them.

The checkout lane is a gauntlet of small, impulsive things at eye level.

None of this is accidental. The store’s goal and your goal are not the same goal. Here’s how to shop like the store layout is irrelevant, because it can be.


Build a List Organized by Zone, Not by Recipe

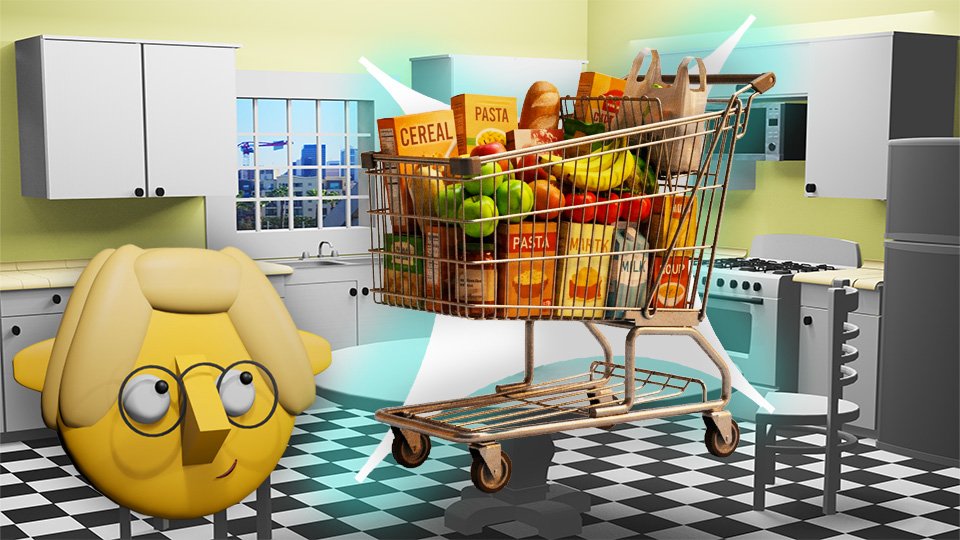
Most people write their grocery list in the order they think of things: milk, pasta, apples, chicken, cereal, onions. Then they zigzag across the store, backtracking constantly, and either miss things or make extra passes that expose them to more impulse buying.

The better method: organize your list by store zone before you go.

Standard grocery store zones: 1. Produce (usually first) 2. Bakery/Deli 3. Meat and Seafood 4. Dairy and Eggs (usually near the back) 5. Frozen Foods 6. Center aisles (canned goods, pasta, snacks, condiments, cereal)

Write your list with items grouped under each zone. You move through the store once, in order, without backtracking. You’re in and out faster and you pass the tempting displays fewer times.


Shop the Perimeter First

Here’s the classic grocery wisdom: the perimeter of most stores contains the fresh food — produce, meat, dairy, bakery. The center aisles contain processed and packaged foods.

Shop the perimeter first, then dip into the center aisles for specific things on your list. This naturally loads your cart with fresh ingredients before you hit the packaged goods, which subtly affects what you end up buying (you’re less likely to load up on snacks if your cart is already full of vegetables and protein).


The “Never Shop Hungry” Rule

This one is so cliché it barely seems worth mentioning, and yet. Hungry shopping produces a cart full of things that sounded like a good idea at the time. Everything looks appealing when you’re hungry. The impulse-buy displays are never more effective than when your blood sugar is low.

Eat something — anything — before you go. Even a handful of crackers makes a difference. This is not a willpower tip; it’s a biochemistry tip. Hunger literally changes how your brain evaluates options.


Know Your Store’s Floor Plan

You shop at the same store most weeks. Spend one trip paying attention to where things are, and you’ll never need to wander again. Within a few weeks, your mental map is so complete that you can write your list in exact aisle order, walk through the store efficiently, and be done before someone else has finished circling the produce section.

This sounds like a small thing, but it saves a meaningful amount of time and willpower every single week.


The “Planned Variety” Rule for Center Aisles

The center aisles are where you build your pantry — and where the danger of unfocused browsing lives. Go in with a specific list. Give yourself permission to grab one “exploratory” item per trip (a new sauce, a grain you haven’t tried, something that catches your eye) and no more.

This gives you novelty without derailment.


Unit Price Math: The Skill Worth Developing

Grocery stores are required to display unit prices (price per ounce, per pound, per count) on shelf tags. Most people ignore these. The people who don’t ignore them consistently spend less.

The larger size is usually cheaper per unit — but not always. Store brands are usually cheaper per unit than name brands for the same quality — but again, not always. The unit price tag does the math for you; you just have to look at it.

Pick two or three things you buy every week and start comparing unit prices. Within a month you’ll be doing it automatically, and it will quietly save you real money over time.


The List Is the Plan

A grocery list isn’t just a memory aid. It’s the physical representation of your meal plan for the week. When you shop from a list built around specific meals, you buy what you need and not much more. When you shop without a list, you buy what looks good in the moment and end up with a refrigerator full of ingredients that don’t form a coherent meal between them.

The list is the plan. The plan is the week. The week is how you eat well without thinking about it too hard.


🛒 Gear Worth Having

  • AnyList Grocery App — Organizes your list by store section automatically. Shared lists for households. The best grocery app in most people’s estimation.
  • Insulated Grocery Tote Bags — For cold items on the way home. Also good for the environment. Also makes you look organized, which is its own satisfaction.
  • Reusable Produce Bags — Eliminate the plastic bag situation in produce. Mesh, washable, and they actually work.
  • Bento-Style Cooler Bag — Keeps produce and dairy properly chilled if you’re shopping and then running errands.
  • Fastcheck Grocery Planner — For those who prefer pen-and-paper. A weekly template for list-building, budget tracking, and meal planning.

As an Amazon affiliate, I earn from qualifying purchases. Thank you for supporting TumbleBump. 


Related Reads


Posted on TumbleBump | PLANS Category

TumbleBump is part of the John D Reinhart content family. Writer, illustrator, videographer, and accidental filmmaker — find the whole story at JohnDReinhart.com.

22013

©2026 John D Reinhart/TumbleBump.com – all rights reserved

My Pasta Is a Sticky Brick

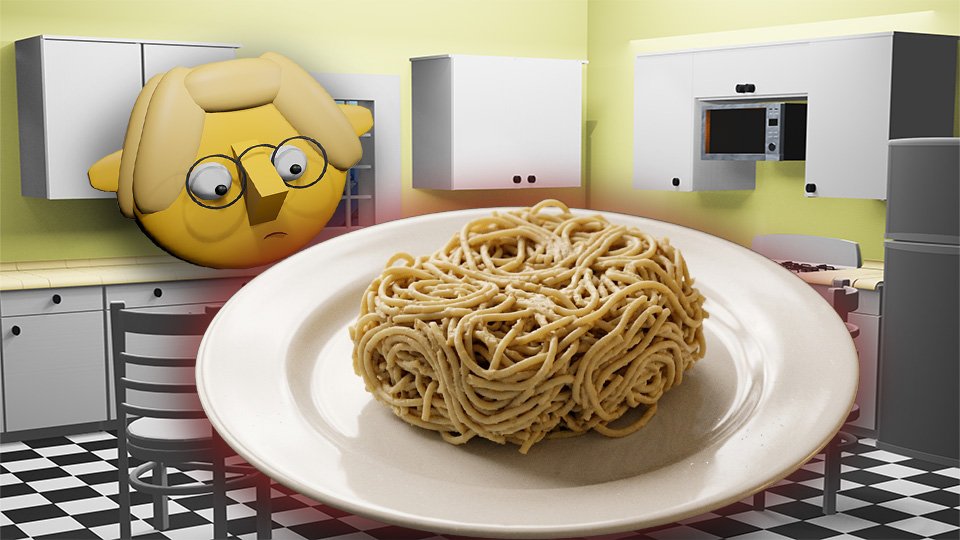
You drained the pasta, turned around for two minutes, and it has fused into a single mass. This happens to everyone and has a specific cause — and specific fixes. Here’s why pasta sticks, how to rescue it right now, and how to make sure it never happens again.

Sticky pasta is the result of starch, timing, and one very common draining mistake. Once you understand the cause, both the fix and the prevention become obvious.


Why Pasta Sticks

Fresh-cooked pasta is covered in a layer of gooey, sticky starch that was leached from the pasta during cooking. When you drain the pasta and let it sit — especially if it cools — this starch becomes an effective adhesive, gluing the strands or pieces together into a unified mass.

The mistake that makes it worse: rinsing pasta after draining. Many people rinse pasta to stop cooking or to cool it, which removes the starchy coating. This sounds like it would help with sticking, but rinsing also removes the starchy coating that helps sauce adhere to pasta. The pasta is slippery, sauceless, and then sticks anyway as it cools. Rinsing cooked pasta is almost never the right call.


The Actual Prevention

Get the pasta into sauce immediately. Freshly drained pasta tossed immediately with sauce doesn’t stick — the sauce coats the strands before they can bond to each other. This is why professional cooks move hot pasta directly into the pan with the sauce, using a bit of pasta water to help everything come together. Timing is everything.

Reserve pasta water before draining. Starchy pasta water (it looks slightly cloudy and milky) is the secret sauce of pasta cooking. A splash tossed with drained pasta prevents sticking, and more added to the sauce makes it clingy and cohesive.

Add a small amount of olive oil if holding. If you need to hold cooked pasta before saucing — for a buffet or timed dinner — toss it with a teaspoon of olive oil after draining to coat the strands lightly. This is a short-term fix that works for 20–30 minutes. Longer than that, the pasta will still begin to clump.


Rescuing the Brick Right Now

If the pasta is already stuck:

The hot water splash: Bring a small amount of water to boil in the pot. Add the stuck pasta and toss briefly — 30–45 seconds — in the hot water. The heat and water loosen the bonds. Drain immediately and get it into sauce.

The sauté method: Add the stuck pasta to a pan with a tablespoon of olive oil or butter and a splash of water over medium heat. Toss with tongs as it heats. The steam loosens the stuck strands while the oil coats and separates them. This works well and has the advantage of also adding flavor.

The pasta water rescue: If you remembered to save pasta water — pour a few tablespoons over the stuck pasta and toss. The warm, starchy water rehydrates the bonding layer and lets the strands separate.


The Pasta-to-Sauce Ratio Problem

Sometimes pasta sticks not from sitting too long but because there isn’t enough sauce to coat it. The pasta absorbs some of the sauce and the rest sits dry. This is a different problem with a different fix: more sauce, or pasta water stirred into the existing sauce to add volume and body.


Cold Pasta for Tomorrow: Different Rules

If you’re intentionally storing cooked pasta for next day use:

Toss with a teaspoon of olive oil after draining and let it cool completely before refrigerating. The oil keeps the strands from sticking in storage. When reheating, add a splash of water to the pan and warm over medium heat, tossing to loosen. Don’t microwave cold pasta without added moisture — it will be a brick again and dry out.


🛒 Gear Worth Having

As an Amazon affiliate, I earn from each qualifying purchase. Thank you for supporting TumbleBump. 


Related Reads


Posted on TumbleBump | OOPS Category

TumbleBump is part of the John D Reinhart content family. Writer, illustrator, videographer, and accidental filmmaker — find the whole story at JohnDReinhart.com.

26006

©2026 John D Reinhart/TumbleBump.com – all rights reserved

Breaking Down the Cutting Board

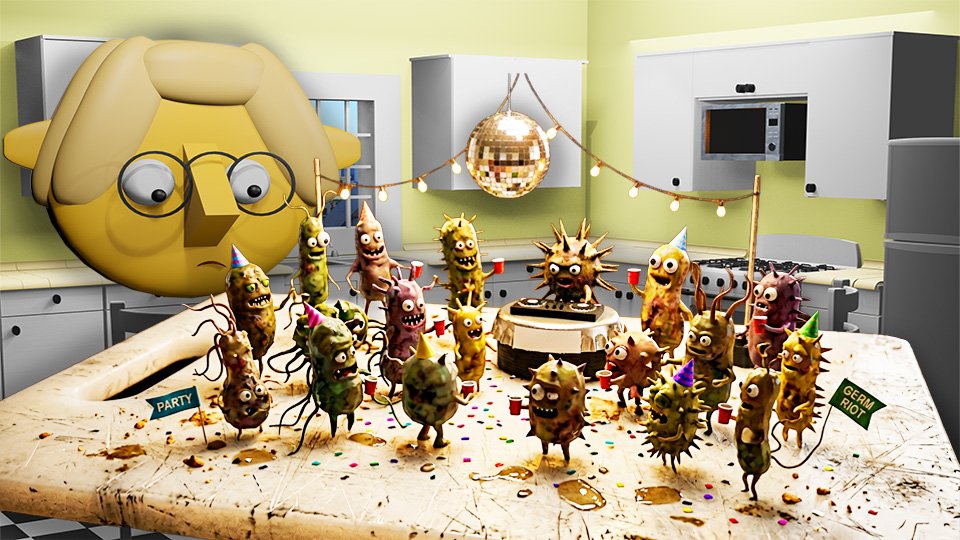
Your cutting board is one of the hardest-working surfaces in your kitchen — and one of the least understood. Here’s how to clean it properly, why cross-contamination is a real thing (and how to avoid it), and what to do when it starts looking like it lost a fight.

The cutting board is where most of your kitchen work actually happens. It’s where onions get diced, chicken gets sliced, herbs get chopped, and whatever you’re making gets its first real attention.

It’s also, consequently, where a lot of things accumulate that you’d rather not think about.

The good news: cutting board cleaning is not complicated. It just requires knowing a few things that nobody thinks to mention until something goes wrong.


The Two Types of Cutting Board, and Why It Matters

Wood and bamboo boards are porous. They absorb liquids, which means they can harbor bacteria in their fibers if not cleaned properly — but they also self-sanitize over time due to the natural antimicrobial properties of wood. They should never go in the dishwasher (they’ll warp, crack, and split). They need occasional oiling to stay in good condition.

Plastic boards are technically easier to sanitize and dishwasher-safe, but they develop knife grooves over time, and those grooves become excellent hiding places for bacteria that are very difficult to remove even with scrubbing. A heavily grooved plastic board is arguably less hygienic than a well-maintained wood one.

The practical conclusion: both work fine if properly maintained. Know which type you have, because the care is different.


The Basic Wash: After Every Use

For everyday cleaning after non-raw-meat use:

  1. Scrape off any food debris with a bench scraper or the back of your knife.
  2. Wash with hot, soapy water — both sides, not just the top.
  3. Rinse thoroughly.
  4. Stand upright or prop on its edge to air dry. Don’t lay it flat — water pools underneath and promotes warping and mold.

That’s it. Two sides, both washed, stood up to dry.

Why both sides? If only one side gets wet consistently, the board warps as one side absorbs moisture and the other doesn’t. A warped board rocks on the counter. A rocking board is an unstable board. Wash both sides.


After Raw Meat, Poultry, or Fish: Step It Up

Raw proteins require more than soap and water. After cutting raw meat on any board:

Option A (plastic or any board): Wash with hot soapy water, then sanitize. A simple sanitizing solution: 1 tablespoon of liquid chlorine bleach diluted in 1 gallon of water. Apply, let sit 2–3 minutes, rinse thoroughly, air dry.

Option B (any board): A spray of undiluted white vinegar followed by a spray of 3% hydrogen peroxide (standard drugstore variety). These work in sequence, not combined. Let each sit briefly, rinse. This is effective and leaves no chemical aftertaste.

The cardinal rule: Raw chicken gets its own board, or at minimum gets the full sanitizing treatment before the board touches anything else. This is the one non-negotiable in cutting board hygiene.


Deodorizing: When It Smells Like What You Cut

Onion, garlic, fish — these aromas linger in wood boards long after washing. The fix:

Salt and lemon: Sprinkle coarse salt generously over the board. Cut a lemon in half and use it to scrub the salt into the surface, squeezing as you go. Let sit 5–10 minutes, scrape off, rinse. The salt abrades, the lemon acid neutralizes odors and brightens the wood. This also works beautifully as a periodic cleaning treatment even without odor issues.

Baking soda paste: Make a paste with baking soda and a little water, scrub, let sit, rinse. Effective and gentle.


Deep Cleaning and Stain Removal

For stubborn stains (beet, berry, turmeric — the chromatic troublemakers):

A paste of baking soda and hydrogen peroxide, applied to the stain, left for 15–20 minutes, then scrubbed and rinsed. For wood boards, this works better than bleach, which can dry out and crack the wood.

For plastic boards with heavy staining: the dishwasher (if labeled dishwasher-safe) plus a pre-treatment of hydrogen peroxide paste.


Oiling Wood Boards: The Maintenance Nobody Does

This is the most skipped cutting board task and one of the most important for wood board longevity.

About once a month (or whenever the wood looks dry or pale), apply a liberal coat of food-grade mineral oil. Rub it in with a cloth in the direction of the grain. Let it soak in for a few hours or overnight. Wipe off the excess.

This prevents drying, cracking, and warping. It makes the board more resistant to staining. And it extends the board’s life from “a few years” to “potentially decades.”

Use food-grade mineral oil specifically. Olive oil, vegetable oil, and other culinary oils will go rancid inside the wood and eventually make your board smell sour. Mineral oil doesn’t. It’s cheap and available at any pharmacy.


When to Replace It

  • Plastic boards: When the knife grooves are deep and numerous. If you can’t get them clean-looking after washing, it’s time.
  • Wood boards: Almost never, if properly maintained. Serious cracks or mold that won’t budge despite treatment are the only real reasons.
  • Bamboo boards: Similar to wood, but bamboo is harder and cracks more readily if dried out. Oil them, and they’ll last.

🛒 Gear Worth Having

As an Amazon affiliate, I earn from each qualified purchase. Thank you for supporting TumbleBump.


Related Reads


TumbleBump is part of the John D Reinhart content family. Writer, illustrator, videographer, and accidental filmmaker — find the whole story at JohnDReinhart.com.

23015

©2026 John D Reinhart/TumbleBump.com – all rights reserved

The Rice in the Back of the Fridge Is Better Than the Rice You Just Made

Leftover rice is not a consolation prize. It is secretly the superior ingredient. Here’s why day-old rice is better than fresh — and what it wants to become next.

There is a container of rice in your refrigerator right now. It has been there since Tuesday. You are eyeing it with mild suspicion, trying to decide whether it’s still good and whether anyone is going to eat it.

Here is the thing about that rice: it is not a problem to solve. It is an upgrade waiting to happen.

Day-old rice is genuinely better than fresh rice for certain applications — not “better for leftovers” in the way people say things are “not bad” when they mean mediocre. Actually better. Chemically, structurally, culinarily better. The restaurant fried rice you’ve been trying to replicate at home and failing? The secret ingredient is old rice.

🤔 Why Old Rice Is Better (The Actual Science)

Fresh rice is full of surface moisture. That moisture is great when you want fluffy steamed rice. It is the enemy when you want fried rice, because wet rice steams in the pan instead of frying. The grains clump together. Nothing crisps. The result is soft, heavy, and nothing like what you ordered at the restaurant.

Day-old rice has lost that surface moisture. The grains have dried and separated. When they hit a screaming hot pan they fry — actually fry — developing a slight crust and that characteristic crackling texture that makes fried rice worth eating.

This is not a workaround or a trick. This is how fried rice is supposed to be made. Every restaurant that produces excellent fried rice is using rice that was cooked earlier. The leftover container in your fridge is the correct starting point, not a compromise.

🍳 What Leftover Rice Wants to Become

Day-old rice has a short list of second acts, and they are not consolation meals. They are genuinely excellent things:

  • Fried rice. The obvious one and the best one. High heat, cold rice, a few pantry staples, eight minutes. The technique is straightforward once you understand why the heat and the cold rice matter — YouTube has dozens of excellent demonstrations of exactly what “high heat” looks like and what to do when. Watch one before you cook one.
  • Congee. Rice simmered in a large amount of broth until it breaks down into something thick, warm, and deeply comforting. The rice equivalent of chicken soup. Day-old rice gets there faster than fresh rice and the result is identical. It is the meal for a difficult day, a cold evening, or a Tuesday that has not been going well.
  • Rice bowls. Warmed leftover rice as a base for whatever else is in the fridge. A fried egg, some roasted vegetables, a drizzle of something — soy sauce, hot sauce, anything. Five minutes. Feels like a complete meal because rice is one of those bases that makes everything served on it seem intentional.
  • Arancini. Fried rice balls with cheese in the center. A project rather than a weeknight meal, but the result is spectacular enough to be worth occasional effort. If you have leftover risotto specifically, this is its correct destiny. YouTube will show you exactly how.
  • Stuffed peppers or tomatoes. Rice mixed with whatever protein and vegetables are available, stuffed into a vegetable, baked. A complete meal that looks considerably more deliberate than the ingredients would suggest.

🚧 The One Actual Rule About Leftover Rice

Leftover rice has a food safety consideration worth knowing. Rice can harbor Bacillus cereus, a bacteria that produces heat-resistant toxins in rice left at room temperature for extended periods. This is one of the genuine cases where “it looks fine” is not reliable guidance.

The rule is simple: cool leftover rice quickly after cooking, refrigerate it within two hours, and keep it for no more than four days. Reheat it thoroughly when you use it.

This sounds alarming but is actually very manageable. The risk is in rice left sitting at room temperature for hours — the classic covered pot on the stovetop situation. Rice that goes from pot to fridge within two hours is fine. Rice that sat out all evening is the concern.

Cool it fast. Refrigerate promptly. Use within four days. That’s the whole food safety conversation for leftover rice.

🛒 Gear Worth Having

  • Zojirushi rice cooker — Makes perfect rice and keeps it warm without overcooking. The appliance that makes batch rice cooking entirely painless — and batch rice cooking is how you always have day-old rice available when you want fried rice.
  • Carbon steel wok — The correct pan for fried rice. Gets hot enough to actually fry rather than steam the rice. A regular skillet can work but a wok works better. This is one of those tool-matters situations.
  • Kikkoman soy sauce — The fried rice seasoning workhorse. Keep a bottle in the fridge. Use it on rice bowls, congee, and anything that needs a savory hit without much effort.
  • Sesame oil — The finishing oil that makes fried rice taste like the restaurant version. A few drops at the end of cooking. Not for the heat — it burns — just for the flavor.

As an Amazon affiliate, I earn from each qualified purchase. Thank you for supporting TumbleBump.

✨ The Short Version

The rice in the back of your fridge is not a leftover problem. It is a better ingredient than the rice you made on Tuesday evening, specifically because it has had time to dry out and separate.

Fried rice, congee, rice bowls, arancini, stuffed vegetables — all of them start here. Cool it fast, refrigerate within two hours, use within four days, and let YouTube show you what high heat actually looks like before you start.

The restaurant has been using day-old rice the whole time. Now so do you.

📚 Related Reads


TumbleBump is part of the John D. Reinhart content family. Writer, illustrator, videographer, and accidental filmmaker — find the whole story at JohnDReinhart.com.

24008

©2026 John D. Reinhart / TumbleBump.com. All rights reserved.

Cooking for One (Without Eating the Same Thing for 5 Days)

Cooking for yourself is supposed to be simple. So why does it always end in a vat of soup you’re still eating on Thursday? Here’s how to cook for one like a person who has options — and variety — and a life.

Cooking for one is genuinely tricky, and the reasons are structural rather than personal.

Recipes are written for four. Ingredients are packaged for families. A head of cabbage is enormous when you live alone. A bunch of cilantro is so much cilantro. You buy the rotisserie chicken, eat half, and then you’re staring at the remaining half for four days trying to feel creative about it.

The result, for most single-person households, is one of two failure modes: either you cook a full recipe and eat the same meal until you hate it, or you give up and order delivery because cooking “just for you” feels like too much effort.

Neither of these is inevitable. Here’s a better framework.


The Core Strategy: Cook Components, Not Meals

Instead of cooking a completed dish (chicken tikka masala, full pot of soup, a lasagna), cook components — proteins, grains, and vegetables that can combine into different meals throughout the week.

Example Sunday session, 45 minutes: – Roast a sheet pan of mixed vegetables (broccoli, sweet potato, bell pepper) – Cook a pot of grain (quinoa or rice) – Cook one protein (roasted chicken thighs, or hard-boil some eggs, or cook a batch of lentils)

Now you have: grain bowl Monday, veggie scramble Tuesday, chicken over greens Wednesday, fried rice Thursday. Four different meals from one cooking session, with almost zero repetition.

The components are the same. The assemblies are different.


Scale Down Your Recipes — Or Don’t

You don’t have to make a full recipe. Most recipes scale down reasonably well by halving or quartering ingredients. Some — baked goods especially — don’t scale as reliably, but stovetop cooking is very forgiving.

That said, some things are worth making in full and freezing half: soups, stews, chili, pasta sauces, meatballs. These freeze beautifully and become future emergency meals. A batch of homemade chili in the freezer is one of the most valuable things a solo cook can have.


The Proteins That Work for One

Some proteins are naturally single-serving friendly. Others come in bulk and need a strategy.

Naturally sized for one: – Eggs (always, endlessly flexible) – A single fish fillet (salmon, cod, tilapia) – One chicken thigh or drumstick – A single pork chop or steak – A small can of tuna, sardines, or beans

Bulk proteins that need a plan: – A package of ground meat → cook it all, use half in pasta sauce Monday, half in tacos Wednesday – A whole rotisserie chicken → eat as-is night one, strip and use in grain bowl, make a quick soup with the carcass – A can of beans → use half, refrigerate half in water for 3–4 days


The Variety Trick: Change the Flavor Profile

The same chicken, rice, and broccoli can taste completely different depending on what you do to it.

  • Monday: Soy sauce, sesame oil, ginger → Asian-inspired bowl
  • Wednesday: Olive oil, lemon, herbs → Mediterranean plate
  • Friday: Hot sauce, lime, cumin → Southwest vibes

You’re not eating the same meal three times. You’re eating the same ingredients interpreted three different ways. This is how restaurants work — mise en place components, finished to order in different directions.


Invest in Single-Serve Storage

One of the real pain points of solo cooking is portioning. Get a set of small, single-serve containers. When you cook a batch of something, immediately portion it into individual servings and refrigerate or freeze them. When you’re hungry and unmotivated, you’re not faced with a giant pot of something — you’re faced with a single container of a ready meal.

This turns cooking-for-one from a logistics problem into a convenience.


Embrace the “Almost Meal”

Not every solo meal needs to be cooked. The “almost meal” — an assembly of quality items that requires no heat — is a legitimate dinner.

  • Good cheese + crackers + fruit + a handful of nuts
  • Smoked salmon + capers + cream cheese + a good bread
  • Hummus + pita + sliced vegetables + olives
  • A can of good sardines on toast with butter and lemon

These are fast, satisfying, and require basically no cleanup. Keep the components around and give yourself permission to call them dinner.


🛒 Gear Worth Having

As an Amazon affiliate, I earn with each qualifying purchase. Thank you for supporting TumbleBump.


Related Reads

Posted on TumbleBump PLANS Category

TumbleBump is part of the John D Reinhart content family. Writer, illustrator, videographer, and accidental filmmaker — find the whole story at JohnDReinhart.com.

22014

©2026 John D Reinhart/TumbleBump.com – all rights reserved

I Oversalted It: The Potato and Acid Rescue

Too much salt is one of the most common cooking mistakes and one of the most misunderstood to fix. The potato trick is real (sort of). The acid trick is also real (differently). Here’s what actually works, what’s a myth, and how to rescue an oversalted dish with the tools you have right now.

Oversalting is one of the most common cooking crises, and it’s surrounded by more folklore than almost any other kitchen problem. The advice is plentiful and ranges from genuinely useful to completely ineffective.

Let’s sort it out.


The Honest Assessment First

Before reaching for any fix, be clear about how severe the oversalting is.

Mildly too salty: Just a bit over — food that tastes more seasoned than intended but isn’t actively unpleasant. This is the easiest situation and has the most options.

Significantly oversalted: Noticeably too salty, the kind where the salt is the first and dominant flavor and the food tastes like the ocean. This requires more intervention.

Catastrophically oversalted: The kind where you genuinely cannot eat it without wincing. Some of these situations are beyond rescue and are more honestly handled by cutting losses and starting over or significantly redirecting the dish.


The Potato Method: Partially True

The potato myth says: drop a raw potato into an oversalted soup or stew, let it simmer, remove it, and it absorbs excess salt. This is partially true and partially myth.

What potatoes actually do: A potato added to a soup does absorb some salt — specifically, it absorbs the liquid it sits in, which happens to contain salt. It is not a selective salt sponge; it’s a porous starch that absorbs liquid with whatever’s dissolved in it, including salt, in proportion to what’s in the soup.

What this means practically: A potato will absorb some of the oversalted broth and reduce the total volume of oversalted liquid. But when you remove the potato, you’ve removed a volume of salty soup, which is almost the same as just ladling some of the soup out and discarding it. The concentration hasn’t changed much.

When it actually helps: If you then add liquid to compensate for what the potato absorbed — water, unsalted broth — the concentration is reduced. This works. But you could also just add unsalted liquid directly without the potato intermediate step.


What Actually Works

Dilution (the most reliable fix): Add more of the unsalted components. More water or unsalted broth to a soup. More tomatoes to a sauce. More cream. More vegetables. More beans or lentils. You’re spreading the same amount of salt across a larger volume, which reduces the concentration. This is the most reliable and consistent fix.

Add an acid: A squeeze of lemon juice, a splash of vinegar, a spoonful of yogurt. Acid doesn’t reduce the amount of salt in the dish, but it activates different taste receptors and shifts the overall flavor profile in a way that makes the saltiness feel less dominant. This is not a fix for severely oversalted food, but it’s a genuinely effective tool for mildly oversalted dishes where the balance just needs adjusting.

Add sweetness: A small amount of sugar, honey, or coconut milk provides a counterpoint to salt that reduces the perception of saltiness without changing the actual concentration. Again, a tool for mild oversalting, not a rescue for severe cases.

Add fat: Butter, cream, olive oil, or coconut milk add richness that softens the perception of saltiness and rounds out the flavor. A butter finish to an oversalted pan sauce can bring it back from the edge.

Add more of everything else (bulk up the dish): The most effective fix for stews, soups, and curries is to add more of everything — more vegetables, more protein, more unsalted liquid — transforming what would have been four portions into six, and simultaneously diluting the salt concentration.


By Dish Type

Soups and stews: Add unsalted broth, water, or dairy. Add a potato (which will absorb some liquid; replace with unsalted liquid when you remove it). Add more vegetables.

Pasta sauces: Add more tomatoes, cream, or pasta water. Serve over plain pasta with no added salt in the water.

Meats and fish: The salt is already in; if the exterior is over-seasoned, you can scrape or blot the surface. If cooked through, serve with something acidic (lemon, pickle) or creamy to balance.

Rice and grains: Not fixable after cooking; the salt is absorbed. Use them in a mixed dish where other unsalted components dilute the total saltiness.

Salad dressings: Add more oil, more citrus, more of the acidic component without additional salt.


Prevention: The Build-Slowly Approach

Season in stages throughout cooking, tasting after each addition. Most oversalting happens from a single large addition — a heavy hand with the salt shaker at the end, when the dish has already reduced and concentrated. Salt before and during, not only at the end, and you build control rather than relying on correction.


🛒 Gear Worth Having

As an Amazon affiliate, I earn from each qualifying purchase. Thank you for supporting TumbleBump. 


Related Reads

TumbleBump is part of the John D Reinhart content family. Writer, illustrator, videographer, and accidental filmmaker — find the whole story at JohnDReinhart.com.

Posted on TumbleBump | OOPS Category

26004

©2026 John D Reinhart/TumbleBump.com – all rights reserved

How Baking Actually Works (And Why It’s Not as Scary as Advertised)

Baking has a reputation for being unforgiving. It isn’t — once you understand what’s actually happening in the bowl. Here’s the logic, the terms, and the map.

Baking has a reputation. Precise. Unforgiving. The kind of cooking where one wrong measurement produces a flat, dense, sad result and the recipe shrugs at you from the counter.

The reputation is partly earned and mostly overstated.

Yes, baking is more precise than cooking. Ratios matter. Order sometimes matters.

But baking becomes much easier, and much more fun, once you understand the basic logic of what’s happening in the bowl and in the oven. It stops being mysterious and starts being predictable. Predictable things can be troubleshot. Troubleshot things can be fixed.

Here’s the map. And at the end, a glossary of the terms that recipes throw around without explanation — because nobody should have to Google “what is a bain Marie” in the middle of making a cheesecake.

🌟 Start Here

These best first baking projects have a small margin for error and a fast feedback loop:

  • Banana bread — naturally forgiving, uses the bananas you were about to throw out, tastes good even when slightly imperfect.
  • Chocolate chip cookies — fast turnaround, immediate results, never truly bad.
  • Muffins — simple method, quick bake, endlessly variable once you have the basic ratio.

Save croissants, macarons, and choux pastry for after you have opinions. Those are fine but they require confidence that comes from making the forgiving things first.

Before you rush into the kitchen to start cranking these out, let’s review some of the things that will make your bake a success.

⚖️ Make Accurate Measurements

Where cooking is flexible because heat and flavor compounds are broadly forgiving, baking only works if the ingredients are measured correctly. If those measurements are off, the chemistry doesn’t work and the result tells you about it.

Why flour is the main culprit: Scooping a measuring cup directly into a bag of flour compacts it. You can end up with 20-30% more flour than the recipe intended, which makes the result dense and dry and leaves you blaming yourself when the bag was the problem.

The fix: spoon flour into the measuring cup and level it off with a straight edge. Better yet, use a kitchen scale and measure in grams. Weight is always more accurate than volume for baking. This one change fixes more baking problems than any other single adjustment.

Everything else is considerably more forgiving than the reputation suggests.

🧑‍🔬 What Each Ingredient Is Actually Doing

Every ingredient in a baking recipe has a job. Understanding the job means understanding what goes wrong when something is missing, mis-measured, or substituted.

  • Flour — structure. Flour provides gluten, which forms a network that holds things together. More mixing means more gluten means chewier results. Good for bread. Bad for tender muffins. This is why muffin recipes say “don’t overmix” and mean it.
  • Fat (butter, oil) — tenderness and flavor. Fat coats gluten strands and prevents them from forming tough networks. It’s literally interrupting the structure, which is why fat makes things tender. Cold butter in biscuits creates pockets that steam in the oven and produce flaky layers. Melted butter in brownies produces a denser, fudgier result. Same ingredient, different behavior depending on temperature.
  • Sugar — sweetness, browning, and moisture. Sugar also helps baked goods stay moist longer. Things baked with more sugar go stale slower. This is chemistry, not magic.
  • Eggs — structure, richness, and binding. Yolks add fat and flavor. Whites add structure when beaten — whipped egg whites trap air, which is how soufflés and angel food cakes get their lift. Whole eggs bind everything together.
  • Leaveners — the rise. Baking soda needs an acid to activate and reacts immediately. Baking powder contains its own acid and works in two stages. Yeast is alive, eats sugar, produces carbon dioxide slowly, and requires time and warmth. They are not interchangeable.
  • Liquid — activation. Liquid activates gluten and leaveners. Water produces a leaner result. Milk produces richer. Buttermilk produces tender and tangy. The type of liquid is a flavor and texture decision, not an arbitrary one.

⚠️ The Mistakes Worth Knowing About

  • Opening the oven too early. Cold air rushes in before structure has set. Cakes collapse. Soufflés have opinions about this. Wait until at least 80% of the bake time has passed before opening the door.
  • Not preheating. Baking relies on consistent heat from the moment something enters the oven. A cold oven produces uneven, unpredictable results. Always preheat fully.
  • Cold ingredients when room temperature is specified. Cold butter won’t cream properly. Cold eggs in warm batter can make it seize. Room temperature usually means 30-60 minutes on the counter. Plan for it. The linked post tells you about other recipe sticking-points to watch out for.
  • Overbaking. The single most common mistake. Usually, you stick a toothpick into the cake to see if it’s done. A toothpick with a few moist crumbs means it’s cooked. A completely clean toothpick often means it’s slightly overdone. Try to pull things out of the oven while there are still a few moist crumbs and let the carryover heat inside the baked goods finish the job.
  • Confusing baking soda and baking powder. They are completely different things that happen to live next to each other. Be very careful not to mix them up.

📚 The Baking Terms Glossary

Baking recipes are full of terms that get used without explanation, presumably because the author forgot they weren’t obvious. They are not obvious. Here they are.

  • Blind baking — baking a pie or tart shell before adding the filling. The shell goes into the oven weighted down with parchment and dried beans or pie weights so it doesn’t puff up. It produces a fully cooked crust that won’t go soggy when filled. Recipes sometimes call this par-baking – same thing, different term.
  • Bain Marie — a water bath. The delicate thing you’re making sits in a pan of hot water in the oven, which keeps the heat gentle and even. Cheesecakes use this to prevent cracking. Custards use it to prevent curdling. The French name makes it sound fancier than “pan of water.”
  • Folding — gently combining ingredients without knocking out air. The spatula goes under the batter and over the top, rotating the bowl as you go. Not stirring. Not beating. The goal is incorporation without deflation. Do this when whipped eggs or cream are involved.
  • Creaming — beating butter and sugar together until pale, fluffy, and significantly increased in volume. This builds air into the batter before anything else goes in. It takes longer than you think — usually 3-5 minutes. Under-creamed butter looks less fluffy and produces dense results.
  • Proofing — letting yeast dough rise. The first proof develops flavor and volume. The second proof comes after you’ve shaped the dough and produces the final structure. The dough is ready when it’s roughly doubled in size and a finger poke leaves an indent that springs back slowly.
  • Docking — poking holes in pastry dough with a fork before baking. Steam escapes through the holes instead of puffing the dough into bubbles. Used for pie shells, tart bases, and flatbreads.
  • Tempering — bringing ingredients to similar temperatures before combining. Adding cold eggs to warm melted butter can scramble them. Adding cold milk to hot chocolate mixture can seize it. Tempering means adding a little of the warm mixture to the cold ingredient first, raising its temperature gradually, then combining everything.
  • Par-baking — partially baking something before finishing it later. Pizza dough gets par-baked before the toppings go on. Pie shells get par-baked before filling. Finishes the cooking at the right moment without overcooking the components.
  • Resting — leaving baked goods alone after they come out of the oven. Cakes need time to set before turning out of the pan. Bread needs time for the crumb to stabilize. Cookies finish cooking on the hot pan for a few minutes. Resting is not optional — it’s the last step.

A note: when any of these terms appear in a recipe and you’re not sure what you’re looking at, YouTube has a video of exactly that technique performed by someone who clearly enjoys explaining it. Watch the whole thing once before you start. Baking terms make considerably more sense in motion than on paper.

🛒 The Gear Worth Having

  • Digital kitchen scale — The single most impactful baking purchase. Weight beats volume every time. Fixes the flour problem permanently and makes every recipe more reliable.
  • Stainless steel mixing bowls — The right sizes for almost every recipe. Nesting, stable, and they don’t absorb smells or stains.
  • Nonstick baking sheet — Even heat distribution, durable, and the surface cookies actually want to live on.
  • BraveTart by Stella Parks — The best baking science book written for real people. Parks explains not just what to do but why — which means you understand enough to fix things when they go sideways.

As an Amazon affiliate, I earn from qualifying purchases. Thank you for supporting TumbleBump.

✨ The Short Version

Baking is chemistry with an oven. The ingredients have jobs. The measurements matter more than in cooking but less than the reputation suggests. The terms are learnable. The mistakes are fixable.

Start with the forgiving recipes. Learn the terms. Measure the flour by weight. Don’t open the oven early.

The soggy bottom, the flat cake, the dense muffin — these are not failures. They’re lessons with frosting on top.

📚 Related Reads

TumbleBump is part of the John D Reinhart content family. Writer, illustrator, videographer, and accidental filmmaker — find the whole story at JohnDReinhart.com.

21004

©2026 John D. Reinhart / TumbleBump.com. All rights reserved.