The “Sink is the Finish Line” Philosophy

Kitchen cleanup feels endless because most people are doing it wrong — or rather, doing it all at once at the end, which is the hard way. The Sink is the Finish Line philosophy is a simple mental shift that makes cleanup feel like something that’s already mostly done.

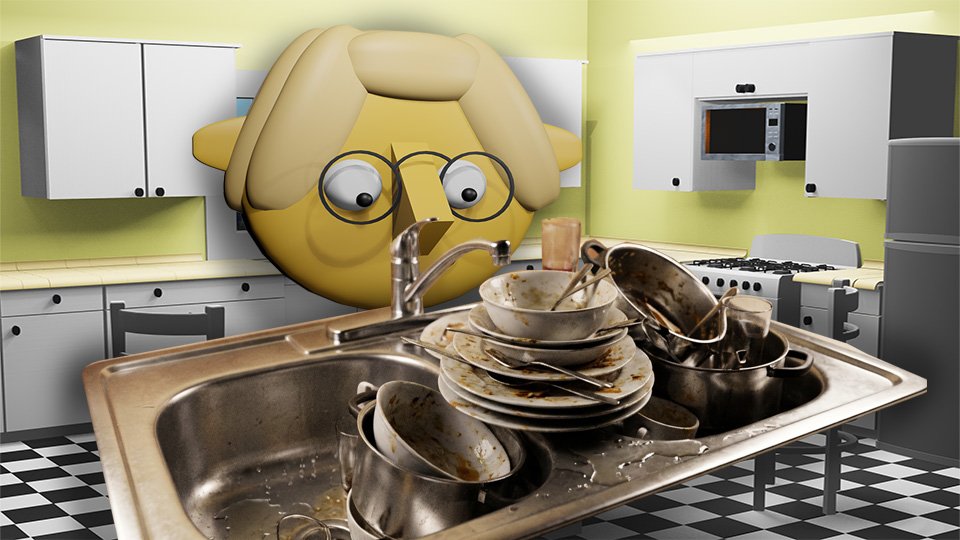
Here is the worst version of kitchen cleanup: you cook a meal, eat the meal, feel pleasantly full, turn around, and behold the disaster zone you’ve created. Every pan is dirty. Every surface has something on it. The sink is a geological formation of dishes. And now you have to deal with all of it while you’re full and tired and would like very much to not be in the kitchen right now.

This version of cleanup is a consequence of a specific approach to cooking — the approach where you do all the cooking, then all the eating, then all the cleaning, in three separate and sequential phases.

The Sink is the Finish Line philosophy changes the sequencing. And it changes everything.


The Philosophy

The Sink is the Finish Line means exactly this: getting something to the sink (or dishwasher) is the goal, not washing it. And you work toward that goal continuously, throughout cooking, rather than all at once at the end.

That’s it. That’s the whole idea.

Every time a bowl or utensil or cutting board is done being used, it goes to the sink immediately. You don’t set it “aside” — you move it. Not washed, necessarily. Just there. At the finish line.

At the end of cooking, the counter is clear. The sink has things in it, but they’re all there. The big job of washing is smaller because the big job of gathering and organizing is already done. And often, many of the things at the sink can be soaked or rinsed while you eat, making post-meal cleanup a 5-minute task instead of a 30-minute one.


Why This Works Psychologically

Cleanup feels overwhelming in proportion to its visual footprint. A counter covered in scattered dishes, bowls, and utensils looks like a project. The same mess concentrated in the sink looks like dishes. Dishes you can deal with.

Moving things to the sink continuously removes the visual overwhelm progressively, throughout the cooking session. You never arrive at the end of the meal facing the full horror of a scattered kitchen. You arrive facing a sink of dishes, which is a known and manageable quantity.


The Four Moves

Move One: The Bowl Drop Every time you finish using a mixing bowl, measuring cup, or prep container, walk it to the sink. Not the counter. The sink.

Move Two: The Utensil Round-Up Keep a narrow vessel (a tall glass, a small pitcher, a jar) near the stove for used utensils — spoons, spatulas, whisks. They collect there instead of all over the counter. At the end of cooking, the vessel goes to the sink.

Move Three: The Cutting Board Transit When you’re done with the cutting board, it goes to the sink or leans against it. The counter where it was sitting is now clear.

Move Four: The Pot and Pan Parking Finished using a pot or pan but it’s still hot? Set it on a cold burner or trivet. When it’s cool enough to handle, it moves to the sink. You don’t wash it mid-cook — you just relocate it out of the workspace.


The Soaking Strategy

Some things don’t need to be washed immediately — they need to soak. The Sink is the Finish Line philosophy pairs naturally with strategic soaking.

Any pan with baked-on or stuck food: fill it with hot water the moment you’re done using it (or done with dinner) and let it soak while you eat. By the time you return, what would have been a 10-minute scrubbing job is a 2-minute one.

Soaking while you eat is one of the most effective free productivity moves in domestic life.


The End-of-Meal State

When you sit down to eat, your kitchen should look like this: stove somewhat present, a few residual things on the counter, the sink containing essentially everything that’s been used. The workspace is mostly clear. The mess is contained.

When you finish eating, you return to a sink full of things that have been soaking, a counter that needs a quick wipe, and a kitchen that’s 80% done already.

The last 20% — washing the dishes, wiping down the stove and counters — takes 10–15 minutes. Not because dishes are easier to wash. Because the organizational work is already done.


The Counter Wipe as Punctuation

The final move of any cooking session is a single, deliberate counter wipe — one pass with a damp cloth or sponge across all surfaces, removing crumbs and spills. This takes 60 seconds and transforms the kitchen from “mostly clean” to “clean.”

The counter wipe is the period at the end of the cooking sentence. Do it every time, and the kitchen never gets away from you.


🛒 Gear Worth Having

As an Amazon affiliate, I earn from each qualifying purchase. Thank you for supporting TumbleBump.


Related Reads


TumbleBump is part of the John D Reinhart content family. Writer, illustrator, videographer, and accidental filmmaker — find the whole story at JohnDReinhart.com.

23013

©2026 John D Reinhart/TumbleBump.com – all rights reserved
Breaking Down the Cutting Board

Your cutting board is one of the hardest-working surfaces in your kitchen — and one of the least understood. Here’s how to clean it properly, why cross-contamination is a real thing (and how to avoid it), and what to do when it starts looking like it lost a fight.

The cutting board is where most of your kitchen work actually happens. It’s where onions get diced, chicken gets sliced, herbs get chopped, and whatever you’re making gets its first real attention.

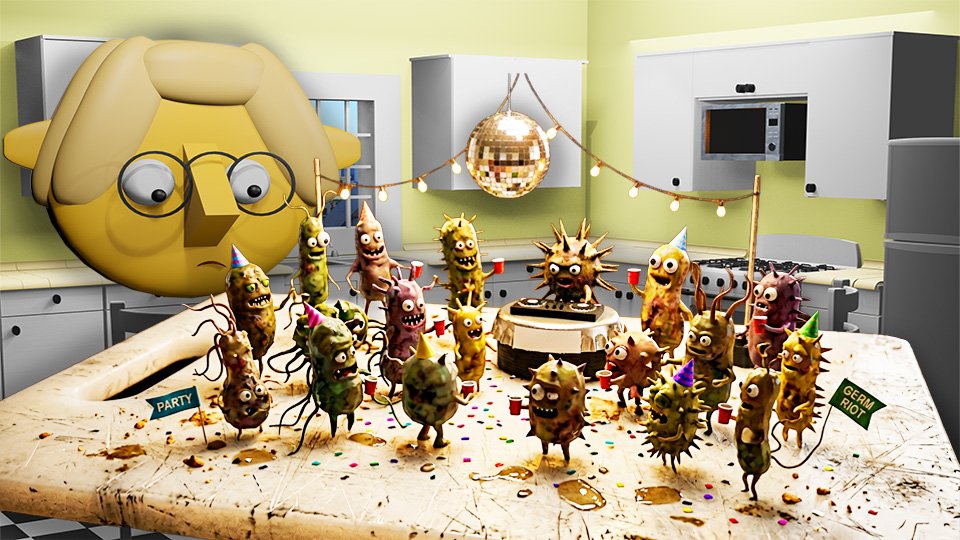
It’s also, consequently, where a lot of things accumulate that you’d rather not think about.

The good news: cutting board cleaning is not complicated. It just requires knowing a few things that nobody thinks to mention until something goes wrong.


The Two Types of Cutting Board, and Why It Matters

Wood and bamboo boards are porous. They absorb liquids, which means they can harbor bacteria in their fibers if not cleaned properly — but they also self-sanitize over time due to the natural antimicrobial properties of wood. They should never go in the dishwasher (they’ll warp, crack, and split). They need occasional oiling to stay in good condition.

Plastic boards are technically easier to sanitize and dishwasher-safe, but they develop knife grooves over time, and those grooves become excellent hiding places for bacteria that are very difficult to remove even with scrubbing. A heavily grooved plastic board is arguably less hygienic than a well-maintained wood one.

The practical conclusion: both work fine if properly maintained. Know which type you have, because the care is different.


The Basic Wash: After Every Use

For everyday cleaning after non-raw-meat use:

  1. Scrape off any food debris with a bench scraper or the back of your knife.
  2. Wash with hot, soapy water — both sides, not just the top.
  3. Rinse thoroughly.
  4. Stand upright or prop on its edge to air dry. Don’t lay it flat — water pools underneath and promotes warping and mold.

That’s it. Two sides, both washed, stood up to dry.

Why both sides? If only one side gets wet consistently, the board warps as one side absorbs moisture and the other doesn’t. A warped board rocks on the counter. A rocking board is an unstable board. Wash both sides.


After Raw Meat, Poultry, or Fish: Step It Up

Raw proteins require more than soap and water. After cutting raw meat on any board:

Option A (plastic or any board): Wash with hot soapy water, then sanitize. A simple sanitizing solution: 1 tablespoon of liquid chlorine bleach diluted in 1 gallon of water. Apply, let sit 2–3 minutes, rinse thoroughly, air dry.

Option B (any board): A spray of undiluted white vinegar followed by a spray of 3% hydrogen peroxide (standard drugstore variety). These work in sequence, not combined. Let each sit briefly, rinse. This is effective and leaves no chemical aftertaste.

The cardinal rule: Raw chicken gets its own board, or at minimum gets the full sanitizing treatment before the board touches anything else. This is the one non-negotiable in cutting board hygiene.


Deodorizing: When It Smells Like What You Cut

Onion, garlic, fish — these aromas linger in wood boards long after washing. The fix:

Salt and lemon: Sprinkle coarse salt generously over the board. Cut a lemon in half and use it to scrub the salt into the surface, squeezing as you go. Let sit 5–10 minutes, scrape off, rinse. The salt abrades, the lemon acid neutralizes odors and brightens the wood. This also works beautifully as a periodic cleaning treatment even without odor issues.

Baking soda paste: Make a paste with baking soda and a little water, scrub, let sit, rinse. Effective and gentle.


Deep Cleaning and Stain Removal

For stubborn stains (beet, berry, turmeric — the chromatic troublemakers):

A paste of baking soda and hydrogen peroxide, applied to the stain, left for 15–20 minutes, then scrubbed and rinsed. For wood boards, this works better than bleach, which can dry out and crack the wood.

For plastic boards with heavy staining: the dishwasher (if labeled dishwasher-safe) plus a pre-treatment of hydrogen peroxide paste.


Oiling Wood Boards: The Maintenance Nobody Does

This is the most skipped cutting board task and one of the most important for wood board longevity.

About once a month (or whenever the wood looks dry or pale), apply a liberal coat of food-grade mineral oil. Rub it in with a cloth in the direction of the grain. Let it soak in for a few hours or overnight. Wipe off the excess.

This prevents drying, cracking, and warping. It makes the board more resistant to staining. And it extends the board’s life from “a few years” to “potentially decades.”

Use food-grade mineral oil specifically. Olive oil, vegetable oil, and other culinary oils will go rancid inside the wood and eventually make your board smell sour. Mineral oil doesn’t. It’s cheap and available at any pharmacy.


When to Replace It

  • Plastic boards: When the knife grooves are deep and numerous. If you can’t get them clean-looking after washing, it’s time.
  • Wood boards: Almost never, if properly maintained. Serious cracks or mold that won’t budge despite treatment are the only real reasons.
  • Bamboo boards: Similar to wood, but bamboo is harder and cracks more readily if dried out. Oil them, and they’ll last.

🛒 Gear Worth Having

As an Amazon affiliate, I earn from each qualified purchase. Thank you for supporting TumbleBump.


Related Reads


TumbleBump is part of the John D Reinhart content family. Writer, illustrator, videographer, and accidental filmmaker — find the whole story at JohnDReinhart.com.

23015

©2026 John D Reinhart/TumbleBump.com – all rights reserved
Why Dish Soap Is Different

Dish soap isn’t just soap that happens to be by the sink. It’s a specifically engineered product for a specific set of problems — grease, food proteins, and bacteria — and understanding what it’s actually doing explains why brand matters, concentration matters, and why you can’t just use whatever’s handy.

Soap is soap, right? Cleaning agent, add water, things get clean?

Not exactly. Dish soap is a distinct product category, specifically engineered for the particular challenges of kitchen cleaning: emulsifying cooking fats, breaking down proteins, suspending food particles, cutting through the grease residue that coats every pan and dish after cooking. Regular soap doesn’t do all of this as effectively.

Here’s what’s actually in that squeeze bottle, why it works, and what the real differences between products actually mean.


What Dish Soap Is Made Of

The core of every dish soap is a surfactant blend — molecules with a split personality, one end water-loving (hydrophilic), one end water-hating (hydrophobic). These are the molecules that make oil and water compatible, as described in Chemistry in the Sink.

But dish soaps also contain:

Additional surfactants: Most modern dish soaps blend multiple types — anionic surfactants for grease cutting, nonionic surfactants for gentleness, amphoteric surfactants for foam and skin compatibility.

Enzymes (in some formulas): Specific enzymes target specific food residues. Proteases break down proteins (egg, meat residue). Amylases break down starches. Lipases break down fats. Enzyme-containing dish soaps are more effective on food residue but also more expensive.

pH adjusters: Most dish soaps are mildly alkaline, which helps saponify (break down) fats. The alkalinity is gentle enough for skin with prolonged exposure, unlike household cleaners that are more aggressively alkaline.

Chelating agents: These bind hard water minerals (calcium, magnesium) that would otherwise interfere with the surfactant’s performance, making soap less effective in hard water areas.

Foam boosters: Because consumers associate foam with cleaning power. This is partly psychological — foam doesn’t clean anything directly — but foam does help distribute soap across a surface and provides useful visual feedback about soap concentration.

Preservatives, colorants, fragrances: For shelf stability and aesthetics.


Why Dish Soap Cuts Grease When Regular Soap Doesn’t (As Well)

Cooking grease is a particularly challenging cleaning target. It’s not a thin layer — it polymerizes with heat into a partially solidified coating that adheres strongly to surfaces. Regular soap handles light oils adequately. Dish soap is formulated with higher concentrations of the specific surfactants that work on cooking fats.

Dawn’s famous performance in cleaning birds after oil spills is a real demonstration of its grease-cutting capacity — the formulation was designed around high-performance fat emulsification, and it genuinely outperforms most competitors and all non-dish soaps at this.


Does Brand Actually Matter?

Yes, meaningfully so — for grease cutting.

In independent testing, Dawn Platinum consistently performs at the top for grease-cutting efficiency. This translates to less soap needed per dish, fewer passes to clean greasy pans, and a pan that actually feels clean (not slick) after rinsing.

Cheaper dish soaps often have lower surfactant concentrations and more water filler. You use more product per wash. Over time, the cost difference narrows or inverts.

That said: for lightly soiled dishes, any dish soap works fine. The brand difference is most pronounced on heavy cooking residue — greasy pans, baked-on food, protein residue.


Concentration: The Number Nobody Looks At

Dish soaps vary widely in concentration. A highly concentrated product like Dawn Platinum requires less per wash than a standard-concentration product. The bottle may cost more per ounce but produce far more washes per bottle.

The practical advice: if you’re cost-comparing dish soaps, compare cost per wash rather than cost per ounce. The concentrated products often win.


Hand Dish Soap vs. Dishwasher Detergent: Not Interchangeable

This is worth stating clearly: dish soap (the kind by the sink for hand washing) is not interchangeable with dishwasher detergent.

Hand dish soap is designed to foam heavily — the foam is part of how it works and how it signals to the user that soap is present. Put hand dish soap in a dishwasher and you will have a foam situation in your kitchen. The dishwasher will foam uncontrollably and overflow. This is a genuine mess.

Dishwasher detergent is formulated to clean without foaming, at the temperatures and water pressures specific to dishwasher cycles. It’s a completely different product.


Antibacterial Dish Soap: Worth It?

Antibacterial dish soaps contain triclosan or other antimicrobial agents that kill bacteria in addition to removing them. The practical value of this is debated.

For most dish washing, physically removing food, grease, and bacteria with regular surfactant-based soap and rinsing thoroughly accomplishes the same safety outcome as killing bacteria. You don’t need to kill the bacteria if you’ve removed them from the surface.

Antibacterial soap has a role for surfaces that need sanitizing (cutting boards after raw meat) but the FDA has raised questions about the long-term effects of triclosan and its contribution to antibiotic resistance. Regular dish soap is the default; antibacterial soap is a specific tool for specific situations.


The One Dish Soap Rule

Whatever dish soap you use, dilute it less than you think you need to. A common habit is squeezing soap directly onto every dish, producing far more soap than necessary and requiring more rinsing. Instead: a squirt into hot water creates a sudsy washing solution you dip dishes into, and stretches your soap much further.

Alternatively, use a soap dispensing dish brush — the reservoir releases exactly the right amount of soap per brush of a surface.


🛒 Gear Worth Having

As an Amazon affiliate, I earn from qualifying purchases. Thank you for supporting TumbleBump.


Related Reads


Posted on TumbleBump | CLEANS Category

TumbleBump is part of the John D. Reinhart content family. Writer, illustrator, videographer, and accidental filmmaker — find the whole story at JohnDReinhart.com.

23000

©2026 John D Reinhart/TumbleBump.com – all rights reserved
Does This Go in the Dishwasher?

The dishwasher is one of the great conveniences of modern life — until it ruins your good knife, clouds your wine glasses, or warps your wooden spoon. Here’s the definitive yes/no list, with explanations you can actually use.

The dishwasher is a remarkable machine that cleans things so efficiently that it occasionally cleans the finish right off them, warps them, rusts them, or leaves them permanently cloudy.

The question “can I put this in the dishwasher?” is one of the most frequently asked in domestic life, and the answer is almost always either “yes, obviously” or “absolutely not, and here’s what will happen if you do.”

Here’s the full guide.


Definitive YES: These Go in the Dishwasher

Plates, bowls, and mugs: Yes. This is what the dishwasher was made for. Ceramic, porcelain, and glass dinnerware is entirely dishwasher safe, with one exception: hand-painted or gold-rimmed pieces. The heat and detergent fade hand-painted designs and strip metallic accents over time. Everyday dishes: dishwasher. Heirloom china: hand wash.

Glass bakeware (Pyrex, etc.): Yes. Tempered glass bakeware is dishwasher safe. Just make sure pieces aren’t clanking against each other — chipping happens when glass items knock together in the cycle.

Stainless steel utensils: Yes. Forks, spoons, most spatulas, ladles, and stainless steel whisks are fine. Caveat: stainless steel can develop spots in the dishwasher — a rinse aid helps prevent this.

Plastic containers and lids (if dishwasher-safe labeled): Top rack only. Lower rack heat can warp plastic. Look for the dishwasher-safe symbol — wavy lines in a box — on the bottom.

Silicone utensils and bakeware: Yes, generally. Silicone is heat-stable and dishwasher-safe. Some silicone develops a greasy film in the dishwasher that requires extra attention — if this happens, a hand wash with hot soapy water or a rinse with baking soda cuts it.

Dishwasher-safe non-stick pans (sometimes): Some manufacturers label their non-stick cookware as dishwasher-safe. If yours says so, it’s technically permissible. But: even “dishwasher-safe” non-stick ages faster in the dishwasher than it does with hand washing. The detergent and heat are hard on non-stick coatings over time. Hand washing extends the life of non-stick significantly. Your call.


Definitive NO: These Never Go in the Dishwasher

Good kitchen knives: This is the cardinal rule. The dishwasher damages knives in three ways: the heat can loosen handles, the detergent is harsh on the blade steel and edge, and the movement of the cycle causes knives to knock against other items, dulling and chipping the edge. A good knife hand-washed after every use will last decades. A good knife run through the dishwasher will deteriorate perceptibly within months. This rule applies to all quality knives — chef’s knives, paring knives, bread knives.

Cast iron: Strips seasoning, causes rust, generally catastrophic for the pan. If you use the dishwasher for cast iron, you will experience the full re-seasoning protocol on a regular basis. Don’t.

Carbon steel pans: Same as cast iron. Rust immediately.

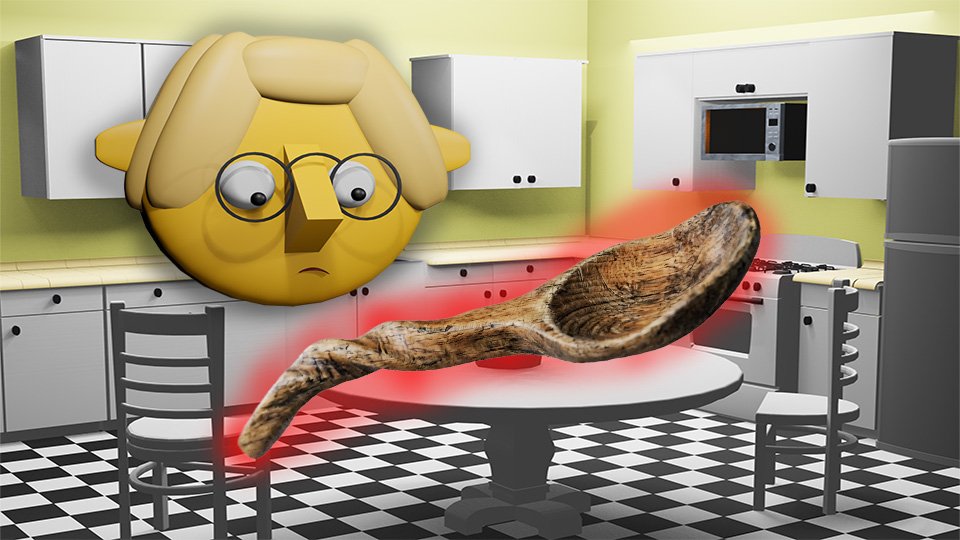
Wooden items (spoons, cutting boards, handles): The dishwasher causes wood to expand, crack, warp, and split. A wooden spoon in the dishwasher is a wooden spoon that’s on its way to the trash. Hand wash and dry immediately.

Copper cookware: The dishwasher strips copper’s finish and causes discoloration. Hand wash with gentle soap, dry immediately.

Aluminum cookware (uncoated): Dishwasher detergent reacts with uncoated aluminum and causes it to oxidize and discolor — a dark, dull, permanent effect.

Crystal glassware: The harsh detergent etches crystal over time, producing permanent cloudiness. Hand wash.

Hand-painted or gold-rimmed dishes: The detergent fades paint and strips metallic trim. Hand wash.

Insulated travel mugs and bottles: Most aren’t dishwasher-safe, and even those that are can develop leaks around the vacuum seal over time from repeated heat exposure. Check the label; when in doubt, hand wash.

Non-stick pans (even if labeled dishwasher-safe): See above. Technically permissible, practically inadvisable for longevity.


The “It Depends” Zone

Wine glasses: Standard wine glasses can go in the dishwasher (top rack, with plenty of space). Delicate crystal, or glasses with a very thin rim, are better hand-washed to prevent chipping.

Blender jars: Many are dishwasher-safe. Check your model. The blade assembly is usually better hand-washed — dishwasher cycles can dull the blades.

Instant Pot and slow cooker inserts: The insert (the pot itself) is usually dishwasher-safe; the lid and sealing ring often are too. The base with the electrical components is never dishwasher-safe.


The Cloudiness Problem

White film or cloudiness on glasses and dishes after the dishwasher is caused by hard water — mineral deposits left behind as water evaporates. This is not damage to the glass; it’s mineral buildup on the surface.

Fix it: rinse the affected items with white vinegar, or soak briefly in a vinegar-water solution. The acid dissolves the mineral deposits.

Prevent it: rinse aid in the dishwasher dramatically reduces spotting and cloudiness. Keep the rinse aid reservoir full.


🛒 Gear Worth Having

As an Amazon affiliate, I earn from each qualified purchase. Thank you for supporting TumbleBump.


Related Reads


Posted on TumbleBump | CLEANS Category

TumbleBump is part of the John D Reinhart content family. Writer, illustrator, videographer, and accidental filmmaker — find the whole story at JohnDReinhart.com.

23003

©2026 John D Reinhart/TumbleBump.com – all rights reserved
Chemistry in the Sink: Why Hot Water Isn’t Enough

Hot water is great. Hot water plus soap is much better. But why? And when is soap not enough either? A brief, friendly tour of what’s actually happening in your sink — and why the right cleaner for the right job matters more than temperature alone.

Hot water feels like it should be cleaning things. It’s hot. Bacteria don’t like heat. It must be doing something.

And it is doing something — just not as much as you might think, and not for the reasons most people assume.

Here’s what’s actually happening in your sink, and why the combination of hot water, soap, and the right chemistry beats hot water alone by a wide margin.


What Hot Water Actually Does

Hot water helps in several ways:

It increases solubility. Many substances dissolve more readily in hot water than cold — sugars, some proteins, starch residues. Hot water softens and loosens food residue that cold water would leave sitting there.

It speeds up chemical reactions. Every cleaning reaction — whether soap, baking soda, vinegar, or a commercial cleaner — works faster at higher temperatures. Heat is a catalyst.

It has some antimicrobial effect. Above 140°F (60°C), hot water starts killing some bacteria. However: the hot water from most home faucets maxes out around 120°F, which is well below the threshold for reliable sanitization. Your hot water is cleaning your dishes, not sanitizing them.

It helps rinse. Lower viscosity means water at higher temperatures flows off surfaces and carries debris more efficiently than cold water.

What hot water cannot do: break down grease and oil. Oil and water famously don’t mix. No amount of heat changes this fundamental chemistry.


Why Grease Needs Soap

Grease is hydrophobic — it repels water. A greasy pan rinsed with even very hot water comes out still greasy, because the grease and water simply don’t interact.

Dish soap solves this through a molecule called a surfactant. Surfactant molecules have a dual nature: one end is hydrophilic (water-loving) and one end is hydrophobic (water-hating, grease-loving). When you add soap to greasy water, these molecules orient themselves between the water and the grease — the greasy end latches onto the fat, the watery end stays in the water. As you rinse, the grease is encapsulated in tiny spheres called micelles and rinses away with the water.

This is why soap works and hot water alone doesn’t for grease. It’s not about temperature. It’s about molecular chemistry.


The Cleaning Toolkit: What Else to Know

Baking soda (sodium bicarbonate): A mild abrasive and a base. Useful for physical scrubbing without scratching, and for neutralizing acids. Good for scrubbing food residue, baked-on grease, and deodorizing. Not a sanitizer.

White vinegar (acetic acid): An acid that dissolves mineral deposits (hard water scale, calcium buildup), cuts through some greases, and has mild antimicrobial properties. The classic pair with baking soda produces a fizzing reaction that’s more dramatic than functional — the neutralization is the reaction, and neutralizing both the acid and the base leaves you with mostly water and sodium acetate. The fizz looks impressive; the chemistry is somewhat self-defeating. Use them separately for best results.

Hydrogen peroxide (3%, drugstore variety): An oxidizer with real antimicrobial properties. Used after soap washing to sanitize surfaces. It breaks down into water and oxygen — no harmful residue. Excellent for cutting boards and surfaces that touched raw meat.

Bleach (sodium hypochlorite): The heavy hitter. One tablespoon per gallon of water creates an effective sanitizing solution for surfaces, cutting boards, and anything that needs actual disinfection. Not a cleaner for food residue — it’s a sanitizer to use after cleaning. Rinse after application.


The Cleaning vs. Sanitizing Distinction

These two words are often used interchangeably and mean different things.

Cleaning removes dirt, food, grease, and visible residue. Soap and water clean.

Sanitizing reduces microbial populations (bacteria, viruses) to safe levels. Bleach solution, hydrogen peroxide, and certain commercial sanitizers sanitize.

For most home kitchen use, cleaning is enough. You don’t need to sanitize every dish after every meal. You do want to sanitize surfaces and boards that have contacted raw meat, fish, or poultry, and anything that will touch food without further cooking.

The protocol: clean first, sanitize after. Sanitizing something with visible food on it is much less effective — the food residue protects microbes from the sanitizer.


The Temperature Sweet Spot

For washing dishes: as hot as is comfortable for your hands. Hotter is more effective at loosening and removing food residue, but you’re working with your hands in this water. The soap is doing the heavy lifting regardless.

For rinsing: hot works, but cold rinse is perfectly adequate. The soap has already done its job.

For sanitizing: follow the product directions. Most sanitizing solutions work at room temperature.


🛒 Gear Worth Having

As an Amazon affiliate, I earn from qualifying purchases. Thank you for supporting TumbleBump.


Recommended Reads


Posted on TumbleBump | CLEANS Category

TumbleBump is part of the John D Reinhart content family. Writer, illustrator, videographer, and accidental filmmaker — find the whole story at JohnDReinhart.com.

23008

©2026 John D Reinhart/TumbleBump.com – all rights reserved
How to Wash That Cast Iron Skillet

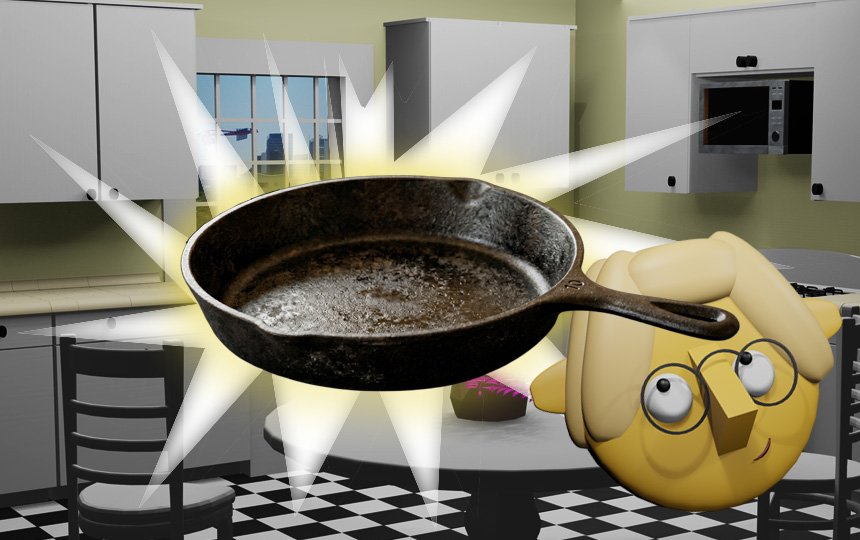
Everyone knows cast iron is “different” to clean — but the actual step-by-step gets surprisingly vague. Here’s the complete, practical washing routine for cast iron after every kind of cooking situation, from a simple egg to a baked-on disaster.

Cast iron’s reputation for being finicky is earned but overstated. Yes, it needs different treatment from your stainless and non-stick pans. No, it’s not so delicate that a wrong move ruins everything.

The Post on Cast Iron: The Exception to the Rule covered the principles. This one is the practical playbook — specifically what to do with the pan in your hand, after each type of cooking situation you’ll actually encounter.


After Light Cooking (Eggs, Sautéed Vegetables, Most Everyday Use)

Time required: 2–3 minutes.

  1. While the pan is still warm (not hot enough to steam you, but not cold), use a folded paper towel or dish cloth to wipe out any food residue.
  2. If the food debris comes out cleanly: you’re done. Dry completely over low heat for 1–2 minutes on the stove, apply a whisper-thin coat of neutral oil, store.
  3. If there’s light residue remaining: rinse with hot water. Wipe again with a cloth or the salt method below if needed. Back to the stove to dry. Oil. Store.

The key here: Light use doesn’t need more than light cleaning. The instinct to “really wash” a pan that barely got dirty is counterproductive with cast iron.


After Cooking Proteins (Chicken, Steak, Fish)

Time required: 3–5 minutes.

Proteins leave more fond (browned residue) and sometimes some stuck bits.

  1. While the pan is still warm or over low heat, add ¼ cup of water. It will sizzle. This is the cleaning deglaze — the steam loosens stuck material. Scrape with a wooden spoon or spatula.
  2. Pour the liquid out.
  3. If there’s still residue: use the chain mail scrubber or the salt method. Sprinkle coarse salt into the pan, scrub with a paper towel using some pressure.
  4. Rinse with hot water.
  5. Dry on the stove over low heat until completely dry.
  6. Apply a very thin layer of neutral oil (flaxseed, canola, vegetable) while still warm. Wipe off any visible excess — you want a sheen, not a coating.
  7. Store.

After Cooking Acidic Foods (Tomatoes, Wine-Based Sauces, Citrus)

Time required: 4–5 minutes, plus a note.

Acidic foods can interact with cast iron’s seasoning and strip it over time, and can also leach small amounts of iron into the food (generally not harmful, but worth knowing). Cooking acidic foods briefly in cast iron is usually fine. Extended simmering of tomato sauce for 45 minutes — less so.

After cooking with acid:

  1. Clean as normal — deglaze, rinse, salt-scrub if needed.
  2. Dry completely on the stove.
  3. Apply oil generously this time — two light coats instead of one whisper-coat. You’ve earned the extra seasoning step.

If the pan looks dull, stripped, or less non-stick than usual after an acidic cook, do a mini re-seasoning: heat the pan over medium heat until very hot, apply a thin layer of oil, let it smoke briefly, wipe out excess. This restores the seasoning.


After Baking (Cornbread, Frittata, Oven Use)

Cast iron handles oven use beautifully — the whole pan including the handle goes in (assuming no rubber or wooden handles). After oven cooking:

  1. Let the pan cool enough to handle without oven mitts.
  2. Use a stiff spatula or chain mail scrubber to remove any stuck baked goods or egg.
  3. Rinse with hot water. If needed, brief soak of 5 minutes (not longer) to loosen baked-on material.
  4. Dry on the stove over low heat.
  5. Oil and store.

After a Real Mess (Burned-On, Stuck Hard, Genuine Disaster)

Time required: 10–15 minutes.

  1. Fill the pan with water and put it on the stove over medium heat. Bring to a simmer. The simmering water does the deglazing and soaking work simultaneously — very effective for stubborn material.
  2. With the water still in the pan (carefully — it’s hot), scrape with a stiff spatula. Most material releases.
  3. Pour out the water. If there’s still residue, sprinkle coarse salt and scrub with a paper towel while the pan is warm.
  4. For truly extreme situations only: a brief, targeted scrub with steel wool on the affected area. This will remove the seasoning from that spot. That’s fine — you’ll re-season.
  5. Rinse, dry completely on the stove, apply oil, and consider a re-seasoning pass if needed (see the cast iron care post for the full re-seasoning protocol).

The Three Never-Dos (Repeated Because They Bear Repeating)

  1. Never soak. Even a 20-minute soak can start rust. In, clean, dry, out.
  2. Never put in the dishwasher. It will strip the seasoning completely and invite rust. Every time.
  3. Never store wet. If you skip the stovetop drying step and put the pan away with any moisture, you will find rust. Dry. Every time.

The One Rule That Beats All Others

Dry it on the stove after every wash. This single step prevents the one thing that actually damages cast iron: rust. You can do almost everything else imperfectly, and a well-dried, lightly oiled cast iron pan will survive and thrive.


🛒 Gear Worth Having


Recommended Reads


Posted on TumbleBump | CLEANS Category

TumbleBump is part of the John D Reinhart content family. Writer, illustrator, videographer, and accidental filmmaker — find the whole story at JohnDReinhart.com.

23004

©2026 John D Reinhart/TumbleBump.com – all rights reserved
Cast Iron: The Exception to the Rule

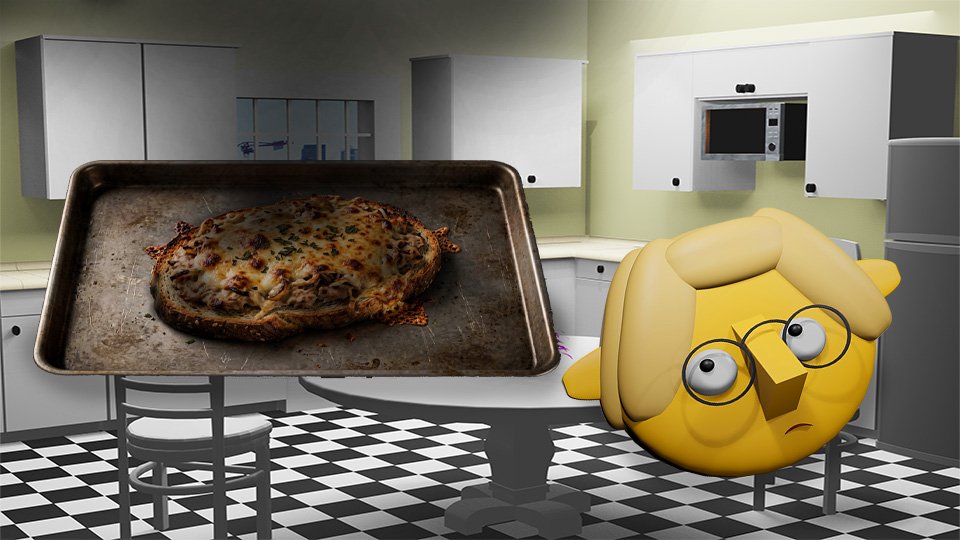
Cast iron plays by its own rules — no soap (mostly), no soaking (ever), no dishwasher (absolutely not). But it’s not as fussy as its reputation suggests. Here’s the actual cleaning protocol that keeps cast iron in fighting shape for decades.

Cast iron is the one piece of cookware that gets a completely different set of care instructions from everything else in your kitchen. And people treat those instructions with a mixture of reverence and anxiety that is, frankly, a little more intense than the situation requires.

Yes, cast iron is different. Yes, it has specific needs. No, it is not fragile. It is, in fact, one of the most durable things you own, and it will survive a reasonable amount of imperfect cleaning without complaint.

Here’s what it actually needs, what it absolutely cannot tolerate, and how to handle the full range of cleaning situations you’ll encounter.


First: What “Seasoning” Actually Is

Cast iron’s surface — the dark, somewhat nonstick layer that develops over time — is called seasoning. It is not rust. It is not dirt. It is polymerized fat: layers of oil that have been heated past their smoke point and bonded chemically to the iron, forming a durable, low-stick coating.

This is why the cleaning rules for cast iron are different. Every cleaning instruction below exists to protect this layer.


The Standard Clean: After Most Uses

For everyday cooking (eggs, sautéed vegetables, most stovetop work):

  1. While the pan is still warm (not blazing hot, but warm — never plunge a hot cast iron into cold water), wipe it out with a folded paper towel or dish cloth. Get out the food debris.
  2. If needed, rinse with hot water. That’s it. Rinse, not soak. In and out.
  3. Return the pan to the stove over low heat for 1–2 minutes to fully evaporate any water. Water left on cast iron causes rust. This step takes seconds and prevents the only real threat.
  4. While still warm, apply a very thin layer of neutral oil (flaxseed oil, vegetable oil, canola — not olive oil, which has too low a smoke point for this) to the cooking surface with a paper towel. Wipe off any excess — you want a ghost of oil, not a coating.
  5. Store in a dry place.

That’s the whole routine. It takes about three minutes and becomes automatic quickly.


The Soap Question: Let’s Settle This

Old lye-based soaps were harsh enough to strip seasoning from cast iron with a single wash — hence the “never use soap” rule that has been passed down through generations like a kitchen commandment.

Modern dish soap (Dawn, Palmolive, etc.) is not lye soap. A small amount of mild dish soap, used occasionally, will not ruin your seasoning. If there’s something stuck or if you’ve cooked something strongly flavored that you’d rather rinse out, a brief wash with a drop of soap, rinsed thoroughly, followed by the dry-and-oil step, is perfectly fine.

What you cannot do: soak it in soapy water. Prolonged exposure breaks down seasoning and invites rust. Brief wash, yes. Soak, never.


For Stuck-On Food

Method One: Salt and a paper towel. Coarse kosher salt is a natural abrasive that won’t damage seasoning. Sprinkle a generous amount into the still-warm (or room temperature) pan and scrub with a folded paper towel. The salt grabs the stuck bits physically. Rinse, dry, oil.

Method Two: Hot water and a scraper. Add a little hot water to the warm pan on the stove, let it loosen the stuck material (30 seconds over low heat), and scrape with a flat wooden or silicone spatula or a chain mail scrubber. Rinse, dry, oil.

Method Three: Chain mail scrubber. Specifically designed for cast iron. Stainless steel rings that clean off stuck food without damaging seasoning. Works better than any other physical scrubber for cast iron. A genuine revelation if you cook with cast iron regularly.


What to Never Do

Dishwasher: The sustained heat, harsh detergent, and prolonged water exposure will strip your seasoning completely and invite rust. Cast iron and dishwashers are incompatible. Full stop.

Soaking in water: Even 30 minutes of soaking can start rust formation. Cast iron and standing water are enemies.

Abrasive steel wool (uncoated): Will remove seasoning and potentially scratch the cooking surface. Use chain mail or salt instead.

Storing wet: Always dry completely before storing. A minute over heat, then a wipe of oil.


What If It Rusts?

Cast iron that develops surface rust has not been destroyed. It has been temporarily neglected.

To restore it: scrub the rust off with steel wool (yes, in this case, steel wool is correct — you’re removing rust, not seasoning, because the seasoning is already gone), wash, dry completely on the stove, then re-season.

Re-seasoning: Apply a thin layer of neutral oil all over the pan — inside, outside, handle. Put it upside down in a 450–500°F oven for an hour (put foil on the rack below to catch any drips). Turn the oven off and let the pan cool inside. Repeat this process 2–3 times for a solid new layer of seasoning.


The Truth About Cast Iron Care

The people who treat cast iron like a family heirloom requiring elaborate rituals are not wrong — it can be a family heirloom, and it does reward care. But it’s also fundamentally a piece of iron, and iron is tough. If you forget the oil step sometimes, it’s fine. If you give it a brief soap wash once in a while, it’s fine. If it gets a small rust spot, you can fix it in an afternoon.

Respect the basic rules — no soaking, dry before storing, oil occasionally — and your cast iron will outlast every other piece of cookware you own.


🛒 Gear Worth Having


Recommended Reads


Posted on TumbleBump | CLEANS Category

TumbleBump is part of the John D Reinhart content family. Writer, illustrator, videographer, and accidental filmmaker — find the whole story at JohnDReinhart.com.

23012

©2026 John D Reinhart/TumbleBump.com – all rights reserved
What to Do When It’s Really Baked On

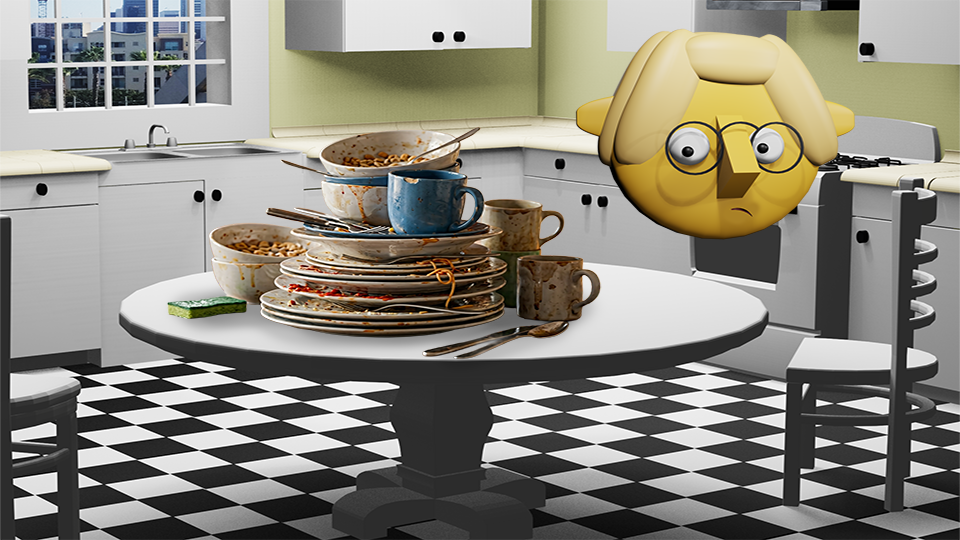
You forgot the pan on the stove. Or the oven decided that “450 degrees for 30 minutes” was also an instruction for the baking sheet. Now something is very, very stuck. Here’s the full escalating response plan — from gentle persuasion to serious intervention.

You forgot the pan on the stove. Or the oven decided that “450 degrees for 30 minutes” was also an instruction for the baking sheet. Now something is very, very stuck.

The baked-on pan has defeated better people than you. It’s okay. It happens to everyone who cooks with any regularity, and the good news is that virtually any baked-on situation is recoverable with the right technique at the right escalation level.

The key is knowing that different levels of baked-on require different responses — and that escalating too quickly (going straight for steel wool and aggression) often damages the pan, while starting gently and working up solves the problem without casualties.

Here is the escalating response plan.


Level One: Soak and Wait (For Most Situations)

Before doing anything else, try patience.

Fill the pan with hot water (boiling if you can get it there safely). Add a small squirt of dish soap. Let it soak for at least 30 minutes, ideally 2–4 hours, ideally overnight for severe cases.

The water rehydrates the baked-on material, which initially stuck because it dried and hardened. Given enough time and hot water, most baked-on food will loosen to the point where a standard scrubber or wooden spatula removes it with minimal effort.

After soaking, try scraping and scrubbing before reaching for anything more aggressive. You’ll be surprised how often this is enough.

What it works on: Most food residue, including egg, pasta, starches, caramelized sugars. Less effective on pure oil/fat charring.


Level Two: The Boiling Water Method

When a soak wasn’t enough, apply heat.

Fill the pan with water (about an inch) and put it back on the stove over medium-high heat. Let it boil vigorously for 5–10 minutes. As it boils, use a flat wooden spoon or stiff spatula to scrape the bottom while the water is simmering.

The combination of sustained heat and the mechanical action of scraping in boiling water releases material that cold soaking couldn’t. This method works remarkably well for the stuck layer that survived overnight soaking.

Pour out the water carefully, then scrub what remains.

What it works on: Stubborn food residue, fond that survived soaking, stuck starches and proteins.


Level Three: Baking Soda and Dish Soap

For pans that still have stuck material after levels one and two:

Method: Return a small amount of water to the pan (enough to cover the bottom). Add 2–3 tablespoons of baking soda and a squirt of dish soap. Bring to a boil on the stove. Let it simmer for 10 minutes. The baking soda is mildly alkaline and helps break down greasy, carbonized material that soap alone can’t touch. Scrape and scrub while still warm.

This is the go-to for stainless steel pans with seriously stuck material. It’s also excellent for enamel-coated pots (Le Creuset, etc.) where you don’t want abrasive scrubbing.


Level Four: Barkeepers Friend

When the baking soda method isn’t enough for stainless or stainless-clad pans:

Wet the pan surface. Apply Barkeepers Friend powder, either dry or as a paste with a little water. Let it sit for 2–5 minutes. Scrub with a non-scratch pad.

The oxalic acid in Barkeepers Friend dissolves mineral-based and carbonized residue chemically, while the mild abrasive handles what the chemistry didn’t reach. This combination solves most stainless steel baked-on situations that survive everything else.

Do not use on: Non-stick, cast iron, aluminum.


Level Five: Dryer Sheet Soak (The Unexpected One)

This sounds implausible and works reliably. Place a dryer sheet in the pan, fill with hot water, let it soak overnight.

The fabric softening agents in the dryer sheet (similar to surfactants) penetrate and loosen baked-on food in a way that plain water can’t. By morning, what was immovably stuck wipes away.

Use this for any pan where you want a no-scrub solution. Works on stainless, enamel, and even some glass bakeware.


Level Six: Oven Cleaner (The Big Gun)

For truly extreme situations on surfaces that can tolerate it (stainless steel, oven interiors, cast iron being stripped for re-seasoning):

Commercial oven cleaners (Easy-Off, etc.) contain lye (sodium hydroxide), a powerful base that dissolves carbonized material. These are not casual cleaning products — they require gloves, ventilation, and careful application per product directions.

Apply to the affected area, let sit per instructions (often 30 minutes or overnight for the cold method), wipe clean, and rinse thoroughly.

Where this is appropriate: Oven interiors, stainless steel pans that have survived everything else, heavily carbonized baking sheets. Not for non-stick, not for aluminum without testing, not for delicate finishes.


By Pan Type: Which Escalation Path to Follow

Stainless steel: All six levels, in order.

Non-stick: Level 1 (soak) and Level 2 (boiling water only, gently). Stop there. If it survived gentle treatment, the coating may be compromised.

Cast iron: Level 2 (boiling water on the stove, scraping), Level 3 (baking soda simmer), then if the seasoning is gone, full strip with steel wool and re-season.

Enamel-coated (Le Creuset, etc.): Levels 1, 2, 3. Barkeepers Friend on enamel gently and occasionally. Avoid abrasive scrubbers that scratch the enamel surface.

Glass and ceramic bakeware: Levels 1–3. For really baked-on situations, a paste of baking soda and hydrogen peroxide, left for 30 minutes, usually handles the rest.

Baking sheets (aluminum): Levels 1–2. For carbonized edges, Bar Keepers Friend or a baking soda paste. Aluminum baking sheets with heavy carbonization are cheap enough that replacement is often the right answer.


🛒 Gear Worth Having


Recommended Reads


Posted on Skippity | CLEANS Category

TumbleBump is part of the John D Reinhart content family. Writer, illustrator, videographer, and accidental filmmaker — find the whole story at JohnDReinhart.com.

23002

©2026 John D Reinhart/TumbleBump.com – all rights reserved
The Microwave “Steam Bomb”

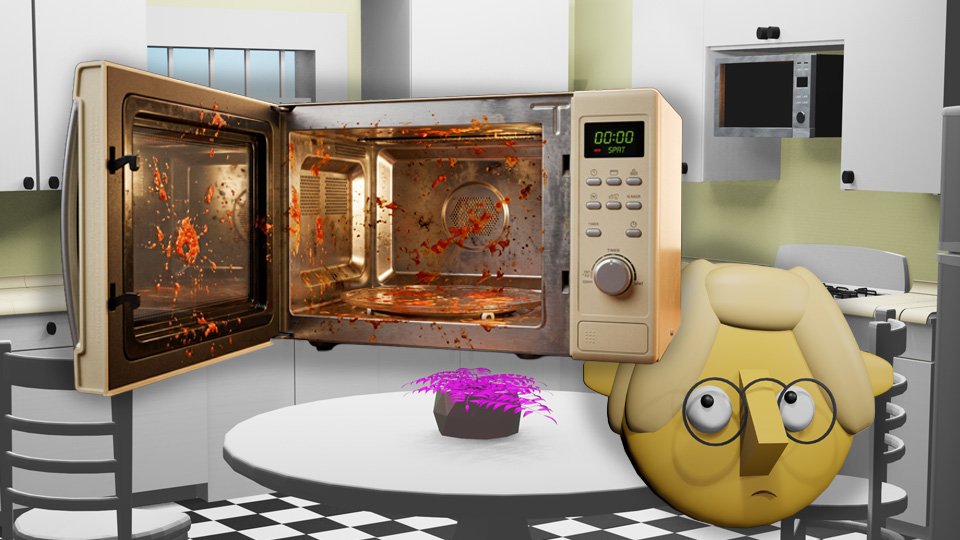
Your microwave is probably a little frightening on the inside. The Steam Bomb is the two-minute trick that loosens every splatter, every mystery stain, and every hardened food incident so it wipes away without scrubbing. It also smells nice.

Let’s be honest about what the inside of most microwaves looks like.

There’s a layer of general griminess that happened gradually. There’s at least one specific incident — a soup eruption, an exploded tomato sauce moment, possibly a popcorn situation — that left its mark. And then there’s the rest of it, the ambient residue of hundreds of reheated meals, that gives the whole thing a faintly prehistoric quality.

The reason this accumulates is that microwaves are hard to clean in the conventional way. The interior is small and angled, the vents and turntable plate are awkward, and anything that has dried and hardened in there requires real effort to scrub.

The Steam Bomb addresses this by doing the prep work for you.


What the Steam Bomb Is

The Steam Bomb is a technique that uses steam — generated inside the microwave — to loosen and re-hydrate every spatter, stain, and hardened residue on the interior walls. By the time you open the door, virtually everything wipes away with a damp cloth and zero scrubbing.

It takes about two minutes of actual effort, plus five minutes of waiting. Your microwave comes out looking like you actually care about it, which you now do.


The Basic Method: Lemon Water

  1. Fill a microwave-safe bowl or measuring cup with about a cup of water. Add two or three slices of lemon, a squeeze of lemon juice, or a few tablespoons of white vinegar. (The acid helps cut grease; the lemon makes it smell significantly better than vinegar alone.)
  2. Place in the microwave and heat on high for 3–5 minutes. The water should boil and steam for the duration.
  3. Leave the door closed for another 3–5 minutes after it’s done. This is the active cleaning phase — the steam is sitting against the walls, loosening everything.
  4. Carefully remove the bowl (it will be very hot) and the turntable plate.
  5. Wipe down the interior with a damp cloth or paper towel. Everything should come off with almost no resistance.
  6. Wash the turntable plate in the sink.

The White Vinegar Version (No Lemon Needed)

Same process, with two tablespoons of white vinegar in a cup of water. White vinegar is an excellent degreaser and the steam carries its cleaning properties throughout the interior. The smell dissipates quickly — within a few minutes of leaving the door open after cleaning.

If the lemon version is the pleasant spa experience, the white vinegar version is the slightly more industrial spa experience. Both work.


After the Steam: Handling Persistent Spots

The Steam Bomb loosens everything, but occasionally a particularly determined splatter from three months ago requires a little encouragement.

  • Baking soda paste: Mix a tablespoon of baking soda with just enough water to make a paste. Apply to stubborn spots, let sit 2–3 minutes, wipe away. Gentle abrasive action plus mild base chemistry.
  • A damp paper towel + elbow grease: After steaming, even the resistant spots are far softer than they were. A bit more pressure on the wipe usually does it.
  • Dawn dish soap directly on the cloth: For greasy spots that need a little degreaser, a tiny drop of dish soap on your wiping cloth speeds things up.

The Door: The Forgotten Zone

The interior of the door — particularly the window and the seal — gets just as dirty as the walls and is wiped far less often. After the Steam Bomb, wipe the door interior with the same damp cloth. Pay attention to the edges and the rubber seal around the glass.

The exterior of the door (the handle, the buttons, the front panel) should be wiped with a lightly damp cloth regularly — this is the most-touched surface on the microwave and picks up grease and food residue from hands throughout the day.


How Often to Steam Bomb

Once a week if you’re a heavy microwave user. Once every two weeks for average use. Once a month if you use it occasionally.

The intervals don’t matter much as long as the habit is consistent. The microwave that gets a monthly Steam Bomb stays reasonably clean. The one that never gets it becomes an archaeological site.


Prevention: The Microwave Cover

A microwave-safe cover or splatter guard, placed over food before heating, prevents 90% of the mess that accumulates in there. A piece of paper towel laid over the top of a bowl works just as well for most things.

Prevention plus monthly Steam Bombing means your microwave stays in a condition you’re not embarrassed by when guests use it. This is, remarkably, a lower bar than it sounds.


🛒 Gear Worth Having

  • Tovolo Microwave Cover — Vented to let steam escape, wide enough to cover most plates and bowls. Use it every time and the Steam Bomb becomes almost optional.
  • Angry Mama Microwave Cleaner — A novelty-shaped steam bomb vessel that works exactly as described and is genuinely amusing to own. Fill it with water and vinegar, microwave for 7 minutes, wipe.
  • Method Daily Kitchen Spray — For wiping down the exterior after cleaning. Smells nice and cuts grease effectively.
  • Micro-Fiber Cleaning Cloths 24-Pack — The ideal wiping cloth for microwave interiors. Doesn’t leave lint, doesn’t scratch.
  • Lemon Essential Oil — A few drops in the steam water makes the whole exercise smell like a very clean, citrus-forward spa.

As an Amazon affiliate, I earn from qualified purchases.


Related Reads

Posted on TumbleBump | CLEANS Category

TumbleBump is part of the John D Reinhart content family. Writer, illustrator, videographer, and accidental filmmaker — find the whole story at JohnDReinhart.com.

23011

©2026 John D Reinhart/TumbleBump.com – all rights reserved

Cleanup as You Go: The Secret to Not Hating Cooking (And Actually Wanting To Do It Again)

The meal is 30 minutes. The cleanup is an hour. Unless you do it as you go — in which case it’s ten minutes and you actually want to cook again tomorrow.

You just made a great dinner. Your family’s impressed. You feel, for a solid thirty seconds, like a person who has their life together.

Then you turn around.

The kitchen looks like a tornado hit a restaurant supply store. There’s a cutting board doing its best impression of a crime scene. A mysterious bowl with flour residue on it. Oil splatters on every available surface. And somewhere in the back of your mind, a small voice is saying: “pizza from now on.”

Here’s what nobody tells you: the meal is 30 minutes. The cleanup is an hour. And the cleanup, not the cooking, is the actual reason people quietly stop cooking. The fix has a name — cleanup as you go — and it’s simpler than it sounds: ten extra minutes woven into the cooking itself, instead of an hour of dish purgatory waiting on the other side of dinner.

🧮 The Math

The hard way: thirty minutes to cook, sixty minutes of regret afterward, ninety minutes total, ending in resentment. The smart way: forty minutes to cook with cleanup woven in, five minutes afterward, forty-five minutes total, ending in something closer to satisfaction. You’re not adding time to the evening. You’re just moving it — from the end, when you’re tired and full and done, to the middle, when the stove’s already doing the work anyway.

🍽️ The Moves

Set up before you start. Fill the sink with hot soapy water, and put a bowl on the counter for scraps and peels. Everything has a place before the chaos actually begins.

Clean the cutting board immediately. The moment you’re done cutting, rinse the board and the knife. Raw chicken juice sitting for forty minutes is a food safety problem. Raw chicken juice from two minutes ago rinses right off.

Wipe splatters while they’re fresh. Keep a damp cloth near the stove. A fresh oil splatter takes two seconds to wipe. A dried one takes five minutes and your will to live.

Rinse as you empty. Used a bowl to hold chopped onions? It’s empty now — rinse it and drop it in the soapy water rather than letting it sit and crust over. An empty bowl takes five seconds. A crusted one takes five minutes.

Soak pots the moment they’re empty. Food just came out of the pan — fill it with hot water right now. Don’t scrub it, just fill it. While you eat, the water’s doing the work. By the time you’re back, it wipes clean.

Keep one clear counter. Clutter creates chaos. Designate one counter for active cooking and keep everything else off it, so there’s room to actually move without knocking things into other things.

❌ What Not to Do

Don’t leave oil splatters to dry on the stove — they fossilize, and wiping them now takes a fraction of the effort scraping them later will. Don’t stack dirty dishes instead of rinsing them; a stack of dishes is a Jenga tower of regret waiting for the wrong moment to fall. Don’t let a cutting board sit with raw meat residue on it — wash it, right now, no exceptions. And don’t wait until after eating to deal with the pots — at minimum, fill them with water. Future you will be grateful.

🌟 The Payoff

Once cleanup stops being a nightmare, cooking stops being a chore. You finish eating, spend five minutes on the last few dishes, and walk out of a clean kitchen — which means tomorrow, you’ll actually consider cooking again. And the night after that. Before long, you’re just someone who cooks, casually, like it’s not a big deal. That’s the whole game: ten minutes woven into cooking, a kitchen you don’t dread, and a habit that actually sticks.

🛒 Gear Worth Having

OXO Good Grips Soap Dispensing Dish Brush — Loads soap into the handle so rinsing a bowl mid-cook is a five-second reflex instead of a whole separate errand to the sink.

Sink Caddy and Kitchen Organizer — Keeps the brush, sponge, and soap within actual arm’s reach, which is half the battle in making cleanup-as-you-go a habit rather than a chore.

Countertop Compost Bin with Lid — The scrap bowl this post keeps mentioning, upgraded — contains the smell and mess of peels and trimmings until it’s time to empty it.

As an Amazon affiliate, I earn from qualifying purchases. Thank you for supporting TumbleBump.

📖 Related Reads


TumbleBump is part of the John D Reinhart content family. Writer, illustrator, videographer, and accidental filmmaker — find the whole story at JohnDReinhart.com.

23006

©2026 John D Reinhart/TumbleBump.com — All rights reserved