

Why Dish Soap Is Different

Dish soap isn’t just soap that happens to be by the sink. It’s a specifically engineered product for a specific set of problems — grease, food proteins, and bacteria — and understanding what it’s actually doing explains why brand matters, concentration matters, and why you can’t just use whatever’s handy.

Soap is soap, right? Cleaning agent, add water, things get clean?

Not exactly. Dish soap is a distinct product category, specifically engineered for the particular challenges of kitchen cleaning: emulsifying cooking fats, breaking down proteins, suspending food particles, cutting through the grease residue that coats every pan and dish after cooking. Regular soap doesn’t do all of this as effectively.

Here’s what’s actually in that squeeze bottle, why it works, and what the real differences between products actually mean.


What Dish Soap Is Made Of

The core of every dish soap is a surfactant blend — molecules with a split personality, one end water-loving (hydrophilic), one end water-hating (hydrophobic). These are the molecules that make oil and water compatible, as described in Chemistry in the Sink.

But dish soaps also contain:

Additional surfactants: Most modern dish soaps blend multiple types — anionic surfactants for grease cutting, nonionic surfactants for gentleness, amphoteric surfactants for foam and skin compatibility.

Enzymes (in some formulas): Specific enzymes target specific food residues. Proteases break down proteins (egg, meat residue). Amylases break down starches. Lipases break down fats. Enzyme-containing dish soaps are more effective on food residue but also more expensive.

pH adjusters: Most dish soaps are mildly alkaline, which helps saponify (break down) fats. The alkalinity is gentle enough for skin with prolonged exposure, unlike household cleaners that are more aggressively alkaline.

Chelating agents: These bind hard water minerals (calcium, magnesium) that would otherwise interfere with the surfactant’s performance, making soap less effective in hard water areas.

Foam boosters: Because consumers associate foam with cleaning power. This is partly psychological — foam doesn’t clean anything directly — but foam does help distribute soap across a surface and provides useful visual feedback about soap concentration.

Preservatives, colorants, fragrances: For shelf stability and aesthetics.


Why Dish Soap Cuts Grease When Regular Soap Doesn’t (As Well)

Cooking grease is a particularly challenging cleaning target. It’s not a thin layer — it polymerizes with heat into a partially solidified coating that adheres strongly to surfaces. Regular soap handles light oils adequately. Dish soap is formulated with higher concentrations of the specific surfactants that work on cooking fats.

Dawn’s famous performance in cleaning birds after oil spills is a real demonstration of its grease-cutting capacity — the formulation was designed around high-performance fat emulsification, and it genuinely outperforms most competitors and all non-dish soaps at this.


Does Brand Actually Matter?

Yes, meaningfully so — for grease cutting.

In independent testing, Dawn Platinum consistently performs at the top for grease-cutting efficiency. This translates to less soap needed per dish, fewer passes to clean greasy pans, and a pan that actually feels clean (not slick) after rinsing.

Cheaper dish soaps often have lower surfactant concentrations and more water filler. You use more product per wash. Over time, the cost difference narrows or inverts.

That said: for lightly soiled dishes, any dish soap works fine. The brand difference is most pronounced on heavy cooking residue — greasy pans, baked-on food, protein residue.


Concentration: The Number Nobody Looks At

Dish soaps vary widely in concentration. A highly concentrated product like Dawn Platinum requires less per wash than a standard-concentration product. The bottle may cost more per ounce but produce far more washes per bottle.

The practical advice: if you’re cost-comparing dish soaps, compare cost per wash rather than cost per ounce. The concentrated products often win.


Hand Dish Soap vs. Dishwasher Detergent: Not Interchangeable

This is worth stating clearly: dish soap (the kind by the sink for hand washing) is not interchangeable with dishwasher detergent.

Hand dish soap is designed to foam heavily — the foam is part of how it works and how it signals to the user that soap is present. Put hand dish soap in a dishwasher and you will have a foam situation in your kitchen. The dishwasher will foam uncontrollably and overflow. This is a genuine mess.

Dishwasher detergent is formulated to clean without foaming, at the temperatures and water pressures specific to dishwasher cycles. It’s a completely different product.


Antibacterial Dish Soap: Worth It?

Antibacterial dish soaps contain triclosan or other antimicrobial agents that kill bacteria in addition to removing them. The practical value of this is debated.

For most dish washing, physically removing food, grease, and bacteria with regular surfactant-based soap and rinsing thoroughly accomplishes the same safety outcome as killing bacteria. You don’t need to kill the bacteria if you’ve removed them from the surface.

Antibacterial soap has a role for surfaces that need sanitizing (cutting boards after raw meat) but the FDA has raised questions about the long-term effects of triclosan and its contribution to antibiotic resistance. Regular dish soap is the default; antibacterial soap is a specific tool for specific situations.


The One Dish Soap Rule

Whatever dish soap you use, dilute it less than you think you need to. A common habit is squeezing soap directly onto every dish, producing far more soap than necessary and requiring more rinsing. Instead: a squirt into hot water creates a sudsy washing solution you dip dishes into, and stretches your soap much further.

Alternatively, use a soap dispensing dish brush — the reservoir releases exactly the right amount of soap per brush of a surface.


🛒 Gear Worth Having

As an Amazon affiliate, I earn from qualifying purchases. Thank you for supporting TumbleBump.


Related Reads


Posted on TumbleBump | CLEANS Category

TumbleBump is part of the John D. Reinhart content family. Writer, illustrator, videographer, and accidental filmmaker — find the whole story at JohnDReinhart.com.

23000

©2026 John D Reinhart/TumbleBump.com – all rights reserved
How Old Does a Leftover Have to Get?

Four days. That’s the number. But there’s more to it than that — because some things last longer, some shorter, and “four days” assumes your fridge is the right temperature and the food was stored correctly from the start. Here’s the complete, honest leftover timeline.

The question everybody asks — quietly, usually standing in front of the open refrigerator — is: is this still okay?

The container has been in there for a few days. It still looks fine. It smells fine. The date was… probably Sunday? Or was it Monday?

Here’s the answer, with more specificity than “use your nose” and more nuance than a single blanket number.


The Four-Day Rule (And Where It Comes From)

The USDA’s general guideline for most cooked leftovers is 3–4 days refrigerated at 40°F or below. This isn’t arbitrary — it’s based on the growth rates of common bacterial pathogens at refrigerator temperatures and the point at which populations can reach levels that cause illness.

Four days is a conservative, reliable number that accounts for typical home refrigerators and typical storage conditions. It’s the right number to default to when you’re uncertain.

The important caveats:

  • It assumes the food was refrigerated within two hours of cooking (one hour if ambient temperature was above 90°F).
  • It assumes your refrigerator is actually running at 40°F or below (many aren’t — measure yours).
  • It assumes the food is in an airtight container rather than uncovered or loosely wrapped.

Leftovers that violated any of these conditions on the way in are on a shorter clock than four days suggests.


The Actual Timelines by Food Type

Not all leftovers are equal. Here are the more specific windows:

3–4 Days (The Standard Window): – Cooked chicken, turkey, other poultry – Cooked beef, pork, lamb – Cooked fish and shellfish – Soups and stews – Cooked egg dishes (frittata, scrambled, quiche) – Cooked pasta and pasta dishes – Cooked rice and grains (with a note — see below) – Pizza (store in an airtight container) – Casseroles and baked dishes (lasagna, shepherd’s pie)

3–5 Days: – Cooked beans and lentils – Cooked vegetables and vegetable dishes – Deli meats (opened package)

5–7 Days: – Hard-boiled eggs (in shell, unpeeled) — the shell protects them – Opened canned goods transferred to containers (beans, tomatoes, tuna)

1–2 Days: – Raw ground meat (should be cooked or frozen immediately) – Raw whole poultry – Raw fish and shellfish (buy the day of or freeze) – Oysters and live shellfish


The Rice Situation (A Special Case)

Cooked rice deserves specific mention because the risk is slightly different from most cooked foods.

Bacillus cereus spores — heat-resistant, common in the environment — can survive cooking and germinate in cooked rice stored at room temperature. The toxins this bacterium produces can cause illness.

This is not unique to rice (any starchy food can carry it), but rice is particularly associated with it because it’s so commonly left out to cool slowly or stored without refrigeration.

The rules for rice: refrigerate within one hour of cooking, in a shallow container that cools quickly. Eat within 4–5 days. Reheat thoroughly — above 165°F — before eating. Never leave cooked rice out overnight.


Reading the Signs (What the Nose Tells You and Doesn’t)

As covered in the “Your Nose is Not a Food Safety Inspector” post: the four-day guideline exists precisely because many dangerous bacteria produce no smell. “It smells fine on day 6” is not a reliable safety assessment.

That said, smell is still useful for catching obvious spoilage. If something smells off, sour, fermented, or in any way wrong — even within the four-day window — don’t eat it.

The framework: four-day rule is the clock. Smell is an additional alarm. Both matter. Neither alone is sufficient.


The Honest Assessment of What Actually Happens

Here’s the thing most food safety guidance doesn’t say directly: many people have eaten five-day-old leftovers and been fine. Many people have eaten two-day-old leftovers that were improperly stored and gotten sick. The timeline guidelines are probabilistic, not absolute.

What the four-day rule gives you is a reasonable safety margin that accounts for the range of typical home storage conditions. Operating within it consistently means you are almost never in the risky zone. Operating past it consistently means you’re taking on increasing odds of an unpleasant experience.

The math of food safety is also about the cost of being wrong. A foodborne illness ranges from miserable-but-fine to genuinely dangerous depending on the pathogen, the individual, and the dose. The cost of throwing out a four-day-old container of soup is low. The cost of getting seriously ill from keeping it is high. The four-day rule is not paranoia — it’s favorable arithmetic.


The Freezer Exit Strategy

When you realize something is reaching the end of its refrigerator window — day 3 and you won’t eat it by day 4 — freeze it. Today. Before it reaches the limit.

Food frozen at its quality peak is infinitely better than food that limped to the limit and then went in the trash. The freezer is not the end of the road. It’s a reset button.


🛒 Gear Worth Having

  • Refrigerator Thermometer — Confirms you’re actually at 40°F. This is the most important piece of information for accurate leftover timing.
  • Dry-Erase Refrigerator Labels — Write the date on every container before it goes in the fridge. Makes the four-day rule automatic.
  • OXO Airtight Containers Set — Proper sealing slows bacterial growth and keeps food at its quality longer within the window.
  • ThermoWorks Thermapen — For confirming reheated leftovers reach 165°F internal temperature before eating.
  • USDA FoodKeeper App — A free, comprehensive reference for storage times by food type. The authoritative answer to every “how long does this last” question.

As an Amazon affiliate, I earn from each qualifying purchase. Thank you for supporting TumbleBump.


Recommended Reads


Posted on TumbleBump | SAVES Category

TumbleBump is part of the John D. Reinhart content family. Writer, illustrator, videographer, and accidental filmmaker — find the whole story at JohnDReinhart.com.

24000

©2026 John D Reinhart/TumbleBump.com – all rights reserved
What Causes My Soggy Bottom

A soggy bottom is one of baking’s most demoralizing outcomes — the cake looks fine from above and reveals its failure only on the plate. Here’s every cause of a soggy baked bottom, which one you’re dealing with, and the fixes for each situation.

The soggy bottom — that dense, undercooked, damp layer at the base of a cake, pie, or baked good — is one of baking’s more frustrating problems because it hides until serving and often seems mysterious. But it has specific, identifiable causes, and most of them are preventable once you know what they are.


Cause One: The Oven Temperature Was Wrong

Too low: A low oven doesn’t produce the initial burst of heat that sets the structure of the bottom of the bake. The bottom stays in contact with the pan, which conducts heat slowly at low temperatures, and the batter in contact with the pan remains soft and wet while the top and sides set.

Too cool overall: Some ovens run significantly cooler than their dial suggests. A calibration difference of 25–50°F is common and enough to leave the bottom of a bake undercooked consistently.

The fix: Get an oven thermometer ($10–15) and know your oven’s actual temperature. Adjust accordingly. Most ovens benefit from being set 25°F higher than the recipe to compensate.


Cause Two: The Pan Material or Position Was Wrong

Dark pans: Dark metal absorbs heat more readily than light metal and can actually cause the bottom to cook faster — but dark pans also have a different effect with certain types of batters where the bottom sets before the interior, trapping steam that creates a dense layer.

Glass pans: Glass conducts heat more slowly than metal and heats unevenly. For a recipe calling for a metal pan, using glass often under-bakes the bottom.

Too high in the oven: Most baking should happen in the lower third of the oven, where the bottom heat is more direct. Baking on a rack that’s too high means the bottom of the pan receives less heat than the top of the bake.

The fix: Use the pan material the recipe specifies. Place baked goods in the lower third of the oven for cakes and pies.


Cause Three: Too Much Liquid in the Batter

A batter with too much liquid takes longer to set throughout, and the bottom — which is in contact with the pan and has the least direct oven heat — is the last part to dry out.

Causes of excess liquid: – Measuring flour incorrectly (too little flour relative to liquid) – Very large eggs when medium was called for – Wet add-ins (fresh fruit, yogurt, very moist vegetables) – Using full-fat dairy when low-fat was specified (or vice versa, depending on the recipe)

The fix: Accurate measuring (kitchen scale over volume), correct egg size, squeezing or draining moisture from wet add-ins.


Cause Four: Underbaked

Sometimes the bottom is soggy simply because the cake wasn’t baked long enough. The toothpick test only checks the top portion of a deep bake; the bottom can still be wet when the center tests clean.

The fix: Test for doneness at multiple depths. Press lightly on the center of the top of the cake — it should spring back rather than leave a dent. If it dents, it needs more time.. A thermometer inserted at a 45-degree angle toward the bottom of a cake reads 200–210°F when fully baked.


Cause Five: Steam From Below (Pie Specifically)

Pies get soggy bottoms when the filling releases moisture that steams the bottom crust from the inside. This is especially common with fruit pies that haven’t been properly thickened.

The fixes: – Blind bake the bottom crust (bake just the empty crust partially before adding filling) – Thicken the filling adequately (enough starch to set the fruit juices) – Bake on the lowest oven rack so the bottom crust gets direct heat – Sprinkle dry breadcrumbs or semolina on the blind-baked crust before adding filling — these absorb excess moisture


Rescuing a Soggy Bottom After Baking

If the cake or bake is out of the oven and the bottom is soggy:

Put it back in. If the interior is otherwise correct, remove it from the pan, invert onto a baking rack, and return to the oven directly on the rack at a slightly lower temperature (325°F) for 10–15 minutes. The direct heat from the element can help dry the bottom without burning the top.

Accept and adapt. A soggy-bottomed cake served sliced (bottom hidden) is still edible. Top generously with frosting, whipped cream, or fruit compote. The presentation carries the day.


🛒 Gear Worth Having

As an Amazon affiliate, I earn with each qualifying purchase. Thank you for supporting TumbleBump.


Related Reads

Posted on TumbleBump| OOPS Category

TumbleBump is part of the John D. Reinhart content family. Writer, illustrator, videographer, and accidental filmmaker — find the whole story at JohnDReinhart.com.

26003

©2026 John D Reinhart/TumbleBump.com – all rights reserved
The Calendar of Perishability: What to Eat When

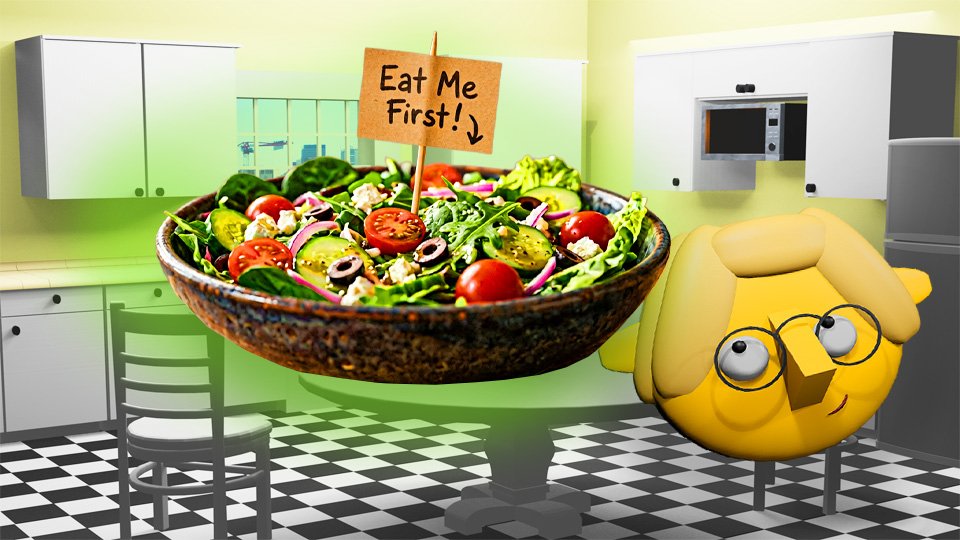
Your groceries are on a countdown the moment they hit your fridge. Learning the simple logic of eating in the right order so you don’t throw anything away. Fresh first, sturdy later, freezer last. It’s a calendar, not a chore.

There is a tragedy that plays out in refrigerators across the country every week. Someone buys good food — fresh herbs, a bag of salad greens, some lovely fish — with the best of intentions. Then life happens. The fish gets pushed to the back. The herbs wilt into a damp heap. The salad becomes a liquid apology. And by Sunday, a depressing amount of money goes into the trash.

The fix is not discipline. It’s sequencing.

Your groceries are not all equal. They have lifespans, and those lifespans vary wildly. The skill is simply learning to eat them in the right order — fresh things first, sturdy things middle, shelf-stable things whenever.

This is the Calendar of Perishability.


The Tiers

Tier One: Eat Within 1–2 Days

These are your most fragile ingredients. They should anchor your first meals of the week.

  • Fresh fish and shellfish — 1–2 days, maximum. Buy it the day you cook it, or the day before.
  • Fresh pasta and filled pasta (tortellini, ravioli) — 2–3 days once opened
  • Delicate salad greens (spinach, arugula, spring mix) — wilt fast, eat within 2 days of opening
  • Fresh berries — 1–3 days depending on how they look
  • Fresh herbs (basil, cilantro, parsley) — 2–4 days; basil especially hates the fridge (keep it on the counter in water)
  • Ripe avocados — eat immediately once ripe or refrigerate for 1–2 more days

The move: Build Monday and Tuesday meals around these. Grilled fish on Monday. A big salad Tuesday. Berries with breakfast, every morning, until they’re gone.


Tier Two: Eat Within 3–5 Days

Solid mid-week staples. They can carry you through Wednesday and Thursday without panic.

  • Ground meat — 1–2 days raw; cook it early in the week and the cooked version lasts 3–4 days
  • Chicken pieces (raw) — 2 days raw; again, cook early
  • Whole milk and dairy — check the sell-by, usually 5–7 days after opening
  • Cooked grains (rice, quinoa) — 4–5 days refrigerated; make a big batch on Sunday
  • Tofu — 3–5 days once opened
  • Fresh broccoli, green beans, asparagus, zucchini — 3–5 days
  • Eggs — 3–5 weeks (they last much longer than most people think)
  • Deli meat — 3–5 days after opening
  • Soft cheeses (ricotta, cottage cheese, goat cheese) — 5–7 days

The move: Wednesday and Thursday meals live here. Stir-fry the broccoli. Use the cooked rice as a base. Finish the tofu.


Tier Three: Eat Within the Week (Flexible)

Sturdy, forgiving, and reliable.

  • Hard cheeses (parmesan, cheddar, gruyère) — 2–4 weeks, often longer
  • Carrots, celery, onions, cabbage — 1–3 weeks refrigerated
  • Apples, citrus — 1–3 weeks
  • Cooked beans — 5 days refrigerated, indefinitely frozen
  • Leftover cooked meat — 3–4 days
  • Butter — weeks in the fridge; months in the freezer
  • Yogurt — 1–2 weeks past the sell-by date (it’s fine, it’s already fermented)

The move: These are your weekend backstops. Friday’s pasta. Saturday’s grain bowl. The cheese that shows up on everything.


Tier Four: Whenever (Pantry and Freezer)

These don’t care about the calendar. They’re your safety net.

  • Canned tomatoes, beans, fish — years
  • Dried pasta, rice, lentils — years
  • Frozen vegetables and proteins — months
  • Oils, vinegars, condiments — months to years
  • Dried spices — 1–2 years before they start to fade

The move: Fill in gaps. Sunday pantry cooking when you’ve eaten through everything perishable. Emergency dinner when the week went sideways.


The Weekly Shape

If you think of your week as a timeline, it looks like this:

Monday–Tuesday: Fresh fish, delicate greens, ripe produce, fresh herbs. Eat the things that can’t wait.

Wednesday–Thursday: The mid-range ingredients — cooked grains, cooked chicken, sturdier vegetables, dairy.

Friday–Saturday: Hard cheese, root vegetables, eggs, leftovers, whatever’s left. This is also the day to check the fridge and use up anything approaching its limit.

Sunday: Pantry day. Pasta, canned beans, frozen things. Shop in your own cupboards. Then reset.


The Two Questions to Ask Every Day

Before you decide what to make, ask: What do I have that needs to be eaten soonest? Then: What can I make with that?

This flips the usual logic (decide what you want, then see if you have it) and reduces food waste dramatically. It also produces unexpectedly good meals, because constraint is an excellent creativity prompt.


🛒 Gear Worth Having

As an Amazon affiliate, I earn from each qualifying purchase. Thank you for supporting TumbleBump.


Related Reads

Posted on TumbleBump | PLANS Category

TumbleBump is part of the John D. Reinhart content family. Writer, illustrator, videographer, and accidental filmmaker — find the whole story at JohnDReinhart.com.

22015

©2026 John D Reinhart/TumbleBump.com – all rights reserved
Bread’s Second Act (And Third, And Fourth)

Bread doesn’t go bad. It goes somewhere else. Here’s the whole beautiful arc from fresh loaf to last crouton — and why stale bread is secretly the more interesting ingredient.

Somewhere in your kitchen right now, there is bread that has passed its peak moment. It’s not bad. It’s not moldy. It’s just no longer the soft, yielding, tear-it-with-your-hands loaf it was two days ago. And because it no longer meets that specific standard, there is a real chance it ends up in the trash.

This would be a mistake. Not a moral failure — just a waste of something that hasn’t finished being useful yet.

Bread doesn’t go bad so much as it goes somewhere else. Fresh bread has one destiny. Day-old bread has different ones — and in many cases, genuinely better ones. The croûton, the breadcrumb, the bread pudding: these aren’t consolation prizes for bread that didn’t make it. They’re the whole point. Entire classic dishes were invented specifically to use bread at this stage. The Italians have been doing this for centuries and they are not wrong.

Here’s the whole arc. From the first slice to the last crouton, nothing has to be wasted.

✨ Days One and Two: Peak Bread

This is bread at its most itself. Soft interior, crackling crust, the kind of loaf you tear rather than slice if nobody’s watching. Eat it as-is. Make sandwiches. Dip it in soup. Toast it. This is what bread was born to do and it does it magnificently for about 48 hours.

Storage: A bread box on the counter, or wrapped loosely in a clean cloth. Room temperature, not the fridge.

Why not the fridge? This is the one that surprises people. Refrigeration actually accelerates staling — the cold causes the starch in bread to recrystallize faster, which is exactly what makes bread go stale. The fridge is bread’s enemy, not its friend. The one exception: a hot, humid kitchen where mold is a faster problem than staleness. In that case, refrigerate and accept the trade-off.

🍞 Days Three and Four: Day-Old and Getting Interesting

The crumb is tightening. The crust has softened slightly as it draws moisture from the interior. It’s less pleasant to eat straight and hasn’t lost a bit of flavor. This is the moment to pivot.

Why does day-old bread work better for certain things? Because moisture is the variable. Fresh bread is full of it. When you make French toast with fresh bread, it absorbs the egg custard too fast, goes soggy, and falls apart. Day-old bread absorbs it at exactly the right rate, cooks up custardy inside and golden outside, and holds together beautifully. The staleness is doing structural work.

Same logic applies to bread pudding, to panzanella (the Tuscan bread salad where stale bread gets soaked, squeezed out, and tossed with tomatoes and olive oil), and to bruschetta, where day-old bread toasts to a firmer, more satisfying base than fresh ever would.

Toast from slightly stale bread is also, quietly, better than toast from fresh. The toaster drives out remaining moisture and re-crisps everything. Fresh bread toasts soft in the center. Stale bread toasts all the way through. File this away.

🧀 Day Five and Beyond: Crouton Country

This is genuinely good territory and most people don’t know it.

  • Croutons. Bread cut or torn into chunks, tossed with olive oil and seasoning, baked until golden and fully crispy. The irregular shapes of torn croutons have better texture than the uniform cubes of the store-bought kind. Homemade croutons are not just cheaper — they’re actually better. This is one of those kitchen upgrades that takes 20 minutes and produces something meaningfully superior to anything in a bag.
  • Breadcrumbs. Stale bread in a food processor, pulsed to whatever coarseness you want. Fresh breadcrumbs for topping casseroles and binding meatballs. Toasted breadcrumbs — pangrattato — cooked in olive oil and garlic until deeply golden, then scattered over pasta, soup, or eggs. The Italians call this “poor man’s parmesan.” It provides crunch, richness, and a savory nuttiness that genuinely earns that description.
  • Ribollita. The Tuscan bread and bean soup where stale bread is the thickening agent — chunks added to a thick vegetable and white bean broth, left to soak, swell, and dissolve into something rich and magnificent. Peasant food at its most intentional. YouTube will show you exactly how it’s done.

❄️ The Freezer: The Pause Button

At any point in this arc — day one, day three, day five — the freezer stops the clock. Slice before freezing so you can pull individual pieces. Toast directly from frozen. The result is excellent and the bread has just bought itself months of useful life.

This is the move for any loaf you know you won’t finish before it stales. Don’t watch it age on the counter. Freeze it and use it on your schedule, not bread’s.

🛒 Gear Worth Having

  • A bread box — The correct bread storage. Maintains the right humidity, prevents mold better than open air, extends fresh life by days. Worth every inch of counter space it occupies.
  • A small food processor — Turns stale bread into breadcrumbs in about ten seconds. One of those tools that earns its place every single week.
  • A half sheet pan — The crouton-baking surface. Even heat, good browning, the right size for a full loaf’s worth of croutons in one go.
  • Airtight storage containers — For keeping finished croutons and breadcrumbs crispy. A week of excellent croutons starts with a good lid.
  • Ziploc freezer bags — For sliced bread going into the freezer. The airtight seal is everything. Freezer burn is just slow disappointment.

As an Amazon affiliate, I earn from each qualifying purchase. Thank you for supporting TumbleBump.

✨ The Short Version

Fresh bread has one great day. Day-old bread has several more useful ones. Stale bread becomes croutons, breadcrumbs, and the base of dishes that specifically require it. Frozen bread waits patiently until you need it.

Nothing has to be wasted. The loaf just needs a plan.

The trash is not the next step. The toaster is.

📚 Related Reads

TumbleBump is part of the John D. Reinhart content family. Writer, illustrator, videographer, and accidental filmmaker — find the whole story at JohnDReinhart.com.

24005

©2026 John D Reinhart/TumbleBump.com – all rights reserved
Baking Soda vs. Baking Powder: The Mix-Up That Ruins Muffins

They live next to each other, they look alike, and one is three times more powerful than the other. Baking soda and baking powder are not the same thing. Here’s why that matters.

Mistaking baking soda for baking powder is like bringing a trombone to a violin recital. Sure, it’s the same music — but.

They sit next to each other on the shelf. The containers look nearly identical. Neither one is labeled with the kind of urgent warning that would actually help in the middle of a recipe. And yet they are categorically, chemically, functionally different things — one is about three times more powerful than the other — and using the wrong one will produce baked goods that are flat, metallic, soapy, or all three simultaneously.

This happens to everyone. Here’s why it happens, what’s actually going on inside the batter, and how to never do it again.

🧪 Baking Soda: The One That Needs a Partner

Baking soda is pure sodium bicarbonate. A base. On its own, sitting in the bowl, it does absolutely nothing. It is waiting. It needs an acid.

Why? When sodium bicarbonate meets an acid — buttermilk, yogurt, lemon juice, vinegar, brown sugar, honey, cocoa powder, molasses — it reacts and produces carbon dioxide gas. That gas is what makes baked goods rise. No acid, no gas, no rise. It’s a partnership and baking soda is very much the one who can’t show up alone.

The other thing to know: the reaction starts immediately. The moment baking soda meets its acid, the gas production begins. This is why recipes using baking soda tell you to get the batter into the oven without dawdling — you’re working with a reaction already in progress.

And it is three to four times more potent than baking powder. This is not a small difference. This is a trombones-and-violins difference.

🎂 Baking Powder: The One That Came Prepared

Baking powder is a committee. It contains baking soda, a dry acid (usually cream of tartar), and a starch to keep everything from reacting prematurely in the container. It brought everything it needs.

Why does this matter? Because baking powder doesn’t need the recipe to supply an acid — it already has one. Use it in recipes that don’t otherwise contain acidic ingredients and it works perfectly on its own.

It also works in two stages: once when it gets wet (in the batter) and again when it gets hot (in the oven). This is the “double-acting” claim on most packaging, and it’s real. The double reaction gives baked goods a more sustained, even rise than the immediate single blast of baking soda.

Slower, gentler, self-contained. The reliable one. The one that thought ahead.

💥 What Actually Happens When You Mix Them Up

The results are specific and consistently unpleasant:

  • Used baking soda when powder was called for: No acid in the recipe means the baking soda has nobody to react with. It sits there, inert, contributing nothing to the rise and everything to a metallic, soapy aftertaste. Dense, flat, vaguely medical-tasting baked goods. Not the goal.
  • Used baking powder when soda was called for: The recipe’s acid reacts with the baking powder’s built-in acid in ways nobody planned for, producing off flavors. And since baking powder is far less potent than soda, the leavening is significantly weaker. Flat and odd-tasting. A double disappointment.
  • Used too much baking soda: Bitter, soapy, metallic. The excess that doesn’t react stays in the finished product as unreacted base and announces itself loudly on the palate. The goods may also rise dramatically and then collapse, which is at least visually interesting.
  • Used too much baking powder: Slightly bitter and tinny from excess acid and leavening. Also prone to the rise-and-collapse situation. The oven giveth and the oven taketh away.

🔍 How to Tell Them Apart Mid-Recipe

If you’re already in the middle of things and genuinely not sure which container you grabbed:

  • The taste test. Tiny pinch on the tongue. Baking soda tastes strongly bitter and soapy — unmistakably unpleasant. Baking powder tastes mildly bitter with a slight sourness from the acid component. Unpleasant in different ways. Reliable test.
  • The water test. Drop a small amount into hot water. Baking soda does almost nothing on its own — remember, it needs an acid. Baking powder fizzes actively because the hot water triggers its built-in acid. One bubbles, one doesn’t.
  • The label. Both containers have labels. Read them. This is the obvious solution that gets skipped in the heat of the moment every single time.

🔄 Can You Substitute One for the Other?

In a pinch, yes — imperfectly but functionally:

  • Baking powder in place of baking soda: Use three times the amount. One teaspoon of baking soda becomes three teaspoons of baking powder. The result may be slightly more bitter and the texture slightly different, but it will rise and it will be edible.
  • Baking soda in place of baking powder: Use one-third the amount and add an acid to the recipe — a quarter teaspoon of cream of tartar per quarter teaspoon of baking soda works well. More complicated, less reliable, but doable in a genuine emergency.

Neither substitution is perfect. Both beat starting over if you’re already committed.

🧹 Prevention (Embarrassingly Simple)

  • Label them. “SODA” and “POWDER” in large letters on masking tape. Ten seconds of effort, zero future mix-ups.
  • Different containers. Some cooks keep one in a round container and one in a square one. Instant tactile distinction even when you’re not paying full attention.
  • Check freshness. Both go stale and a stale leavener is only slightly better than the wrong one. Test baking soda by dropping a pinch into hot water with a splash of vinegar — vigorous bubbling means it’s good. Test baking powder by dropping a teaspoon into hot water — it should foam. Flat reaction means it’s time to replace.

🛒 Worth Having

  • Arm & Hammer Baking Soda 2-Pack — Fresh baking soda on hand and a spare. Replace every six months for baking use. The fridge deodorizer box and the baking box are different jobs — don’t confuse those either.
  • Clabber Girl Baking Powder — Reliable, widely available, and it has a date on the bottom. Check it. Replace annually. It’s not expensive and stale baking powder is just expensive disappointment.
  • OXO Good Grips Pop Containers small set — Store each in a different shaped airtight container, label them clearly, and the mix-up becomes physically impossible. Problem solved at the storage level.
  • Bob’s Red Mill Aluminum-Free Baking Powder — For those who prefer no aluminum in their leavening. Eliminates the slightly tinny taste that can appear at higher doses. Worth knowing about.
  • BraveTart by Stella Parks — The best book on baking science for home cooks. Parks explains not just what to do but why — which means mix-ups like this stop happening because you actually understand what’s going on in the bowl.

As an Amazon affiliate, I earn from each qualifying purchase. Thank you for supporting TumbleBump.

✨ The Short Version

Baking soda needs an acid. Baking powder brought its own. One is three times stronger than the other. Using the wrong one produces flat, metallic, soapy results that no amount of frosting will fix.

Label the containers. Check the freshness. Read the label before you grab.

And if the muffins come out flat anyway — they crumble beautifully over yogurt. Every baking disaster has a plan B.

📚 Related Reads

TumbleBump is part of the John D. Reinhart content family. Writer, illustrator, videographer, and accidental filmmaker — find the whole story at JohnDReinhart.com.

26012

©2026 John D Reinhart/TumbleBump.com – all rights reserved
The Rule of Threes: One Protein, Three Identities

Cook a pound of chicken on Sunday. Eat it in three completely different meals across the week. Nobody repeats themselves. Nobody gets bored. This is the Rule of Threes — the most useful meal planning trick you’ll ever learn.

There is a concept in cooking that doesn’t have a common name but that experienced home cooks use constantly, usually without thinking about it. It goes like this: cook one protein in quantity, and give it completely different identities across multiple meals.

The same pound of ground beef becomes spaghetti Bolognese on Monday, tacos on Wednesday, and the filling for stuffed peppers on Friday. The same roasted chicken is dinner Sunday, lunch grain bowl Monday, and chicken soup Thursday. The same baked salmon is plated as a main Tuesday and flaked into a rice bowl Thursday.

This is the Rule of Threes. One protein, cooked once, becomes three different meals. The cooking effort is concentrated. The variety is maintained. The week makes sense.


Why This Works So Well

The biggest lie in cooking is that meal variety requires cooking from scratch every night. It doesn’t. It requires creative assembly of pre-cooked components — which is exactly what professional kitchens do.

A restaurant doesn’t make three different dishes starting from raw chicken three times a night. They break down chicken, cook it in quantity, and finish it differently for each dish that goes out. You can do the same at home, with less finesse and approximately the same result.

The protein is the most time-intensive part of most meals to cook. Cooking it once and using it three ways multiplies your output without multiplying your effort.


The Proteins That Transform Best

Some proteins are naturally more “transformable” than others. Here are the best ones for the Rule of Threes and some suggested identities for each.

Roasted Chicken Thighs (or a Whole Rotisserie Chicken)

Identity 1: Sliced as a main protein over roasted vegetables and grain Identity 2: Shredded into a grain bowl with tahini dressing, cucumber, and herbs Identity 3: Shredded into a quick chicken soup with whatever vegetables and broth are around, or stuffed into tacos with salsa and avocado

Why it works: Chicken thighs are forgiving and moist when reheated. The flavor is neutral enough to accept completely different seasoning profiles in different identities.

Ground Beef or Turkey

Identity 1: A simple pasta Bolognese or meat sauce Identity 2: Tacos or burrito bowls with taco seasoning, lime, cilantro Identity 3: Stuffed into bell peppers with rice and cheese, or formed into a quick burger

Why it works: Ground meat absorbs new flavors readily. Adding different spices, acids, and aromatics makes each identity genuinely taste different.

Salmon or Other Fish

Identity 1: Baked as a simple main with lemon and herbs Identity 2: Flaked into a rice bowl with soy sauce, sesame oil, cucumber, and avocado Identity 3: Mixed into a quick fish cake or patty, pan-fried and served with a simple salad

Why it works: Fish flakes naturally and integrates into other dishes effortlessly. Note: cook fish a little under if you plan to reheat it — it firms up on second heating.

Cooked Lentils or Beans

Identity 1: As a base for a warm grain bowl with roasted vegetables Identity 2: Mashed with garlic, lemon, and olive oil as a dip or spread on toast with a fried egg Identity 3: Added to a soup or stew as protein, or wrapped in a tortilla with cheese and salsa

Why it works: Legumes are cheap, nutritious, neutral in flavor, and extraordinarily flexible. They’re the best budget protein for the Rule of Threes.

Roasted Pork Shoulder (a Weekend Cook)

Identity 1: Served as pulled pork over rice or with a side Identity 2: In tacos with pickled onions and salsa verde Identity 3: Mixed into fried rice, or piled onto a simple flatbread with barbecue sauce and coleslaw

Why it works: Pork shoulder is one of the easiest proteins to cook in bulk (low oven, long time, minimal attention) and one of the most flexible.


The Seasoning Secret

The key to making three identities feel genuinely different is changing the flavor profile, not just the presentation.

Same chicken, three flavor profiles: – Italian: Olive oil, garlic, fresh herbs, lemon → pasta or simple plate – Asian: Soy sauce, sesame oil, ginger, scallion → grain bowl or fried rice – Mexican: Cumin, lime, cilantro, chili → tacos, burrito bowl

You’re not reheating and serving the same thing three times. You’re taking a neutral base protein and redirecting it with the sauces, spices, and aromatics of different cuisines.


Planning the Rule of Threes

When you sit down for your Sunday Reset, don’t just pick meals — pick your anchor proteins. Ask: What is my main protein this week, and what three meals will I make from it?

Then shop for the protein and all three identities in one trip. Cook the protein once (usually during Sunday prep, or early in the week when you have more time). Assemble the three meals across the week.

This is the system. It is boring to describe and quietly excellent in practice.


🛒 Gear Worth Having

Add Post

As an Amazon affiliate, I earn from each qualifying purchase. Thank you for supporting TumbleBump.


Related Reads

Posted on TumbleBump | PLANS Category

TumbleBump is part of the John D. Reinhart content family. Writer, illustrator, videographer, and accidental filmmaker — find the whole story at JohnDReinhart.com.

22007

©2026 John D Reinhart/TumbleBump.com – all rights reserved
You Forgot to Defrost. Here’s How to Not Ruin Dinner.

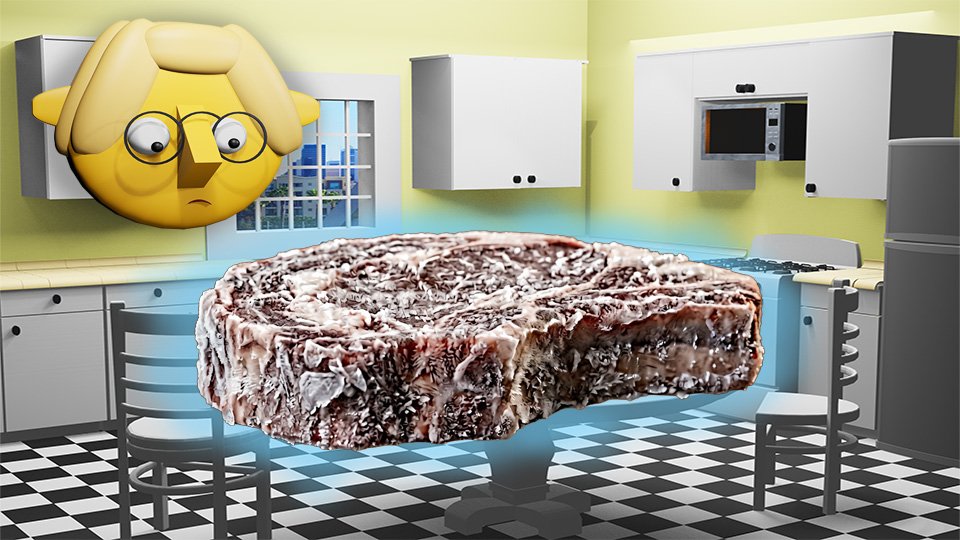
It’s 6pm. The steak is a frozen brick. Dinner was supposed to be in an hour. Here’s what to do — the safe options, the fast options, and the one option that looks tempting but will make you regret it — ranked by speed and sanity.

This is not a crisis. This is a logistics problem, and logistics problems have solutions. The key is understanding “why” each solution works — because once you get the logic, you’ll never panic about a frozen chicken breast again.

The underlying principle behind all of this: bacteria multiply rapidly between 40°F and 140°F. That’s the danger zone. Every thawing method is really just a strategy for getting meat from frozen to cooked without spending too long in that range. Keep that in mind and everything else makes sense.

There are roughly seven-gazillion YouTube videos for each of these methods. The mission here is to help you see what those different methods are.

🔥 Option One: Just Cook It Frozen (Fastest, Genuinely Works)

Here’s the thing nobody tells you: you don’t always have to thaw meat first. Many proteins cook perfectly well from frozen — the result is slightly different from thawed-then-cooked, but often completely indistinguishable on the plate.

Why it works: the oven or pan simply does the thawing and cooking in one continuous process. The exterior thaws first and starts cooking while the interior catches up. The logic is sound. The math just requires more time — roughly 50% longer than you’d use for thawed meat — and a thermometer to confirm you got there.

  • Chicken thighs and breasts — oven at 400°F, straight from frozen, more time than usual, thermometer to 165°F at the thickest part. Works reliably.
  • Ground meat — frozen block into a pan on medium heat. As the exterior thaws, break it apart and keep working toward the center. Takes longer, works perfectly for pasta sauce or tacos where texture isn’t precious.
  • Fish fillets — a quick rinse under cold water removes ice crystals, then cook as normal with a few extra minutes. Thin fillets from frozen are a genuinely good meal. Don’t let anyone tell you otherwise.
  • Sausages and meatballs — excellent from frozen. Bake or simmer, add time, done.

What doesn’t work from frozen: thick steaks and pork chops. The exterior will be fully cooked before the interior has thawed, producing the specific culinary horror of charred outside, raw inside. Don’t do this to yourself or the steak.

💧 Option Two: Cold Water Thaw (30–60 Minutes, The Smart Move)

When you have a little time and want properly thawed meat, this is the method. Drop the sealed packaging into a bowl of cold water, change the water every 30 minutes. Done in under an hour for most cuts.

Why cold water and not hot? This is the question that unlocks the whole thing. Hot water thaws the exterior fast — but fast means the outer surface rockets through the danger zone while the interior is still frozen. You’ve created a situation where part of your meat has been sitting at bacteria-friendly temperatures for an extended period. Cold water conducts heat into the meat much faster than air, but slowly enough that the surface stays below the danger zone while the interior catches up. It’s the Goldilocks method. Fast enough to be useful. Safe enough to actually work.

The one rule: cook immediately after cold water thawing. Don’t thaw it and then put it back in the fridge for later. The window is now.

🌀 Option Three: Microwave Defrost (10–20 Minutes, Handle With Care)

The microwave defrost setting exists for exactly this situation and it works — imperfectly, but it works.

Why imperfectly? Microwaves heat unevenly. Thin edges and corners thaw faster than thick centers, which means some spots can start actually cooking while other parts are still frozen. The gap between “almost thawed” and “accidentally cooked the outside” is narrow and the microwave doesn’t care about your dinner timeline.

The workaround: use the defrost setting, check every two or three minutes, rotate and flip, and pull it out before it’s fully thawed. Let cold water finish the last bit. Then cook immediately — microwave-defrosted meat has been through enough temperature fluctuation that it should go straight into the pan.

Best for thin cuts where the uneven heating problem is smaller. Less useful for anything thick.

🚫 The Option That Sounds Fine But Isn’t: The Counter

Leaving frozen meat on the counter to thaw at room temperature. This is the method that food safety professionals lose sleep over, and here’s the exact reason why:

The exterior of the meat thaws first and immediately enters the danger zone — above 40°F, where bacteria multiply rapidly. While the interior is still frozen and perfectly safe, the outside has been sitting at room temperature accumulating a bacterial load. By the time the whole piece is thawed, the exterior has been in the danger zone for hours.

Yes, plenty of people have done this for decades without getting sick. Luck is a real variable in food safety. So is the temperature of your kitchen, the type of meat (poultry carries considerably more risk than beef), and whether anything else went slightly wrong that day. The cold water method takes the same amount of time and eliminates the variable entirely. There is no good reason to choose the counter.

🔄 The Honest Option: Pivot

Sometimes the most dignified move is to change the plan entirely.

Eggs. Pasta with whatever’s in the pantry. A quesadilla. The omelet that takes eight minutes and uses what’s already thawed. These exist for exactly this moment.

The frozen meat goes into the refrigerator tonight and thaws slowly and safely overnight — the gold standard method that preserves quality and requires exactly zero attention. It becomes tomorrow’s dinner. Tonight is a pivot night, and pivot nights have saved more dinners than any thawing method ever invented.

The freezer is not a failure. It’s inventory. Work with what you’ve got.

🛒 Gear That Helps

  • ThermoWorks Thermapen instant-read thermometer — Cooking from frozen requires a thermometer even more than cooking from thawed. The exterior looks done long before the interior is safe. Ten seconds and you know.
  • Large stainless mixing bowl — Wide and deep enough to fully submerge most proteins for the cold water method. The right bowl makes the right method easy.
  • Ziploc gallon freezer bags — For resealing proteins before the cold water soak if the original packaging has been opened. Keeps the water out and the situation sanitary.
  • Instant Pot Duo 7-in-1 — Pressure cooks chicken from frozen in about 25 minutes. The consistent, reliable, set-it-and-walk-away solution to the forgotten defrost. If this problem happens to you regularly, this is the answer.

As an Amazon affiliate, I earn from each qualifying purchase. Thank you for supporting TumbleBump.

✨ The Short Version

You have four legitimate options and one illegitimate one. Cook it frozen, cold water thaw it, carefully microwave defrost it, or pivot to something else entirely. The counter is not on the list.

Every method works when you understand the logic behind it. The logic is always the same: keep the meat out of the danger zone as much as possible and get it to a safe internal temperature before it hits the plate.

The freezer forgot nothing. You just need a plan B. Now you have four of them.

📚 Related Reads

TumbleBump is part of the John D. Reinhart content family. Writer, illustrator, videographer, and accidental filmmaker — find the whole story at JohnDReinhart.com.

26011

©2026 John D Reinhart/TumbleBump.com – all rights reserved
Why Wood Wins: The End-Grain Cutting Board

Your cutting board is either your knife’s best friend or its worst enemy. Here’s why end-grain wood wins the argument — and why it gets better every single time you use it.

Somewhere in your kitchen right now there is a cutting board. It might be plastic. It might be wood. It might be that glass monstrosity someone gave you as a housewarming gift that sounds like a crime scene every time a knife touches it.

Cutting boards are one of those purchases that feel so simple that nobody thinks about them twice. And then one day you use a really good one and realize you’ve been doing it wrong for years. Not catastrophically wrong. Just quietly, consistently, unnecessarily wrong.

Here’s the case for the cutting board that serious cooks swear by, why it makes your knives happier, and why it’s the one piece of kitchen equipment most likely to outlive you.

📋 The Three Boards and Their Honest Report Cards

There are essentially three cutting board materials and each has a personality:

  • Plastic. Cheap, lightweight, dishwasher-safe, and deceptively problematic. Every knife stroke cuts a little groove into the surface. Those grooves collect bacteria and never fully clean out — research from UC Davis found that bacteria drawn into wood actually die off, while bacteria in plastic grooves survive and multiply. Professional kitchens use dedicated color-coded plastic boards for raw meat specifically because they can be machine-washed at high heat — a sanitation option wood can’t offer. In most kitchens, a plastic cutting board is more like a bacteria hotel with great reviews. Useful only as a dedicated raw meat board that goes straight into the dishwasher after every use. Not the hero of the story.
  • Edge-grain wood. The most common wood board — cut from the long face of the plank, showing those familiar parallel grain lines. More affordable, attractive, solid. The knife cuts across the wood fibers though, which eventually shows as visible scoring. A well-used edge-grain board develops the kind of character that’s politely called “rustic.”
  • End-grain wood. Cut from the end of the wood, showing the concentric rings — like looking at a tree stump from above. This is the one. Here’s why.

✨ The Self-Healing Board (This Is Actually Real)

When a knife cuts into an end-grain surface, it doesn’t cut across the wood fibers — it parts them. The fibers open, receive the blade, and then close again. This is not marketing language. This is what wood fibers actually do when cut with the grain rather than across it.

The result: an end-grain board used daily for years can look nearly new on the surface. The same board in edge-grain would be visibly scored and grooved. The end-grain board is quietly healing itself every time you use it.

It also does something remarkable for your knives. When a blade cuts across wood fibers, the edge deflects slightly with each stroke — that’s what dulls it. When it parts fibers, it passes through with less resistance. End-grain boards keep your knives sharper longer. It’s not magic. It’s just wood grain doing exactly what wood grain does.

This is why professional knife-focused cooks use end-grain boards. The board is doing active work to protect the tool.

🌳 Which Wood? (The Short Version)

Not all end-grain boards are created equal. Wood type matters:

  • Maple. The professional standard. Hard, tight-grained, odor-neutral, and what most serious boards are made from. John Boos has been making maple boards for professional kitchens since 1887. That’s a long time to be right about something.
  • Walnut. Slightly softer than maple, which is actually gentler on knife edges. Beautiful dark color that hides staining gracefully. More expensive, worth it if you care about the aesthetics of your kitchen.
  • Teak. Naturally oily, which means less maintenance work. Durable and often sustainably sourced. The oil content can very slightly affect knife edges over time but for most home cooks this is completely irrelevant.
  • What to avoid. Bamboo is very hard and damages knife edges faster than softer hardwoods — despite its reputation as a kitchen-friendly material. Glass and marble are actively hostile to knives and should be used for serving, not cutting. If someone gives you a glass cutting board, smile, say thank you, and serve cheese on it.

🪣 The Maintenance (It’s Not Hard, It’s Just Oil)

End-grain boards need oiling. This is the one thing that stands between a board that lasts a lifetime and one that dries out, cracks, and warps into something sculptural but useless.

The good news: oiling a cutting board takes about four minutes and needs to happen roughly once a month for an active board. When the wood looks dry or pale, it’s crying for oil.

  • Use food-grade mineral oil. Apply it liberally, let it soak in for an hour, wipe off the excess. Repeat until the board stops absorbing readily. That’s it.
  • Follow with board cream. A blend of mineral oil and beeswax that seals the surface after the oil step. Howard Products makes one that is universally praised and costs almost nothing.
  • Never use cooking oils. Olive oil, vegetable oil, coconut oil — any culinary fat will go rancid inside the wood over time. The smell is unpleasant. The experience is worse. Mineral oil only.

A regularly oiled end-grain board doesn’t just survive — it improves. The grain tightens, the surface becomes more moisture-resistant, and the board develops the kind of patina that comes from actual use. It gets better. This is unusual behavior for a kitchen tool.

🛒 The Boards Worth Owning

  • John Boos Maple End-Grain Cutting Board — The gold standard. Professional kitchens have been using John Boos maple boards for over a century. Beautiful, durable, and the kind of thing that gets passed down rather than replaced.
  • Teakhaus End-Grain Teak Cutting Board — Sustainably sourced teak with slightly more forgiving maintenance than maple. Excellent quality and a board that looks as good as it performs.
  • Howard Products Butcher Block Conditioner — The oil-and-beeswax blend that completes the maintenance routine. One bottle lasts years. The board will outlast the bottle by decades.
  • Howard Products Food Grade Mineral Oil — The base conditioning oil. Inexpensive, effective, and the only oil your board should ever see.
  • OXO Bench Scraper — For clearing food off the board between tasks without a trip to the sink. Underrated tool, immediately useful, and your board will thank you for not dragging wet food across it constantly.

As an Amazon affiliate, I earn from each qualifying purchase. Thank you for supporting TumbleBump.

🏆 The Investment Case

A quality end-grain board runs $60 to $200 depending on size and wood. That sounds like a lot for a cutting board until you consider that a well-maintained end-grain board lasts indefinitely — and that the cheap plastic board it replaces was quietly destroying your knife edges and harboring bacteria in its grooves the whole time.

It’s the rare kitchen purchase where spending more actually costs less over time. And it’s almost certainly the only piece of kitchen equipment you’ll ever own that gets genuinely better with age.

Buy it once. Oil it occasionally. Hand it down eventually. That’s the whole plan.

📚 Related Reads

TumbleBump is part of the John D. Reinhart content family. Writer, illustrator, videographer, and accidental filmmaker — find the whole story at JohnDReinhart.com.

25013

©2026 John D Reinhart/TumbleBump.com – all rights reserved
Soft Fruit Is “Smoothie Fruit”

Overripe fruit isn’t food waste. It’s smoothie fuel, jam potential, and baking gold — waiting patiently on your counter for you to recognize its second calling. Here’s the complete guide to what to do with fruit that’s past its prime but nowhere near the trash.

There is a specific window in the life of most fruits during which they are perfect: firm enough to hold their shape, sweet enough to be satisfying, with the right balance of flavor. This window is, depending on the fruit, approximately 36 to 72 hours long. Then it closes.

What’s on the other side of that window is not garbage. It’s a different ingredient.

Soft fruit has more concentrated sugar, more intense flavor, and less structural integrity. These are not failures. These are features — for different applications. The trick is knowing which application applies to which fruit, and acting before the fruit crosses the line from “past peak” to “actually finished.”


The Smoothie Destination

The fastest, easiest save for soft fruit of almost any type: freeze it and make smoothies.

The process: Cut away any truly bad spots (mold, major bruising that’s gone dark and funky). Peel if necessary. Slice into chunks. Freeze on a sheet pan for an hour, then transfer to a bag or container. Label it “smoothie fruit.”

Frozen soft fruit is actually better for smoothies than fresh fruit — it chills the smoothie without watering it down with ice, and the texture difference (soft vs. firm) is completely irrelevant once blended.

What works for smoothies: Bananas (peel before freezing), mangoes, peaches, nectarines, plums, strawberries, blueberries, raspberries, blackberries, cherries (pit them), melon (cut from the rind), kiwi (peel), pineapple, papaya.

What doesn’t work well: Citrus (too much membrane and pith for pleasant blending), grapes (fine but require pitting and can be seedy), watermelon (mostly water, produces a thin result).


The Baking Destination

Soft fruit is, in many cases, superior for baking to fresh fruit. The concentrated sweetness and softened texture integrate better into batters and fillings.

Overripe bananas: The blacker, the better for banana bread. Black bananas have more sugar and more banana flavor than yellow ones. This is the correct destination for every banana that’s gone too far.

Soft peaches and nectarines: Perfect for cobblers, crisps, and muffins. The soft texture means they don’t need to be pre-cooked for most applications.

Overripe berries: Fold into muffins, quick breads, or pancake batter. The cell structure has already broken down, which means they distribute more evenly through the batter.

Soft pears: Excellent in cakes and crumbles. Pear and ginger. Pear and almond. Pear and blue cheese (in a savory tart). All excellent.


The Jam and Compote Destination

You don’t need a canning operation to turn soft fruit into something preserved and spreadable. A quick compote takes 15 minutes and lasts a week in the refrigerator.

Quick compote method: Put soft fruit (roughly chopped, pits and cores removed) in a small saucepan with a tablespoon of sugar and a squeeze of lemon juice. Cook over medium heat, stirring occasionally, until the fruit breaks down into a chunky sauce — about 10–15 minutes. That’s it.

Use it on yogurt, oatmeal, toast, pancakes, or ice cream. Store in the fridge for up to a week.


The Savory Destination

Soft fruit, particularly stone fruits and berries, can be used in savory applications where their intense sweetness and acidity are assets.

  • Soft peaches or nectarines: Pan sauce for pork chops or chicken. Chutney with onion, ginger, and vinegar.
  • Overripe tomatoes: The best tomatoes for sauce are slightly soft ones. They have more concentrated flavor and less water content than peak-firm tomatoes.
  • Soft citrus: Zest before the fruit goes too far, freeze the zest. The juice of a slightly past-prime orange or lemon is still excellent for cooking.

The Line You Cannot Cross

Soft is a stage. Moldy, fermenting, or foul-smelling is a different stage entirely. If the fruit has visible mold spreading across its surface, smells alcoholic or off, or has turned to liquid in spots, it has crossed the line. Some molds on produce produce mycotoxins that can penetrate beneath the visible surface, so “cut away the moldy bit” is less reliable than it is for, say, hard cheese.

When in doubt on mold: if it’s soft fruit, toss it. The rule of thumb is that mold in soft/wet items (berries, peaches, tomatoes) means the whole thing; mold in hard/dry items (hard cheese, firm carrots) can sometimes be cut away with a generous margin.


🛒 Gear Worth Having

As an Amazon affiliate, I earn from each qualifying purchase. Thank you for supporting TumbleBump.


Related Reads


Posted on TumbleBump | SAVES Category

TumbleBump is part of the John D. Reinhart content family. Writer, illustrator, videographer, and accidental filmmaker — find the whole story at JohnDReinhart.com.

24011

©2026 John D Reinhart/TumbleBump.com – all rights reserved