

Butter: Salted vs. Unsalted (The Control Issue)

 The salted vs. unsalted butter debate is real, practical, and settled — but not in the way most people expect. It’s not about one being better than the other. It’s about control. Here’s when each one belongs in your kitchen, what the salt difference actually means, and why serious bakers keep both.

The grocery store dairy case offers salted and unsalted butter side by side, often at the same price, and most people pick one and use it for everything without thinking much about it. This works fine for casual cooking. For anyone who bakes with any regularity, understanding the distinction matters — because the two products are genuinely not interchangeable, for a specific and practical reason.


What the Difference Actually Is

Unsalted butter: Pure butterfat and water. Nothing else. The salt content is zero (or so close to zero it’s functionally irrelevant).

Salted butter: Butterfat, water, and added salt — typically about 1.5–2% salt by weight, which translates to roughly ¼ teaspoon of salt per half-cup (one stick) of butter.

That’s the whole distinction. Flavor and salt content.


The Baking Case for Unsalted

Baking recipes are precise. They specify salt amounts because salt affects gluten development, yeast activity, flavor balance, and the interaction of other ingredients. When a recipe calls for “1 cup unsalted butter” and “½ teaspoon salt,” it has been calibrated with those specific amounts.

If you substitute salted butter, you’re adding approximately an additional ½ teaspoon of salt from the butter alone (for two sticks), on top of whatever salt the recipe specifies. That extra salt is invisible — you can’t adjust for it because you don’t know the exact salt content of your specific salted butter (brands vary from 1.25% to 2% salt), and the recipe writer didn’t account for it.

The result: Baked goods made with salted butter can taste measurably saltier than intended, have subtly different texture (salt affects gluten behavior), and rise differently if yeast is involved. These effects are sometimes invisible, sometimes noticeable, and occasionally problematic.

The control argument: Unsalted butter lets the baker control all salt in the recipe independently. You add the precise amount the recipe specifies and know exactly what went in.


The Cooking Case (Where It Matters Less)

For stovetop cooking — sautéing, making pan sauces, scrambling eggs, making a roux — the salt in salted butter is often irrelevant. You’re seasoning to taste throughout the cooking process, and the small additional salt from the butter is easily adjusted for or completely inconsequential.

Many home cooks who never bake keep only salted butter and are entirely fine. The flavor of salted butter (the salt enhances the butter’s richness and makes it taste more complete) is pleasant on bread and in casual cooking. It’s a legitimate choice for the non-baker.


Freshness: The Other Difference

There’s a secondary reason professional bakers prefer unsalted butter: freshness.

Salt is a preservative. Salted butter has a longer shelf life, which means stores can turn it over more slowly. Unsalted butter, having no preservative, must be fresher. When you buy unsalted butter, you’re more likely to be buying a recently produced product.

Butter is surprisingly delicate — its flavor degrades with age and exposure to light, heat, and air (going rancid). Fresher butter tastes measurably better in applications where butter flavor is featured, like a compound butter, a simple pan sauce, or a high-quality croissant.


European Butter: The Third Category Worth Knowing

European-style butter (Kerrygold, Président, Plugrá, Vermont Creamery) has a higher butterfat content than standard American butter — typically 82–84% vs. 80%. The extra fat makes it richer, creamier, and more flavorful. In baked goods where butter is the star (croissants, shortbread, butter cake), European butter makes a perceptible difference.

European butter comes in salted and unsalted versions. The same rules apply — baking = unsalted, personal preference for everything else.


The Practical Recommendation

If you bake: Keep both. Unsalted in the refrigerator (or freezer in quantity) for baking. Salted on the counter for everyday use.

If you don’t bake: Keep salted. It tastes better on toast and performs identically in cooking. The extra expense and complexity of maintaining two butters isn’t warranted.

For both uses: Buy the freshest butter you can find (check the date), store extra in the freezer where it keeps for up to 12 months, and if butter quality matters to you in a specific application — a special bake, a compound butter — reach for the European variety.


🛒 Gear Worth Having

As an Amazon affiliated, I earn from each qualifying purchase. Thank you for supporting TumbleBump. 


Related Reads


TumbleBump is part of the John D Reinhart content family. Writer, illustrator, videographer, and accidental filmmaker — find the whole story at JohnDReinhart.com.

27001

©2026 John D Reinhart/TumbleBump.com – all rights reserved
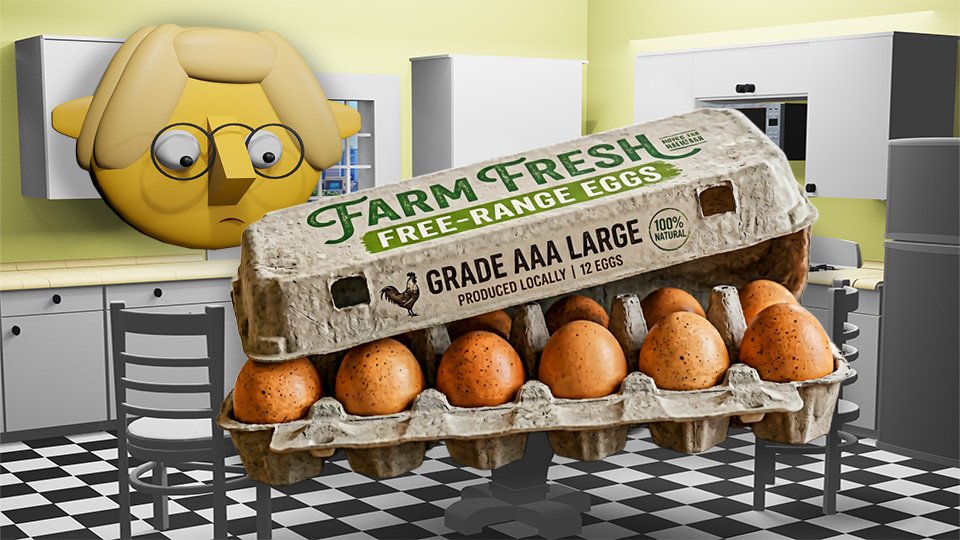
Decoding the Egg Carton

The egg carton is one of grocery shopping’s most confusing documents. Grade AA, free-range, cage-free, pasture-raised, omega-3 enriched, brown vs. white — most of these terms mean something specific, a few mean almost nothing, and only some of them affect the egg you’re actually eating. Here’s the translation.

Standing in front of the egg section of any grocery store is an exercise in label overload. There are ten different cartons with different prices, different colors, different certifications, and different claims — and it’s genuinely unclear which ones represent real differences and which ones are marketing.

Here’s the translation guide.


The Grade: AA vs. A vs. B

Eggs are graded by the USDA based on the quality of the shell, the white, and the yolk — assessed by “candling” (shining light through the egg to see the interior).

Grade AA: The highest grade. Thick, firm white; round, high-standing yolk; clean, unbroken shell. Best for applications where appearance matters: fried eggs, poached eggs.

Grade A: Slightly less firm white that may spread a bit more when cracked. Still excellent and the standard for most home cooking.

Grade B: Flatter, thinner whites; may have slightly off-center yolks. Rarely seen at retail — usually used in liquid egg products and commercial baking.

Practical implication: For cooking, Grade A and Grade AA are essentially interchangeable. Buy whichever is available.


The Size: Large Is the Recipe Standard

Eggs are sold by size — Jumbo, Extra Large, Large, Medium, Small — based on the minimum weight per dozen.

Recipes almost universally assume “large” eggs. 

If you’re baking, using extra large or jumbo eggs when large is specified adds more liquid, fat, and protein than the recipe accounts for — which can leave cakes denser, cookies flatter, and delicate bakes like soufflés less likely to cooperate.

For savory cooking, nobody cares.

Where size genuinely doesn’t matter at all: scrambled eggs, fried eggs, poached eggs, omelets, frittatas, quiches — anything where the egg is the main event rather than a supporting player in a precise formula. The recipe has no formula to upset. It’s just egg.

For everything that isn’t baking, buy whatever size is cheapest per ounce and don’t give it another thought.


White vs. Brown: Purely Cosmetic

The color of an eggshell is determined by the breed of the hen — not the diet, the living conditions, the feed, or the flavor. White-feathered hens typically lay white eggs; red-feathered hens typically lay brown. That’s the entire story.

Brown eggs are not more natural, more nutritious, or better-tasting than white eggs. They cost more primarily because the breeds that lay brown eggs are larger birds that eat more feed, making production slightly more expensive — not because the eggs are superior.

Buy whichever is cheaper.


The Housing and Living Condition Terms

This is where the meaningful differences live.

Conventional/Cage: Hens kept in small wire battery cages, roughly the size of a sheet of paper. No ability to exhibit natural behaviors (foraging, nesting, dustbathing). The cheapest eggs.

Cage-Free: Hens kept in a barn or enclosed facility with no individual cages. More space and ability to walk, but no outdoor access and often still very crowded. A modest improvement over conventional.

Free-Range: Cage-free plus some outdoor access. The catch: “some outdoor access” can legally mean a small concrete patch accessed through a tiny door. The term is often more marketing than meaningful improvement.

Pasture-Raised: The substantive term. Hens spend most of their time outdoors on actual pasture, typically with a minimum of 108 square feet per bird (the Humane Farm Animal Care standard). These hens eat a natural diet supplemented by feed and produce eggs with noticeably richer, more orange yolks. This is the term that reflects a genuine difference in how the hen is raised.

If animal welfare or egg quality matters to you: Pasture-raised is the meaningful tier. Cage-free and free-range represent incremental improvements but are often overstated.


The Nutrition and Feed Claims

Organic: Hens are fed certified organic feed (no pesticides, no GMOs) and receive no antibiotics. Says nothing about living conditions.

Omega-3 Enriched: Hens are fed a diet supplemented with flaxseed or algae, which increases the omega-3 content of their eggs. The increase is real but modest — you’d need to eat several of these eggs daily to approach what a serving of salmon provides.

Vegetarian-Fed: Hens were not fed animal byproducts. This sounds like a health benefit but is actually somewhat misleading — chickens are naturally omnivores that eat insects. A truly naturally fed chicken would eat bugs. “Vegetarian-fed” often just means the hens weren’t outdoors eating insects.

Hormone-Free, Antibiotic-Free: All commercially sold eggs in the US are hormone-free by federal law. The hormone-free claim is meaningless on an egg carton. Antibiotic-free has more substance — it means the flock didn’t receive routine antibiotics.


The Date Codes

Sell-By: The date by which the store should sell the eggs. Not a safety date.

Best By / Best If Used By: Quality date, not safety date. Eggs refrigerated properly remain safe and of good quality for 3–5 weeks after the pack date.

Pack Date: A three-digit number (001–365 representing day of year). On the carton somewhere, often below the sell-by date. The most useful date — eggs packed on day 300 were packed on October 27th. Freshest pack date = freshest eggs.

The float test for freshness: Place an egg in a glass of water. Fresh eggs sink and lay flat. Slightly older eggs stand upright. Floaters are very old and should be discarded. This works because the air cell inside the egg grows as moisture evaporates over time.


The Summary Table

ClaimMeaningful?What It Actually Means
Grade AA vs. AMinimallySlightly firmer white — largely irrelevant
White vs. BrownNoBreed of hen only
Cage-FreeSomewhatNo cages, but still indoors
Free-RangeSomewhatMinimal outdoor access required
Pasture-RaisedYesMeaningful outdoor time on real pasture
OrganicYes (feed)Organic feed, no antibiotics
Omega-3 EnrichedMarginallySmall increase in omega-3s
Hormone-FreeNoAll eggs are hormone-free by law
Vegetarian-FedDebatableActually unnatural for chickens

🛒 Gear Worth Having

As an Amazon affiliate, I earn from each qualified purchase. Thank you for supporting TumbleBump.


Related Reads


Posted on TumbleBump | GOODS Category

TumbleBump is part of the John D Reinhart content family. Writer, illustrator, videographer, and accidental filmmaker — find the whole story at JohnDReinhart.com.

27008

©2026 John D Reinhart/TumbleBump.com – all rights reserved
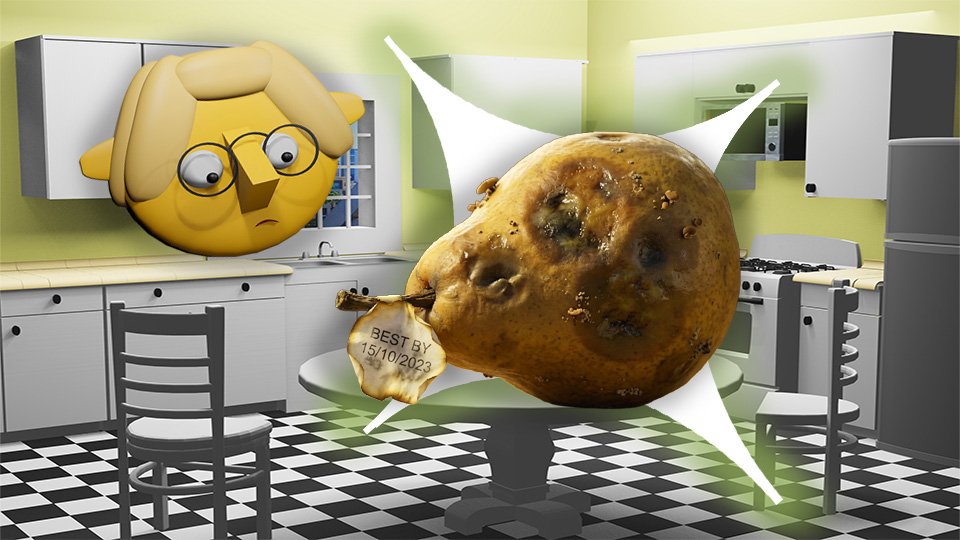
The “Expired” vs. “Best By” Myth

Most food that’s past its printed date is not expired. The date on the package is almost never a safety date — it’s a quality date, a manufacturer preference, or a retail inventory tool. Here’s what the dates actually mean, which ones to take seriously, and the enormous amount of perfectly good food that gets thrown away every year because of a misunderstood label.

Americans throw away an estimated 30–40% of the food supply. A significant portion of this waste is driven by misreading food date labels — tossing food that is perfectly safe and often perfectly good because the printed date has passed.

The critical thing to know: in the United States, with the exception of infant formula, there is no federal law requiring food expiration dates. The dates you see on food packaging are not regulated safety standards. They are manufacturer estimates of peak quality — and “past peak quality” is very different from “unsafe.”


The Date Types and What They Actually Mean

“Best By” / “Best If Used By”: A manufacturer’s estimate of when the product will be at peak quality — flavor, texture, appearance. The product is almost certainly still safe after this date; it may just be slightly less fresh or vibrant than the manufacturer prefers.

“Sell By”: An inventory management date for retailers, not consumers. It tells the store when to pull the product from shelves to ensure customers have reasonable time to use it after purchase. The food is still safe and often still at peak quality on this date and significantly beyond.

“Use By”: The manufacturer’s recommended last date for peak quality. Slightly more conservative than “Best By” but still not a safety date for most products. The exception: “Use By” on highly perishable ready-to-eat products (deli meats, prepared salads) should be taken more seriously.

“Freeze By”: A recommendation for when to freeze the product to maintain best quality — not an indication that it will be unsafe if you don’t.

“Packed On”: When the product was manufactured or packaged. Most useful for calculating freshness from the pack date rather than from an arbitrary printed cutoff.


Products Where the Date Doesn’t Matter Much

Canned goods: The USDA says most canned foods are safe indefinitely. Quality degrades over years — textures soften, flavors mellow — but properly stored canned goods with intact seals are safe well past any printed date. The “best by” date on a can of tomatoes is about flavor peak, not safety.

Dried pasta, rice, and grains: Shelf-stable almost indefinitely when stored properly (airtight, cool, dry). A two-year-old box of pasta is fine.

Dried beans and lentils: Safe indefinitely; become harder to rehydrate over time and require longer cooking. An “expired” bag of dried lentils is not dangerous.

Honey: Does not expire. Honey found in ancient Egyptian tombs was still edible. Crystallization is normal and reversible (warm gently).

Hard liquor: Doesn’t expire. Wine and beer degrade in quality after opening but are not unsafe.

Vinegar: The USDA considers vinegar to have an indefinite shelf life. Quality stays consistent for years.

Soy sauce, fish sauce, hot sauce: Very high salt and acid content makes these shelf-stable well beyond any printed date once opened.

Salt and sugar: No expiration. These are minerals and simple carbohydrates that don’t degrade.

White vinegar, apple cider vinegar: Indefinitely shelf-stable.

Spices: Don’t go bad in a safety sense; do go stale in a flavor sense. See the spice freshness section.


Products Where the Date Matters More

Ready-to-eat deli meats and prepared foods: These are the products where date labels are most meaningful, because listeria can grow at refrigerator temperatures in high-moisture, ready-to-eat environments. Follow “Use By” dates on these more carefully.

Fresh meat, poultry, and seafood: Buy close to the sell-by date only if cooking immediately; otherwise freeze. Fresh fish is particularly time-sensitive.

Soft cheeses: Higher moisture content and lower acidity make soft cheeses (ricotta, brie, fresh mozzarella) more time-sensitive than hard cheeses.

Eggs: See the dedicated egg post for the float test. But eggs in the shell last 3–5 weeks refrigerated past the pack date.

Milk: Usually safe for 7–10 days past the sell-by date when refrigerated properly. Use your nose — it will tell you.


The Sensory Test (Better Than Any Date)

For most foods, your senses are better expiration detectors than any printed date.

Smell it: Most food that has gone genuinely bad smells wrong. (The exception: the foodborne pathogens discussed in the SAVES nose post — Salmonella and listeria don’t have a smell. For these, the date and proper storage matter more than the nose.)

Look at it: Mold, unusual discoloration, liquefied texture — these are visible signs of genuine spoilage.

Taste a small amount: Off flavors are usually obvious.

The combination of smell + look + taste is more reliable for most foods than the date stamp.


The Waste Calculation

The average American household throws away $1,500–2,000 worth of food per year. A significant portion of this is date-driven — food that was thrown away because the date passed, not because the food was actually bad. This is money directly in the trash.

Understanding what dates mean — and that most of them are quality estimates, not safety deadlines — is one of the most immediately useful pieces of food knowledge available.


🛒 Gear Worth Having

  • Refrigerator Thermometer — Proper refrigeration (at or below 40°F) is the most important variable in food longevity. Know what yours is actually running at.
  • OXO Airtight Food Storage Containers — Proper storage extends safe food life significantly beyond what the printed date assumes.
  • Dry-Erase Refrigerator Labels — Date your own food when you open or prepare it. A more accurate signal than the manufacturer’s date.
  • USDA FoodKeeper App — The official resource for how long foods remain safe under different storage conditions.
  • Vacuum Sealer Food Bags — For extending the life of opened products significantly. Removes the air that drives oxidation and mold.

As an Amazon affiliate, I earn from qualifying purchases. Thank you for supporting TumbleBump.


Related Reads


Posted on TumbleBump | GOODS Category

TumbleBump is part of the John D Reinhart content family. Writer, illustrator, videographer, and accidental filmmaker — find the whole story at JohnDReinhart.com.

27004

©2026 John D Reinhart/TumbleBump.com – all rights reserved
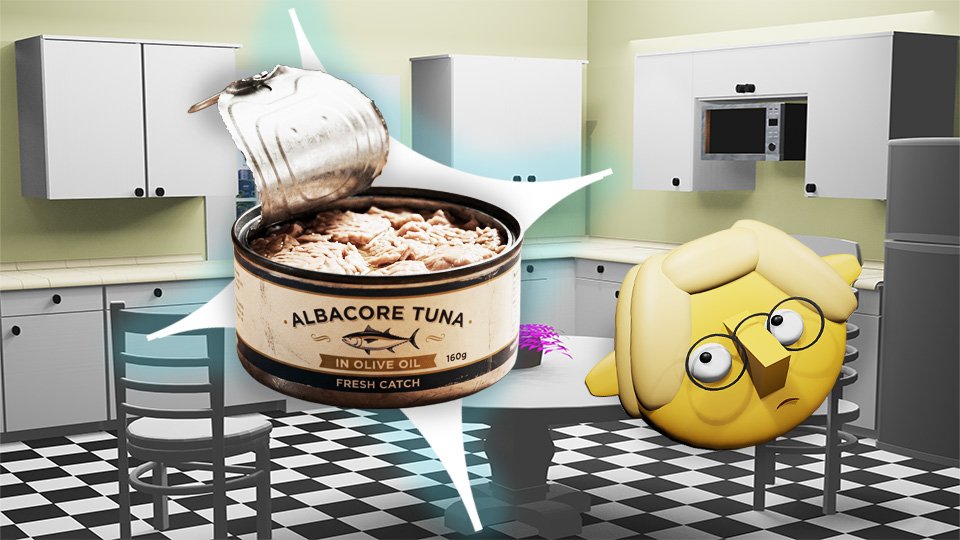
The Case for Fancy Tuna

You’ve been grabbing the cheapest can and shrugging. Turns out there’s a whole world between “fine for the cat” and “why is this so good?” — and the upgrade costs less than you think.

You’ve stood in the canned fish aisle. You’ve looked at forty-seven nearly identical cans of tuna and grabbed the cheapest one because honestly, what’s the difference?

Quite a bit, actually. Canned tuna ranges from “fine for the cat” to “why is this so good?” and the gap between them is smaller than you think — in price, in effort, and in the number of decisions you have to make. You just need to know what you’re looking at.

Here’s the whole thing, from the can to the plate.

🫙 Decision One: Oil or Water?

This is the one that matters most and the one most people never think about. Water-packed tuna is leaner and more convenient. Oil-packed tuna tastes better. That’s the whole argument.

Water-packed: Lower in fat and calories. Milder flavor. Easier to drain and use in anything. The default for most people and perfectly respectable. Works well when the tuna is playing a supporting role — mixed into a casserole, stuffed into a sandwich with a lot going on.

Oil-packed: Richer, silkier, more flavorful. The oil keeps the tuna moist and adds body to whatever you’re making. When the tuna is the star — tuna salad, a tuna melt, tuna on crackers — oil-packed is the one that makes people ask what you did differently.

Olive oil vs. vegetable oil: If you’re going oil-packed, go olive oil. Vegetable oil adds fat without adding flavor. Olive oil adds both, and in a tuna salad the difference is noticeable. Good olive oil-packed tuna — the kind worth eating straight from the can with a fork — is packed in decent olive oil.

And yes, you can use the olive oil from the can. Drizzle it on toast, use it in the dressing, stir it into the tuna salad. It’s already flavored. Don’t waste it.

📋 Decision Two: Solid, Chunk, or Flaked?

This is about texture, and texture matters depending on what you’re making.

  • Solid (or “solid white”): Large, intact pieces. The premium option. Best when you want visible chunks of tuna in the finished dish — a composed salad, a nice pasta, something where presentation counts for something.
  • Chunk: Smaller pieces, still recognizable as tuna. The most common and most versatile. Great for tuna salad, melts, casseroles — anywhere the tuna gets mixed with other things. This is the everyday workhorse.
  • Flaked: Very fine, almost paste-like. Best for dips or anywhere you want the tuna to disappear into the mixture. Less common, less necessary.

🐟 Decision Three: Which Tuna?

The label says “tuna” but the species varies, and species affects both flavor and mercury content.

  • Albacore (white tuna): Mild, firm, pale. The most popular variety in the U.S. Slightly higher in mercury than skipjack, so the FDA suggests limiting it if you’re eating canned tuna several times a week.
  • Skipjack (light tuna): Darker, stronger flavor, softer texture. Lower in mercury. The “chunk light” on most shelves is skipjack. Cheaper, more sustainable, and perfectly delicious in anything that’s getting seasoned and mixed anyway.

For everyday tuna salad and melts: chunk light skipjack in olive oil. For something you want to look beautiful on a plate: solid white albacore. That’s the simple version of the whole decision.

🎯 So What Should You Actually Buy?

The Costco aisle shrug is understandable. Here’s a quick orientation:

  • Everyday use: Store brand chunk light in olive oil. Cheap, solid, does the job. If your store doesn’t carry olive oil-packed, Starkist or Bumblebee chunk light in water is the fallback.
  • Step up: Wild Planet Wild Albacore or Wild Skipjack. Pole-and-line caught, no fillers or broth added, just tuna and olive oil (or water). The difference in flavor over standard supermarket tuna is real and the price difference is modest.
  • Fancy occasion: Tonnino or Ortiz. Jarred, olive oil-packed, solid tuna. The kind you put on a charcuterie board and act casual about. Also extraordinary in a tuna melt if you want to feel unreasonably smug about lunch.

The Best Way to Drain Tuna

Open the can, but don’t throw the lid into the recycle bin yet. Instead, hold it flat over the tuna while you turn the can upside down to let the liquid out.

  • Water: this can go down the kitchen sink.
  • Olive Oil: drain it into a bowl to use in a different salad, or you can drain it into the trash can.
  • Vegetable Oil: drain it straight into the trash can.

You don’t want to send the oil down the kitchen sink because it can gum up the drain and cause it to clog.

🥪 Now Make Something

Three things worth knowing how to make, in ascending order of effort:

Classic Tuna Salad

Drain one can of tuna. Mix with a spoonful of mayonnaise, a squeeze of lemon, a little Dijon, salt, pepper. Taste and adjust. That’s it. Add celery, red onion, or capers if you want texture and bite. Eat on toast, crackers, or a lettuce leaf if you’re feeling virtuous.

Oil-packed tuna needs less mayo because the oil is already doing the work. Start with less and add more if needed.

The Tuna Melt

Make the tuna salad above. Pile it on an open-faced bun, English muffin, or thick slice of bread. Cover with a slice of Swiss, cheddar, or provolone. Put it on a sheet pan and put that in the broiler for three to four minutes until the cheese bubbles and begins to brown. Watch it — broilers are fast and merciless.

Olive oil-packed tuna + good cheese + thirty seconds longer under the broiler than you think you need = the tuna melt that ruins all other tuna melts.

Tuna on Pasta (Five Minutes, Seriously)

Drain the tuna.

Cook the pasta. If you’re new to making pasta, this post will help: The Nuts and Bolts of Making Pasta.

While it drains in the colander, warm a glug of olive oil in the pasta pan, add a clove of garlic, cook thirty seconds. Add the drained tuna, break it up gently, add a squeeze of lemon and a handful of parsley if you have it.

Pour in the cooked pasta and toss everything together. A little salt and pepper, done. This is the weeknight dinner that sounds like nothing and tastes like you did something.

🌊 Where Tuna Comes From

Before it’s in a can on your shelf, tuna is one of the most extraordinary animals in the ocean — and almost nobody knows this.

Tuna are built for speed. Unlike most fish, which are cold-blooded and sluggish in cold water, tuna are warm-blooded — they regulate their own body temperature, which means their muscles stay warm and powerful regardless of what the ocean is doing around them. A bluefin tuna can hit 40 miles per hour. They are, in every meaningful sense, the cheetahs of the sea.

They’re also built to never stop moving. Tuna breathe by swimming — they push water over their gills by moving forward, which means if they stop, they suffocate. A tuna swims every moment of its life, from birth until it ends up in your tuna salad. This constant motion is exactly why tuna meat is so dense, dark, and flavorful compared to a fish that spends its days drifting around a reef.

Tuna are open-ocean hunters. They travel in schools, covering thousands of miles across entire ocean basins — Atlantic, Pacific, Indian — following prey and warm currents. They eat smaller fish, squid, and crustaceans, and they eat aggressively, because fueling a warm-blooded, perpetually-moving, 40-mph torpedo takes considerable effort.

The skipjack in your everyday can is a smaller, faster-maturing species — typically two to three feet long and a few pounds. The albacore is larger and milder. The bluefin, the one you’re paying for at a sushi bar, can exceed ten feet and a thousand pounds. Same family. Very different price point.

What ends up in the can is the loin — the dense, flavorful muscle along the fish’s side that did all that swimming. Which is why good tuna, simply packed in good olive oil, needs almost nothing else. It already did the work.

🛒 Gear Worth Having

As an Amazon affiliate, I earn from qualified purchases. Thank you for supporting TumbleBump.

📚 Related Reads


Posted on TumbleBump | GOODS Category

TumbleBump is part of the John D Reinhart content family. Writer, illustrator, videographer, and accidental filmmaker — find the whole story at JohnDReinhart.com.

27011

©2026 John D Reinhart/TumbleBump.com – all rights reserved
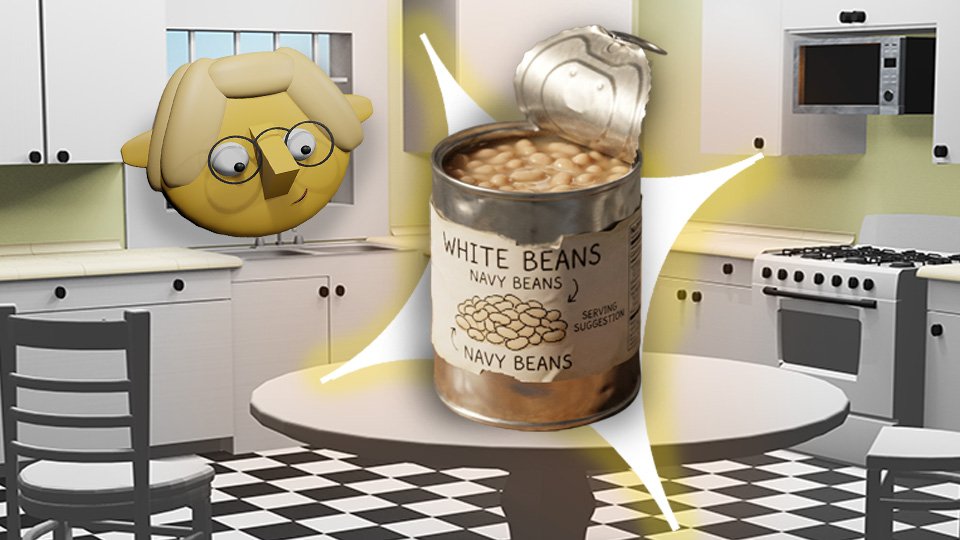
Canned Beans: The “Rinse” Requirement

To rinse or not to rinse — it’s one of the small but genuinely meaningful debates in everyday cooking. The liquid in a can of beans is not mysterious gunk. It’s also not always worth keeping. Here’s when to rinse, when not to, what aquafaba actually is, and why this tiny decision changes more than you’d think.

Canned beans are one of the most useful, most affordable, and most nutritious pantry staples available. They’re also one of the more contested items in the kitchen, specifically around a question that sounds trivial but has real implications: should you rinse them?

The short answer is: it depends on what you’re making. The longer answer explains why, and introduces you to one of the most remarkable byproducts in the kitchen that most people pour down the drain.


What’s in the Can Liquid

The liquid in a can of beans (called brine, bean liquid, or — when it’s from chickpeas specifically — aquafaba) is not a mystery. It’s primarily water, starch, and proteins that leached from the beans during the canning process, combined with any salt added during canning and sometimes other preservatives or flavor agents.

The composition: – Water (the majority) – Starch (gives it a slightly viscous, cloudy quality) – Proteins (including albumins that have interesting culinary properties) – Sodium (anywhere from 100–400mg per serving depending on the brand and whether it’s low-sodium) – Sometimes: preservatives (calcium chloride for texture), sugar, natural flavors


The Case for Rinsing

Reduces sodium: Rinsing canned beans under cold water for 30 seconds removes roughly 40% of the sodium content, according to research from the Bean Institute. For anyone watching sodium intake, this is a meaningful reduction.

Improves flavor in some applications: The brine has a distinctive, slightly metallic, somewhat fermented flavor that is muted in some dishes but noticeable in others. In salads, fresh bean applications, and any dish where the beans are featured on their own without heavy seasoning, the brine can impart a “canned” quality. Rinsed beans taste cleaner.

Reduces flatulence: A portion of the oligosaccharides (complex carbohydrates) responsible for digestive gas have leached into the brine. Rinsing removes some of these. The effect is meaningful but not dramatic.

Improves texture: Rinsed beans are firmer and more distinct. The brine’s starch content causes beans to clump slightly; rinsed beans separate more cleanly.


The Case for Not Rinsing

The brine adds body to soups and stews: In a minestrone, a ribollita, a black bean soup, a chili — the starch in the bean liquid naturally thickens the dish and adds a rounded, integrated quality that rinsed beans (which then just add water from the rinse) don’t provide.

The brine can be the sauce: In a simple dish of white beans with olive oil and garlic, or braised greens with cannellini beans, the bean liquid emulsifies with the olive oil and makes a silky, glossy sauce that has no substitute.

It costs you sodium reduction, which you may not need: If sodium isn’t a concern, the brine’s flavor contribution may be a net positive.


The Rule of Thumb

Rinse when: Using beans in salads, grain bowls, or applications where the beans are served relatively unembellished and the “canned” flavor would be noticeable. Also rinse when sodium is a concern.

Don’t rinse when: Adding beans directly to soups, stews, or dishes where the liquid cooks into the dish and becomes part of the sauce. The brine contributes positively to flavor and texture here.

Either way: The difference is real but not dramatic. Rinsed or not, canned beans are excellent.


Aquafaba: Don’t Pour This Down the Drain

Here’s the part that will genuinely surprise you.

The liquid from a can of chickpeas — aquafaba (Latin for “bean water”) — has remarkable culinary properties. It behaves like egg whites when whipped: it foams, it holds peaks, it emulsifies, and it can be used as a direct substitute for egg whites in many applications.

Whipped aquafaba produces a stable foam that can be used in:

  • Vegan meringues: Aquafaba whipped with sugar and cream of tartar produces meringue that is functionally indistinguishable from egg white meringue to most tasters.
  • Vegan mayonnaise: Aquafaba emulsifies with oil to produce a mayo with no egg.
  • Mousse, pavlova, macarons: Any application that uses whipped egg whites can substitute aquafaba.
  • Cocktails: The egg white foam in a pisco sour or whiskey sour can be replaced with aquafaba for a vegan version with the same texture.

The reason: aquafaba contains albumins — the same class of proteins found in egg whites — that denature and trap air when agitated. The foam is real, stable, and culinarily useful.

To use it: Drain a can of chickpeas, reserving the liquid. That’s aquafaba. Whip it with an electric mixer just as you would egg whites — it takes longer than egg whites but gets there. Use 3 tablespoons of aquafaba per egg white in any recipe.


Low-Sodium vs. Regular Canned Beans

Low-sodium canned beans have roughly 50–140mg of sodium per serving vs. 300–440mg in regular. For those managing blood pressure or overall sodium intake, the low-sodium versions are worth seeking out — particularly when you’re not rinsing (soups, stews). Regular beans that are rinsed approach low-sodium levels in terms of final sodium content.


🛒 Gear Worth Having

As an Amazon affiliate, I earn from qualified purchases. Thank you for supporting TumbleBump.


Related Reads


Posted on TumbleBump | GOODS Category

TumbleBump is part of the John D Reinhart content family. Writer, illustrator, videographer, and accidental filmmaker — find the whole story at JohnDReinhart.com.

27000

©2026 John D Reinhart/TumbleBump.com – all rights reserved
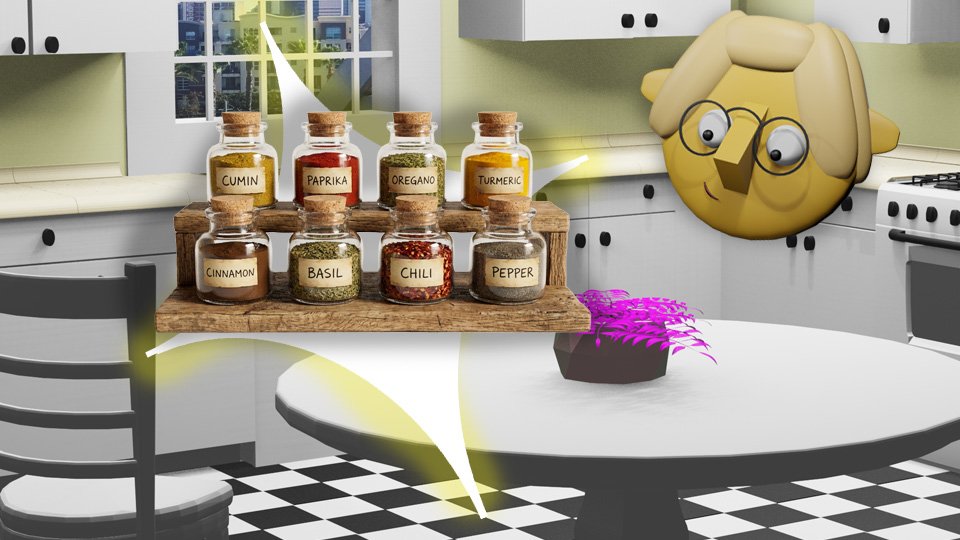
Spices: The “Big Five” Starter Kit

A spice rack with 40 bottles sounds comprehensive and is mostly cabinet space in service of eight spices you actually use. The Big Five is the set that genuinely matters — the five spices that appear in more recipes, across more cuisines, than anything else — plus how to know when they’re fresh and when they’re just colored dust.

The spice aisle is one of grocery shopping’s more paralyzing environments. Dozens of options, enormous price variation, and the nagging sense that a well-stocked spice rack requires not just the common suspects but also sumac, za’atar, smoked pimentón, and various other jars that will sit at the back of the cabinet for four years.

Here’s a more useful frame: there are five spices that appear across more dishes, more cuisines, and more situations than any others. Build around these five first. Add others when specific recipes call for them. This approach produces a spice collection that’s actually used rather than displayed.


The Big Five

1. Kosher Salt (and Flaky Finishing Salt)

Salt is technically a mineral, not a spice, but it deserves first position in any seasoning conversation because nothing else matters as much. Kosher salt (Diamond Crystal specifically — the coarser grain and lower density make it easier to control) is the everyday cooking salt. Flaky sea salt (Maldon) is the finishing salt — a pinch on top of a finished dish adds texture and a clean, bright burst of salinity that regular salt can’t produce.

Two salts, two roles. Neither is optional.

2. Black Pepper (Whole Peppercorns, Freshly Ground)

Pre-ground black pepper oxidizes rapidly and loses most of its aromatic complexity within weeks of grinding. The pre-ground pepper in the standard shaker is, by the time you use most of it, delivering very little beyond a vague peppery heat with none of the floral, piney, spicy complexity of fresh-ground.

Buy whole peppercorns. Keep a pepper grinder. Grind directly into whatever you’re cooking. The difference is immediate and dramatic.

3. Cumin

The spice that appears in Mexican, Indian, Middle Eastern, North African, and Central Asian cooking in slightly different forms and roles. Cumin has a warm, earthy, slightly bitter character that deepens the base of almost any savory dish it enters. It’s in taco seasoning, in garam masala, in harissa, in chili, in hummus, in shakshuka.

Ground cumin is the convenient everyday form. Whole cumin seeds, toasted briefly in a dry pan before grinding, produce a noticeably more complex result — worth the extra step for dishes where cumin is featured prominently.

4. Smoked Paprika

Regular paprika (sweet, mild, red) adds color without much flavor and features in some European dishes. Smoked paprika adds color plus a deeply savory, woody, campfire-adjacent complexity that transforms many dishes. It’s what makes a grain bowl taste like it was made with intention. It’s what deepens a tomato-based sauce. It’s what makes roasted vegetables taste like they spent time near a fire.

Sweet smoked paprika is the everyday form. Hot smoked paprika is the version with heat. Either one belongs in the Big Five; pick based on your heat preference.

5. Garlic Powder

Fresh garlic is almost always preferable to garlic powder — but garlic powder is a different ingredient with a different role, not an inferior substitute. It distributes evenly through dry rubs, spice blends, and flour-based coatings in a way that fresh garlic can’t. It doesn’t burn at high heat the way fresh garlic does. It builds a round, mild background garlic flavor that doesn’t have the sharpness of raw or the sweetness of roasted.

Garlic powder is a support ingredient, not a shortcut. Keep it alongside fresh garlic, not instead of it.


The Honorable Mentions (The Next Five)

Once the Big Five are covered, these five expand the range significantly without veering into specialty territory:

  • Dried oregano — Italian, Greek, Mexican cooking; the herb that costs nothing and adds enormously to tomato sauces and marinades
  • Red pepper flakes (crushed chili) — The adjustable heat that works in almost any cuisine
  • Cinnamon (ground) — Not just for dessert; a pinch in Moroccan tagines, chili, and certain Mexican sauces adds warming depth
  • Turmeric — Color, mild earthy flavor, and anti-inflammatory properties; the base of most curry powders
  • Dried bay leaves — The background note in soups, braises, and stocks that’s impossible to pinpoint but noticeably absent

Freshness: When Spices Die

Dried spices don’t go bad in the food safety sense — they don’t grow mold or become dangerous. They go stale. The volatile aromatic compounds that carry flavor and aroma oxidize over time, leaving behind color but little else.

Signs a spice is stale: Rub a small amount between your fingers and smell it. Fresh spices are immediately aromatic. Stale spices smell like cardboard or almost nothing. If the smell is gone, the flavor is gone.

General shelf life (in an airtight container, away from heat and light): – Ground spices: 2–3 years – Whole spices: 3–5 years – Dried herbs: 1–2 years (they degrade faster than spices)

The spice rack inherited from a previous tenant or bought in a set ten years ago should be completely replaced. This is not a waste — it’s the moment your food starts tasting like the spices you added.


🛒 Gear Worth Having

As an Amazon affiliate, I earn from qualified purchases.


Related Reading

Posted on TumbleBump | GOODS Category

TumbleBump is part of the John D Reinhart content family. Writer, illustrator, videographer, and accidental filmmaker — find the whole story at JohnDReinhart.com.

27006

©2026 John D Reinhart/TumbleBump.com – all rights reserved
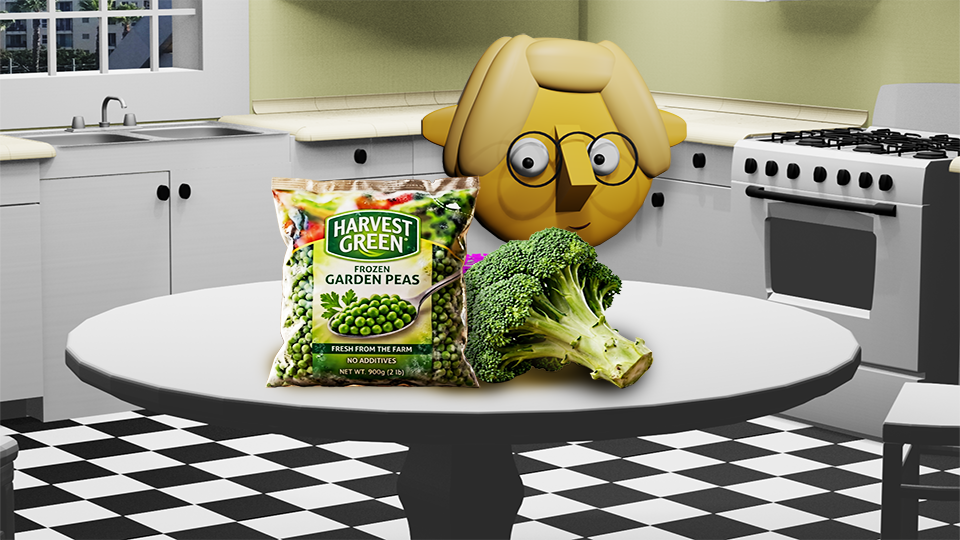
Fresh vs. Frozen Vegetables: The Nutrition Shock

Frozen vegetables have a reputation as the sad consolation prize of the produce world. The reality — backed by decades of nutrition research — is more complicated and considerably more interesting. Frozen vegetables are often more nutritious than “fresh” ones. Here’s why, and when each one is the right choice.

The hierarchy is assumed: fresh vegetables are better, frozen are the compromise you make when fresh isn’t available or affordable. This hierarchy is wrong — or more precisely, it’s situationally wrong in a way that matters for how you shop, eat, and think about nutrition.

Here’s the actual science.


How Fresh Vegetables Lose Nutrition

The moment a vegetable is harvested, its nutritional content begins to decline. Enzymes start breaking down vitamins and other compounds. Exposure to light, heat, and oxygen accelerates the degradation. This is not a flaw in the food — it’s normal biological chemistry.

By the time a “fresh” vegetable reaches your plate, it has typically been:

  • Harvested (often picked before peak ripeness to survive transit)
  • Transported anywhere from 100 to 2,000+ miles
  • Stored in distribution centers, sometimes for days to weeks
  • Displayed in grocery store produce sections, sometimes for additional days
  • Stored in your refrigerator for however many days before you use it

A study from the University of California, Davis found that some fresh vegetables lose 15–55% of their vitamin C content within a week of harvest. Spinach stored at room temperature loses 90% of its folate in 24 hours. Green beans lose 45% of their vitamin C in three days of refrigerator storage.

The “fresh” broccoli you bought on Monday and ate on Thursday has less nutritional value than it did when it was harvested — potentially substantially less.


How Frozen Vegetables Retain Nutrition

Frozen vegetables are almost always harvested at peak ripeness — the moment of maximum nutritional density — then blanched briefly (a few seconds in hot water or steam to deactivate enzymes) and frozen within hours of harvest.

The blanching step does cause some loss of water-soluble vitamins (primarily vitamin C and some B vitamins). But then the freezing essentially stops time. A frozen vegetable held at 0°F loses very little additional nutritional value over the months it sits in your freezer.

Multiple peer-reviewed studies have found that frozen vegetables are nutritionally comparable to, and in many cases superior to, “fresh” vegetables that have been stored for any meaningful length of time. A 2017 study in the Journal of the Science of Food and Agriculture found that frozen produce often had higher levels of certain nutrients (vitamin C, beta-carotene, and folate) than fresh produce stored for three to five days.


The Honest Comparison

Truly fresh vegetables (farmers market, CSA, home garden, same day): At peak nutrition, best flavor, no compromise. This is the gold standard, and if you have consistent access to it, use it.

Frozen vegetables: Frozen at peak ripeness. Nutritionally very strong. Often superior to supermarket “fresh” that has traveled far and sat long. Budget-friendly, waste-free (use exactly what you need, return the rest to the freezer), and available year-round regardless of season.

Supermarket “fresh” vegetables (shipped, stored, displayed): Nutritionally variable depending on specific vegetable, storage time, and transit distance. Still nutritious and worth eating — but the assumption that they’re automatically more nutritious than frozen is not supported by evidence.


What Frozen Does Worse

Texture after cooking: Freezing ruptures cell walls (the water inside expands). Thawed vegetables are softer than their fresh equivalents. This matters a great deal for some applications (salads, crudités, stir-fries where you want a crisp bite) and not at all for others (soups, purées, casseroles, cooked sides).

Raw eating applications: You cannot use frozen vegetables in applications that require them raw. A frozen cucumber does not become a salad cucumber.

Some specific vegetables: Delicate lettuces, fresh herbs, and high-moisture vegetables like cucumber and zucchini do not freeze well at all. These are always better fresh.


The Smart Hybrid Approach

Buy fresh for: salads and raw applications, dishes where texture is critical, items with short transit (local produce in season), and things you’ll use within a day or two.

Buy frozen for: cooking applications (stir-fries where texture isn’t the priority, soups, sautés, roasting), vegetables out of season, bulk nutrition filling for grain bowls and pasta dishes, and emergency cooking when fresh ran out.

Both have a place. Neither is categorically better. The “fresh is always better” assumption costs money, produces food waste, and is not what the nutrition research supports.


🛒 Gear Worth Having

As an Amazon affiliate, I earn from qualifying purchases.


Recommended Reads

Posted on TumbleBump.com | GOODS Category

TumbleBump is part of the John D Reinhart content family. Writer, illustrator, videographer, and accidental filmmaker — find the whole story at JohnDReinhart.com.

27003

©2026 John D Reinhart/TumbleBump.com – all rights reserved
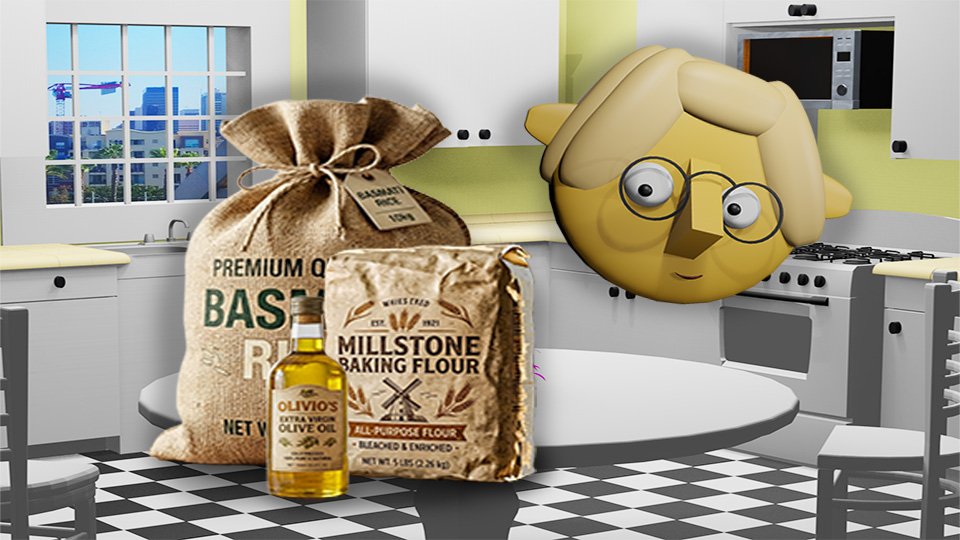
The Essential Five: Your Kitchen’s Stable of Staples

The Culinary Launchpad: Imagine having the power to whip up a delicious, home-cooked meal any night of the week without a frantic trip to the store. By mastering these five essential staples, you are claiming your independence and building a pantry that works as hard as you do. Start here, and turn your kitchen into a place of endless possibility.

Picture having a home-cooked meal within reach on any night of the week, no frantic grocery run required. That’s not a fantasy — it’s just five ingredients, properly stocked, doing more work than their price tags suggest. Master these five, and the pantry stops being empty shelves and starts being a genuine launchpad.

🧱 The Core Idea: Five Staples, Not Five Meals

Cooking doesn’t require magic. It requires building blocks. A true staple lasts a long time, works across a huge range of dishes, costs almost nothing, and is genuinely hard to mess up. Stock five of them well, and you’re not limited to five meals — you’re limited only by what you feel like combining that day. This is the actual mindset shift: cooking confidence isn’t a mystery skill some people have and others don’t. It’s five ingredients and the willingness to combine them.

🍚 Rice: The Foundation

Rice is neutral by design — it carries almost no personality of its own, which is exactly why it soaks up whatever flavor sits next to it. Plain white rice, long or medium grain, is the right starting point; save jasmine or arborio for later once a preference actually develops. Stored dry, it lasts for years without meaningful degradation, which makes “I might not use this in time” a non-issue.

🫘 Beans: Protein Without the Price Tag

Canned beans deliver real protein and fiber for around a dollar a can, and they’re genuinely hard to get wrong. Dried beans are cheaper still, but they ask for a soak and a few hours of cooking — worth graduating to once canned beans feel like second nature, not a requirement to start. Canned beans store indefinitely on a shelf, no real expiration pressure to think about.

🌾 Flour: The Quiet Multitasker

Flour thickens a sauce, binds a dumpling, makes a pancake come together — it’s foundational in the literal sense of the word. All-purpose flour handles everything a home cook actually needs; there’s no specialty version required to get started. Stored dry, ideally in an airtight container, it holds for a long stretch without issue.

🫒 Oil: What Makes Food Taste Cooked

Oil carries flavor, prevents sticking, and is the actual difference between food that browns nicely and food that just sits in a pan being sad. A basic vegetable or canola oil covers the vast majority of everyday cooking — reliable, neutral, and inexpensive. Extra virgin olive oil is wonderful and worth having eventually, but it burns at a lower temperature and costs more, so it’s a second oil to add rather than a first one to insist on.

🧂 Salt: The One Ingredient Everything Needs

Salt doesn’t just add flavor — it makes existing flavor more itself. Plain table salt does the job completely; fancy sea salt or pink Himalayan salt are aesthetic choices, not functional upgrades for everyday cooking. The actual skill worth learning is tasting as you go: a pinch, a taste, another pinch if it needs it, and stopping the moment it tastes like food instead of a salt lick.

🍽️ The Assembly: A Real First Meal

Rice, beans, salt, oil, and a store-bought rotisserie chicken add up to genuine dinner. Cook the rice. Warm the beans with a pinch of salt. Warm a skillet with a little oil and shred the chicken into it. Plate the rice and beans, top with chicken, squeeze a lime or add hot sauce if you have one. That’s a real meal, built from staples plus one shortcut — and shortcuts that get dinner on the table are nothing to apologize for.

🛒 Gear Worth Having

Airtight Rice and Flour Storage Containers — Keeps both staples free of moisture and pests far better than the bag they came in, and looks a lot less chaotic in the pantry.

Extra Virgin Olive Oil, Everyday Bottle — Worth having alongside a basic cooking oil once flavor starts to matter as much as function — finishing a dish, not frying in it.

Salt Cellar with Lid — Keeps a pinch of salt right at the stove where tasting-as-you-go actually happens, instead of buried in a cabinet mid-cook.

As an Amazon affiliate, I earn from qualifying purchases. Thank you for supporting TumbleBump.

📖 Related Reads


TumbleBump is part of the John D Reinhart content family. Writer, illustrator, videographer, and accidental filmmaker — find the whole story at JohnDReinhart.com.

27010

©2026 John D Reinhart/TumbleBump.com — All rights reserved