From Ladles to Spatulas: Essential Kitchen Tools

Beyond knives and pans, your kitchen needs a supporting cast of tools that handle everything from flipping to straining to basting. Here’s the complete guide to the essential non-knife, non-cookware kitchen tools — what they do, what to look for, and which ones are worth spending money on.

The best kitchen tools are the ones you reach for every day without thinking. They’re sized right, feel comfortable, and do their job without drama. Building a collection of these tools — deliberately, rather than by accumulation — means your kitchen works with you rather than against you.

Here’s the full supporting cast beyond knives and cookware.


The Mixing and Prep Tools

Mixing bowls (nesting set, 3–5 sizes) The workhorses of prep. You need small (for beaten eggs, small mixes), medium (for most batters and doughs), and large (for big salads, bread dough, batch mixing). Stainless steel nests efficiently, is dishwasher-safe, and lasts forever. Glass is heavier but see-through and microwave-safe.

Look for: flat bottoms for stability, a pour spout on at least one bowl, non-slip base.

Whisk (balloon and/or flat) A balloon whisk incorporates air — for eggs, cream, vinaigrettes, and sauces. A flat whisk (also called a roux whisk) works across the bottom of a saucepan without lifting — better for sauces and gravies. One of each is ideal; a balloon whisk alone covers 80% of needs.

Measuring cups and spoons Dry and liquid measuring cups are not interchangeable. Dry cups (fill and level) for flour, sugar, and dry ingredients. Liquid measuring cups (Pyrex glass) for anything pourable — set them on the counter and read from the side at eye level for an accurate pour. Measuring spoons for small quantities of both. This is the basics set — every kitchen needs it.


The Lifting and Moving Tools

Fish spatula (thin, flexible, slotted stainless) For flipping delicate items that would break with a thicker tool: fish fillets, pancakes, fried eggs, latkes. The offset angle keeps the hand away from the heat; the thin, flexible head slides under food without breaking it.

Solid spatula (wide, heat-safe) For pressing burgers, flipping pancakes in bulk, transferring larger items. Slightly more rigid than the fish spatula.

Long-handled tongs (12-inch, locking) For reaching into pots and pans, turning proteins at the grill, serving salads, and picking up things that are too hot or too awkward to handle otherwise. The locking mechanism keeps them closed for storage.

Slotted spoon (large, stainless) For lifting solids out of liquids. Poached eggs from water, dumplings from broth, vegetables from blanching liquid. Nothing substitutes for a good slotted spoon in this role.


The Straining and Sifting Tools

Colander (large, stainless or silicone) For draining pasta, rinsing produce, draining blanched vegetables. A large colander (5+ quart) handles everything without overflow. Stainless lasts forever; silicone is foldable and storage-efficient.

Fine mesh strainer (medium, stainless) For straining stocks and sauces, sifting flour and powdered sugar, rinsing small grains like quinoa, and creating smooth sauces. The fine mesh catches small particles that a colander passes. Versatile and underrated.


The Measuring and Monitoring Tools

Kitchen scale (digital) For accurate baking (weight is always more precise than volume for flour), for portioning, and for following recipes by weight (most professional recipes and many good cookbooks use grams). A $15–25 kitchen scale changes baking outcomes immediately.

Instant-read thermometer The most important single monitoring tool in the kitchen. Covered in full in the dedicated post called The Digital Instant-Read Thermometer .


The Specialty Tools Worth Having

Bench scraper (metal) For sweeping cutting board debris into a bowl or trash, for dividing dough, for cleaning surfaces. One of the most used and least celebrated kitchen tools.

Microplane grater For grating citrus zest, parmesan, garlic, fresh ginger, nutmeg, and hard spices. The fine razor-sharp teeth produce a feather-light result that a box grater cannot. One Microplane per kitchen, used constantly.

Vegetable peeler (Y-peeler) The Y-shaped swivel peeler removes less material than the classic straight peeler and works faster in most people’s hands.


🛒 Gear Worth Having

As an Amazon affiliate, I earn from qualified purchases. 


Posted on TumbleBump | INVESTS Category

TumbleBump is part of the John D Reinhart content family. Writer, illustrator, videographer, and accidental filmmaker — find the whole story at JohnDReinhart.com.

25003

©2026 John D Reinhart/TumbleBump.com – all rights reserved
The Microwave “Steam Bomb”

Your microwave is probably a little frightening on the inside. The Steam Bomb is the two-minute trick that loosens every splatter, every mystery stain, and every hardened food incident so it wipes away without scrubbing. It also smells nice.

Let’s be honest about what the inside of most microwaves looks like.

There’s a layer of general griminess that happened gradually. There’s at least one specific incident — a soup eruption, an exploded tomato sauce moment, possibly a popcorn situation — that left its mark. And then there’s the rest of it, the ambient residue of hundreds of reheated meals, that gives the whole thing a faintly prehistoric quality.

The reason this accumulates is that microwaves are hard to clean in the conventional way. The interior is small and angled, the vents and turntable plate are awkward, and anything that has dried and hardened in there requires real effort to scrub.

The Steam Bomb addresses this by doing the prep work for you.


What the Steam Bomb Is

The Steam Bomb is a technique that uses steam — generated inside the microwave — to loosen and re-hydrate every spatter, stain, and hardened residue on the interior walls. By the time you open the door, virtually everything wipes away with a damp cloth and zero scrubbing.

It takes about two minutes of actual effort, plus five minutes of waiting. Your microwave comes out looking like you actually care about it, which you now do.


The Basic Method: Lemon Water

  1. Fill a microwave-safe bowl or measuring cup with about a cup of water. Add two or three slices of lemon, a squeeze of lemon juice, or a few tablespoons of white vinegar. (The acid helps cut grease; the lemon makes it smell significantly better than vinegar alone.)
  2. Place in the microwave and heat on high for 3–5 minutes. The water should boil and steam for the duration.
  3. Leave the door closed for another 3–5 minutes after it’s done. This is the active cleaning phase — the steam is sitting against the walls, loosening everything.
  4. Carefully remove the bowl (it will be very hot) and the turntable plate.
  5. Wipe down the interior with a damp cloth or paper towel. Everything should come off with almost no resistance.
  6. Wash the turntable plate in the sink.

The White Vinegar Version (No Lemon Needed)

Same process, with two tablespoons of white vinegar in a cup of water. White vinegar is an excellent degreaser and the steam carries its cleaning properties throughout the interior. The smell dissipates quickly — within a few minutes of leaving the door open after cleaning.

If the lemon version is the pleasant spa experience, the white vinegar version is the slightly more industrial spa experience. Both work.


After the Steam: Handling Persistent Spots

The Steam Bomb loosens everything, but occasionally a particularly determined splatter from three months ago requires a little encouragement.

  • Baking soda paste: Mix a tablespoon of baking soda with just enough water to make a paste. Apply to stubborn spots, let sit 2–3 minutes, wipe away. Gentle abrasive action plus mild base chemistry.
  • A damp paper towel + elbow grease: After steaming, even the resistant spots are far softer than they were. A bit more pressure on the wipe usually does it.
  • Dawn dish soap directly on the cloth: For greasy spots that need a little degreaser, a tiny drop of dish soap on your wiping cloth speeds things up.

The Door: The Forgotten Zone

The interior of the door — particularly the window and the seal — gets just as dirty as the walls and is wiped far less often. After the Steam Bomb, wipe the door interior with the same damp cloth. Pay attention to the edges and the rubber seal around the glass.

The exterior of the door (the handle, the buttons, the front panel) should be wiped with a lightly damp cloth regularly — this is the most-touched surface on the microwave and picks up grease and food residue from hands throughout the day.


How Often to Steam Bomb

Once a week if you’re a heavy microwave user. Once every two weeks for average use. Once a month if you use it occasionally.

The intervals don’t matter much as long as the habit is consistent. The microwave that gets a monthly Steam Bomb stays reasonably clean. The one that never gets it becomes an archaeological site.


Prevention: The Microwave Cover

A microwave-safe cover or splatter guard, placed over food before heating, prevents 90% of the mess that accumulates in there. A piece of paper towel laid over the top of a bowl works just as well for most things.

Prevention plus monthly Steam Bombing means your microwave stays in a condition you’re not embarrassed by when guests use it. This is, remarkably, a lower bar than it sounds.


🛒 Gear Worth Having

  • Tovolo Microwave Cover — Vented to let steam escape, wide enough to cover most plates and bowls. Use it every time and the Steam Bomb becomes almost optional.
  • Angry Mama Microwave Cleaner — A novelty-shaped steam bomb vessel that works exactly as described and is genuinely amusing to own. Fill it with water and vinegar, microwave for 7 minutes, wipe.
  • Method Daily Kitchen Spray — For wiping down the exterior after cleaning. Smells nice and cuts grease effectively.
  • Micro-Fiber Cleaning Cloths 24-Pack — The ideal wiping cloth for microwave interiors. Doesn’t leave lint, doesn’t scratch.
  • Lemon Essential Oil — A few drops in the steam water makes the whole exercise smell like a very clean, citrus-forward spa.

As an Amazon affiliate, I earn from qualified purchases.


Related Reads

Posted on TumbleBump | CLEANS Category

TumbleBump is part of the John D Reinhart content family. Writer, illustrator, videographer, and accidental filmmaker — find the whole story at JohnDReinhart.com.

23011

©2026 John D Reinhart/TumbleBump.com – all rights reserved
Spices: The “Big Five” Starter Kit

A spice rack with 40 bottles sounds comprehensive and is mostly cabinet space in service of eight spices you actually use. The Big Five is the set that genuinely matters — the five spices that appear in more recipes, across more cuisines, than anything else — plus how to know when they’re fresh and when they’re just colored dust.

The spice aisle is one of grocery shopping’s more paralyzing environments. Dozens of options, enormous price variation, and the nagging sense that a well-stocked spice rack requires not just the common suspects but also sumac, za’atar, smoked pimentón, and various other jars that will sit at the back of the cabinet for four years.

Here’s a more useful frame: there are five spices that appear across more dishes, more cuisines, and more situations than any others. Build around these five first. Add others when specific recipes call for them. This approach produces a spice collection that’s actually used rather than displayed.


The Big Five

1. Kosher Salt (and Flaky Finishing Salt)

Salt is technically a mineral, not a spice, but it deserves first position in any seasoning conversation because nothing else matters as much. Kosher salt (Diamond Crystal specifically — the coarser grain and lower density make it easier to control) is the everyday cooking salt. Flaky sea salt (Maldon) is the finishing salt — a pinch on top of a finished dish adds texture and a clean, bright burst of salinity that regular salt can’t produce.

Two salts, two roles. Neither is optional.

2. Black Pepper (Whole Peppercorns, Freshly Ground)

Pre-ground black pepper oxidizes rapidly and loses most of its aromatic complexity within weeks of grinding. The pre-ground pepper in the standard shaker is, by the time you use most of it, delivering very little beyond a vague peppery heat with none of the floral, piney, spicy complexity of fresh-ground.

Buy whole peppercorns. Keep a pepper grinder. Grind directly into whatever you’re cooking. The difference is immediate and dramatic.

3. Cumin

The spice that appears in Mexican, Indian, Middle Eastern, North African, and Central Asian cooking in slightly different forms and roles. Cumin has a warm, earthy, slightly bitter character that deepens the base of almost any savory dish it enters. It’s in taco seasoning, in garam masala, in harissa, in chili, in hummus, in shakshuka.

Ground cumin is the convenient everyday form. Whole cumin seeds, toasted briefly in a dry pan before grinding, produce a noticeably more complex result — worth the extra step for dishes where cumin is featured prominently.

4. Smoked Paprika

Regular paprika (sweet, mild, red) adds color without much flavor and features in some European dishes. Smoked paprika adds color plus a deeply savory, woody, campfire-adjacent complexity that transforms many dishes. It’s what makes a grain bowl taste like it was made with intention. It’s what deepens a tomato-based sauce. It’s what makes roasted vegetables taste like they spent time near a fire.

Sweet smoked paprika is the everyday form. Hot smoked paprika is the version with heat. Either one belongs in the Big Five; pick based on your heat preference.

5. Garlic Powder

Fresh garlic is almost always preferable to garlic powder — but garlic powder is a different ingredient with a different role, not an inferior substitute. It distributes evenly through dry rubs, spice blends, and flour-based coatings in a way that fresh garlic can’t. It doesn’t burn at high heat the way fresh garlic does. It builds a round, mild background garlic flavor that doesn’t have the sharpness of raw or the sweetness of roasted.

Garlic powder is a support ingredient, not a shortcut. Keep it alongside fresh garlic, not instead of it.


The Honorable Mentions (The Next Five)

Once the Big Five are covered, these five expand the range significantly without veering into specialty territory:

  • Dried oregano — Italian, Greek, Mexican cooking; the herb that costs nothing and adds enormously to tomato sauces and marinades
  • Red pepper flakes (crushed chili) — The adjustable heat that works in almost any cuisine
  • Cinnamon (ground) — Not just for dessert; a pinch in Moroccan tagines, chili, and certain Mexican sauces adds warming depth
  • Turmeric — Color, mild earthy flavor, and anti-inflammatory properties; the base of most curry powders
  • Dried bay leaves — The background note in soups, braises, and stocks that’s impossible to pinpoint but noticeably absent

Freshness: When Spices Die

Dried spices don’t go bad in the food safety sense — they don’t grow mold or become dangerous. They go stale. The volatile aromatic compounds that carry flavor and aroma oxidize over time, leaving behind color but little else.

Signs a spice is stale: Rub a small amount between your fingers and smell it. Fresh spices are immediately aromatic. Stale spices smell like cardboard or almost nothing. If the smell is gone, the flavor is gone.

General shelf life (in an airtight container, away from heat and light): – Ground spices: 2–3 years – Whole spices: 3–5 years – Dried herbs: 1–2 years (they degrade faster than spices)

The spice rack inherited from a previous tenant or bought in a set ten years ago should be completely replaced. This is not a waste — it’s the moment your food starts tasting like the spices you added.


🛒 Gear Worth Having

As an Amazon affiliate, I earn from qualified purchases.


Related Reading

Posted on TumbleBump | GOODS Category

TumbleBump is part of the John D Reinhart content family. Writer, illustrator, videographer, and accidental filmmaker — find the whole story at JohnDReinhart.com.

27006

©2026 John D Reinhart/TumbleBump.com – all rights reserved
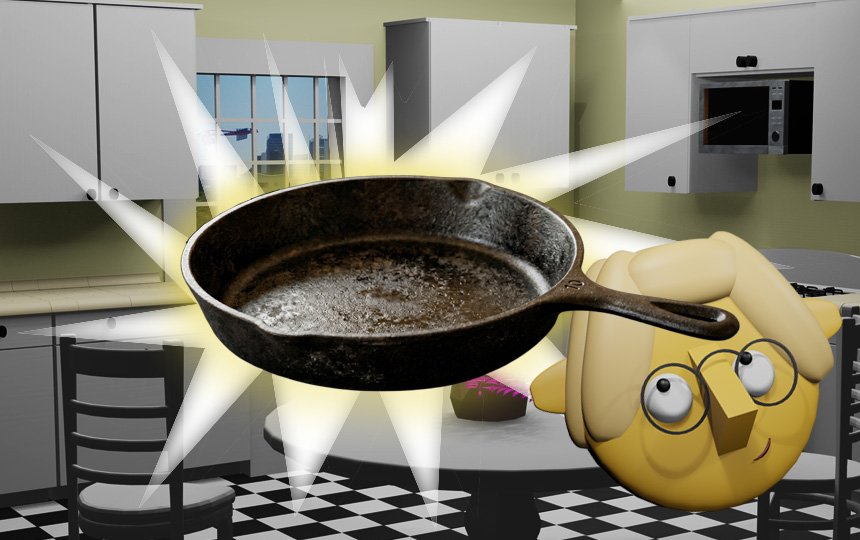
Turning the “Bottom of the Jar” into Dressing

When the mustard, tahini, honey, or jam is almost gone, don’t wash the jar. Add vinegar, oil, and a pinch of salt, shake hard, and watch it become the best dressing you’ll make this week. Here’s the complete guide to jar dressings — one of the most satisfying kitchen hacks in existence.

There is a moment in the life of most condiment jars when the contents are technically “gone” — scraped out to the best of the human hand’s ability — but the jar still holds a meaningful coating of flavor on every interior surface.

This coating is not a cleaning problem. It is a dressing problem, and it has an elegant solution.

Add an acid. Add an oil. Add a pinch of salt. Put the lid on. Shake vigorously for ten seconds. You now have a small-batch dressing made in a container that is already perfectly portioned, airtight, and requires zero bowls or measuring.

This is one of the most satisfying kitchen moments available to a person who cooks regularly. Here’s how to do it with every jar in your pantry.


The Mustard Jar Dressing

Dijon mustard is perhaps the greatest jar dressing base, because Dijon is already a vinaigrette ingredient — it’s an emulsifier that binds oil and vinegar together into a stable, creamy dressing.

What’s left in the jar: The thin coating of Dijon on every interior surface, worth roughly a teaspoon.

What to add: 1 tablespoon red wine vinegar or lemon juice. 3 tablespoons good olive oil. A pinch of salt and pepper. Optional: a small spoonful of honey, a clove of garlic if you want to let it sit.

Shake: Hard. For 15 seconds. The mustard emulsifies the oil and vinegar into a cohesive, slightly creamy vinaigrette.

Use: On a salad immediately, or refrigerate for up to a week.


The Tahini Jar Dressing

What’s left: The thick paste coating a tahini jar, worth a tablespoon or two.

What to add: 2 tablespoons lemon juice. 1 tablespoon water. 1 tablespoon olive oil. A pinch of salt. Optional: a tiny clove of garlic, a pinch of cumin.

Shake: The tahini will seize up when the lemon juice hits it, then relax and emulsify as you add more liquid and shake. This is normal.

Use: On grain bowls, roasted vegetables, falafel, or as a general drizzle on anything that sounds good with sesame.


The Jam or Honey Jar Dressing

What’s left: A sweet, fruity or floral coating worth a spoonful.

What to add: 1 tablespoon apple cider vinegar or white wine vinegar. 3 tablespoons olive oil. A pinch of salt. Optional: a small amount of Dijon if you have a separate open jar.

Shake: The residual sweetness balances the vinegar into a bright, lightly sweet vinaigrette. This is particularly good on bitter greens like arugula or radicchio, where the sweetness is a counterpoint.


The Hot Sauce Jar Dressing

What’s left: The coating of vinegar-forward hot sauce on the interior.

What to add: 1 tablespoon lime juice. 2 tablespoons olive oil or neutral oil. A pinch of salt. Optional: a small spoonful of honey for a honey-hot situation.

Shake: Produces a tangy, spicy vinaigrette that works well on taco salads, roasted vegetables, or anything that benefits from a kick.


The Pickle Brine Enhancement (A Related Move)

When the pickles are gone, don’t pour the brine down the drain. It’s acidic, salty, and deeply flavored — a ready-made vinaigrette acid component.

Add a few tablespoons of pickle brine directly to olive oil, shake, and you have a quick dressing. Or use the brine anywhere you’d use vinegar: deglazing a pan, in a marinade, in a potato salad dressing.


The Peanut Butter Jar Sauce

A jar of nearly-empty peanut butter becomes a quick peanut sauce for noodles or a dipping sauce for spring rolls.

What to add: 2 tablespoons soy sauce. 1 tablespoon lime juice. 1 tablespoon warm water. Optional: a few drops of sesame oil, a small piece of ginger, a squeeze of honey.

Shake: The peanut butter loosens with the liquid and emulsifies into a smooth, spreadable sauce.


The General Formula

Any jar with residual contents + acid (vinegar, citrus juice) + fat (olive oil, neutral oil) + salt = a dressing. The jar’s contents provide the flavor variable. The formula is constant.

Start with roughly a 3:1 ratio of oil to acid — 3 parts oil, 1 part acid — and adjust from there based on taste. Saltier jar contents (like pickle brine or soy sauce) need less additional salt. Sweeter contents (jam, honey) benefit from more acid.


🛒 Gear Worth Having

As an Amazon affiliate, I earn from qualified purchases. 


Related Reads

Posted on TumbleBump | SAVES Category

TumbleBump is part of the John D Reinhart content family. Writer, illustrator, videographer, and accidental filmmaker — find the whole story at JohnDReinhart.com.

24007

©2026 John D Reinhart/TumbleBump.com – all rights reserved
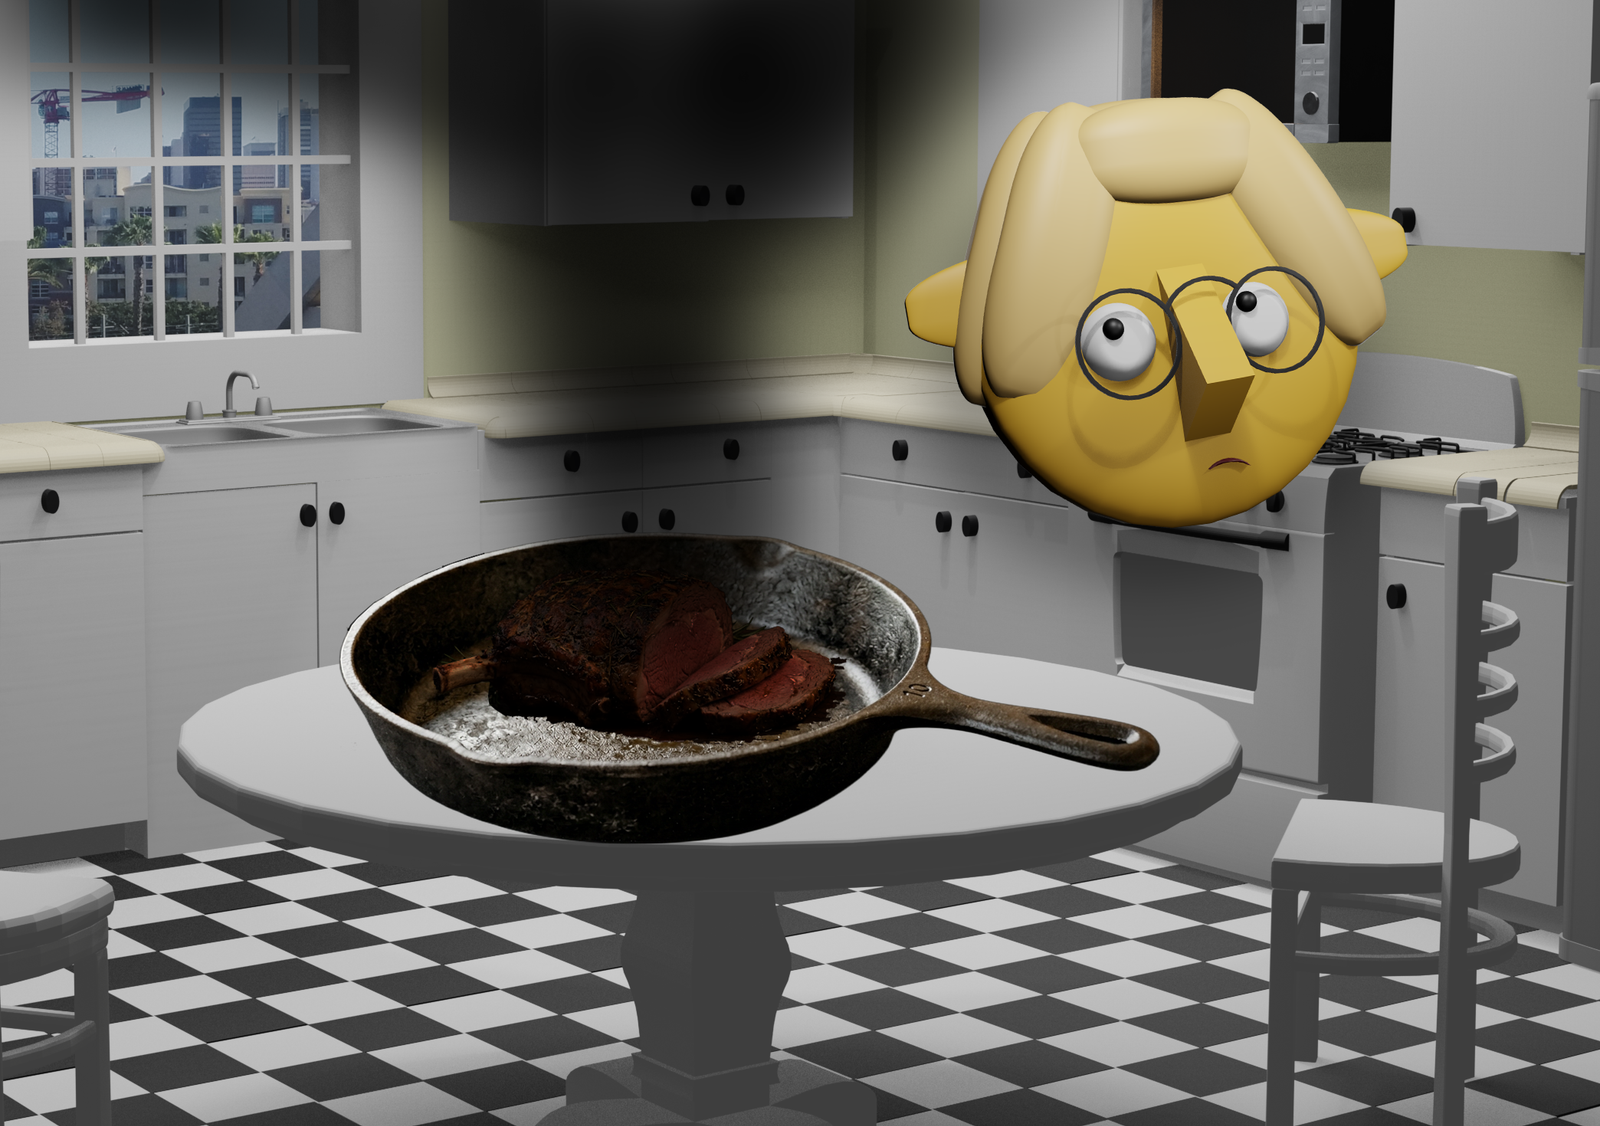
Resurrecting Tuesday’s Lasagna

Cold leftover lasagna reheated wrong is a dense, rubbery, vaguely sad experience. Reheated right, it’s almost better than it was on Tuesday — with a crust on the bottom that didn’t exist the first time around. Here’s how to properly reheat any layered, baked, or sauced leftover dish.

Tuesday’s lasagna deserves better than what most people do to it.

What most people do: pull it out of the fridge cold, put it directly in the microwave, blast it on high for three minutes, and serve something that is searing hot on the outside and still cold in the center, with a rubber layer of pasta and a layer of grease sitting on top of it.

What Tuesday’s lasagna deserves: a proper reheat that brings it back to temperature gently, lets the cheese melt through again, and produces something that is actually as good as the original. Or, with the right technique, better.

This post is about leftover lasagna specifically — but the principles apply to every layered, baked, or sauced leftover: pasta bakes, moussaka, enchiladas, shepherd’s pie, cassoulet. Anything that went into the oven the first time benefits from going back in.


The Oven Method: The Right Way

The oven is the correct tool for reheating baked dishes. It heats gently and evenly, allows the cheese to re-melt properly, and — if you want it — produces a slightly crispy bottom and top that didn’t exist the first time.

The method:

  1. Let the lasagna come toward room temperature for 20–30 minutes on the counter before reheating. Not mandatory, but it means shorter oven time and more even heating.
  2. Preheat your oven to 350°F.
  3. Add a tablespoon or two of water or tomato sauce to the top of the portion before covering. This steam prevents the pasta from drying out during reheating. Don’t skip this.
  4. Cover tightly with foil. The trapped steam is what rehydrates the pasta layers.
  5. Bake for 20–30 minutes (for a single portion or small section). A full pan takes longer — 45 minutes to an hour.
  6. Remove the foil for the last 5–10 minutes if you want a slightly browned, bubbling top. Optional but recommended.
  7. Let it sit for 5 minutes before serving. The interior keeps cooking and the temperature equalizes.

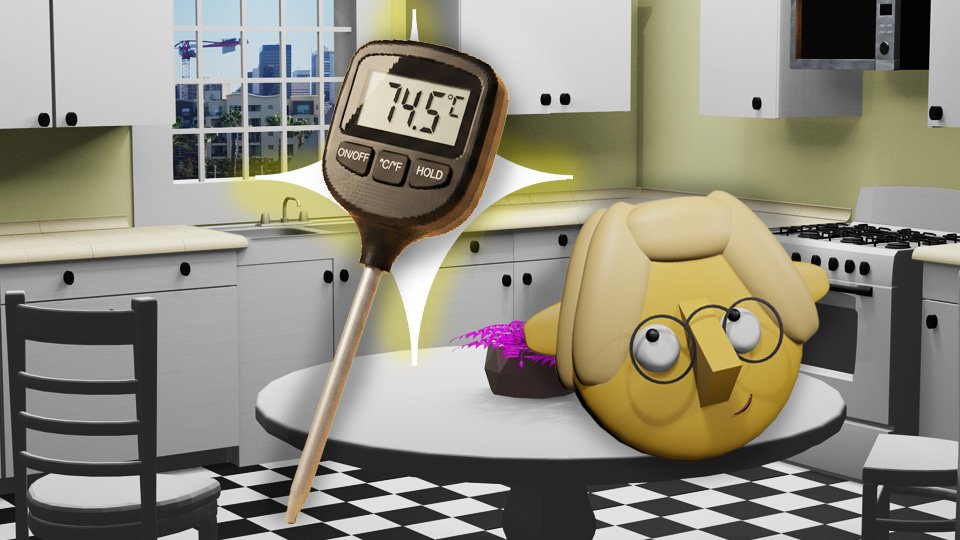
Temperature check: The internal temperature should reach 165°F. A thermometer removes any guesswork.


The Skillet Method: The Crispy Bottom Upgrade

This method applies specifically to individual slices of lasagna or similar baked pasta, and it produces something the original didn’t have: a crackling, golden, slightly fried bottom crust.

  1. Heat a non-stick or cast iron skillet over medium-low heat. Add a small amount of olive oil or butter.
  2. Place the cold lasagna slice in the skillet.
  3. Add a tablespoon of water to the pan and immediately cover with a lid. The steam heats the interior; the pan crisps the bottom.
  4. Cook over medium-low heat for 8–10 minutes. The bottom will brown; the interior will heat through.
  5. Uncover for the last 2 minutes to let the steam escape and the bottom crisp further.

This is, with some justification, better than the original. A fried lasagna bottom is a different and excellent thing.


The Microwave Method: For When Speed Is the Priority

The microwave is not ideal for lasagna, but it’s not catastrophic if done correctly.

  1. Use a microwave-safe cover or damp paper towel over the portion. This creates steam and prevents the pasta from drying out.
  2. Heat at medium power (50–70%), not full blast. Full power heats unevenly — boiling some parts while others remain cold. Medium power heats more gradually and evenly.
  3. Heat in 90-second intervals, checking between each. Stir sauce or rearrange if possible.
  4. Let it sit for 90 seconds after the last interval. The carry-over heat finishes the job.

The microwave produces acceptable results with these adjustments. It doesn’t produce the skillet version’s crust or the oven version’s even melt, but it gets food hot in 5 minutes.


The Universal Leftover Reheat Principles

These apply beyond lasagna to most baked or sauced leftovers:

Add moisture before reheating. Baked dishes lose moisture in storage. A tablespoon of water, broth, or sauce added before covering prevents drying out.

Cover while reheating. Whether foil in the oven or a damp paper towel in the microwave — covering traps steam and heats evenly.

Reheat low and slow. High heat scorches the outside before the inside is warm. Moderate heat (350°F in the oven, medium-low in a skillet, medium power in a microwave) is consistently better.

Rest after reheating. The 5 minutes of rest after oven heating isn’t a formality — the center is still warming during that time. Cutting immediately produces cold centers and wasted heat.


🛒 Gear Worth Having

As an Amazon affiliate, I earn from qualified purchases.


Related Reads


Posted on TumbleBump | SAVES Category

TumbleBump is part of the John D Reinhart content family. Writer, illustrator, videographer, and accidental filmmaker — find the whole story at JohnDReinhart.com.

24003

©2026 John D Reinhart/TumbleBump.com – all rights reserved
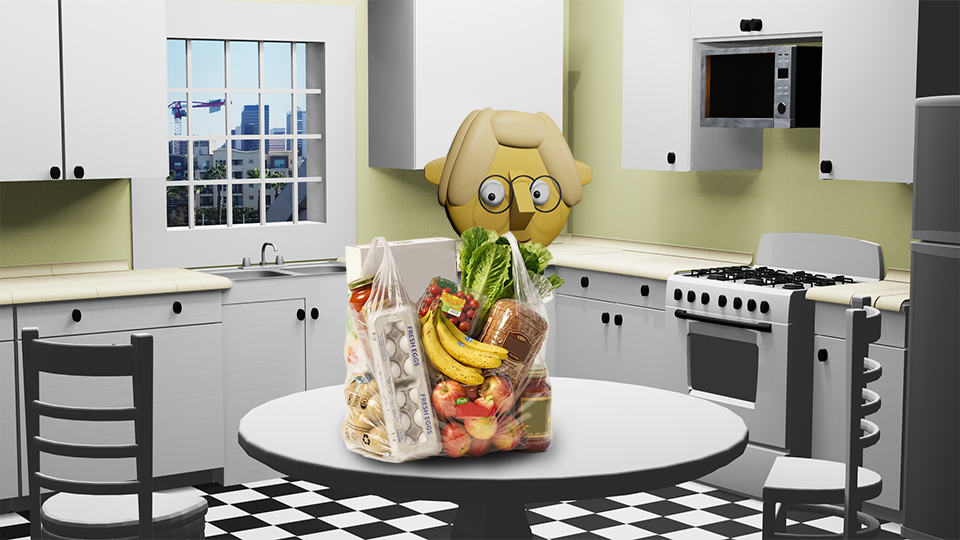
What Recipes Assume You Already Know

Recipes are written by people who already know how to cook, for people who also already know how to cook — which is why they’re sometimes maddening. Here’s how to actually decode what they’re telling you (and what they forgot to mention).

Recipes are, in theory, a set of instructions. In practice, they are a set of instructions written by someone who has made this dish 40 times and has stopped noticing the parts that would confuse a beginner, because those parts have become as automatic as breathing.

This is not the recipe writer’s fault. It’s just how expertise works. But it does mean you need to read recipes with a specific kind of critical eye — catching the assumptions, translating the jargon, and planning ahead for the moments they forgot to mention.

Here’s how.


Step One: Read the Whole Thing Before You Start

This sounds obvious and is widely ignored. Read the entire recipe — ingredients and instructions — before you turn on a single burner.

Why? Because recipes contain surprises. “Leave to marinate overnight.” “Let the dough rest for 2 hours.” “Make the sauce first.” If you find these surprises after you’ve already started, you will have a bad time. If you find them before you start, you can plan around them.

Reading through first also shows you the overall shape of the dish — what order things happen in, what the goal is, what you’re building toward. This makes the individual steps make sense instead of feeling like arbitrary instructions from a stranger.


Step Two: Check the Ingredients for Prep Notes

Look carefully at how each ingredient is listed. There’s a difference between:

  • “1 cup mushrooms, sliced” (slice them before you start)
  • “1 cup sliced mushrooms” (this is just describing what you need)

The difference is that a cup of pre-sliced mushrooms has more mushrooms in it than the cup of un-sliced mushrooms. That little comma tells you to bring a whole cup of whole mushrooms to slice. Without the comma, bring a cup of mushroom slices. It can make quite a difference.

Similarly, while “2 cloves garlic, minced” means the garlic gets minced as part of your prep, “2 cloves of minced garlic” means you’re bringing the cloves pre-minced.

Other common prep notes to watch for:

  • Room temperature butter/eggs” — plan ahead by 30 minutes
  • “Divided” — this ingredient gets used in two different steps, don’t use it all at once
  • “Finely chopped” vs. “roughly chopped” — the texture difference matters more than you’d think

Step Three: Know What the Jargon Means

Recipes assume you know certain words. Here are the most common ones worth having in your vocabulary:

Heat levels: –

  • Sauté — cook in a little fat over medium-high heat, stirring occasionally  
  • Simmer — cook in liquid just below boiling (small bubbles, gentle movement)  
  • Blanch — briefly boil, then immediately plunge into ice water to stop cooking

Cutting terms:

  •  Mince — as small as possible (garlic, herbs)
  • Dice — small, even cubes (about ½ inch)
  • Julienne — thin matchstick strips
  • Chiffonade — stack leaves, roll, and slice into thin ribbons (usually herbs or leafy greens)

Other terms: 

  • Fold — gently combine to preserve the air bubbles that give whipped eggs, cream, and delicate batters their light texture. Stirring or overmixing collapses those bubbles and flattens the result.
  • Deglaze — add liquid to a hot pan to lift the browned bits off the bottom (this is flavor, don’t skip it)
  • Season to taste — add salt and pepper until it tastes right to you, not to some abstract standard
  • Rest — leave cooked meat alone for a few minutes so the juices redistribute

Step Four: Notice What the Recipe Doesn’t Tell You

Good recipes have gaps. Here are common ones:

“Cook until golden.” Golden means what, exactly? Look for actual browning, not just color change. The Maillard reaction (the science of browning) is where flavor lives.

“Season to taste.” This is instruction to actually taste the food and add salt/pepper until it tastes good. It’s not a get-out-of-jail-free card — it’s an active step.

Prep time estimates. “Prep: 15 minutes” was written by someone who can dice an onion in 45 seconds. Double or triple it until you’re experienced.

“A splash” / “a handful” / “a knob of butter.” These are vibes, not measurements. A splash is about a tablespoon of liquid. A handful of herbs is about ¼ cup loosely packed. A knob of butter is roughly a tablespoon.


Step Five: Set Up Your Mise en Place

Fancy French phrase, practical concept: mise en place means “everything in its place.” Before you start cooking, measure, chop, prep, and organize everything the recipe calls for. Put each ingredient in its own small bowl or measuring cup.

Then, when you start cooking, you just reach for things instead of scrambling to chop garlic with one hand while something is burning in the pan.

This is the single biggest difference between a stressful cooking experience and a calm one.


Step Six: Trust Your Senses More Than the Recipe

The recipe says cook for 20 minutes. If it’s browning heavily at 12, check it. If it looks pale at 20, give it more time.

Recipes are written for an average oven, an average stove, and average ingredients. Your kitchen is specific. Your oven runs hot or cool. Your onions might be bigger or smaller than the writer’s. Cooking times are guidelines, not commandments.

Look. Smell. Taste. Touch. These are your real instruments. The recipe is just the sheet music.


🛒 Gear Worth Having

As an Amazon affiliate, I earn from qualified purchases.


Related Reads

Posted on TumbleBump | COOKS Category

TumbleBump is part of the John D Reinhart content family. Writer, illustrator, videographer, and accidental filmmaker — find the whole story at JohnDReinhart.com.

21006

©2026 John D Reinhart/TumbleBump.com – all rights reserved
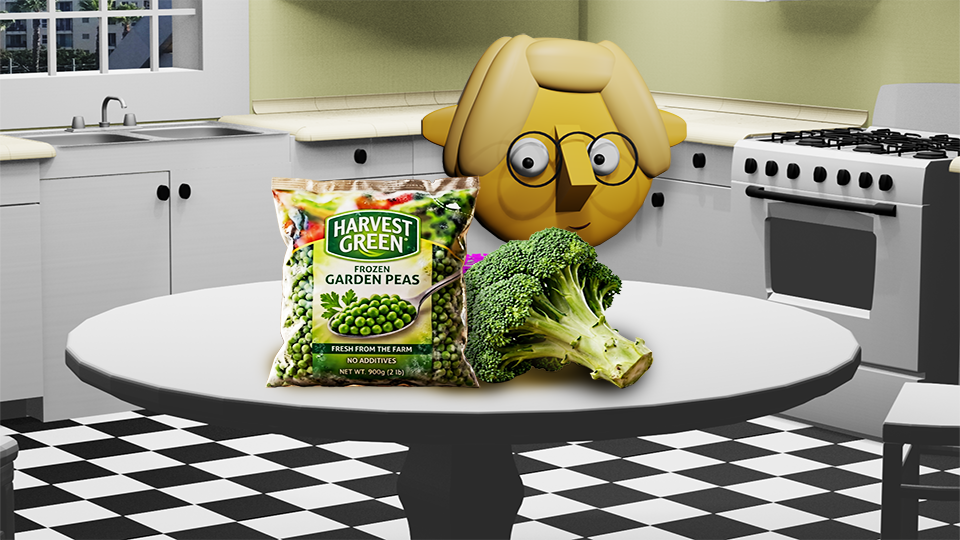
The “Is It Done?” Checklist

You’re staring at the steak. The steak is staring back. Neither of you knows if it’s done. Here’s the checklist that ends the staring contest — for eggs, meat, pasta, veggies, and everything else that’s ever made you anxious at the stove.

The question haunts every cook, from the brand-new to the pretty-experienced: is it done?

You peer into the pan. You poke it a little. You cut a tiny corner off and squint at it. You put it back. You wait two more minutes and check again. You are, at this point, more committed to uncertainty than to the actual cooking.

Here’s a checklist — food by food, category by category — so you can stop guessing and start knowing.


🥚 Eggs

Scrambled: Done when they look almost done. Pull them off heat while they still look slightly wet — they’ll finish from residual heat and you’ll avoid the rubbery fate.

Fried (sunny side up): The whites should be fully set and opaque. The yolk should still jiggle when you shake the pan.

Fried (over easy/medium/hard): Easy = yolk runs freely. Medium = yolk is jammy, moves slowly. Hard = yolk is fully set, no movement.

Boiled: – Soft boil: 6–7 minutes from boiling water – Medium: 9 minutes – Hard: 12 minutes Then immediately into ice water to stop cooking.

Baked / oven dishes with egg: Set around the edges, barely jiggly in the center. It’ll firm up as it cools.


🍗 Chicken

The gold standard: Internal temperature of 165°F (74°C) at the thickest part, not touching bone.

Visual cues (less reliable, but useful): – Juices run clear (not pink) when pierced – No pink visible when cut at the thickest point – The meat feels firm, not squishy, when pressed

Pro tip: Chicken breast goes from done to dry very quickly. Pull it at 160°F — it’ll coast up to 165°F while resting.


🥩 Beef & Pork

Steak internal temps: – Rare: 120–125°F (very red center) – Medium rare: 130–135°F (warm red center) – Medium: 140–145°F (pink center) – Medium well: 150–155°F (slightly pink) – Well done: 160°F+ (no pink, godspeed)

Ground beef: Always cook to 160°F. No exceptions — ground meat is a different animal than whole cuts, literally.

Pork: 145°F for whole cuts (a little pink is fine and correct). 160°F for ground.

The press test (rough guide): Poke your cooked steak. Rare feels like pressing the meaty base of your thumb when your hand is relaxed. Medium rare feels like pressing it with your hand half-closed. Well done feels firm, like pressing it with a full fist. It takes practice, but it works.


🍝 Pasta

The only test that matters: Fish out a piece and bite it. You want it tender but with a tiny bit of resistance in the very center — that’s al dente. If it’s soft all the way through, it’s overdone. If it snaps, it needs more time.

Ignore the box timing as gospel. Use it as a starting point and start tasting 2 minutes before the minimum.

Bonus tip: Pasta continues cooking for a minute after you drain it, especially if you’re adding it to a hot sauce. Pull it slightly early.


🥦 Vegetables

Roasted: Fork-tender and golden at the edges. If they’re fork-tender but pale, give them more time for color — that’s where the flavor is.

Sautéed: Bright in color (green veg turns vivid before it fades to army green — army green means overdone), tender when poked, still with a little texture.

Steamed/boiled: Pierce the thickest part with a knife tip. It should go in without resistance but not feel mushy.

When in doubt: Taste it. This is always allowed.


🍞 Bread & Baked Goods

Bread: Tap the bottom — it should sound hollow. Internal temp of 190–210°F depending on the type.

Muffins/cupcakes: A toothpick inserted in the center comes out clean or with just a couple of dry crumbs. Wet batter = more time.

Cake: Same toothpick test. Also, the edges should pull slightly away from the pan sides, and the top should spring back when pressed lightly.

Cookies: Pull them when they look underdone. Seriously. They continue cooking on the hot pan. The “done” moment at the oven is always one minute before you think it is.


🍲 Soups, Stews & Sauces

Proteins within: Follow the meat rules above.

Vegetables within: Stab them with a fork. They should be tender.

Stews/braises: When the meat falls apart when pressed with a spoon, it’s done. This is one category where overdone is actually the goal.

Sauces: Done when they coat the back of a spoon and a line drawn through it holds. (This is the “nappe” test and you may now feel fancy.)


🌡️ The One Tool That Eliminates All Guessing

Get a meat thermometer. A good instant-read thermometer costs about $15-30 and removes all uncertainty from meat, fish, bread, and anything else temperature-sensitive. It is the single most useful kitchen tool you are probably not using.


🛒 Gear Worth Having

As an Amazon affiliate, I earn from qualified purchases.


Related Reads

Posted on TumbleBump.com | COOKS Category

TumbleBump is part of the John D Reinhart content family. Writer, illustrator, videographer, and accidental filmmaker — find the whole story at JohnDReinhart.com.

21008

©2026 John D Reinhart/TumbleBump.com – all rights reserved
Kitchen Shears: The “Extra Hand”

Kitchen shears are the most underused tool in most kitchens and the first thing professional cooks reach for in a surprisingly large number of situations. Here’s what they actually do, why they’re better than a knife for specific tasks, and what makes a good pair.

Kitchen shears live in a drawer in most homes and come out primarily for opening packages. This is a waste of a very good tool.

Professional cooks reach for kitchen shears constantly — for tasks where scissors do the job faster, more safely, or more precisely than a knife. Once you start using kitchen shears the way cooks use them, you’ll wonder what took you so long and reach for them reflexively for the rest of your cooking life.


What Kitchen Shears Actually Do (That Knives Don’t)

Breaking down a chicken: Spatchcocking (butterflying) a whole chicken requires cutting through the backbone. Kitchen shears do this in under a minute. A knife requires a confident cleaver and some force. For most home cooks, shears are safer, faster, and produce better results. There are approximately a zillion YouTube videos on how to do it.

Cutting fresh herbs directly into a dish: Hold the herb bunch over the pot, bowl, or plate, and snip. Chiffonading basil with a knife on a cutting board takes a minute and a second dirty surface. Shears take 10 seconds and leave only the shears.

(FYI -chiffonade is a knife technique where you stack leafy greens or herbs, roll them tightly into a cylinder, then slice across the roll into thin ribbons. You end up with those pretty, delicate shreds you see on salads or as garnishes. Basil is the classic example — it’s probably the most common herb prepared that way.)

Cutting pizza: Pizza shears (or just kitchen shears) cut through pizza in a controlled way that doesn’t drag toppings the way a rocking pizza cutter can.

Trimming fat and connective tissue: Precision trimming of raw proteins without the awkward angles that knives require on curved or irregular surfaces.

Cutting dried fruit and sticky ingredients: Scissors coated with a little cooking spray glide through dates, figs, dried apricots, and gummy candies without the sticking and pulling that plagues knives.

Cutting green onions, canned tomatoes, canned whole tomatoes: Straight into the pot or bowl. No cutting board, no knife, immediate.

Opening packages: The one thing everyone already uses them for, and they’re genuinely better at it than knives.

Cutting bread without a bread knife: Coarse cuts of bread, rolls, biscuits, naan — shears work cleanly and quickly.

Children’s food: Cutting pasta, noodles, meat, and vegetables into manageable pieces for small children — shears are faster and safer than a knife at the dinner table.


What Makes a Good Pair

Separable blades: The key feature for cleaning. Kitchen shears that come apart at the pivot point can be washed individually — no crevices for food to hide in. If the shears can’t be separated, they can’t be properly cleaned, which is a meaningful hygiene concern given the raw proteins they often touch.

Micro-serration on one blade: A fine serration on one blade prevents food from slipping during cutting. Most quality shears have this.

Heavy-gauge steel blades: Thin blades flex and don’t cut cleanly. Forged or heavy-gauge stamped blades hold their edge longer and cut with authority.

Spring action: Quality shears spring open after each cut, reducing hand fatigue during extended use.

Comfortable handles: Large enough for large hands, with some grip material. All-metal handles are slippery when wet. Some rubber or textured grip is worth having.

The bottle opener and other features: Many kitchen shears include a bottle cap opener, a nut cracker, and sometimes a bone notch in the blade for cracking. These are useful additions, not gimmicks, in good shears.


Care and Maintenance

Wash after every use involving raw protein. Separate the blades, wash both pieces with hot soapy water, dry immediately. Like knives, kitchen shears don’t go in the dishwasher — the heat and moisture degrade the steel and the handles.

Occasionally sharpen. Kitchen shears dull over time like any blade. A sharpening stone, a dedicated scissor sharpener, or a professional sharpening service restores them. Alternatively: running each blade through a quality knife honing steel at an angle works for light maintenance.

Store dry. Moisture leads to rust at the pivot. Dry thoroughly before storage and consider a light coat of food-safe oil on the pivot point occasionally.


🛒 Gear Worth Having

As an Amazon affiliate, I earn from qualified purchases.


Related Reads

Posted on TumbleBump | INVESTS Category

TumbleBump is part of the John D Reinhart content family. Writer, illustrator, videographer, and accidental filmmaker — find the whole story at JohnDReinhart.com.

25015

©2026 John D Reinhart/TumbleBump.com – all rights reserved
The Dutch Oven: The Kitchen’s Iron Lung

A Dutch oven is the single most versatile piece of cookware you can own — braiser, soup pot, bread oven, deep fryer, and pasta pot in one heavy vessel. Here’s what makes it so indispensable, what to look for, and why it’s one of the few kitchen investments that pays back immediately and keeps paying.

If you were going to own only one piece of cookware beyond a basic skillet, it should be a Dutch oven.

This is not hyperbole. The Dutch oven does more genuinely different things well than any other pot or pan:

  • Braises tough cuts of meat into falling-apart tenderness over hours of low oven heat
  • Makes soups and stews with even, consistent heat distribution
  • Bakes the best bread most home ovens will ever produce
  • Deep-fries with the oil capacity and temperature stability that smaller pans can’t match
  • Cooks beans and grains with the kind of even simmer that produces silky, uniform results
  • Serves as a dramatic, beautiful serving vessel that goes from oven to table

The Dutch oven earns its place in the kitchen by multiplying itself. One pot does the work of several.


What a Dutch Oven Is

A Dutch oven is a heavy, thick-walled cooking vessel with a tight-fitting lid, designed for long, slow cooking over low to moderate heat. The walls retain and distribute heat evenly. The lid traps moisture, creating a self-basting environment that keeps braised and stewed foods moist over long cooking times.

Most quality Dutch ovens are made from cast iron — either bare or enamel-coated. The cast iron provides the mass and heat retention that defines the Dutch oven’s performance.


The Enamel vs. Bare Cast Iron Question

Enamel-coated Dutch ovens (Le Creuset, Staub, Lodge Enamel): The enamel coating prevents rusting, makes the pot fully non-reactive (safe for acidic foods like tomatoes and wine that can’t be cooked long in bare iron), and eliminates the need for seasoning. The interior surface is smooth and easy to clean. Enamel Dutch ovens can be washed with soap without concern.

The tradeoff: enamel can chip if dropped or subjected to thermal shock. It’s also more expensive, especially for the French brands.

Bare cast iron Dutch ovens (Lodge, Smithey): Require seasoning like any cast iron. Technically reactive with acidic foods over extended cooking, though most practical acidic applications (tomato sauces, braised wine dishes) are fine for normal durations. Cheaper than enamel equivalents.

For most cooks: Enamel is the more practical choice for a Dutch oven specifically, because the Dutch oven is the natural home of long-cooked, often acidic braises and soups. The non-reactive surface is a genuine advantage.


Size: What to Get

5–7 quarts: The sweet spot for most households. Large enough to braise a whole chicken or a 3-4 pound roast, make a big pot of soup, or bake a full-size loaf of bread. The 5.5-quart round is the most popular size.

3.5–4.5 quarts: For smaller households (1–2 people). Slightly more manageable in weight and storage.

7+ quarts: For large families, frequent batch cooking, or big entertaining. Heavy and requires storage space.

The 5.5-quart round Dutch oven is the default recommendation for a reason. It’s the most versatile size for the widest range of households.


The Brands

Le Creuset: The classic. Made in France since 1925. Exceptional quality, beautiful colors, lifetime warranty. Also: $350+ for a 5.5-quart. A genuine investment that justifies itself with decades of daily use. Worth buying on sale (significantly discounted during seasonal sales and at factory outlets).

Staub: The Le Creuset competitor from Alsace. Similar quality, slightly different interior design (matte black enamel with small bumps on the lid that baste the food as condensation drips back in). Le Creuset loyalists and Staub loyalists argue passionately. Both are excellent.

Lodge Enamel Cast Iron: The American, accessible-price alternative. $60–80 for the 6-quart. Enamel quality is somewhat less refined than the French brands — can be more prone to chipping — but the cooking performance is very good. The rational starting point.

Cuisinart Chef’s Classic Enamel: Another budget-friendly option. Wider availability, decent performance.


The Bread-Baking Application

One of the Dutch oven’s most beloved uses is baking no-knead bread. A covered Dutch oven in a hot oven (450–500°F) creates a steam environment that produces professional-quality bread crust at home — the trapped steam prevents the crust from setting too early, allowing the bread to expand fully before the crust crisps.

Remove the lid for the last 15 minutes, and the result is a dark, crackling, bakery-caliber crust. The Dutch oven has genuinely changed home bread baking.


🛒 Gear Worth Having

As an Amazon affiliated, I earn from qualified purchases.


Recommended Reads

Posted on TumbleBump | INVESTS Category

TumbleBump is part of the John D Reinhart content family. Writer, illustrator, videographer, and accidental filmmaker — find the whole story at JohnDReinhart.com.

25010

©2026 John D Reinhart/TumbleBump.com – all rights reserved
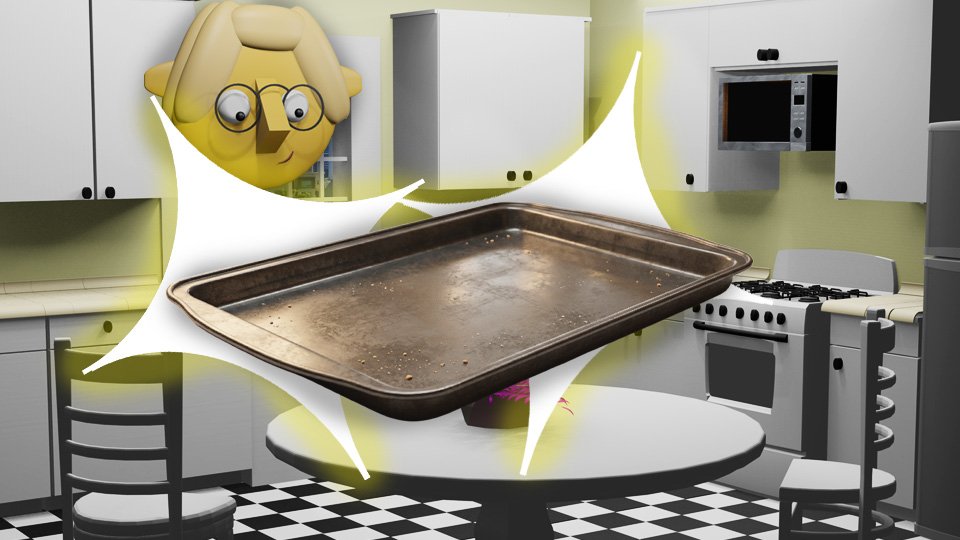
The Heavy-Bottomed Sheet Pan

Not all sheet pans are created equal — and the difference between a cheap, warping pan and a heavy-gauge professional one is the difference between roasted vegetables and steamed vegetables. Here’s what makes a great sheet pan, and why it’s worth buying the right one the first time.

The sheet pan is the most underestimated piece of cookware in the kitchen. It’s just a flat metal rectangle, right? How much could it matter?

It matters a great deal. And the difference between a cheap sheet pan and a good one shows up every time you roast vegetables, bake cookies, make a sheet pan dinner, or toast anything in the oven.


What a Sheet Pan Actually Does

A sheet pan’s job is to conduct heat evenly from the oven to the food sitting on it. When it does this well, food browns evenly, cooks at a consistent rate, and crisps at the edges. When it does this poorly — through warping, uneven construction, or materials that don’t conduct heat efficiently — you get pale patches, uneven cooking, and steamed rather than roasted vegetables.

The pan also needs to survive the thermal stress of repeated high-temperature use without warping. A warped pan rocks on the oven rack and causes food to slide, pool, and cook unevenly.


The Key Specs

Gauge (thickness): Measured in numbers where lower = thicker. An 18-gauge pan is thicker and more rigid than a 22-gauge pan. For baking, you want a minimum of 18-gauge. Professional-grade pans are often 16-gauge. Thicker pans distribute heat more evenly, resist warping, and last longer.

Material: Aluminum is the standard for sheet pans in professional kitchens, for good reason — it’s an excellent conductor of heat, lightweight, and durable. Stainless steel is heavier and conducts heat less evenly. Non-stick coatings degrade with high heat. Dark pans absorb more heat and can over-brown bottoms. For most cooking, natural aluminum is correct.

Rim height: A half-sheet pan (18×13 inches) has a 1-inch rim — deep enough to contain juices from roasting proteins, stop vegetables from rolling off, and handle any liquid-based application. Flat cookie sheets have no rim and are appropriate only for cookies and crackers.

Size: The half-sheet pan (18×13 inches) is the professional standard and the size that fits most home ovens. This is the size to buy. Quarter-sheet pans (9×13) are useful for smaller batches and fit in toaster ovens.


What Cheap Sheet Pans Do Wrong

Warping: A thin pan placed in a hot oven expands rapidly at different rates in different areas, producing a sudden metallic bang and a curved, uneven surface. This is the most common cheap sheet pan problem and the most annoying.

Dark spots from uneven conduction: Thin pans develop hot spots where heat concentrates, producing over-browned patches on food while other areas are pale.

Premature degradation: Thin pans develop surface pitting, discoloration, and dimensional changes faster than heavy-gauge equivalents. They need replacement where a good pan would still be performing excellently.


The Nordic Ware Standard

Nordic Ware’s natural aluminum commercial half-sheet pan is the professional standard for home kitchens. It’s 18-gauge aluminum, properly sized, properly rimmed, and has been the default recommendation of professional cooks and food writers for decades. It costs roughly $15–18 per pan.

At that price, there’s no argument for the cheap alternative. Buy two Nordic Ware half-sheets, maintain them well (don’t store wet, don’t use harsh abrasives), and they’ll outlast every other pan in your kitchen.


Using Your Sheet Pan Well

Don’t crowd the pan. The most common roasting mistake. Food needs space for steam to escape; crowded pans steam instead of roast. If you have more than fits in a single layer with room around each piece, use two pans.

Preheat the pan. Slide the oiled, food-loaded pan into a hot oven — or preheat the pan empty and add food. Starting on a hot surface accelerates browning.

Line thoughtfully. Parchment paper for baking and delicate applications. Nothing (or lightly oiled) for maximum browning. Foil for messy proteins where cleanup matters more than browning.


🛒 Gear Worth Having

As an Amazon affiliate, I earn from qualified purchases. 


Recommended Reads

Posted on TumbleBump | INVESTS Category

TumbleBump is part of the John D Reinhart content family. Writer, illustrator, videographer, and accidental filmmaker — find the whole story at JohnDReinhart.com.

25016

©2026 John D Reinhart/TumbleBump.com – all rights reserved