Why Wood Wins: The End-Grain Cutting Board

Your cutting board is either your knife’s best friend or its worst enemy. Here’s why end-grain wood wins the argument — and why it gets better every single time you use it.

Somewhere in your kitchen right now there is a cutting board. It might be plastic. It might be wood. It might be that glass monstrosity someone gave you as a housewarming gift that sounds like a crime scene every time a knife touches it.

Cutting boards are one of those purchases that feel so simple that nobody thinks about them twice. And then one day you use a really good one and realize you’ve been doing it wrong for years. Not catastrophically wrong. Just quietly, consistently, unnecessarily wrong.

Here’s the case for the cutting board that serious cooks swear by, why it makes your knives happier, and why it’s the one piece of kitchen equipment most likely to outlive you.

📋 The Three Boards and Their Honest Report Cards

There are essentially three cutting board materials and each has a personality:

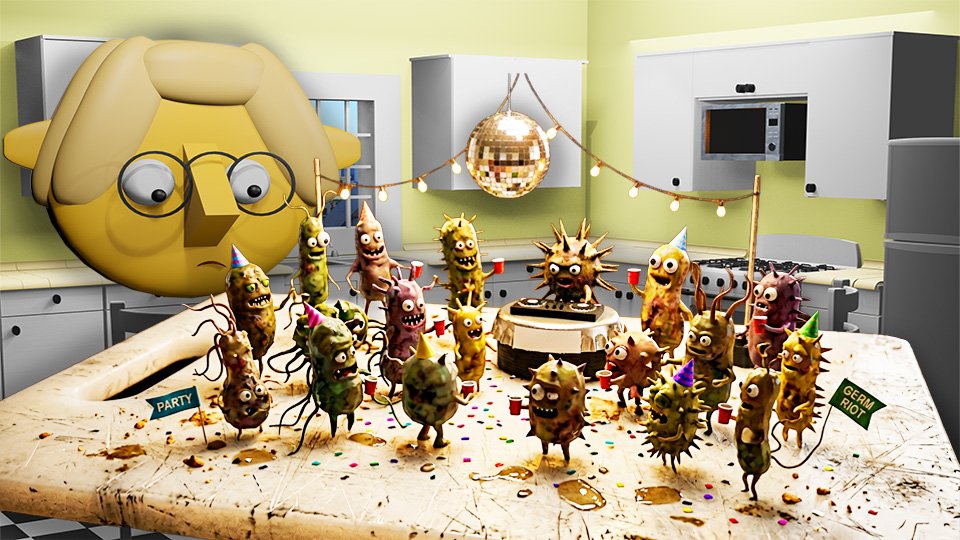
  • Plastic. Cheap, lightweight, dishwasher-safe, and deceptively problematic. Every knife stroke cuts a little groove into the surface. Those grooves collect bacteria and never fully clean out — research from UC Davis found that bacteria drawn into wood actually die off, while bacteria in plastic grooves survive and multiply. Professional kitchens use dedicated color-coded plastic boards for raw meat specifically because they can be machine-washed at high heat — a sanitation option wood can’t offer. In most kitchens, a plastic cutting board is more like a bacteria hotel with great reviews. Useful only as a dedicated raw meat board that goes straight into the dishwasher after every use. Not the hero of the story.
  • Edge-grain wood. The most common wood board — cut from the long face of the plank, showing those familiar parallel grain lines. More affordable, attractive, solid. The knife cuts across the wood fibers though, which eventually shows as visible scoring. A well-used edge-grain board develops the kind of character that’s politely called “rustic.”
  • End-grain wood. Cut from the end of the wood, showing the concentric rings — like looking at a tree stump from above. This is the one. Here’s why.

✨ The Self-Healing Board (This Is Actually Real)

When a knife cuts into an end-grain surface, it doesn’t cut across the wood fibers — it parts them. The fibers open, receive the blade, and then close again. This is not marketing language. This is what wood fibers actually do when cut with the grain rather than across it.

The result: an end-grain board used daily for years can look nearly new on the surface. The same board in edge-grain would be visibly scored and grooved. The end-grain board is quietly healing itself every time you use it.

It also does something remarkable for your knives. When a blade cuts across wood fibers, the edge deflects slightly with each stroke — that’s what dulls it. When it parts fibers, it passes through with less resistance. End-grain boards keep your knives sharper longer. It’s not magic. It’s just wood grain doing exactly what wood grain does.

This is why professional knife-focused cooks use end-grain boards. The board is doing active work to protect the tool.

🌳 Which Wood? (The Short Version)

Not all end-grain boards are created equal. Wood type matters:

  • Maple. The professional standard. Hard, tight-grained, odor-neutral, and what most serious boards are made from. John Boos has been making maple boards for professional kitchens since 1887. That’s a long time to be right about something.
  • Walnut. Slightly softer than maple, which is actually gentler on knife edges. Beautiful dark color that hides staining gracefully. More expensive, worth it if you care about the aesthetics of your kitchen.
  • Teak. Naturally oily, which means less maintenance work. Durable and often sustainably sourced. The oil content can very slightly affect knife edges over time but for most home cooks this is completely irrelevant.
  • What to avoid. Bamboo is very hard and damages knife edges faster than softer hardwoods — despite its reputation as a kitchen-friendly material. Glass and marble are actively hostile to knives and should be used for serving, not cutting. If someone gives you a glass cutting board, smile, say thank you, and serve cheese on it.

🪣 The Maintenance (It’s Not Hard, It’s Just Oil)

End-grain boards need oiling. This is the one thing that stands between a board that lasts a lifetime and one that dries out, cracks, and warps into something sculptural but useless.

The good news: oiling a cutting board takes about four minutes and needs to happen roughly once a month for an active board. When the wood looks dry or pale, it’s crying for oil.

  • Use food-grade mineral oil. Apply it liberally, let it soak in for an hour, wipe off the excess. Repeat until the board stops absorbing readily. That’s it.
  • Follow with board cream. A blend of mineral oil and beeswax that seals the surface after the oil step. Howard Products makes one that is universally praised and costs almost nothing.
  • Never use cooking oils. Olive oil, vegetable oil, coconut oil — any culinary fat will go rancid inside the wood over time. The smell is unpleasant. The experience is worse. Mineral oil only.

A regularly oiled end-grain board doesn’t just survive — it improves. The grain tightens, the surface becomes more moisture-resistant, and the board develops the kind of patina that comes from actual use. It gets better. This is unusual behavior for a kitchen tool.

🛒 The Boards Worth Owning

  • John Boos Maple End-Grain Cutting Board — The gold standard. Professional kitchens have been using John Boos maple boards for over a century. Beautiful, durable, and the kind of thing that gets passed down rather than replaced.
  • Teakhaus End-Grain Teak Cutting Board — Sustainably sourced teak with slightly more forgiving maintenance than maple. Excellent quality and a board that looks as good as it performs.
  • Howard Products Butcher Block Conditioner — The oil-and-beeswax blend that completes the maintenance routine. One bottle lasts years. The board will outlast the bottle by decades.
  • Howard Products Food Grade Mineral Oil — The base conditioning oil. Inexpensive, effective, and the only oil your board should ever see.
  • OXO Bench Scraper — For clearing food off the board between tasks without a trip to the sink. Underrated tool, immediately useful, and your board will thank you for not dragging wet food across it constantly.

As an Amazon affiliate, I earn from each qualifying purchase. Thank you for supporting TumbleBump.

🏆 The Investment Case

A quality end-grain board runs $60 to $200 depending on size and wood. That sounds like a lot for a cutting board until you consider that a well-maintained end-grain board lasts indefinitely — and that the cheap plastic board it replaces was quietly destroying your knife edges and harboring bacteria in its grooves the whole time.

It’s the rare kitchen purchase where spending more actually costs less over time. And it’s almost certainly the only piece of kitchen equipment you’ll ever own that gets genuinely better with age.

Buy it once. Oil it occasionally. Hand it down eventually. That’s the whole plan.

📚 Related Reads

TumbleBump is part of the John D. Reinhart content family. Writer, illustrator, videographer, and accidental filmmaker — find the whole story at JohnDReinhart.com.

25013

©2026 John D Reinhart/TumbleBump.com – all rights reserved
Forged vs. Stamped Knives: What the Fancy Word Actually Means (And Whether to Care)

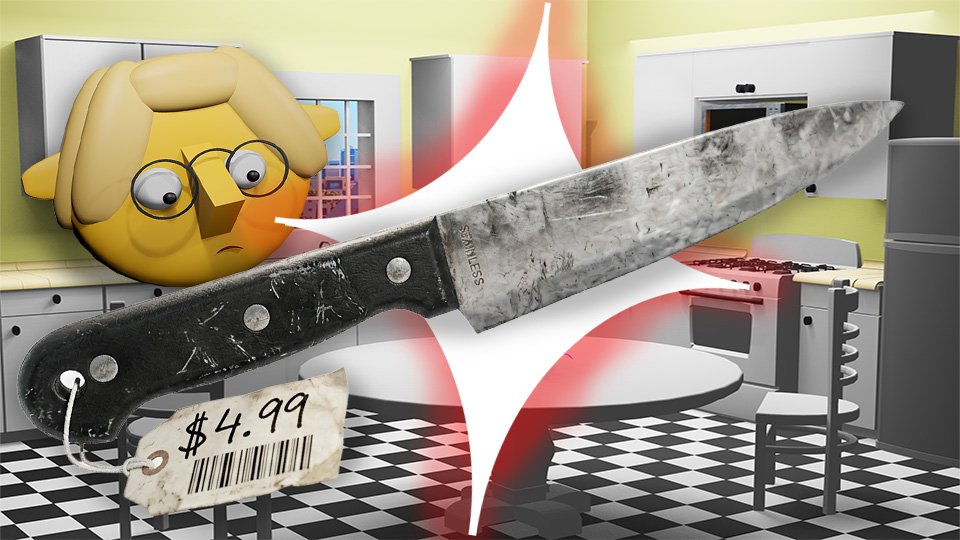
The knife aisle has a lot of opinions and a lot of price tags. Here’s what “forged” actually means, what it doesn’t mean, and how to buy a great knife without losing your mind.

You’re standing in the knife aisle. Or the knife section of a website. Either way, you’re surrounded by knives and every single one of them has an opinion about itself.

“Forged.” “German precision.” “High-carbon steel.” “Handcrafted by monks in a mountain province.” Okay, maybe not that last one. But you get the idea. The knife industry has developed a rich tradition of making you feel like you need a metallurgy degree just to make dinner.

You don’t. Here’s what the words actually mean, which ones matter, and how to walk away with a great knife without spending the equivalent of a car payment.

🔨 What “Forged” Actually Means

A forged knife starts as a bar of steel that gets heated to an impressive temperature and hammered into the shape of a blade. The hammering aligns the steel’s internal structure, makes it denser, and produces a heavier, more rigid knife with better edge retention — meaning it stays sharp longer before needing attention.

The telltale sign of a forged knife is the bolster — that thick, satisfying chunk of metal where the blade meets the handle. On a forged knife, that bolster is part of the blade itself, not glued on afterward. It’s also why forged knives feel substantial in the hand. There’s just more knife there.

The marketing truth: “Forged” does correlate with quality. It’s not a lie. But it’s also not the whole story, which brings us to the part the packaging doesn’t mention.

✂️ What “Stamped” Actually Means

A stamped knife is cut from a flat sheet of steel — imagine a cookie cutter, but for blades — then ground, heat-treated, and sharpened. No hammering. No grain alignment. Less total material. Lighter knife.

This sounds like “cheaper and worse,” and historically that was often true. But here’s where it gets interesting: most Japanese knives are technically stamped or laser-cut. The Victorinox Fibrox — the chef’s knife that professional kitchens have been quietly using for decades because it works great and costs almost nothing — is stamped.

Stamped does not mean bad. It means different. And sometimes it means exactly what you need at a price that doesn’t require a conversation with your bank.

🤔 What Actually Matters (The Stuff They Don’t Put on the Box)

Here’s the honest version of the knife conversation:

  • Steel quality matters more than how it was shaped. A stamped knife made from excellent steel outperforms a forged knife made from mediocre steel. Every time. The word “forged” on the package tells you about the process, not about the steel.
  • Hardness is a tradeoff. Harder steel holds an edge longer but chips more easily. Softer steel dulls faster but is more forgiving. German knives tend toward softer. Japanese knives tend toward harder. Neither is wrong — they’re just different tools for different kitchens.
  • How it feels in your hand. This is the one nobody talks about enough. A knife you like holding gets used. A knife that feels wrong sits in the drawer. Weight, balance, and handle shape matter enormously and are completely personal.
  • Whether it’s sharp. A sharp cheap knife beats a dull expensive one in every possible way. The best investment alongside any knife is a way to keep it sharp.

The forged vs. stamped question is worth understanding. It’s just not the most important question.

🛒 Four Knives Worth Your Actual Money

One from every corner of the conversation:

  • Victorinox Fibrox 8-inch Chef’s Knife — Stamped. The knife that professional kitchens have been quietly using for years because it’s excellent and costs almost nothing. If you want to know what a great knife feels like without committing to a great knife price, start here.
  • Wüsthof Classic 8-inch Chef’s Knife — Forged. The definitive German knife. Heavy, substantial, lifetime warranty, the kind of knife that gets handed down. If you’re buying one knife for the rest of your life, this is a reasonable answer.
  • MAC Knife MTH-80 — Japanese, stamped, harder steel, exceptionally sharp. Frequently cited as one of the best chef’s knives at any price. Requires a little more care than a German knife but rewards that care with performance.
  • Lansky Knife Sharpening System — Because the best knife in the world is useless dull. A good sharpening system is the purchase that makes every other knife purchase worth it.

As an Amazon affiliate, I earn from each qualified purchase. Thank you for supporting TumbleBump.

✨ The Short Version

Forged is generally good. Stamped is not automatically bad. Steel quality and heat treatment matter more than either. A knife that feels right in your hand and stays sharp is the goal, regardless of how it was made.

The Victorinox costs around thirty dollars and has been making professional cooks happy for decades. The Wüsthof costs considerably more and will outlast you. Both are correct answers depending on where you are in your kitchen journey.

The wrong answer is the beautiful knife you bought because of the packaging, used twice, and stuck in a drawer because it felt like too much knife for a Tuesday night. Buy the one you’ll actually use.

📚 Related Reads

TumbleBump is part of the John D Reinhart content family. Writer, illustrator, videographer, and accidental filmmaker — find the whole story at JohnDReinhart.com.

25009

©2026 John D Reinhart/TumbleBump.com – all rights reserved
The “Essential Eight” Utensils

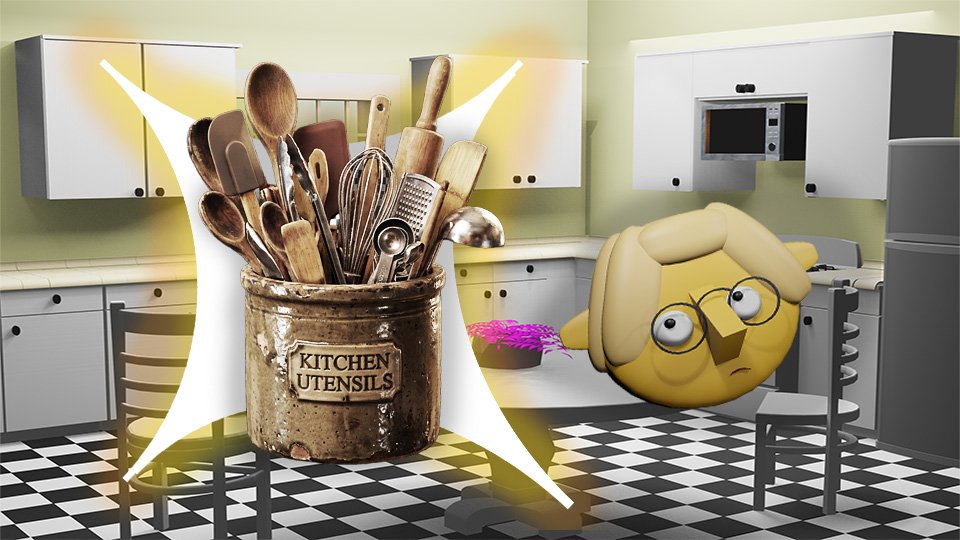
You don’t need a utensil crock overflowing with tools you’ll never touch. You need eight things — and with eight specific things, you can cook almost anything. Here’s the list, and the reason each one earns its place.

Walk through most kitchen stores and you’ll find an overwhelming array of utensils, gadgets, and tools that promise to make cooking easier, faster, or more precise. Some of them deliver. Most of them don’t earn their counter space.

The Essential Eight is the list of eight utensils that together cover the full range of what you actually do at a stove and in an oven — the ones that pull their weight every single time and earn permanent placement in the utensil crock.


The Eight

1. Silicone Spatula (Large) The scraper, the folder, the stirrer. For scrambled eggs, for sauces, for batter, for anything that needs to be moved without scratching a surface. The most versatile single utensil in the kitchen. If you had to choose one, it would be this one.

2. Thin, Flexible Turner (Fish Spatula) For flipping delicate things — fish fillets, pancakes, fried eggs, latkes — without breaking them. The angled, perforated, flexible stainless head of a fish spatula does this better than any other tool. Also excellent for pressing burgers and moving anything thin and flat in a pan.

3. Wooden Spoon (or Silicone-Coated Wooden Spoon) For stirring. For scraping the pan after you’ve browned meat or vegetables (those stuck-on brown bits on the bottom are called fond, and they’re pure flavor). For tasting from the pot. For the sustained, gentle work of stirring a sauce over medium heat without risking a burned hand. The wooden handle stays cool. The spoon is gentle on all surfaces.

4. Slotted Spoon (Stainless) For lifting solids out of liquids — dumplings from broth, poached eggs from water, vegetables from blanching water, fried things from oil. The slots let liquid drain while you lift. No substitution exists for this.

5. Ladle For serving soups, stews, and sauces. For portioning anything liquid into bowls or containers. A ladle with a pouring lip prevents drips; a long handle keeps the hand away from hot liquid. One ladle, kept in the crock.

6. Tongs (12-inch Locking) For turning things in a hot pan without a spatula — chicken thighs, corn cobs, whole vegetables. For reaching into hot water. For serving salads and pasta. For the dozen tasks where you need to grab, turn, or transfer something that’s too hot or too large for any other tool.

7. Whisk For eggs. For sauces that need emulsifying. For incorporating dry and wet ingredients. For the occasional batter or vinaigrette. One good whisk, comfortable in the hand, with wires that spring back.

8. Heatproof Serving Spoon For serving — the tool that moves food from pan or pot to plate or bowl in quantity. A large, solid-bowl spoon, silicone or stainless, that can handle hot food and substantial quantities. Different from the slotted spoon in that it carries liquid along with solids.


The One Rule for Each

Each utensil in the Essential Eight should be:

Heatproof to 400°F+: Silicone or metal, nothing plastic that might melt against a hot pan rim.

Dishwasher-safe or easy to hand wash: Utensils get used every day and need to be cleaned easily. Complex designs with joints and seams collect food and are difficult to sanitize.

Comfortable to grip: The handle matters. A tool that’s awkward in the hand is a tool that gets avoided.


What Doesn’t Make the Eight

Potato masher: A fork works in a pinch. If you make mashed potatoes weekly, add it. Otherwise, skip.

Basting brush: Useful for specific cooking. Not essential for most home cooks.

Pasta fork: The ladle and tongs together do this job.

Skimmer: The slotted spoon covers most needs here.

Everything else: Assess individually. If you’ve reached for it three times this month, it earns a place. If it’s been in the crock for six months untouched, it doesn’t.


🛒 Gear Worth Having

As an Amazon affiliate, I earn from qualified purchases. Thank you for supporting TumbleBump.


Recommended Reading

Posted on TumbleBump | INVESTS Category

TumbleBump is part of the John D Reinhart content family. Writer, illustrator, videographer, and accidental filmmaker — find the whole story at JohnDReinhart.com.

25007

©2026 John D Reinhart/TumbleBump.com – all rights reserved
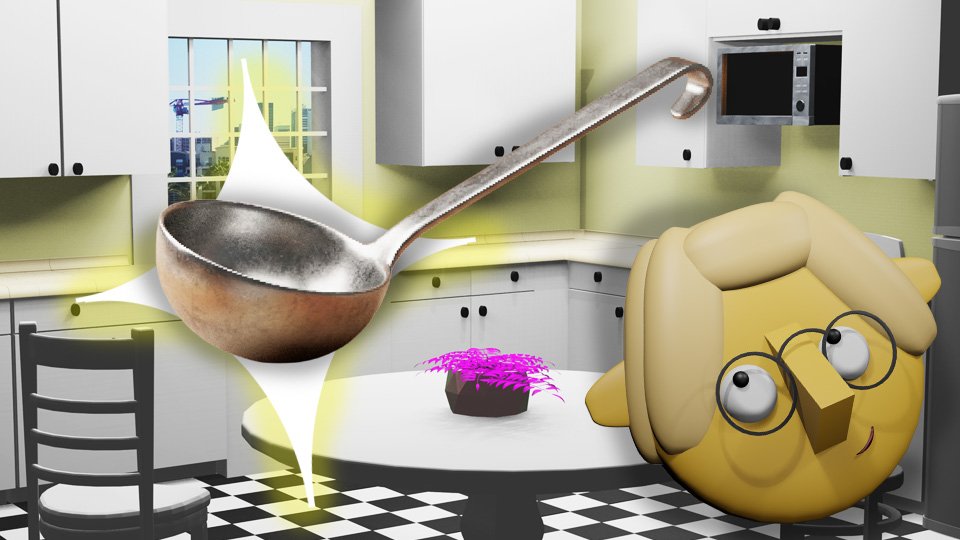
From Ladles to Spatulas: Essential Kitchen Tools

Beyond knives and pans, your kitchen needs a supporting cast of tools that handle everything from flipping to straining to basting. Here’s the complete guide to the essential non-knife, non-cookware kitchen tools — what they do, what to look for, and which ones are worth spending money on.

The best kitchen tools are the ones you reach for every day without thinking. They’re sized right, feel comfortable, and do their job without drama. Building a collection of these tools — deliberately, rather than by accumulation — means your kitchen works with you rather than against you.

Here’s the full supporting cast beyond knives and cookware.


The Mixing and Prep Tools

Mixing bowls (nesting set, 3–5 sizes) The workhorses of prep. You need small (for beaten eggs, small mixes), medium (for most batters and doughs), and large (for big salads, bread dough, batch mixing). Stainless steel nests efficiently, is dishwasher-safe, and lasts forever. Glass is heavier but see-through and microwave-safe.

Look for: flat bottoms for stability, a pour spout on at least one bowl, non-slip base.

Whisk (balloon and/or flat) A balloon whisk incorporates air — for eggs, cream, vinaigrettes, and sauces. A flat whisk (also called a roux whisk) works across the bottom of a saucepan without lifting — better for sauces and gravies. One of each is ideal; a balloon whisk alone covers 80% of needs.

Measuring cups and spoons Dry and liquid measuring cups are not interchangeable. Dry cups (fill and level) for flour, sugar, and dry ingredients. Liquid measuring cups (Pyrex glass) for anything pourable — set them on the counter and read from the side at eye level for an accurate pour. Measuring spoons for small quantities of both. This is the basics set — every kitchen needs it.


The Lifting and Moving Tools

Fish spatula (thin, flexible, slotted stainless) For flipping delicate items that would break with a thicker tool: fish fillets, pancakes, fried eggs, latkes. The offset angle keeps the hand away from the heat; the thin, flexible head slides under food without breaking it.

Solid spatula (wide, heat-safe) For pressing burgers, flipping pancakes in bulk, transferring larger items. Slightly more rigid than the fish spatula.

Long-handled tongs (12-inch, locking) For reaching into pots and pans, turning proteins at the grill, serving salads, and picking up things that are too hot or too awkward to handle otherwise. The locking mechanism keeps them closed for storage.

Slotted spoon (large, stainless) For lifting solids out of liquids. Poached eggs from water, dumplings from broth, vegetables from blanching liquid. Nothing substitutes for a good slotted spoon in this role.


The Straining and Sifting Tools

Colander (large, stainless or silicone) For draining pasta, rinsing produce, draining blanched vegetables. A large colander (5+ quart) handles everything without overflow. Stainless lasts forever; silicone is foldable and storage-efficient.

Fine mesh strainer (medium, stainless) For straining stocks and sauces, sifting flour and powdered sugar, rinsing small grains like quinoa, and creating smooth sauces. The fine mesh catches small particles that a colander passes. Versatile and underrated.


The Measuring and Monitoring Tools

Kitchen scale (digital) For accurate baking (weight is always more precise than volume for flour), for portioning, and for following recipes by weight (most professional recipes and many good cookbooks use grams). A $15–25 kitchen scale changes baking outcomes immediately.

Instant-read thermometer The most important single monitoring tool in the kitchen. Covered in full in the dedicated post called The Digital Instant-Read Thermometer .


The Specialty Tools Worth Having

Bench scraper (metal) For sweeping cutting board debris into a bowl or trash, for dividing dough, for cleaning surfaces. One of the most used and least celebrated kitchen tools.

Microplane grater For grating citrus zest, parmesan, garlic, fresh ginger, nutmeg, and hard spices. The fine razor-sharp teeth produce a feather-light result that a box grater cannot. One Microplane per kitchen, used constantly.

Vegetable peeler (Y-peeler) The Y-shaped swivel peeler removes less material than the classic straight peeler and works faster in most people’s hands.


🛒 Gear Worth Having

As an Amazon affiliate, I earn from qualified purchases. 


Posted on TumbleBump | INVESTS Category

TumbleBump is part of the John D Reinhart content family. Writer, illustrator, videographer, and accidental filmmaker — find the whole story at JohnDReinhart.com.

25003

©2026 John D Reinhart/TumbleBump.com – all rights reserved
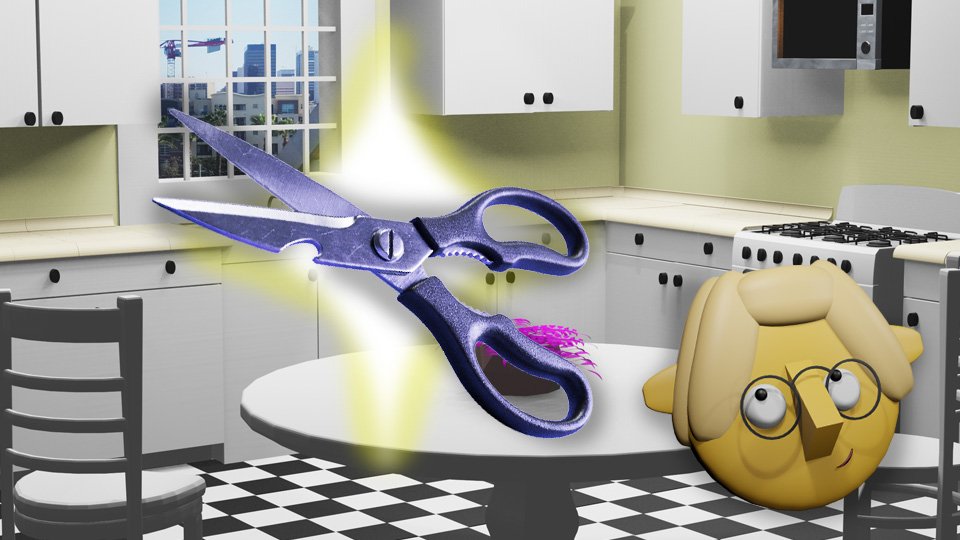
Kitchen Shears: The “Extra Hand”

Kitchen shears are the most underused tool in most kitchens and the first thing professional cooks reach for in a surprisingly large number of situations. Here’s what they actually do, why they’re better than a knife for specific tasks, and what makes a good pair.

Kitchen shears live in a drawer in most homes and come out primarily for opening packages. This is a waste of a very good tool.

Professional cooks reach for kitchen shears constantly — for tasks where scissors do the job faster, more safely, or more precisely than a knife. Once you start using kitchen shears the way cooks use them, you’ll wonder what took you so long and reach for them reflexively for the rest of your cooking life.


What Kitchen Shears Actually Do (That Knives Don’t)

Breaking down a chicken: Spatchcocking (butterflying) a whole chicken requires cutting through the backbone. Kitchen shears do this in under a minute. A knife requires a confident cleaver and some force. For most home cooks, shears are safer, faster, and produce better results. There are approximately a zillion YouTube videos on how to do it.

Cutting fresh herbs directly into a dish: Hold the herb bunch over the pot, bowl, or plate, and snip. Chiffonading basil with a knife on a cutting board takes a minute and a second dirty surface. Shears take 10 seconds and leave only the shears.

(FYI -chiffonade is a knife technique where you stack leafy greens or herbs, roll them tightly into a cylinder, then slice across the roll into thin ribbons. You end up with those pretty, delicate shreds you see on salads or as garnishes. Basil is the classic example — it’s probably the most common herb prepared that way.)

Cutting pizza: Pizza shears (or just kitchen shears) cut through pizza in a controlled way that doesn’t drag toppings the way a rocking pizza cutter can.

Trimming fat and connective tissue: Precision trimming of raw proteins without the awkward angles that knives require on curved or irregular surfaces.

Cutting dried fruit and sticky ingredients: Scissors coated with a little cooking spray glide through dates, figs, dried apricots, and gummy candies without the sticking and pulling that plagues knives.

Cutting green onions, canned tomatoes, canned whole tomatoes: Straight into the pot or bowl. No cutting board, no knife, immediate.

Opening packages: The one thing everyone already uses them for, and they’re genuinely better at it than knives.

Cutting bread without a bread knife: Coarse cuts of bread, rolls, biscuits, naan — shears work cleanly and quickly.

Children’s food: Cutting pasta, noodles, meat, and vegetables into manageable pieces for small children — shears are faster and safer than a knife at the dinner table.


What Makes a Good Pair

Separable blades: The key feature for cleaning. Kitchen shears that come apart at the pivot point can be washed individually — no crevices for food to hide in. If the shears can’t be separated, they can’t be properly cleaned, which is a meaningful hygiene concern given the raw proteins they often touch.

Micro-serration on one blade: A fine serration on one blade prevents food from slipping during cutting. Most quality shears have this.

Heavy-gauge steel blades: Thin blades flex and don’t cut cleanly. Forged or heavy-gauge stamped blades hold their edge longer and cut with authority.

Spring action: Quality shears spring open after each cut, reducing hand fatigue during extended use.

Comfortable handles: Large enough for large hands, with some grip material. All-metal handles are slippery when wet. Some rubber or textured grip is worth having.

The bottle opener and other features: Many kitchen shears include a bottle cap opener, a nut cracker, and sometimes a bone notch in the blade for cracking. These are useful additions, not gimmicks, in good shears.


Care and Maintenance

Wash after every use involving raw protein. Separate the blades, wash both pieces with hot soapy water, dry immediately. Like knives, kitchen shears don’t go in the dishwasher — the heat and moisture degrade the steel and the handles.

Occasionally sharpen. Kitchen shears dull over time like any blade. A sharpening stone, a dedicated scissor sharpener, or a professional sharpening service restores them. Alternatively: running each blade through a quality knife honing steel at an angle works for light maintenance.

Store dry. Moisture leads to rust at the pivot. Dry thoroughly before storage and consider a light coat of food-safe oil on the pivot point occasionally.


🛒 Gear Worth Having

As an Amazon affiliate, I earn from qualified purchases.


Related Reads

Posted on TumbleBump | INVESTS Category

TumbleBump is part of the John D Reinhart content family. Writer, illustrator, videographer, and accidental filmmaker — find the whole story at JohnDReinhart.com.

25015

©2026 John D Reinhart/TumbleBump.com – all rights reserved
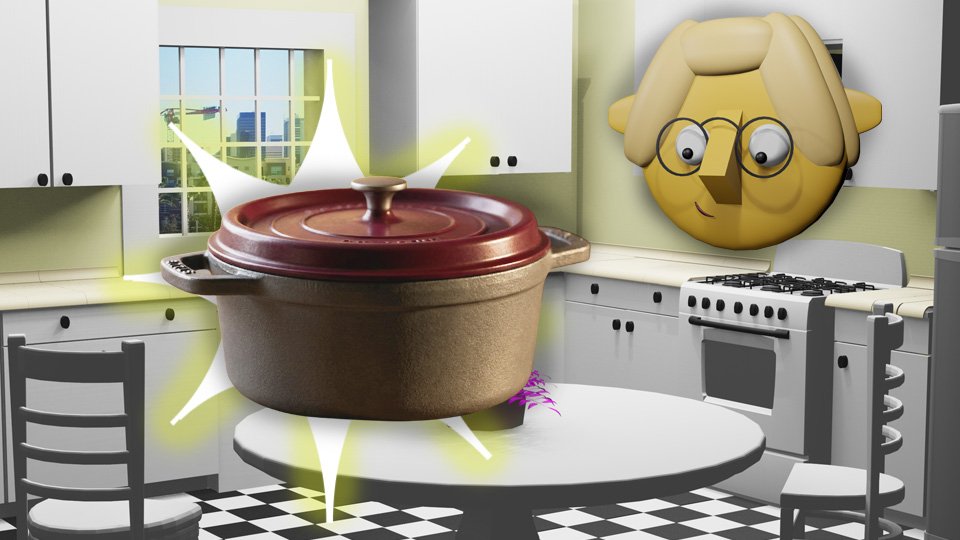
The Dutch Oven: The Kitchen’s Iron Lung

A Dutch oven is the single most versatile piece of cookware you can own — braiser, soup pot, bread oven, deep fryer, and pasta pot in one heavy vessel. Here’s what makes it so indispensable, what to look for, and why it’s one of the few kitchen investments that pays back immediately and keeps paying.

If you were going to own only one piece of cookware beyond a basic skillet, it should be a Dutch oven.

This is not hyperbole. The Dutch oven does more genuinely different things well than any other pot or pan:

  • Braises tough cuts of meat into falling-apart tenderness over hours of low oven heat
  • Makes soups and stews with even, consistent heat distribution
  • Bakes the best bread most home ovens will ever produce
  • Deep-fries with the oil capacity and temperature stability that smaller pans can’t match
  • Cooks beans and grains with the kind of even simmer that produces silky, uniform results
  • Serves as a dramatic, beautiful serving vessel that goes from oven to table

The Dutch oven earns its place in the kitchen by multiplying itself. One pot does the work of several.


What a Dutch Oven Is

A Dutch oven is a heavy, thick-walled cooking vessel with a tight-fitting lid, designed for long, slow cooking over low to moderate heat. The walls retain and distribute heat evenly. The lid traps moisture, creating a self-basting environment that keeps braised and stewed foods moist over long cooking times.

Most quality Dutch ovens are made from cast iron — either bare or enamel-coated. The cast iron provides the mass and heat retention that defines the Dutch oven’s performance.


The Enamel vs. Bare Cast Iron Question

Enamel-coated Dutch ovens (Le Creuset, Staub, Lodge Enamel): The enamel coating prevents rusting, makes the pot fully non-reactive (safe for acidic foods like tomatoes and wine that can’t be cooked long in bare iron), and eliminates the need for seasoning. The interior surface is smooth and easy to clean. Enamel Dutch ovens can be washed with soap without concern.

The tradeoff: enamel can chip if dropped or subjected to thermal shock. It’s also more expensive, especially for the French brands.

Bare cast iron Dutch ovens (Lodge, Smithey): Require seasoning like any cast iron. Technically reactive with acidic foods over extended cooking, though most practical acidic applications (tomato sauces, braised wine dishes) are fine for normal durations. Cheaper than enamel equivalents.

For most cooks: Enamel is the more practical choice for a Dutch oven specifically, because the Dutch oven is the natural home of long-cooked, often acidic braises and soups. The non-reactive surface is a genuine advantage.


Size: What to Get

5–7 quarts: The sweet spot for most households. Large enough to braise a whole chicken or a 3-4 pound roast, make a big pot of soup, or bake a full-size loaf of bread. The 5.5-quart round is the most popular size.

3.5–4.5 quarts: For smaller households (1–2 people). Slightly more manageable in weight and storage.

7+ quarts: For large families, frequent batch cooking, or big entertaining. Heavy and requires storage space.

The 5.5-quart round Dutch oven is the default recommendation for a reason. It’s the most versatile size for the widest range of households.


The Brands

Le Creuset: The classic. Made in France since 1925. Exceptional quality, beautiful colors, lifetime warranty. Also: $350+ for a 5.5-quart. A genuine investment that justifies itself with decades of daily use. Worth buying on sale (significantly discounted during seasonal sales and at factory outlets).

Staub: The Le Creuset competitor from Alsace. Similar quality, slightly different interior design (matte black enamel with small bumps on the lid that baste the food as condensation drips back in). Le Creuset loyalists and Staub loyalists argue passionately. Both are excellent.

Lodge Enamel Cast Iron: The American, accessible-price alternative. $60–80 for the 6-quart. Enamel quality is somewhat less refined than the French brands — can be more prone to chipping — but the cooking performance is very good. The rational starting point.

Cuisinart Chef’s Classic Enamel: Another budget-friendly option. Wider availability, decent performance.


The Bread-Baking Application

One of the Dutch oven’s most beloved uses is baking no-knead bread. A covered Dutch oven in a hot oven (450–500°F) creates a steam environment that produces professional-quality bread crust at home — the trapped steam prevents the crust from setting too early, allowing the bread to expand fully before the crust crisps.

Remove the lid for the last 15 minutes, and the result is a dark, crackling, bakery-caliber crust. The Dutch oven has genuinely changed home bread baking.


🛒 Gear Worth Having

As an Amazon affiliated, I earn from qualified purchases.


Recommended Reads

Posted on TumbleBump | INVESTS Category

TumbleBump is part of the John D Reinhart content family. Writer, illustrator, videographer, and accidental filmmaker — find the whole story at JohnDReinhart.com.

25010

©2026 John D Reinhart/TumbleBump.com – all rights reserved
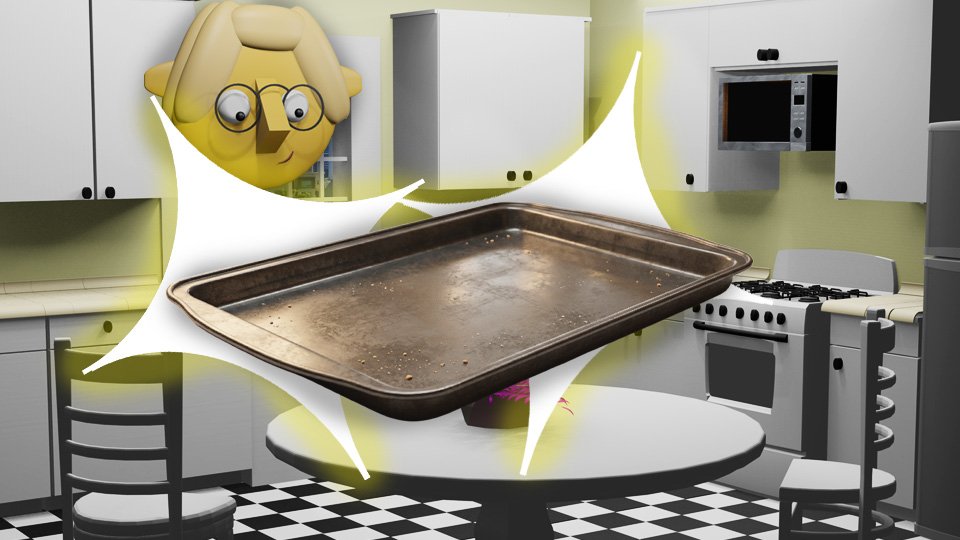
The Heavy-Bottomed Sheet Pan

Not all sheet pans are created equal — and the difference between a cheap, warping pan and a heavy-gauge professional one is the difference between roasted vegetables and steamed vegetables. Here’s what makes a great sheet pan, and why it’s worth buying the right one the first time.

The sheet pan is the most underestimated piece of cookware in the kitchen. It’s just a flat metal rectangle, right? How much could it matter?

It matters a great deal. And the difference between a cheap sheet pan and a good one shows up every time you roast vegetables, bake cookies, make a sheet pan dinner, or toast anything in the oven.


What a Sheet Pan Actually Does

A sheet pan’s job is to conduct heat evenly from the oven to the food sitting on it. When it does this well, food browns evenly, cooks at a consistent rate, and crisps at the edges. When it does this poorly — through warping, uneven construction, or materials that don’t conduct heat efficiently — you get pale patches, uneven cooking, and steamed rather than roasted vegetables.

The pan also needs to survive the thermal stress of repeated high-temperature use without warping. A warped pan rocks on the oven rack and causes food to slide, pool, and cook unevenly.


The Key Specs

Gauge (thickness): Measured in numbers where lower = thicker. An 18-gauge pan is thicker and more rigid than a 22-gauge pan. For baking, you want a minimum of 18-gauge. Professional-grade pans are often 16-gauge. Thicker pans distribute heat more evenly, resist warping, and last longer.

Material: Aluminum is the standard for sheet pans in professional kitchens, for good reason — it’s an excellent conductor of heat, lightweight, and durable. Stainless steel is heavier and conducts heat less evenly. Non-stick coatings degrade with high heat. Dark pans absorb more heat and can over-brown bottoms. For most cooking, natural aluminum is correct.

Rim height: A half-sheet pan (18×13 inches) has a 1-inch rim — deep enough to contain juices from roasting proteins, stop vegetables from rolling off, and handle any liquid-based application. Flat cookie sheets have no rim and are appropriate only for cookies and crackers.

Size: The half-sheet pan (18×13 inches) is the professional standard and the size that fits most home ovens. This is the size to buy. Quarter-sheet pans (9×13) are useful for smaller batches and fit in toaster ovens.


What Cheap Sheet Pans Do Wrong

Warping: A thin pan placed in a hot oven expands rapidly at different rates in different areas, producing a sudden metallic bang and a curved, uneven surface. This is the most common cheap sheet pan problem and the most annoying.

Dark spots from uneven conduction: Thin pans develop hot spots where heat concentrates, producing over-browned patches on food while other areas are pale.

Premature degradation: Thin pans develop surface pitting, discoloration, and dimensional changes faster than heavy-gauge equivalents. They need replacement where a good pan would still be performing excellently.


The Nordic Ware Standard

Nordic Ware’s natural aluminum commercial half-sheet pan is the professional standard for home kitchens. It’s 18-gauge aluminum, properly sized, properly rimmed, and has been the default recommendation of professional cooks and food writers for decades. It costs roughly $15–18 per pan.

At that price, there’s no argument for the cheap alternative. Buy two Nordic Ware half-sheets, maintain them well (don’t store wet, don’t use harsh abrasives), and they’ll outlast every other pan in your kitchen.


Using Your Sheet Pan Well

Don’t crowd the pan. The most common roasting mistake. Food needs space for steam to escape; crowded pans steam instead of roast. If you have more than fits in a single layer with room around each piece, use two pans.

Preheat the pan. Slide the oiled, food-loaded pan into a hot oven — or preheat the pan empty and add food. Starting on a hot surface accelerates browning.

Line thoughtfully. Parchment paper for baking and delicate applications. Nothing (or lightly oiled) for maximum browning. Foil for messy proteins where cleanup matters more than browning.


🛒 Gear Worth Having

As an Amazon affiliate, I earn from qualified purchases. 


Recommended Reads

Posted on TumbleBump | INVESTS Category

TumbleBump is part of the John D Reinhart content family. Writer, illustrator, videographer, and accidental filmmaker — find the whole story at JohnDReinhart.com.

25016

©2026 John D Reinhart/TumbleBump.com – all rights reserved
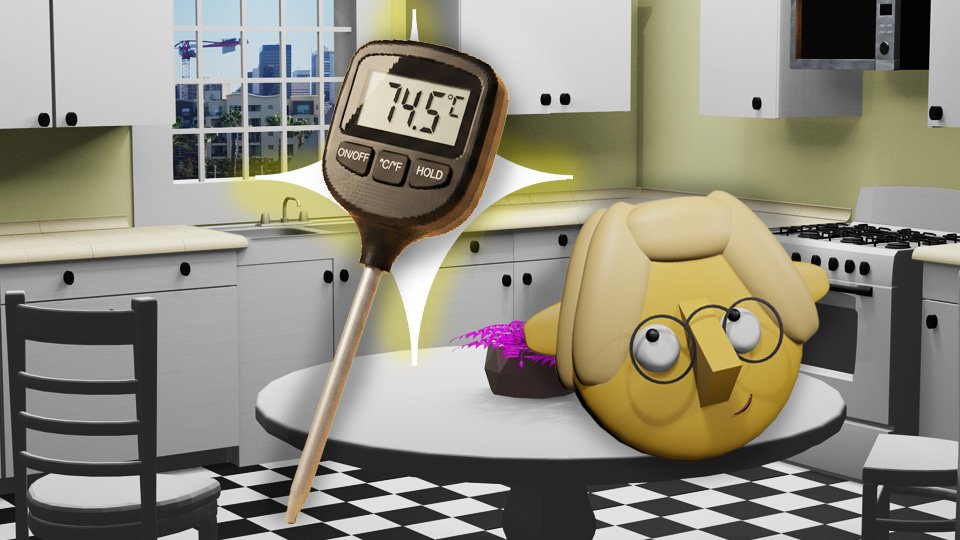
The Digital Instant-Read Thermometer

A meat thermometer removes all guesswork from cooking proteins, candy, bread, and anything else where temperature is the difference between perfect and wrong. Here’s why you need one, which features actually matter, and why a good one is worth every dollar.

The instant-read thermometer is the single piece of kitchen equipment most likely to immediately and measurably improve your cooking. Not a better pan, not a sharper knife, not a more powerful blender. The thermometer.

Here’s why: all of the uncertainty around cooking meat, fish, bread, and candy comes from not knowing the internal temperature. Is the chicken done? Is the steak medium-rare? Is the bread baked through? Without a thermometer, you’re guessing — cutting things open, pressing with a finger, using timing estimates for a specific oven on a specific day. With a thermometer, you know. Every time.


What “Instant-Read” Actually Means

An instant-read thermometer provides a temperature reading within seconds of insertion, rather than requiring 30+ seconds to stabilize like older probe thermometers. The best instant-read thermometers (ThermoWorks Thermapen, for example) read in under 2 seconds. This is practically useful — you can check multiple spots in a roast quickly, monitor a sear without losing significant heat from the pan, and get readings without committing the thermometer to a specific position.

An instant-read is distinct from a leave-in probe thermometer, which stays in the meat throughout cooking and monitors temperature continuously. Both are useful; the instant-read is the more essential of the two.


The Features That Actually Matter

Speed: Under 3 seconds to a stable reading is genuinely useful. Slower thermometers require holding the probe in the food longer, which is inconvenient and introduces more thermal error.

Temperature range: For kitchen use, a range of at least -58°F to 572°F (-50°C to 300°C) covers everything from frozen food to candy-making.

Accuracy: ±0.5°F (±0.3°C) is the standard to look for. The difference between 160°F and 165°F is food safety; the thermometer needs to be accurate enough to make that distinction reliable.

Auto-rotating display: The reading should be visible regardless of whether you’re approaching the food from the left or right, from above or below. Thermometers with fixed displays are awkward to read in many real-world positions.

Folding probe: Protects the probe during storage and makes the thermometer pocket-safe for grill use.

IP rating (waterproofing): Kitchen thermometers get wet. An IPX7 or similar waterproofing rating means the thermometer survives splashes and accidental submersion without damage.

Backlit display: Useful when checking temperatures in dim ovens or at the grill.


The Two Tiers

Professional tier (ThermoWorks Thermapen ONE, $105): Sub-second readings, ±0.5°F accuracy, waterproof, auto-rotating, backlit. The professional standard. Worth every dollar for anyone who cooks seriously and often.

Budget tier (ThermoPro TP19H, $20–30): 2–3 second readings, ±0.9°F accuracy, waterproof, foldable. Excellent performance at an accessible price. The right starting point.

The gap between these is real but not dramatic for home use. The Thermapen is a precision instrument; the ThermoPro is a very good kitchen tool. Both are enormously better than no thermometer.


Using It Correctly

Insert at the thickest part. Not the thin edge of a chicken breast; the center of the deepest part, away from bone (bone conducts heat differently and gives a false reading).

Check multiple spots in large roasts. Temperature is not uniform. A 5-pound roast can vary significantly between the exterior and center.

Account for carryover cooking. Temperature rises 5–10°F after removing from heat as residual warmth distributes. Pull proteins 5°F before target temperature.

Calibrate occasionally. Drop the probe in ice water (32°F/0°C) to verify accuracy. If it reads differently, use the calibration function (most quality thermometers have one) or note the offset.


🛒 Gear Worth Having

As an Amazon affiliate, I earn from qualifying purchases.


Related Reads

Posted on TumbleBump | INVESTS Category

TumbleBump is part of the John D Reinhart content family. Writer, illustrator, videographer, and accidental filmmaker — find the whole story at JohnDReinhart.com.

25012

©2026 John D Reinhart/TumbleBump.com – all rights reserved
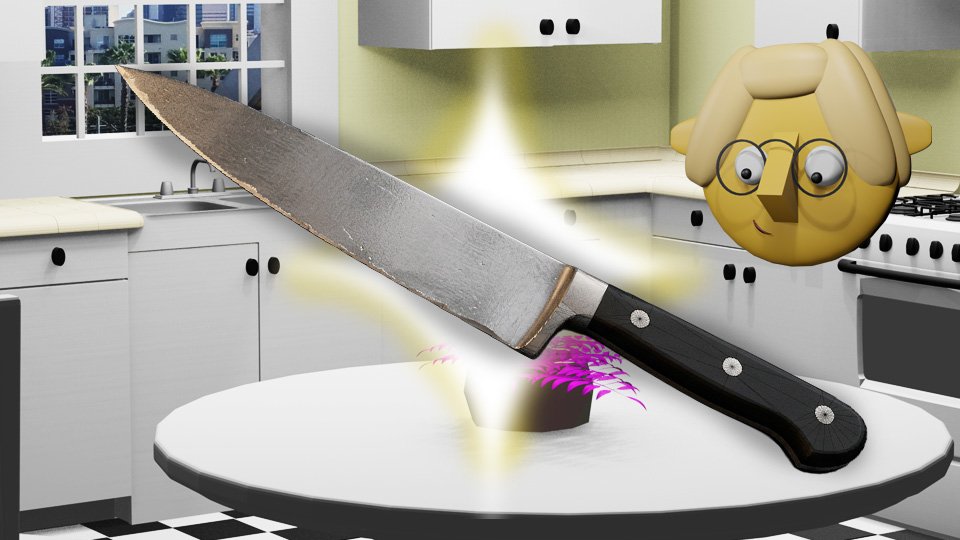
The Essential Kitchen Knives

A kitchen full of knives sounds impressive and is mostly unnecessary. The truth is you need three knives — possibly two — and the right ones cover 99% of what any home cook will ever do. Here’s which ones they are and what makes each essential.

Meta Excerpt: 


The knife block that came with your last apartment or was gifted at a wedding contains anywhere from 6 to 14 pieces. Most of them see the light of day approximately never. The bread knife comes out for bread. The chef’s knife does everything else, and the rest sit in the block looking decorative.

This is fine — having knives you don’t use isn’t a problem. But if you’re building a kitchen intentionally, here’s the honest list of what you actually need, in order of importance.


Knife One: The Chef’s Knife (8–10 inch)

The chef’s knife is the kitchen’s workhorse. It dices, chops, slices, and minces. It breaks down vegetables, portions raw proteins, and handles the vast majority of cutting tasks in any kitchen. If you have one knife, it is this one.

Blade length: 8 inches is the sweet spot for most cooks — long enough to slice through large vegetables and proteins, maneuverable enough for detail work. 10 inches for large-handed cooks or those who process large quantities. 6 inches for those who prefer lighter, more nimble tools.

Style: – German-style (Wüsthof, Henckels): heavier, more curved belly, designed for rocking cuts. More forgiving and durable, harder to chip. – Japanese-style (MAC, Miyabi, Shun): thinner, harder steel, designed for push cuts. Sharper out of the box, holds an edge longer, more prone to chipping if used carelessly.

Neither is objectively better. Choose based on your cooking style and how much knife maintenance you want to do.

Budget: – Entry-level excellent: Victorinox Fibrox 8-inch ($40) — the best knife for the money, full stop. – Mid-range: MAC MTH-80 ($145), Wüsthof Classic ($150–170) – Premium: Shun Classic ($180+), Miyabi Birchwood ($300+)


Knife Two: The Paring Knife (3–4 inch)

The paring knife does the detail work the chef’s knife can’t — peeling, trimming, coring, cutting small vegetables in the hand (carefully, with the claw grip). It’s the knife you use when the cutting board feels like overkill or the item is too small for a large blade.

This post, Knife Safety for the Nervous, explains the claw grip in detail.

You don’t need a paring knife as desperately as the chef’s knife — a small chef’s knife or a chef’s knife with care handles most tasks. But a paring knife costs $15–30 and earns its place.

What to look for: A blade that’s stiff rather than flexible (most tasks require precision, not flexibility), comfortable in the hand for extended close work, a sharp point.

Recommendation: Victorinox 3.25-inch paring knife ($10) is the standard. A Wüsthof or Henckels classic paring knife steps it up modestly.


Knife Three: The Bread Knife (Serrated, 8–10 inch)

A serrated knife cuts through crusty bread without crushing the soft interior — the serrations grip the crust while the thin blade slides through. No other knife type does this as well.

The bread knife is also excellent for: slicing ripe tomatoes (the serrations bite through skin that resists a straight edge), cutting cakes and layered pastries, and slicing any food with a firm exterior and soft interior.

You won’t use this as often as the chef’s knife, but when you need it, nothing substitutes for it.

What to look for: Length (10 inches allows full-stroke cutting without sawing); offset handle (the handle sits above the blade, preventing knuckles from hitting the cutting board); flexible vs. stiff (for bread, a semi-stiff blade is correct).

Recommendation: Wüsthof Classic 10-inch bread knife, or the surprisingly excellent Victorinox 10.25-inch serrated bread knife ($40).


What About the Rest?

Santoku (7-inch): A Japanese-style alternative to the chef’s knife. Shorter, slightly different cutting geometry, excellent for produce and fish. Not an addition — a substitution. If you prefer the santoku style, get one instead of a chef’s knife.

Boning and fillet knives: For specific tasks (deboning a chicken, filleting whole fish). Not essential unless you do these tasks regularly.

Honing steel (not a knife, but essential): The honing steel maintains every knife you own. Buy one and use it before every cooking session.

Kitchen shears: Not a knife, but essential. See the dedicated post.


🛒 Gear Worth Having

As an Amazon affiliate, I earn from qualifying purchases.


Related Reads


Posted on TumbleBump | INVESTS Category

TumbleBump is part of the John D Reinhart content family. Writer, illustrator, videographer, and accidental filmmaker — find the whole story at JohnDReinhart.com.

25004

©2026 John D Reinhart/TumbleBump.com – all rights reserved
Knife Safety for the Nervous

A sharp knife in a confident hand is one of the safest tools in the kitchen. A dull knife in an uncertain hand is one of the most dangerous. Here’s the complete guide to using knives safely — the grips, the guards, the habits, and the one counterintuitive truth that changes everything.

Knives make a lot of people nervous. This is understandable — they’re sharp, they’re fast, and the consequences of a mistake are immediate and unpleasant.

But knife anxiety itself often produces the conditions that lead to accidents. Tentative, uncertain cuts. Dull knives that require force and slip. Improper grips that provide less control. The irony of nervous knife handling is that too much caution produces less safety, not more.

Here’s what actually keeps you safe with a knife — starting with the one truth that surprises most people.


The Counterintuitive Truth: Sharp Knives Are Safer

A sharp knife cuts with light, controlled pressure. You guide the knife; it does the work. Because less force is required, the knife goes where you intend it to go.

A dull knife requires significant downward force to cut through food. That force doesn’t go away if the knife slips — it goes into whatever the knife hits next, which is often a finger. Dull knives slip more and require more force and produce more injuries.

Keeping your knives sharp is the single most important knife safety practice. Before any other technique: sharpen your knives.


The Two Essential Grips

The Pinch Grip (for the cutting hand): Don’t grip the handle. Instead, pinch the blade itself between your thumb and the side of your bent index finger, right at the base of the blade where it meets the handle. Wrap the remaining fingers around the handle.

This grip feels counterintuitive — you’re touching the blade — but it provides significantly more control than a handle-only grip. The blade’s position is determined directly by your fingers, not transmitted through a lever. Professional cooks universally use the pinch grip.

The Claw Grip (for the guiding hand): The hand that holds the food uses what’s called the claw grip: curl your fingertips under, so your knuckles are the highest point of your hand and the fingertips are protected behind them. The flat side of the blade rests against your knuckles as you cut, using the knuckles as a guide.

The claw grip means the blade never reaches your fingertips — it’s physically blocked by your knuckles. This is why professional cooks cut quickly with apparent confidence: the claw grip makes fingertip injury essentially impossible as long as you maintain it.

Practice both grips slowly with a blunt object first if needed. They become automatic within a few sessions.


Safe Cutting Positions and Habits

Stabilize your cutting board. A board that slides is dangerous. Place a damp kitchen towel or a non-slip mat under the board before you start. If the board moves during cutting, stop and re-stabilize.

Cut on a flat surface. Round vegetables (onions, potatoes, apples) should be cut in half first to create a flat side. Set that flat side down before continuing. A round food on a cutting board is unstable; the same food with a flat side is secure.

Keep fingers away from the blade’s path. Know where the knife will go if it completes or overshoots the cut. Nothing else should be in that path.

Don’t rush. Speed comes with practice and proper technique, not with effort. Forcing speed before you have the grips and habits creates risk. Slow down and let the technique develop.

Cut away from yourself. When peeling or trimming with a paring knife, the cut goes away from your body, not toward it.

Walk carefully with knives. Carry a knife with the blade pointed down and close to your leg. Never hand a knife to someone with the blade extended toward them unless you intend to stab them — place the knife on the counter and let them pick it up.

Don’t catch a falling knife. A knife dropped mid-cut should be stepped away from, not caught. The instinct to catch is dangerous. Step back.


The Honing Habit

A honing steel (sometimes called a sharpening steel) doesn’t sharpen a knife — it realigns the edge. A knife’s edge is a thin, flexible strip of steel that bends microscopically with use. Honing straightens it back.

Hone your knives before every cooking session. 4–6 strokes per side on a honing steel, at roughly a 15–20 degree angle for Japanese knives and 20–25 degrees for German knives. This takes 30 seconds and keeps a knife cutting at peak efficiency between sharpenings.

A honed knife is more predictable. A predictable knife is a safer knife.


Storage Matters

Never loose in a drawer. Knives banging against other utensils in a drawer damage the edge and expose you to the blade when reaching in blindly.

Magnetic strip: Mounts on the wall, displays knives safely, protects edges, easy access.

Knife block: Traditional and effective. Make sure the slots are wide enough that you’re not scraping the edge against the wood as you remove the knife.

Blade guards: Inexpensive sheaths for individual knife storage. The option for those without wall space for a strip or counter space for a block.


🛒 Gear Worth Having

As an Amazon affiliate, I earn from qualifying purchases.


Posted on TumbleBump | INVESTS Category

TumbleBump is part of the John D Reinhart content family. Writer, illustrator, videographer, and accidental filmmaker — find the whole story at JohnDReinhart.com.

25008

©2026 John D Reinhart/TumbleBump.com – all rights reserved