Seven Dishes Every Beginning Cook Should Make First

Seven dishes that taste great even when you’re still figuring things out — and smell absolutely wonderful while they’re at it These seven forgiving dishes will build your confidence, fill your kitchen with good smells, and actually taste great — every time.

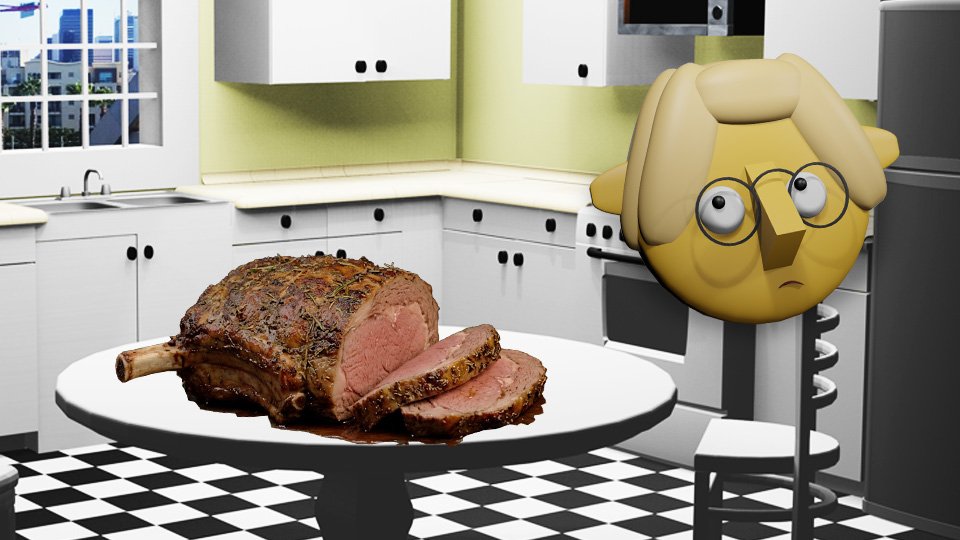
Here is a truth about cooking that nobody puts on the box: the recipe matters less than the dish.

Some dishes are genuinely unforgiving. A soufflé will collapse if someone opens the oven door wrong. A béarnaise sauce will break if you look at it sideways. A perfectly seared scallop requires confidence, timing, and a pan hot enough to make you reconsider your life choices.

Other dishes are built for humans. They have wide margins, generous timing, and the kind of flavors that cover a multitude of small errors. Make a mistake and dinner is still good. Make a slightly bigger mistake and dinner is still pretty good. These are the dishes you start with.

Master the forgiving ones first. The tricky ones will wait.

There are approximately 7 gazillion YouTube videos that will show the nitty-gritty low down, the step-by-step blow-by-blow of actually preparing these dishes. Please don’t think we’ll be offended if you go look. In fact, we encourage you. We’re here to provide the why, not the how!

🍗 One-Pan Roasted Chicken Thighs

Why it’s your new best friend

The chicken thigh is the most forgiving protein in the known universe. It has enough fat to stay juicy even if you overcook it, enough surface area to go golden and crispy without any special technique, and enough flavor to taste genuinely satisfying with nothing more than salt, pepper, and a hot oven.

If you have never cooked a piece of meat in your life, start here.

The technique

  • Season generously with salt, pepper, garlic powder, paprika — whatever sounds good
  • Place skin-side up in an oven-safe pan or baking dish
  • Roast at 425°F for 35–45 minutes until the skin is deep golden
  • Internal temperature should hit 165°F — a meat thermometer removes all doubt

✅  You can over-season these and they’re still good. You can leave them five extra minutes and they’re still juicy. You can make them with olive oil, butter, or nothing at all in a pinch. Chicken thighs simply refuse to fail.

🍝 Pasta with Simple Tomato Sauce

Why it’s your new best friend

Pasta is almost impossible to truly ruin. A can of good crushed tomatoes is already halfway to dinner before you’ve done anything. The whole business comes together in twenty minutes and tastes like someone tried — because you did, and it was easy.

The technique

  • Boil well-salted water in a saucepan. Cook pasta until al dente — taste it, it should have just a little resistance
  • Meanwhile, in another saucepan, warm a can of crushed tomatoes in a pan with olive oil, a clove or two of garlic, and salt
  • Combine pasta and sauce. Add parmesan and black pepper. Eat immediately.

✅  The timing is gentle, the flavors are robust, and even slightly overcooked pasta in a good sauce is entirely acceptable. This is weeknight dinner, not a competition.

Here are the nuts and bolts of making pasta, if you’re curious.

🍲 Lentil Soup

Why it’s your new best friend

Lentils may be the single most forgiving ingredient in the entire kitchen. Unlike dried beans, they need no soaking. They cook in under thirty minutes. They absorb flavor like a sponge. And overcooked lentils don’t become a disaster — they become creamier, which is actually delicious.

The technique

  • In a saucepan, soften diced onion, carrot, and celery in olive oil — this is a mirepoix, the flavor foundation of most soups, and it smells wonderful
  • Add garlic, cumin, a can of diced tomatoes, a cup of dried lentils, and broth or water
  • Simmer 25–30 minutes. Season with salt and a squeeze of lemon juice.

✅  Once everything is in the pot, the soup takes care of itself. The leftovers are arguably better than the first serving. Make a double batch without a second thought.

Lentils make a great foundational staple for a week’s worth of dishes. Here’s a way to plan that out.

🍳 Fried Rice

Why it’s your new best friend

Fried rice was invented to use up what you already have. Day-old rice (actually better than fresh for this), eggs, whatever vegetables are in the freezer, soy sauce — the dish has infinite variation and is genuinely hard to mess up even on a bad day.

The technique

  • High heat in a wok or your trusty cast-iron skillet, a little oil, garlic and ginger if you have them
  • Add vegetables and stir until hot
  • Add rice and press flat for a minute before stirring — this creates a small, satisfying crust
  • Scramble an egg or two directly into the pan, stir to combine
  • Season with soy sauce. Taste. Adjust. Eat.

✅  Too little soy? Add more. Too dry? Splash of broth. Missing a vegetable? Swap something else in. The dish adjusts to you, not the other way around.

🍌 Banana Bread

Why it’s your new best friend

Banana bread is the gateway baking project for excellent reasons. It uses over-ripe bananas — the blacker, the better, because more brown means more sugar means more flavor. It requires no special equipment. And the flavor is robust enough to survive small measurement errors without blinking.

The technique

  • Mash three very ripe bananas thoroughly in a large bowl
  • Mix in melted butter, sugar, one egg, a splash of vanilla, a pinch of salt, baking soda, and flour
  • Pour into a greased loaf pan. Bake at 350°F for 55–65 minutes.
  • A toothpick in the center should come out clean. Let it cool — if you can stand it.

✅  The margin for error is wide, the result is reliably wonderful, and your kitchen will smell like the inside of a hug. This one wins every time.

🥚 Frittata

Why it’s your new best friend

A frittata is a baked omelette, and it’s infinitely less stressful than a French omelette — which requires precise heat, specific technique, and a certain philosophical acceptance that it may slide onto the floor. A frittata you don’t fold. The oven does the work. There’s nothing to panic about.

The technique

  • Whisk eggs in a bowl with salt and a splash of milk or cream
  • In an oven-safe pan, sauté whatever vegetables or protein you like in olive oil
  • Pour in the eggs. Don’t stir. Let the bottom set for 2–3 minutes.
  • Transfer the pan to a 375°F oven for 10–12 minutes until the top is just set

✅  The oven handles the hard part. The dish accepts almost any filling. And it looks far more impressive than the effort required — which is exactly what you want.

If you’re new to the concept of sautéing, this post has helpful information: Sauté: The One Word Every Recipe Uses and Nobody Ever Explains

🥦 Sheet Pan Vegetables with Anything

Why it’s your new best friend

Roasting vegetables is the most forgiving cooking method in existence. You toss things in oil and salt, spread them on a sheet pan, and put them in a hot oven. They will become good. Every single time. No technique required, no timing anxiety, no special skills.

The technique

  • Cut any vegetable into roughly even pieces
  • Toss with olive oil and salt. Spread in a single layer on a sheet pan — don’t crowd them.
  • Roast at 400–425°F for 20–35 minutes depending on the vegetable, tossed once halfway through

✅  Slightly undercooked: pleasantly crunchy. Slightly overcooked: caramelized and sweeter. Either direction from perfect is still a good result. Roast everything. Roast it often.

🛒 Gear Worth Having

The Essentials

  • Lodge 10-Inch Cast Iron Skillet — Stovetop to oven in one pan. Essential for frittatas, chicken thighs, and a lifetime of cooking. Virtually indestructible.
  • Nordic Ware Half Sheet Pans (2-Pack) — The roasting pan every kitchen needs. Two of them means more room and better results on sheet pan night.
  • 9×5 Loaf Pan — For banana bread, and eventually everything else you’ll want to bake in a loaf. A good one releases cleanly every time.
  • Instant-Read Meat Thermometer — Removes all guesswork from chicken. If it reads 165°F, dinner is done. Worth every penny.

Books Worth Reading

As an Amazon Associate, I earn from qualifying purchases. Thank you for supporting TumbleBump.

🔗 Related Reads

TumbleBump is part of the John D Reinhart content family. Writer, illustrator, videographer, and accidental filmmaker — find the whole story at JohnDReinhart.com.

21015

©2026 John D Reinhart/TumbleBump.com – all rights reserved

The 1-2-3s of Cooking Meat

Meat is the ingredient that makes most beginning cooks nervous — too raw, too dry, too tough, too something. Here’s the three-part framework that makes cooking any meat less scary and more delicious, every single time.

Cooking meat well is one of those skills that sounds complicated but is really just a handful of concepts stacked on each other. Once you have the concepts, everything else follows — chicken, steak, pork chops, ground meat, roasts, all of it — because the same logic applies across the board.

The framework is three steps: preparation, heat, and rest. Let’s walk through each.


Step 1: Preparation

What you do before the meat hits the pan matters as much as what you do during cooking.

Dry It

Pat meat dry with paper towels before cooking. This sounds minor and isn’t. Wet meat steams in the pan instead of browning. You’ve had perfectly good chicken turn grayish and watery? Wet meat. Pat it dry and the same chicken turns golden and beautiful.

Salt It — and Early

Salt your meat at least 30 minutes before cooking, ideally longer (1–24 hours for thicker cuts). This is called dry brining, and it does something remarkable: the salt initially draws moisture out of the meat, then that moisture dissolves the salt and gets reabsorbed. The result is meat that is seasoned all the way through, not just on the surface, and that has better moisture retention during cooking.

For quick weeknight cooking, even 30 minutes makes a difference. For a thick steak or pork chop, salting the night before is transformative.

Bring to Room Temperature

Take large or thick cuts of meat out of the refrigerator 20–30 minutes before cooking. Cold meat hitting a hot pan lowers the pan temperature and produces uneven cooking — raw in the center, overdone on the outside. Room temperature meat cooks more evenly.

(Note: For food safety, don’t leave meat out more than 1–2 hours, and never in a very warm environment.)


Step 2: Heat

This is where the cooking happens, and the most important concept is: match the heat level to the thickness and tenderness of the cut.

Thin Cuts: High Heat, Fast

Thin chicken cutlets, fish fillets, pork chops under ½ inch, thin steaks, ground meat — these cook fast and hot. High heat creates browning (flavor) before the inside overcooks.

  • Get the pan very hot before the meat goes in
  • Don’t move the meat for the first 2–3 minutes — let the crust develop
  • Flip once when it releases easily from the pan (it sticks at first, then releases when properly seared)
  • Cook the second side, then check internal temperature.

Thick Cuts: Sear Then Finish in Oven

A thick steak or pork chop or chicken breast needs to be cooked through without burning the outside. The technique:

  1. Sear in a hot, oven-safe pan (cast iron is ideal) for 2–3 minutes per side until well browned
  2. Transfer the pan directly to a 375°F oven and cook until internal temp is reached

This is called the “reverse sear” when done in the opposite order (oven first, sear last) — that version produces even more consistent results.

Tough Cuts: Low Heat, Long Time

Brisket, short ribs, pork shoulder, lamb shanks — these are cuts with a lot of connective tissue and muscle. High heat makes them tough. Low, slow heat (275–325°F for hours, or low and slow in a braising liquid) breaks down collagen into gelatin, producing meat that is tender to the point of falling apart.

These cuts are forgiving precisely because time is the variable, not precision — they’re done “when they’re done,” which you’ll know because a fork or spoon pressed into them meets no resistance.


The Temperature Guide (Because This Is Everything)

Get a meat thermometer. Use it every time until temperatures are second nature.

MeatSafe TemperatureNotes
Chicken (whole/parts)165°FPull at 160°F — it coasts up
Ground beef/pork160°FNo exceptions
Beef steak (medium rare)130–135°FRed center, warm
Beef steak (medium)140–145°FPink center
Pork chops/loin145°FA little pink is fine and correct
Fish (most types)130–140°FFlakes easily, opaque

Step 3: Rest

When you take meat off heat, let it rest before cutting. This is not optional.

Why: When meat cooks, the heat drives moisture toward the center of the cut. When you let it rest, that moisture redistributes throughout the meat. Cut immediately and the moisture rushes out onto the cutting board. Let it rest and it stays in the meat.

How long to rest: – Thin cuts (chicken breast, pork chop, steak): 5 minutes – Thick roasts: 10–20 minutes – Large roasts (whole chicken, turkey breast): 20–30 minutes

Tent loosely with aluminum foil to keep it warm during resting. Don’t wrap tightly — you’ll trap steam and soften the crust.


A Few Specific Notes by Meat Type

Chicken thighs vs. breasts: Thighs have more fat and connective tissue. They’re more forgiving — harder to overcook, more flavorful when cooked properly. If you’re a beginning cook, start with thighs. Breasts are leaner and can go from done to dry very quickly.

Pork: Modern pork is safe to eat at 145°F, which means a little pink in the center is totally fine. You don’t need to cook pork until it’s white all the way through. Overcooked pork chops are unfortunately common.

Steak: The quality of the steak matters. A well-cooked choice-grade ribeye will always be more satisfying than a poorly cooked filet. Buy the best you can afford, keep it simple.

Ground meat: Cook to 160°F without exceptions. Ground meat has more surface area and exposure than whole cuts, which changes the safety calculus.


🛒 Gear Worth Having


As an Amazon affiliate, I earn from qualifying purchases. Thank you for supporting TumbleBump.


Recommended Reads

Posted on Skippity | COOKS Category

TumbleBump is part of the John D Reinhart content family. Writer, illustrator, videographer, and accidental filmmaker — find the whole story at JohnDReinhart.com.

21001

©2026 John D Reinhart/TumbleBump.com – all rights reserved

Salt, Fat, and Flame: The Three Knobs of Flavor

Every flavor problem in your kitchen — flat, bland, greasy, dull, somehow wrong — can be traced back to three things: salt, fat, and heat. Learn how these three knobs work and you’ll never follow a recipe blindly again.

Here is a secret that culinary school charges a lot of money to teach you:

Most cooking problems are caused by not enough salt, not enough fat, or wrong heat. And most great dishes are great because someone understood how to use all three.

That’s the whole game. Let’s play it.


Knob One: Salt

Salt is not seasoning. Salt is a fundamental force in cooking. It doesn’t just make things taste salty — it wakes up flavors that were already there, suppresses bitterness, and brings everything into focus. A dish without enough salt tastes vague and flat. The same dish with the right amount of salt tastes like itself.

When to add it: Earlier than you think. Salting at the end just makes things taste salty. Salting as you go — on the raw vegetable, into the pasta water, on the meat before it hits the pan — lets the salt become part of the food rather than sitting on top of it.

How much: Enough that nothing tastes flat, but not so much that salt is the thing you notice. The goal is for salt to disappear — for the food to just taste good without you being able to identify why.

Tasting for salt: Take a small spoonful of whatever you’re making. Chew it, swallow it, wait a moment. If it tastes flat or muted, add salt, stir, taste again. Keep going until it tastes like a full, complete version of itself.

Types of salt:

  •  Kosher salt — the everyday workhorse. Coarser grain, easier to pinch and apply evenly. Most professional kitchens use this.
  • Table salt — fine grain, very common, but saltier by volume than kosher. If a recipe says “kosher salt” and you use table salt, use about half as much.
  • Flaky sea salt — finishing salt. Sprinkle on top of a dish just before serving for texture and a bright, clean pop of salinity.

Knob Two: Fat

Fat does several things that nothing else can do.

It carries flavor. Many flavor compounds are fat-soluble, meaning they need fat to reach your taste buds fully. Herbs bloomed in butter taste more herby than herbs added to water. Garlic cooked in oil infuses the oil with flavor that distributes through the whole dish.

It conducts heat. Fat in a pan gets much hotter than water, which is why sautéing creates browning and roasting creates crust, while boiling can’t. That browning (the Maillard reaction) is flavor.

It adds richness and texture. A sauce with a pat of butter melted in at the end tastes rounder and fuller. A dressing with good olive oil feels silkier. A biscuit made with cold butter has distinct flaky layers.

Common cooking fats and their strengths: 

  • Butter — flavor, browning, richness. Burns at relatively low temp (use clarified butter for high-heat cooking).
  • Olive oil — flavor, Mediterranean character, good for medium heat. Don’t cook it at very high heat — it smokes and turns bitter.
  • Neutral oils (canola, vegetable, avocado) — for high-heat cooking where you want fat without flavor. Avocado oil has the highest smoke point.
  • Bacon fat / lard — incredible flavor. Old-fashioned and underrated.

Not enough fat: Food sticks to the pan. Food tastes dry and flat. Flavors don’t develop.

Too much fat: Food feels greasy. Sauces break. Baked goods are dense.

The right amount is somewhere between “this seems like a lot” and “this seems like too much.”


Knob Three: Heat

Heat is where cooking actually happens. Fat is your medium. Salt is your tool. But heat is the engine.

The two modes of heat:

Dry heat — roasting, searing, sautéing, grilling — removes moisture and creates browning. This is where crust forms, caramelization happens, and flavor concentrates. Dry heat is flavor development.

Wet heat — simmering, braising, steaming, poaching — the food gently cooks in liquid, keeps things moist, and breaks down tough fibers over time. Wet heat is tenderness.

Most great dishes use both: sear the meat first (dry heat, flavor), then braise it low and slow (wet heat, tenderness).

The main heat mistakes:

  •  Too low, too short — things cook through but never brown. You’ve cooked food without actually cooking flavor.
  • Too high, too fast — the outside burns before the inside is done. Harsh, bitter, uneven.
  • Right heat — the outside caramelizes at roughly the same rate the inside cooks through. This is the sweet spot, and it’s different for every protein, vegetable, and dish.

How to know if your pan is hot enough: Add a drop of water or a single crumb. It should sizzle immediately and evaporate quickly. If it just sits there, not yet. If it instantly vaporizes, too hot.


How the Three Work Together

A great sear on a chicken thigh: dry pan, high heat, enough fat to coat the surface, salted meat. The heat triggers browning. The fat carries the heat evenly and conducts browning across the whole surface. The salt drew out a little surface moisture so you get crust instead of steam.

A perfect pasta sauce: medium heat, olive oil, garlic (fat carries the garlic flavor into the oil), tomatoes, salt added in stages. The heat concentrates the tomato. The fat enriches the sauce. The salt balances the acidity and wakes up the whole thing.

These three things are in every recipe. Now you can see them.


🛒 Gear Worth Having

As an Amazon affiliate, I earn from qualifying purchases. Thank you for supporting TumbleBump.


Recommended Reads: 


Posted on TumbleBump | COOKS Category

TumbleBump is part of the John D Reinhart content family. Writer, illustrator, videographer, and accidental filmmaker — find the whole story at JohnDReinhart.com.

21005

©2026 John D Reinhart/TumbleBump.com – all rights reserved

The Case for Fancy Tuna

You’ve been grabbing the cheapest can and shrugging. Turns out there’s a whole world between “fine for the cat” and “why is this so good?” — and the upgrade costs less than you think.

You’ve stood in the canned fish aisle. You’ve looked at forty-seven nearly identical cans of tuna and grabbed the cheapest one because honestly, what’s the difference?

Quite a bit, actually. Canned tuna ranges from “fine for the cat” to “why is this so good?” and the gap between them is smaller than you think — in price, in effort, and in the number of decisions you have to make. You just need to know what you’re looking at.

Here’s the whole thing, from the can to the plate.

🫙 Decision One: Oil or Water?

This is the one that matters most and the one most people never think about. Water-packed tuna is leaner and more convenient. Oil-packed tuna tastes better. That’s the whole argument.

Water-packed: Lower in fat and calories. Milder flavor. Easier to drain and use in anything. The default for most people and perfectly respectable. Works well when the tuna is playing a supporting role — mixed into a casserole, stuffed into a sandwich with a lot going on.

Oil-packed: Richer, silkier, more flavorful. The oil keeps the tuna moist and adds body to whatever you’re making. When the tuna is the star — tuna salad, a tuna melt, tuna on crackers — oil-packed is the one that makes people ask what you did differently.

Olive oil vs. vegetable oil: If you’re going oil-packed, go olive oil. Vegetable oil adds fat without adding flavor. Olive oil adds both, and in a tuna salad the difference is noticeable. Good olive oil-packed tuna — the kind worth eating straight from the can with a fork — is packed in decent olive oil.

And yes, you can use the olive oil from the can. Drizzle it on toast, use it in the dressing, stir it into the tuna salad. It’s already flavored. Don’t waste it.

📋 Decision Two: Solid, Chunk, or Flaked?

This is about texture, and texture matters depending on what you’re making.

  • Solid (or “solid white”): Large, intact pieces. The premium option. Best when you want visible chunks of tuna in the finished dish — a composed salad, a nice pasta, something where presentation counts for something.
  • Chunk: Smaller pieces, still recognizable as tuna. The most common and most versatile. Great for tuna salad, melts, casseroles — anywhere the tuna gets mixed with other things. This is the everyday workhorse.
  • Flaked: Very fine, almost paste-like. Best for dips or anywhere you want the tuna to disappear into the mixture. Less common, less necessary.

🐟 Decision Three: Which Tuna?

The label says “tuna” but the species varies, and species affects both flavor and mercury content.

  • Albacore (white tuna): Mild, firm, pale. The most popular variety in the U.S. Slightly higher in mercury than skipjack, so the FDA suggests limiting it if you’re eating canned tuna several times a week.
  • Skipjack (light tuna): Darker, stronger flavor, softer texture. Lower in mercury. The “chunk light” on most shelves is skipjack. Cheaper, more sustainable, and perfectly delicious in anything that’s getting seasoned and mixed anyway.

For everyday tuna salad and melts: chunk light skipjack in olive oil. For something you want to look beautiful on a plate: solid white albacore. That’s the simple version of the whole decision.

🎯 So What Should You Actually Buy?

The Costco aisle shrug is understandable. Here’s a quick orientation:

  • Everyday use: Store brand chunk light in olive oil. Cheap, solid, does the job. If your store doesn’t carry olive oil-packed, Starkist or Bumblebee chunk light in water is the fallback.
  • Step up: Wild Planet Wild Albacore or Wild Skipjack. Pole-and-line caught, no fillers or broth added, just tuna and olive oil (or water). The difference in flavor over standard supermarket tuna is real and the price difference is modest.
  • Fancy occasion: Tonnino or Ortiz. Jarred, olive oil-packed, solid tuna. The kind you put on a charcuterie board and act casual about. Also extraordinary in a tuna melt if you want to feel unreasonably smug about lunch.

The Best Way to Drain Tuna

Open the can, but don’t throw the lid into the recycle bin yet. Instead, hold it flat over the tuna while you turn the can upside down to let the liquid out.

  • Water: this can go down the kitchen sink.
  • Olive Oil: drain it into a bowl to use in a different salad, or you can drain it into the trash can.
  • Vegetable Oil: drain it straight into the trash can.

You don’t want to send the oil down the kitchen sink because it can gum up the drain and cause it to clog.

🥪 Now Make Something

Three things worth knowing how to make, in ascending order of effort:

Classic Tuna Salad

Drain one can of tuna. Mix with a spoonful of mayonnaise, a squeeze of lemon, a little Dijon, salt, pepper. Taste and adjust. That’s it. Add celery, red onion, or capers if you want texture and bite. Eat on toast, crackers, or a lettuce leaf if you’re feeling virtuous.

Oil-packed tuna needs less mayo because the oil is already doing the work. Start with less and add more if needed.

The Tuna Melt

Make the tuna salad above. Pile it on an open-faced bun, English muffin, or thick slice of bread. Cover with a slice of Swiss, cheddar, or provolone. Put it on a sheet pan and put that in the broiler for three to four minutes until the cheese bubbles and begins to brown. Watch it — broilers are fast and merciless.

Olive oil-packed tuna + good cheese + thirty seconds longer under the broiler than you think you need = the tuna melt that ruins all other tuna melts.

Tuna on Pasta (Five Minutes, Seriously)

Drain the tuna.

Cook the pasta. If you’re new to making pasta, this post will help: The Nuts and Bolts of Making Pasta.

While it drains in the colander, warm a glug of olive oil in the pasta pan, add a clove of garlic, cook thirty seconds. Add the drained tuna, break it up gently, add a squeeze of lemon and a handful of parsley if you have it.

Pour in the cooked pasta and toss everything together. A little salt and pepper, done. This is the weeknight dinner that sounds like nothing and tastes like you did something.

🌊 Where Tuna Comes From

Before it’s in a can on your shelf, tuna is one of the most extraordinary animals in the ocean — and almost nobody knows this.

Tuna are built for speed. Unlike most fish, which are cold-blooded and sluggish in cold water, tuna are warm-blooded — they regulate their own body temperature, which means their muscles stay warm and powerful regardless of what the ocean is doing around them. A bluefin tuna can hit 40 miles per hour. They are, in every meaningful sense, the cheetahs of the sea.

They’re also built to never stop moving. Tuna breathe by swimming — they push water over their gills by moving forward, which means if they stop, they suffocate. A tuna swims every moment of its life, from birth until it ends up in your tuna salad. This constant motion is exactly why tuna meat is so dense, dark, and flavorful compared to a fish that spends its days drifting around a reef.

Tuna are open-ocean hunters. They travel in schools, covering thousands of miles across entire ocean basins — Atlantic, Pacific, Indian — following prey and warm currents. They eat smaller fish, squid, and crustaceans, and they eat aggressively, because fueling a warm-blooded, perpetually-moving, 40-mph torpedo takes considerable effort.

The skipjack in your everyday can is a smaller, faster-maturing species — typically two to three feet long and a few pounds. The albacore is larger and milder. The bluefin, the one you’re paying for at a sushi bar, can exceed ten feet and a thousand pounds. Same family. Very different price point.

What ends up in the can is the loin — the dense, flavorful muscle along the fish’s side that did all that swimming. Which is why good tuna, simply packed in good olive oil, needs almost nothing else. It already did the work.

🛒 Gear Worth Having

As an Amazon affiliate, I earn from qualified purchases. Thank you for supporting TumbleBump.

📚 Related Reads


Posted on TumbleBump | GOODS Category

TumbleBump is part of the John D Reinhart content family. Writer, illustrator, videographer, and accidental filmmaker — find the whole story at JohnDReinhart.com.

27011

©2026 John D Reinhart/TumbleBump.com – all rights reserved

How Salad Actually Works

You’ve never burned a salad. Here’s how to make one worth eating — the ratio, the dressing formula, and the clean-out-the-fridge move that saves lunch every time.

Nobody ever burned a salad. Nobody ever undercooked one, overcooked one, or set off a smoke alarm making one. Salad is fast, cheap, endlessly flexible, and requires zero cooking — which makes it the single most underrated meal in the home cook’s repertoire.

The reason most homemade salads are disappointing has nothing to do with skill. It’s a ratio problem, a dressing problem, or both. Fix those two things and salad stops being a sad bowl of leaves and starts being a meal.

Here’s how it actually works.

🥗 The Ratio

A good salad has three layers: a base, something interesting on top, and a dressing that ties them together. The proportions matter.

Base (greens or grains): About two-thirds of the bowl. Romaine, spinach, arugula, mixed greens, shredded cabbage, cooked farro, cooked quinoa — anything that gives the salad structure and volume.

Toppings: About one-third. This is where the interest lives — vegetables, proteins, cheese, nuts, croutons, fruit, beans. More on this below.

Dressing: Enough to coat, not drown. Two tablespoons of dressing per two large handfuls of greens is a starting point. Toss, taste, add more if needed.

🌶️ The Dressing Formula

Bottled dressing is fine. But once you know the formula, making your own takes about ninety seconds and tastes significantly better.

The formula: 3 parts oil + 1 part acid + something to emulsify + salt and pepper.

  • Oil: Olive oil for most vinaigrettes. Neutral oil (vegetable, avocado) for creamier or Asian-style dressings.
  • Acid: Red wine vinegar, lemon juice, balsamic, apple cider vinegar, rice vinegar. The acid is what wakes everything up.
  • Emulsifier: A small spoonful of Dijon mustard or honey. This keeps the oil and acid from immediately separating and rounds out the flavor at the same time.

Shake it in a jar, whisk it in a bowl, or just pour it straight onto the salad and toss. The jar is easiest because it doubles as storage — it keeps in the fridge for a week.

Example: 3 tablespoons olive oil + 1 tablespoon red wine vinegar + 1 teaspoon Dijon + pinch of salt + grind of pepper. That’s a vinaigrette. Adjust the ratio to your taste and you’ve got a house dressing.

🍱 Turn It Into a Meal

A side salad is greens and dressing. A meal salad adds protein and enough toppings to make it filling. The options are fast and cheap:

  • Rotisserie chicken: Pull it apart and pile it on. Three minutes of work, done.
  • Canned beans: Chickpeas, black beans, white beans. Rinse, drain, add. High protein, low cost, no cooking.
  • A fried or hard-boiled egg: On top of almost any salad, an egg makes it a meal. Sliced hard-boiled eggs are lunch. A fried egg on warm greens is dinner.
  • Canned tuna or salmon: Open, drain, add. Inexpensive protein, zero prep.
  • Cheese: Feta, parmesan, shredded cheddar, crumbled goat cheese. A little goes a long way toward making a salad feel substantial.

🍻 The Clean-Out-the-Fridge Salad

This is the move. Open the fridge, look at what’s in there, and put it on greens with a dressing. The rules are loose:

  • Leftover roasted vegetables? On the salad.
  • Last night’s cooked grain? Toss it in as the base.
  • Half an avocado? Slice it on top.
  • Random cheese, a handful of nuts, a couple of olives? All of it.
  • Croutons from stale bread? Cut it into cubes, toss with olive oil and salt, toast in a pan or oven for ten minutes. Better than store-bought.

The clean-out-the-fridge salad wastes nothing, costs almost nothing beyond what you already paid for, and is different every time. Once this becomes a habit, food waste drops noticeably.

📦 The Big Batch Salad

Greens wilt the moment they meet dressing. That’s the problem with prepping a salad for the week. The solution: build the salad without the dressing, and use a base that holds up.

Grain-based salads are the move here. Cooked farro, quinoa, or brown rice holds up for four to five days in the fridge without getting soggy. Layer in roasted vegetables, beans, a protein if you like, and whatever else is around. Keep the dressing separate and add it when you eat.

Cook a batch of grains on Sunday. Make the dressing in a jar. Pack lunch for four days without thinking about it again. This is meal planning for people who don’t like meal planning.

If greens are your base, keep them dry and undressed in the container. Add a paper towel on top to absorb moisture. They’ll stay crisp for three to four days.

⚡ A Few Things That Make Salad Better

  • Dry your greens. Wet greens repel dressing. Spin them or pat them dry and dressing actually sticks.
  • Season the greens, not just the dressing. A pinch of salt directly on the greens before tossing makes a surprising difference.
  • Add something crunchy. Toasted nuts, croutons, seeds, fried shallots. Texture is what separates a salad that’s interesting from one that isn’t.
  • Taste it before serving. Too bland? More salt or acid. Too sharp? A drizzle more oil or a pinch of sugar.
  • Big bowl, small portions. Toss the salad in a bowl larger than you think you need. Everything distributes evenly without greens escaping onto the counter.

🛒 Gear Worth Having

As an Amazon affiliate, I earn from qualified purchases. Thank you for supporting TumbleBump.

Recommended Reads

Posted on TumbleBump | COOKS Category

TumbleBump is part of the John D Reinhart content family. Writer, illustrator, videographer, and accidental filmmaker — find the whole story at JohnDReinhart.com.

21014

©2026 John D Reinhart/TumbleBump.com – all rights reserved

The “Essential Eight” Utensils

You don’t need a utensil crock overflowing with tools you’ll never touch. You need eight things — and with eight specific things, you can cook almost anything. Here’s the list, and the reason each one earns its place.

Walk through most kitchen stores and you’ll find an overwhelming array of utensils, gadgets, and tools that promise to make cooking easier, faster, or more precise. Some of them deliver. Most of them don’t earn their counter space.

The Essential Eight is the list of eight utensils that together cover the full range of what you actually do at a stove and in an oven — the ones that pull their weight every single time and earn permanent placement in the utensil crock.


The Eight

1. Silicone Spatula (Large) The scraper, the folder, the stirrer. For scrambled eggs, for sauces, for batter, for anything that needs to be moved without scratching a surface. The most versatile single utensil in the kitchen. If you had to choose one, it would be this one.

2. Thin, Flexible Turner (Fish Spatula) For flipping delicate things — fish fillets, pancakes, fried eggs, latkes — without breaking them. The angled, perforated, flexible stainless head of a fish spatula does this better than any other tool. Also excellent for pressing burgers and moving anything thin and flat in a pan.

3. Wooden Spoon (or Silicone-Coated Wooden Spoon) For stirring. For scraping the pan after you’ve browned meat or vegetables (those stuck-on brown bits on the bottom are called fond, and they’re pure flavor). For tasting from the pot. For the sustained, gentle work of stirring a sauce over medium heat without risking a burned hand. The wooden handle stays cool. The spoon is gentle on all surfaces.

4. Slotted Spoon (Stainless) For lifting solids out of liquids — dumplings from broth, poached eggs from water, vegetables from blanching water, fried things from oil. The slots let liquid drain while you lift. No substitution exists for this.

5. Ladle For serving soups, stews, and sauces. For portioning anything liquid into bowls or containers. A ladle with a pouring lip prevents drips; a long handle keeps the hand away from hot liquid. One ladle, kept in the crock.

6. Tongs (12-inch Locking) For turning things in a hot pan without a spatula — chicken thighs, corn cobs, whole vegetables. For reaching into hot water. For serving salads and pasta. For the dozen tasks where you need to grab, turn, or transfer something that’s too hot or too large for any other tool.

7. Whisk For eggs. For sauces that need emulsifying. For incorporating dry and wet ingredients. For the occasional batter or vinaigrette. One good whisk, comfortable in the hand, with wires that spring back.

8. Heatproof Serving Spoon For serving — the tool that moves food from pan or pot to plate or bowl in quantity. A large, solid-bowl spoon, silicone or stainless, that can handle hot food and substantial quantities. Different from the slotted spoon in that it carries liquid along with solids.


The One Rule for Each

Each utensil in the Essential Eight should be:

Heatproof to 400°F+: Silicone or metal, nothing plastic that might melt against a hot pan rim.

Dishwasher-safe or easy to hand wash: Utensils get used every day and need to be cleaned easily. Complex designs with joints and seams collect food and are difficult to sanitize.

Comfortable to grip: The handle matters. A tool that’s awkward in the hand is a tool that gets avoided.


What Doesn’t Make the Eight

Potato masher: A fork works in a pinch. If you make mashed potatoes weekly, add it. Otherwise, skip.

Basting brush: Useful for specific cooking. Not essential for most home cooks.

Pasta fork: The ladle and tongs together do this job.

Skimmer: The slotted spoon covers most needs here.

Everything else: Assess individually. If you’ve reached for it three times this month, it earns a place. If it’s been in the crock for six months untouched, it doesn’t.


🛒 Gear Worth Having

As an Amazon affiliate, I earn from qualified purchases. Thank you for supporting TumbleBump.


Recommended Reading

Posted on TumbleBump | INVESTS Category

TumbleBump is part of the John D Reinhart content family. Writer, illustrator, videographer, and accidental filmmaker — find the whole story at JohnDReinhart.com.

25007

©2026 John D Reinhart/TumbleBump.com – all rights reserved

Canned Beans: The “Rinse” Requirement

To rinse or not to rinse — it’s one of the small but genuinely meaningful debates in everyday cooking. The liquid in a can of beans is not mysterious gunk. It’s also not always worth keeping. Here’s when to rinse, when not to, what aquafaba actually is, and why this tiny decision changes more than you’d think.

Canned beans are one of the most useful, most affordable, and most nutritious pantry staples available. They’re also one of the more contested items in the kitchen, specifically around a question that sounds trivial but has real implications: should you rinse them?

The short answer is: it depends on what you’re making. The longer answer explains why, and introduces you to one of the most remarkable byproducts in the kitchen that most people pour down the drain.


What’s in the Can Liquid

The liquid in a can of beans (called brine, bean liquid, or — when it’s from chickpeas specifically — aquafaba) is not a mystery. It’s primarily water, starch, and proteins that leached from the beans during the canning process, combined with any salt added during canning and sometimes other preservatives or flavor agents.

The composition: – Water (the majority) – Starch (gives it a slightly viscous, cloudy quality) – Proteins (including albumins that have interesting culinary properties) – Sodium (anywhere from 100–400mg per serving depending on the brand and whether it’s low-sodium) – Sometimes: preservatives (calcium chloride for texture), sugar, natural flavors


The Case for Rinsing

Reduces sodium: Rinsing canned beans under cold water for 30 seconds removes roughly 40% of the sodium content, according to research from the Bean Institute. For anyone watching sodium intake, this is a meaningful reduction.

Improves flavor in some applications: The brine has a distinctive, slightly metallic, somewhat fermented flavor that is muted in some dishes but noticeable in others. In salads, fresh bean applications, and any dish where the beans are featured on their own without heavy seasoning, the brine can impart a “canned” quality. Rinsed beans taste cleaner.

Reduces flatulence: A portion of the oligosaccharides (complex carbohydrates) responsible for digestive gas have leached into the brine. Rinsing removes some of these. The effect is meaningful but not dramatic.

Improves texture: Rinsed beans are firmer and more distinct. The brine’s starch content causes beans to clump slightly; rinsed beans separate more cleanly.


The Case for Not Rinsing

The brine adds body to soups and stews: In a minestrone, a ribollita, a black bean soup, a chili — the starch in the bean liquid naturally thickens the dish and adds a rounded, integrated quality that rinsed beans (which then just add water from the rinse) don’t provide.

The brine can be the sauce: In a simple dish of white beans with olive oil and garlic, or braised greens with cannellini beans, the bean liquid emulsifies with the olive oil and makes a silky, glossy sauce that has no substitute.

It costs you sodium reduction, which you may not need: If sodium isn’t a concern, the brine’s flavor contribution may be a net positive.


The Rule of Thumb

Rinse when: Using beans in salads, grain bowls, or applications where the beans are served relatively unembellished and the “canned” flavor would be noticeable. Also rinse when sodium is a concern.

Don’t rinse when: Adding beans directly to soups, stews, or dishes where the liquid cooks into the dish and becomes part of the sauce. The brine contributes positively to flavor and texture here.

Either way: The difference is real but not dramatic. Rinsed or not, canned beans are excellent.


Aquafaba: Don’t Pour This Down the Drain

Here’s the part that will genuinely surprise you.

The liquid from a can of chickpeas — aquafaba (Latin for “bean water”) — has remarkable culinary properties. It behaves like egg whites when whipped: it foams, it holds peaks, it emulsifies, and it can be used as a direct substitute for egg whites in many applications.

Whipped aquafaba produces a stable foam that can be used in:

  • Vegan meringues: Aquafaba whipped with sugar and cream of tartar produces meringue that is functionally indistinguishable from egg white meringue to most tasters.
  • Vegan mayonnaise: Aquafaba emulsifies with oil to produce a mayo with no egg.
  • Mousse, pavlova, macarons: Any application that uses whipped egg whites can substitute aquafaba.
  • Cocktails: The egg white foam in a pisco sour or whiskey sour can be replaced with aquafaba for a vegan version with the same texture.

The reason: aquafaba contains albumins — the same class of proteins found in egg whites — that denature and trap air when agitated. The foam is real, stable, and culinarily useful.

To use it: Drain a can of chickpeas, reserving the liquid. That’s aquafaba. Whip it with an electric mixer just as you would egg whites — it takes longer than egg whites but gets there. Use 3 tablespoons of aquafaba per egg white in any recipe.


Low-Sodium vs. Regular Canned Beans

Low-sodium canned beans have roughly 50–140mg of sodium per serving vs. 300–440mg in regular. For those managing blood pressure or overall sodium intake, the low-sodium versions are worth seeking out — particularly when you’re not rinsing (soups, stews). Regular beans that are rinsed approach low-sodium levels in terms of final sodium content.


🛒 Gear Worth Having

As an Amazon affiliate, I earn from qualified purchases. Thank you for supporting TumbleBump.


Related Reads


Posted on TumbleBump | GOODS Category

TumbleBump is part of the John D Reinhart content family. Writer, illustrator, videographer, and accidental filmmaker — find the whole story at JohnDReinhart.com.

27000

©2026 John D Reinhart/TumbleBump.com – all rights reserved

Stop Driving to the Coffee Shop. Make Great Coffee at Home.

You don’t need a barista. You need five minutes and the right gear. Here’s how to make genuinely great coffee at home — every single morning.

Somewhere out there, someone is driving across town to pick up a coffee.

They left the house. They got in the car. They are now sitting in a drive-through line behind seven other people who also left their houses and got in their cars. They will return in approximately thirty-five minutes, coffee in hand, slightly smug, slightly later than they needed to be.

This does not have to be anyone’s morning.

Great coffee — genuinely, actually great coffee — is achievable at home, in about five minutes, for a fraction of the cost of whatever the barista just handed through the window. You just need to know a few things.

Let’s sort it out.

☕ The Secret Is Embarrassingly Simple

Fresh beans. Ground right before brewing. Hot (but not boiling) water. The right ratio.

That’s it. That’s the whole secret. The fancy equipment helps, but those four things are responsible for ninety percent of what separates a great cup from a mediocre one.

The barista your family is so devoted to? They’re doing those four things. You can do them too. In your kitchen. In your pajamas.

🫘 Start With Good Beans

Pre-ground coffee from a can is the enemy of great coffee. By the time it reaches your cup, most of the flavor has already escaped into the atmosphere. Coffee starts losing its best qualities within about fifteen minutes of being ground.

What to Look For

  • Whole beans, always. Grind them yourself.
  • A roast date on the bag. Not a ‘best by’ date — a roast date. Look for beans roasted within the last two to four weeks.
  • Single-origin or quality blends from a local roaster, Trader Joe’s, Whole Foods, or a reputable online source.
  • Light to medium roast for brighter, more complex flavor. Dark roasts are bold but can taste bitter if brewed poorly.

💡  Ignore the impressive-sounding blends with names like ‘Midnight Thunder Reserve.’ Check the roast date. That number matters more than the name.

⚙️ Get a Grinder

This is the single most impactful purchase you can make for your coffee. A burr grinder — not a blade grinder — produces a consistent grind that extracts evenly and tastes dramatically better.

Burr vs. Blade

  • Blade grinders chop beans unevenly, producing a mix of powder and chunks that brews inconsistently. They’re cheap, and you get what you pay for.
  • Burr grinders crush beans between two surfaces to a uniform size. Consistent grind = consistent extraction = better taste.

☕  A decent burr grinder in the $40-80 range will transform your morning cup more than any other single upgrade. It’s the best coffee investment you can make.

💧 Water Temperature and Ratio

Temperature

Boiling water (212°F) scorches coffee. You want water between 195°F and 205°F — just off the boil. If you don’t have a thermometer, boil the water and let it sit for thirty seconds. Done.

The Golden Ratio

The standard starting point is one to two tablespoons of ground coffee per six ounces of water. Most people use too little coffee and wonder why their cup tastes weak. Measure it, at least until you find your sweet spot.

📏  One tablespoon per six ounces is weak. Two tablespoons per six ounces is strong. Start in the middle and adjust from there. Your taste buds are the final authority.

🔧 Pick Your Method

Different brewing methods produce genuinely different tasting cups. Here’s a quick field guide:

Drip Coffee Maker

The easiest. A good drip machine with a thermal carafe keeps coffee hot without burning it. Use fresh-ground beans and a good filter and you’ll be surprised how good it gets.

Best for: households, anyone who wants coffee ready when they wake up.

Pour Over

You pour hot water slowly over grounds in a filter cone. It takes about four minutes and produces a clean, bright, extraordinarily flavorful cup. It’s also deeply satisfying in a slightly fussy way that some people find therapeutic.

Best for: one or two cups, people who like a ritual with their morning.

French Press

Grounds steep directly in hot water for four minutes, then you press a plunger down to separate them. Produces a rich, full-bodied cup with more texture than a drip or pour over. No paper filter means more of the coffee’s natural oils make it into your cup.

Best for: people who like bold, rich coffee. Requires a coarser grind.

AeroPress

A plastic cylinder that brews coffee under gentle pressure. Fast (about two minutes), forgiving, easy to clean, and produces a concentrated, smooth cup that’s remarkably versatile. The cult following is real and it’s earned.

Best for: anyone. Seriously. It’s almost impossible to make a bad cup with an AeroPress.

🏆  If you’re new to all this and want one recommendation: get an AeroPress and a decent burr grinder. You’ll make better coffee than most cafes within a week.

📋 Your Five-Minute Morning Coffee Routine

  1. Boil your water. Let it sit thirty seconds.
  2. Measure your beans. Two tablespoons per six ounces of water you’re making.
  3. Grind them fresh. Medium grind for drip or pour over, coarser for French press.
  4. Brew using your method of choice.
  5. Pour it. Drink it. Feel smug. You did not drive anywhere.

🛒 What to Get

The Essentials

  • Burr Coffee Grinder — The single most important upgrade. A consistent grind changes everything.
  • AeroPress Coffee Maker — Fast, forgiving, and produces a genuinely excellent cup. The easiest entry into great home coffee.
  • Pour Over Coffee Dripper — For a cleaner, brighter cup with more nuance. Hario V60 or Chemex are the classics.
  • French Press — Bold, rich, and satisfying. Bodum makes a reliable one at a very reasonable price.

Nice to Have

  • Gooseneck Kettle — For pour over, the slow controlled pour matters. A gooseneck gives you that control.
  • Coffee Scale — Measuring by weight rather than volume is more accurate and more consistent. Coffee nerds swear by it.
  • Coffee Thermometer — Water temperature matters. A simple instant-read thermometer keeps you in the right zone.
  • Thermal Coffee Carafe — Keeps coffee hot without a warming plate, which slowly burns your coffee. Worth every penny.
  • Airtight Coffee Canister — Store your beans here, away from light and air. Freshness preserved, flavor intact.

As an Amazon Associate, I earn from qualifying purchases. Thank you for supporting TumbleBump.

🔗 Related Reads

TumbleBump is part of the John D Reinhart content family. Writer, illustrator, videographer, and accidental filmmaker — find the whole story at JohnDReinhart.com.

21013

©2026 John D Reinhart/TumbleBump.com — All rights reserved
The Nuts and Bolts of Making Pasta

Pasta is the most forgiving, fastest, most satisfying thing you can cook on a weeknight — but a few small mistakes keep most home cooks from getting it quite right. Here’s everything you need to know, including the one ingredient that makes all the difference.

Pasta is the meal most people make when they don’t know what to cook. This makes it both the most familiar and the most underestimated dish in the home cook’s repertoire.

Because here’s the thing: good pasta is not just pasta with sauce poured on top. It’s a dish where the pasta and sauce become a unified thing — where they’re cooked together, where starchy pasta water binds everything, where the result is silky and cohesive rather than a pile of noodles with a pool of sauce underneath.

The difference between pasta-with-sauce-on-top and real pasta is a few small technique shifts. Here they are.


The Water: More Than You Think

Use more water than you think you need — at least 4–5 quarts for a pound of pasta. Pasta needs room to move around as it cooks; crowded pasta clumps.

Salt the water aggressively. This is the step most home cooks undertake too timidly. The water should be “salty like the sea” — a common instruction that means a tablespoon or more of salt per quart of water. Pasta absorbs flavor as it cooks; this is your only opportunity to season the pasta itself. Water that isn’t well-salted produces pasta that tastes of nothing no matter how good your sauce is.

Bring the water to a full rolling boil before adding pasta.


The Pasta: Shapes Have Reasons

Pasta shapes exist for reasons, not just aesthetic variety. Different shapes are designed to work with different sauce textures.

Long, thin pasta (spaghetti, linguine, fettuccine): Best with smooth or lightly textured sauces — aglio e olio, carbonara, light tomato sauces, simple cream sauces. The sauce coats the strands.

Short, tubular pasta (penne, rigatoni, paccheri): Best with chunky sauces or meaty ragùs. The sauce gets inside the tubes and catches in the ridges.

Small pasta (fusilli, farfalle, orecchiette): Best with chunky vegetable sauces, sausage-based sauces, or pesto. Small pastas catch chunky bits.

Large, wide pasta (pappardelle, wide egg noodles): Best with rich, hearty, braised meat sauces. The broad surface carries big flavors.

You don’t need to be rigid about this. But matching shape to sauce makes a difference you’ll taste.


The Cook: Al Dente Is a Specific Thing

Al dente means “to the tooth” in Italian — a pasta that is cooked through but retains a slight resistance when you bite it. It should be tender but not soft. There should be the faintest bit of chew in the very center.

Cook it less than the box says. Start tasting 2 minutes before the package minimum. Fish out a piece and bite it. If you see a white line in the cross-section, it needs more time. When the white line is gone but there’s still a tiny bit of resistance, you’re there.

Don’t rinse your pasta. Rinsing washes off the surface starch that helps sauce adhere. Drain it, don’t rinse it.


Pasta Water: Liquid Gold

Before you drain your pasta, scoop out a cup or two of the cooking water. This pasta water is starchy, salty, and slightly thick — it’s the secret ingredient that makes restaurant pasta sauces silky and cohesive.

When you combine pasta with sauce, adding a splash of pasta water helps the sauce cling to the noodles and creates an emulsified, glossy result instead of a separated, greasy, or watery one.

Add it sparingly, a few tablespoons at a time. You usually won’t use the whole cup — but you’ll almost always need some of it.


Finishing in the Sauce: The Critical Step

Most home cooks drain pasta completely, then add sauce to the bowl or plate. This is fine, but it produces that characteristic “pasta with sauce on top” quality.

The restaurant approach: undercook the pasta by 1–2 minutes, then finish cooking it directly in the sauce.

  1. Remove pasta from water slightly before it’s done (still very al dente)
  2. Transfer directly into the pan with warm sauce (a ladle of pasta water goes with it)
  3. Toss over medium heat for 1–2 minutes

The pasta finishes cooking in the sauce. It absorbs the sauce’s flavors. The sauce thickens slightly from the starch in the pasta. The whole thing comes together as a unified dish.

This is the single biggest improvement most home pasta cooks can make.


The Simplest Sauces That Are Also the Best

Aglio e Olio (Garlic and Oil): Spaghetti + good olive oil + plenty of garlic (thinly sliced, not minced, cooked gently) + red pepper flakes + parsley + pasta water. That’s it. It takes 20 minutes and costs almost nothing.

Cacio e Pepe: Pasta + pecorino romano cheese + black pepper + pasta water. Three ingredients. Notoriously tricky to get smooth (the cheese can clump) but deeply satisfying when it works.

Simple Tomato Sauce: Crushed canned tomatoes (San Marzano if you can find them) + olive oil + garlic + salt + a little basil at the end. Simmer for 20 minutes. This is the sauce of Italian grandmothers and it is unbeatable.

Pasta with Butter and Parmesan: Drained pasta + a few tablespoons of good butter + grated parmesan + pasta water to make it silky. Dinner for one, late at night, quietly excellent.


A Note on Fresh vs. Dried

Dried pasta is not inferior to fresh pasta — they’re just different products for different dishes. Fresh pasta (made from egg dough) is silkier, richer, cooks faster, and suits delicate sauces and stuffed pasta shapes. Dried pasta (made from semolina and water) is heartier, has better texture for al dente, and is better for robust sauces.

Both are good. Dried pasta from a good brand (De Cecco, Barilla, Rummo) is excellent and costs almost nothing. Don’t feel you need to make fresh pasta to cook pasta well.


🛒 Gear Worth Having

As an Amazon affiliate, I earn from qualifying purchases. Click through the links above to support TumbleBump.


Recommended Reads


Posted on TumbleBump | COOKS Category

TumbleBump is part of the John D Reinhart content family. Writer, illustrator, videographer, and accidental filmmaker — find the whole story at JohnDReinhart.com.

21000

©2026 John D Reinhart/TumbleBump.com – all rights reserved

The Maillard Reaction: Why Browned Food Tastes Better

Your food isn’t just getting hot — it’s getting interesting. Here’s the science behind browning, why it matters, and how to get more of it every time you cook.

META DESCRIPTION:

You’ve noticed it. The sear on a steak. The crust on a loaf of bread. The golden edge of a grilled cheese sandwich. The way roasted vegetables taste completely different from steamed ones, even if you started with the exact same vegetable.

That’s not just heat doing its thing. That’s chemistry. Specifically, it’s the Maillard Reaction — and once you understand it, you’ll never look at a pale, gray piece of chicken the same way again.

🔥 What Is the Maillard Reaction?

In 1912, a French chemist named Louis-Camille Maillard noticed something interesting: when you heat amino acids (from proteins) alongside sugars, they react with each other. Hundreds of new flavor compounds form. Color develops. Aromas bloom. The food becomes something it wasn’t before.

This reaction — named after him, because that’s how science works — is what’s responsible for:

  • The brown crust on a seared steak
  • The toasty exterior of bread
  • The golden color of roasted vegetables
  • The complex flavor of coffee and chocolate
  • The irresistible smell of bacon in the morning

It is not caramelization — that’s a different reaction involving only sugars. The Maillard Reaction needs both protein and sugar. It also needs heat: it starts happening around 280°F (140°C) and really gets going above 300°F (150°C).

🍳 Why It Matters in Your Kitchen

Simple: browned food tastes better. Not because we’re used to it. Because the Maillard Reaction is literally creating new flavor molecules that weren’t there before. A raw chicken breast has maybe a handful of flavor compounds. A seared one has hundreds.

This is why a steak from a screaming-hot cast iron pan tastes fundamentally different from one that was cooked low-and-slow the whole way. Why roasted carrots taste almost sweet and complex while boiled carrots taste like… water with a vegetable in it.

The Maillard Reaction is the difference between “cooked” and “delicious.”

⭐ How to Get More of It

Dry the surface. Moisture is the enemy. Water on the surface of meat or vegetables has to boil off before the temperature can climb high enough for browning to begin. Pat things dry before they hit the pan. Seriously. Use a paper towel. Be thorough.

Use high heat. Below 280°F, the Maillard Reaction barely happens. Preheat your pan until it’s properly hot before food goes in. If it doesn’t sizzle, it’s not ready.

Don’t crowd the pan. Too much food at once drops the pan temperature and releases steam. Now you’re steaming, not browning. Cook in batches if you have to. Your patience will be rewarded.

Use fat wisely. Oil and butter conduct heat to the food’s surface evenly. They also carry fat-soluble flavor compounds, amplifying the browning effect. A dry pan produces dry results.

Let it sit. Move food too soon and you interrupt the reaction before it has time to develop. A properly preheated pan will release the food naturally when a good crust has formed. If it’s sticking, it’s not done yet.

Salt after, not before (for some things). Salt draws moisture out. On a steak going straight to the pan, last-minute salting keeps the surface drier. (Salt well in advance — 45+ minutes — and the moisture reabsorbs. Either works. Right before is the mistake.)

⚠️ When You Don’t Want It

Sometimes pale is correct. Poached eggs. Braised meats. White sauces. Delicate fish. In these cases, you’re after tenderness and moisture retention, not a crust. The Maillard Reaction doesn’t happen in water (water maxes out at 212°F, below the threshold), which is why poaching and braising produce a completely different result.

Knowing what you’re going for — brown or pale — is half the battle.

🛒 Gear Worth Having

As an Amazon affiliate, I earn from qualified purchases.

Related Reads

Posted on TumbleBump.com | COOKS Category

TumbleBump is part of the John D Reinhart content family. Writer, illustrator, videographer, and accidental filmmaker — find the whole story at JohnDReinhart.com.

21012

©2026 John D Reinhart/TumbleBump.com – all rights reserved