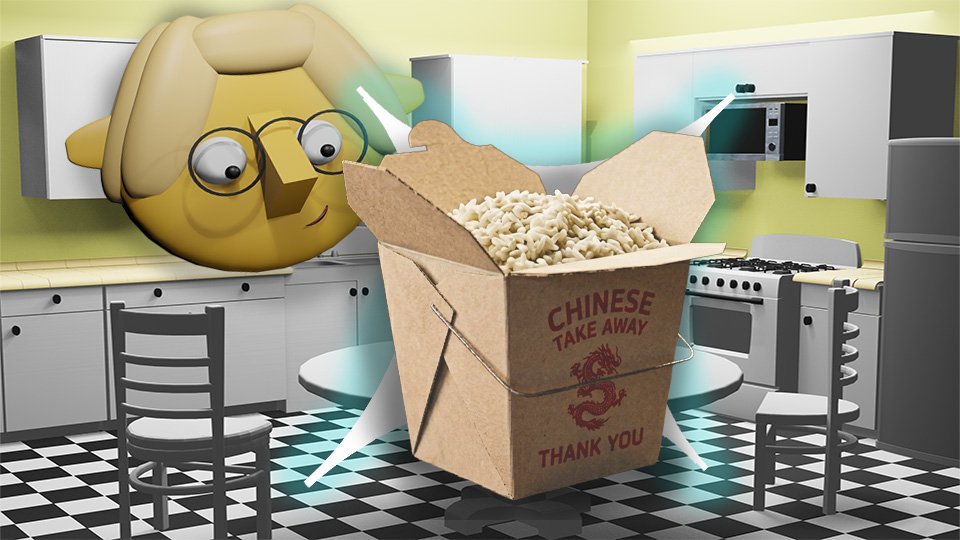
The Rice in the Back of the Fridge Is Better Than the Rice You Just Made

Leftover rice is not a consolation prize. It is secretly the superior ingredient. Here’s why day-old rice is better than fresh — and what it wants to become next.

There is a container of rice in your refrigerator right now. It has been there since Tuesday. You are eyeing it with mild suspicion, trying to decide whether it’s still good and whether anyone is going to eat it.

Here is the thing about that rice: it is not a problem to solve. It is an upgrade waiting to happen.

Day-old rice is genuinely better than fresh rice for certain applications — not “better for leftovers” in the way people say things are “not bad” when they mean mediocre. Actually better. Chemically, structurally, culinarily better. The restaurant fried rice you’ve been trying to replicate at home and failing? The secret ingredient is old rice.

🤔 Why Old Rice Is Better (The Actual Science)

Fresh rice is full of surface moisture. That moisture is great when you want fluffy steamed rice. It is the enemy when you want fried rice, because wet rice steams in the pan instead of frying. The grains clump together. Nothing crisps. The result is soft, heavy, and nothing like what you ordered at the restaurant.

Day-old rice has lost that surface moisture. The grains have dried and separated. When they hit a screaming hot pan they fry — actually fry — developing a slight crust and that characteristic crackling texture that makes fried rice worth eating.

This is not a workaround or a trick. This is how fried rice is supposed to be made. Every restaurant that produces excellent fried rice is using rice that was cooked earlier. The leftover container in your fridge is the correct starting point, not a compromise.

🍳 What Leftover Rice Wants to Become

Day-old rice has a short list of second acts, and they are not consolation meals. They are genuinely excellent things:

  • Fried rice. The obvious one and the best one. High heat, cold rice, a few pantry staples, eight minutes. The technique is straightforward once you understand why the heat and the cold rice matter — YouTube has dozens of excellent demonstrations of exactly what “high heat” looks like and what to do when. Watch one before you cook one.
  • Congee. Rice simmered in a large amount of broth until it breaks down into something thick, warm, and deeply comforting. The rice equivalent of chicken soup. Day-old rice gets there faster than fresh rice and the result is identical. It is the meal for a difficult day, a cold evening, or a Tuesday that has not been going well.
  • Rice bowls. Warmed leftover rice as a base for whatever else is in the fridge. A fried egg, some roasted vegetables, a drizzle of something — soy sauce, hot sauce, anything. Five minutes. Feels like a complete meal because rice is one of those bases that makes everything served on it seem intentional.
  • Arancini. Fried rice balls with cheese in the center. A project rather than a weeknight meal, but the result is spectacular enough to be worth occasional effort. If you have leftover risotto specifically, this is its correct destiny. YouTube will show you exactly how.
  • Stuffed peppers or tomatoes. Rice mixed with whatever protein and vegetables are available, stuffed into a vegetable, baked. A complete meal that looks considerably more deliberate than the ingredients would suggest.

🚧 The One Actual Rule About Leftover Rice

Leftover rice has a food safety consideration worth knowing. Rice can harbor Bacillus cereus, a bacteria that produces heat-resistant toxins in rice left at room temperature for extended periods. This is one of the genuine cases where “it looks fine” is not reliable guidance.

The rule is simple: cool leftover rice quickly after cooking, refrigerate it within two hours, and keep it for no more than four days. Reheat it thoroughly when you use it.

This sounds alarming but is actually very manageable. The risk is in rice left sitting at room temperature for hours — the classic covered pot on the stovetop situation. Rice that goes from pot to fridge within two hours is fine. Rice that sat out all evening is the concern.

Cool it fast. Refrigerate promptly. Use within four days. That’s the whole food safety conversation for leftover rice.

🛒 Gear Worth Having

  • Zojirushi rice cooker — Makes perfect rice and keeps it warm without overcooking. The appliance that makes batch rice cooking entirely painless — and batch rice cooking is how you always have day-old rice available when you want fried rice.
  • Carbon steel wok — The correct pan for fried rice. Gets hot enough to actually fry rather than steam the rice. A regular skillet can work but a wok works better. This is one of those tool-matters situations.
  • Kikkoman soy sauce — The fried rice seasoning workhorse. Keep a bottle in the fridge. Use it on rice bowls, congee, and anything that needs a savory hit without much effort.
  • Sesame oil — The finishing oil that makes fried rice taste like the restaurant version. A few drops at the end of cooking. Not for the heat — it burns — just for the flavor.

As an Amazon affiliate, I earn from each qualified purchase. Thank you for supporting TumbleBump.

✨ The Short Version

The rice in the back of your fridge is not a leftover problem. It is a better ingredient than the rice you made on Tuesday evening, specifically because it has had time to dry out and separate.

Fried rice, congee, rice bowls, arancini, stuffed vegetables — all of them start here. Cool it fast, refrigerate within two hours, use within four days, and let YouTube show you what high heat actually looks like before you start.

The restaurant has been using day-old rice the whole time. Now so do you.

📚 Related Reads


TumbleBump is part of the John D. Reinhart content family. Writer, illustrator, videographer, and accidental filmmaker — find the whole story at JohnDReinhart.com.

24008

©2026 John D. Reinhart / TumbleBump.com. All rights reserved.
Cooking for One (Without Eating the Same Thing for 5 Days)

Cooking for yourself is supposed to be simple. So why does it always end in a vat of soup you’re still eating on Thursday? Here’s how to cook for one like a person who has options — and variety — and a life.

Cooking for one is genuinely tricky, and the reasons are structural rather than personal.

Recipes are written for four. Ingredients are packaged for families. A head of cabbage is enormous when you live alone. A bunch of cilantro is so much cilantro. You buy the rotisserie chicken, eat half, and then you’re staring at the remaining half for four days trying to feel creative about it.

The result, for most single-person households, is one of two failure modes: either you cook a full recipe and eat the same meal until you hate it, or you give up and order delivery because cooking “just for you” feels like too much effort.

Neither of these is inevitable. Here’s a better framework.


The Core Strategy: Cook Components, Not Meals

Instead of cooking a completed dish (chicken tikka masala, full pot of soup, a lasagna), cook components — proteins, grains, and vegetables that can combine into different meals throughout the week.

Example Sunday session, 45 minutes: – Roast a sheet pan of mixed vegetables (broccoli, sweet potato, bell pepper) – Cook a pot of grain (quinoa or rice) – Cook one protein (roasted chicken thighs, or hard-boil some eggs, or cook a batch of lentils)

Now you have: grain bowl Monday, veggie scramble Tuesday, chicken over greens Wednesday, fried rice Thursday. Four different meals from one cooking session, with almost zero repetition.

The components are the same. The assemblies are different.


Scale Down Your Recipes — Or Don’t

You don’t have to make a full recipe. Most recipes scale down reasonably well by halving or quartering ingredients. Some — baked goods especially — don’t scale as reliably, but stovetop cooking is very forgiving.

That said, some things are worth making in full and freezing half: soups, stews, chili, pasta sauces, meatballs. These freeze beautifully and become future emergency meals. A batch of homemade chili in the freezer is one of the most valuable things a solo cook can have.


The Proteins That Work for One

Some proteins are naturally single-serving friendly. Others come in bulk and need a strategy.

Naturally sized for one: – Eggs (always, endlessly flexible) – A single fish fillet (salmon, cod, tilapia) – One chicken thigh or drumstick – A single pork chop or steak – A small can of tuna, sardines, or beans

Bulk proteins that need a plan: – A package of ground meat → cook it all, use half in pasta sauce Monday, half in tacos Wednesday – A whole rotisserie chicken → eat as-is night one, strip and use in grain bowl, make a quick soup with the carcass – A can of beans → use half, refrigerate half in water for 3–4 days


The Variety Trick: Change the Flavor Profile

The same chicken, rice, and broccoli can taste completely different depending on what you do to it.

  • Monday: Soy sauce, sesame oil, ginger → Asian-inspired bowl
  • Wednesday: Olive oil, lemon, herbs → Mediterranean plate
  • Friday: Hot sauce, lime, cumin → Southwest vibes

You’re not eating the same meal three times. You’re eating the same ingredients interpreted three different ways. This is how restaurants work — mise en place components, finished to order in different directions.


Invest in Single-Serve Storage

One of the real pain points of solo cooking is portioning. Get a set of small, single-serve containers. When you cook a batch of something, immediately portion it into individual servings and refrigerate or freeze them. When you’re hungry and unmotivated, you’re not faced with a giant pot of something — you’re faced with a single container of a ready meal.

This turns cooking-for-one from a logistics problem into a convenience.


Embrace the “Almost Meal”

Not every solo meal needs to be cooked. The “almost meal” — an assembly of quality items that requires no heat — is a legitimate dinner.

  • Good cheese + crackers + fruit + a handful of nuts
  • Smoked salmon + capers + cream cheese + a good bread
  • Hummus + pita + sliced vegetables + olives
  • A can of good sardines on toast with butter and lemon

These are fast, satisfying, and require basically no cleanup. Keep the components around and give yourself permission to call them dinner.


🛒 Gear Worth Having

As an Amazon affiliate, I earn with each qualifying purchase. Thank you for supporting TumbleBump.


Related Reads

Posted on TumbleBump PLANS Category

TumbleBump is part of the John D Reinhart content family. Writer, illustrator, videographer, and accidental filmmaker — find the whole story at JohnDReinhart.com.

22014

©2026 John D Reinhart/TumbleBump.com – all rights reserved

Bread’s Second Act (And Third, And Fourth)

Bread doesn’t go bad. It goes somewhere else. Here’s the whole beautiful arc from fresh loaf to last crouton — and why stale bread is secretly the more interesting ingredient.

Somewhere in your kitchen right now, there is bread that has passed its peak moment. It’s not bad. It’s not moldy. It’s just no longer the soft, yielding, tear-it-with-your-hands loaf it was two days ago. And because it no longer meets that specific standard, there is a real chance it ends up in the trash.

This would be a mistake. Not a moral failure — just a waste of something that hasn’t finished being useful yet.

Bread doesn’t go bad so much as it goes somewhere else. Fresh bread has one destiny. Day-old bread has different ones — and in many cases, genuinely better ones. The croûton, the breadcrumb, the bread pudding: these aren’t consolation prizes for bread that didn’t make it. They’re the whole point. Entire classic dishes were invented specifically to use bread at this stage. The Italians have been doing this for centuries and they are not wrong.

Here’s the whole arc. From the first slice to the last crouton, nothing has to be wasted.

✨ Days One and Two: Peak Bread

This is bread at its most itself. Soft interior, crackling crust, the kind of loaf you tear rather than slice if nobody’s watching. Eat it as-is. Make sandwiches. Dip it in soup. Toast it. This is what bread was born to do and it does it magnificently for about 48 hours.

Storage: A bread box on the counter, or wrapped loosely in a clean cloth. Room temperature, not the fridge.

Why not the fridge? This is the one that surprises people. Refrigeration actually accelerates staling — the cold causes the starch in bread to recrystallize faster, which is exactly what makes bread go stale. The fridge is bread’s enemy, not its friend. The one exception: a hot, humid kitchen where mold is a faster problem than staleness. In that case, refrigerate and accept the trade-off.

🍞 Days Three and Four: Day-Old and Getting Interesting

The crumb is tightening. The crust has softened slightly as it draws moisture from the interior. It’s less pleasant to eat straight and hasn’t lost a bit of flavor. This is the moment to pivot.

Why does day-old bread work better for certain things? Because moisture is the variable. Fresh bread is full of it. When you make French toast with fresh bread, it absorbs the egg custard too fast, goes soggy, and falls apart. Day-old bread absorbs it at exactly the right rate, cooks up custardy inside and golden outside, and holds together beautifully. The staleness is doing structural work.

Same logic applies to bread pudding, to panzanella (the Tuscan bread salad where stale bread gets soaked, squeezed out, and tossed with tomatoes and olive oil), and to bruschetta, where day-old bread toasts to a firmer, more satisfying base than fresh ever would.

Toast from slightly stale bread is also, quietly, better than toast from fresh. The toaster drives out remaining moisture and re-crisps everything. Fresh bread toasts soft in the center. Stale bread toasts all the way through. File this away.

🧀 Day Five and Beyond: Crouton Country

This is genuinely good territory and most people don’t know it.

  • Croutons. Bread cut or torn into chunks, tossed with olive oil and seasoning, baked until golden and fully crispy. The irregular shapes of torn croutons have better texture than the uniform cubes of the store-bought kind. Homemade croutons are not just cheaper — they’re actually better. This is one of those kitchen upgrades that takes 20 minutes and produces something meaningfully superior to anything in a bag.
  • Breadcrumbs. Stale bread in a food processor, pulsed to whatever coarseness you want. Fresh breadcrumbs for topping casseroles and binding meatballs. Toasted breadcrumbs — pangrattato — cooked in olive oil and garlic until deeply golden, then scattered over pasta, soup, or eggs. The Italians call this “poor man’s parmesan.” It provides crunch, richness, and a savory nuttiness that genuinely earns that description.
  • Ribollita. The Tuscan bread and bean soup where stale bread is the thickening agent — chunks added to a thick vegetable and white bean broth, left to soak, swell, and dissolve into something rich and magnificent. Peasant food at its most intentional. YouTube will show you exactly how it’s done.

❄️ The Freezer: The Pause Button

At any point in this arc — day one, day three, day five — the freezer stops the clock. Slice before freezing so you can pull individual pieces. Toast directly from frozen. The result is excellent and the bread has just bought itself months of useful life.

This is the move for any loaf you know you won’t finish before it stales. Don’t watch it age on the counter. Freeze it and use it on your schedule, not bread’s.

🛒 Gear Worth Having

  • A bread box — The correct bread storage. Maintains the right humidity, prevents mold better than open air, extends fresh life by days. Worth every inch of counter space it occupies.
  • A small food processor — Turns stale bread into breadcrumbs in about ten seconds. One of those tools that earns its place every single week.
  • A half sheet pan — The crouton-baking surface. Even heat, good browning, the right size for a full loaf’s worth of croutons in one go.
  • Airtight storage containers — For keeping finished croutons and breadcrumbs crispy. A week of excellent croutons starts with a good lid.
  • Ziploc freezer bags — For sliced bread going into the freezer. The airtight seal is everything. Freezer burn is just slow disappointment.

As an Amazon affiliate, I earn from each qualifying purchase. Thank you for supporting TumbleBump.

✨ The Short Version

Fresh bread has one great day. Day-old bread has several more useful ones. Stale bread becomes croutons, breadcrumbs, and the base of dishes that specifically require it. Frozen bread waits patiently until you need it.

Nothing has to be wasted. The loaf just needs a plan.

The trash is not the next step. The toaster is.

📚 Related Reads

TumbleBump is part of the John D. Reinhart content family. Writer, illustrator, videographer, and accidental filmmaker — find the whole story at JohnDReinhart.com.

24005

©2026 John D Reinhart/TumbleBump.com – all rights reserved

Soft Fruit Is “Smoothie Fruit”

Overripe fruit isn’t food waste. It’s smoothie fuel, jam potential, and baking gold — waiting patiently on your counter for you to recognize its second calling. Here’s the complete guide to what to do with fruit that’s past its prime but nowhere near the trash.

There is a specific window in the life of most fruits during which they are perfect: firm enough to hold their shape, sweet enough to be satisfying, with the right balance of flavor. This window is, depending on the fruit, approximately 36 to 72 hours long. Then it closes.

What’s on the other side of that window is not garbage. It’s a different ingredient.

Soft fruit has more concentrated sugar, more intense flavor, and less structural integrity. These are not failures. These are features — for different applications. The trick is knowing which application applies to which fruit, and acting before the fruit crosses the line from “past peak” to “actually finished.”


The Smoothie Destination

The fastest, easiest save for soft fruit of almost any type: freeze it and make smoothies.

The process: Cut away any truly bad spots (mold, major bruising that’s gone dark and funky). Peel if necessary. Slice into chunks. Freeze on a sheet pan for an hour, then transfer to a bag or container. Label it “smoothie fruit.”

Frozen soft fruit is actually better for smoothies than fresh fruit — it chills the smoothie without watering it down with ice, and the texture difference (soft vs. firm) is completely irrelevant once blended.

What works for smoothies: Bananas (peel before freezing), mangoes, peaches, nectarines, plums, strawberries, blueberries, raspberries, blackberries, cherries (pit them), melon (cut from the rind), kiwi (peel), pineapple, papaya.

What doesn’t work well: Citrus (too much membrane and pith for pleasant blending), grapes (fine but require pitting and can be seedy), watermelon (mostly water, produces a thin result).


The Baking Destination

Soft fruit is, in many cases, superior for baking to fresh fruit. The concentrated sweetness and softened texture integrate better into batters and fillings.

Overripe bananas: The blacker, the better for banana bread. Black bananas have more sugar and more banana flavor than yellow ones. This is the correct destination for every banana that’s gone too far.

Soft peaches and nectarines: Perfect for cobblers, crisps, and muffins. The soft texture means they don’t need to be pre-cooked for most applications.

Overripe berries: Fold into muffins, quick breads, or pancake batter. The cell structure has already broken down, which means they distribute more evenly through the batter.

Soft pears: Excellent in cakes and crumbles. Pear and ginger. Pear and almond. Pear and blue cheese (in a savory tart). All excellent.


The Jam and Compote Destination

You don’t need a canning operation to turn soft fruit into something preserved and spreadable. A quick compote takes 15 minutes and lasts a week in the refrigerator.

Quick compote method: Put soft fruit (roughly chopped, pits and cores removed) in a small saucepan with a tablespoon of sugar and a squeeze of lemon juice. Cook over medium heat, stirring occasionally, until the fruit breaks down into a chunky sauce — about 10–15 minutes. That’s it.

Use it on yogurt, oatmeal, toast, pancakes, or ice cream. Store in the fridge for up to a week.


The Savory Destination

Soft fruit, particularly stone fruits and berries, can be used in savory applications where their intense sweetness and acidity are assets.

  • Soft peaches or nectarines: Pan sauce for pork chops or chicken. Chutney with onion, ginger, and vinegar.
  • Overripe tomatoes: The best tomatoes for sauce are slightly soft ones. They have more concentrated flavor and less water content than peak-firm tomatoes.
  • Soft citrus: Zest before the fruit goes too far, freeze the zest. The juice of a slightly past-prime orange or lemon is still excellent for cooking.

The Line You Cannot Cross

Soft is a stage. Moldy, fermenting, or foul-smelling is a different stage entirely. If the fruit has visible mold spreading across its surface, smells alcoholic or off, or has turned to liquid in spots, it has crossed the line. Some molds on produce produce mycotoxins that can penetrate beneath the visible surface, so “cut away the moldy bit” is less reliable than it is for, say, hard cheese.

When in doubt on mold: if it’s soft fruit, toss it. The rule of thumb is that mold in soft/wet items (berries, peaches, tomatoes) means the whole thing; mold in hard/dry items (hard cheese, firm carrots) can sometimes be cut away with a generous margin.


🛒 Gear Worth Having

As an Amazon affiliate, I earn from each qualifying purchase. Thank you for supporting TumbleBump.


Related Reads


Posted on TumbleBump | SAVES Category

TumbleBump is part of the John D. Reinhart content family. Writer, illustrator, videographer, and accidental filmmaker — find the whole story at JohnDReinhart.com.

24011

©2026 John D Reinhart/TumbleBump.com – all rights reserved

Your Nose Is Not a Food Safety Inspector

Your nose is a liar. A well-meaning, occasionally useful liar — but a liar. Here’s what the smell test actually tells you, and the system that keeps you off the bathroom floor.

It goes like this: you open the fridge, locate a container of unknown age, pop the lid, and lean in for the sniff test. Your nose reports back. You make a decision. You have been doing this your entire adult life and you consider it a reliable system.

Here is the problem with your system: your nose has no idea what Salmonella smells like. Neither does it know E. coli, or Listeria, or any of the other invisible freeloaders that cause the kind of food poisoning that clears your entire social calendar for three days.

Your nose is excellent at detecting things that smell bad. It is completely useless at detecting things that will make you sick. These are not the same category of problem, and the gap between them is where food poisoning lives.

Your nose is not lying to you, exactly. It’s just working its own job description, which was never “food safety inspector.” It’s more of a “does this smell weird” consultant with a very limited contract.

✅ What Your Nose Is Actually Good At

Credit where it’s due. Your nose does handle some things reliably:

  • Rancid fats. Old butter, stale nuts, cooking oil that’s been sitting since the last administration — oxidized fat has a sharp, almost crayon-like smell that your nose catches every time. Won’t kill you. Will taste terrible. Nose wins.
  • Souring. Milk that’s turned, over-fermented yogurt, produce going fizzy in the back of the drawer. Your nose identifies sourness reliably. In early stages this is more unpleasant than dangerous, but the signal is real.
  • Meat that’s gone off. Putrefaction — the smell of protein properly decomposing — is one of the most unmistakable smells on earth. If your chicken smells like that, your nose has done its job. No further consultation required.
  • Mold. Musty, earthy, sharp. Often detectable before you can see it. Your nose here is actually ahead of your eyes, which is a rare compliment.

So yes. Your nose has a skill set. It’s just a very specific skill set, and “detecting dangerous pathogens” is not on the list.

❌ What Your Nose Cannot Detect (The Actual Problem)

This is the part worth paying attention to. The bacteria responsible for the most serious foodborne illness are, almost without exception, completely odorless.

  • Salmonella — no smell, no visible change, no taste difference. Chicken that looks perfect, smells perfect, and tastes fine can be fully loaded with it. This is why “cook to temperature” is not optional advice.
  • E. coli O157:H7 — the strain behind serious outbreak headlines produces nothing detectable in contaminated ground beef. Smells fine. Is not fine.
  • Listeria — the overachiever of food pathogens. Not only odorless, but capable of multiplying in your refrigerator. Most bacteria slow down in the cold. Listeria treats your fridge like a comfortable apartment.
  • Staph toxins — here’s the truly annoying one. Staphylococcus aureus produces toxins that are odorless, tasteless, and heat-stable. Meaning you can cook the bacteria out of the food and still have a problem, because the toxins they left behind are not going anywhere. The smell test and the cooking step both miss this one entirely.

The pattern: the things your nose catches are mostly unpleasant. The things your nose misses are the ones that put you in bed for three days. The smell test is a comfort, not a verdict.

🌡️ The Actual System: Time and Temperature

Food safety runs on two variables and two variables only: time and temperature. Your nose is not one of them.

  • The Danger Zone — bacteria multiply rapidly between 40°F and 140°F. Food sitting in that range is accumulating a bacterial load whether it smells like anything or not.
  • The Two-Hour Rule — cooked food left at room temperature for more than two hours is in risky territory. Above 90°F (hot kitchen, summer cookout), that window shrinks to one hour. Your nose will not alert you when the clock runs out.
  • Your refrigerator temperature — which should be 40°F or below. Many refrigerators run warmer than their settings suggest. A $10 thermometer tells you the truth your fridge dial is not necessarily telling you.

How long is stuff actually safe in the fridge? Here’s the honest guide:

FoodSafe Refrigerator Time
Cooked meat, poultry, fish3–4 days
Cooked eggs3–4 days
Soups and stews3–4 days
Cooked rice and grains4–5 days
Cooked pasta3–5 days
Deli meats (opened)3–5 days
Hard-boiled eggs (in shell)1 week
Raw ground meat1–2 days
Raw whole poultry1–2 days
Raw fish1–2 days

These are conservative guidelines from actual food safety authorities, not optimistic estimates from someone who doesn’t want to throw out the leftover chicken.

🤔 The Right Way to Use Your Nose

Your nose isn’t fired. It’s just been reassigned to a supporting role.

Use it for what it’s good at: catching obvious off smells, rancidity, sourness, and the unmistakable signal of meat that has genuinely turned. Those are real signals worth heeding.

Then apply the time-temperature framework as the actual decision: How long has this been in the fridge? Was it refrigerated promptly? Do I actually know when this went in, or am I just hoping?

“It smells fine” is supporting evidence. The date on the container is the verdict.

And when the date is uncertain, when the storage history is murky, when you’re standing there genuinely unsure — the professional food safety answer is throw it out. Not because it’s definitely dangerous. Because the cost of guessing wrong is a very bad 48 hours, and leftovers are not worth that math.

🛒 The Gear That Replaces the Guesswork

  • Refrigerator thermometer — Confirms your fridge is actually running at 40°F or below. Many aren’t. Ten dollars, removes all doubt, immediately more useful than your nose.
  • Dry-erase fridge labels — Write the date on every container that goes in the fridge. The smell test becomes completely unnecessary when you know exactly how old something is. Revolutionary in its simplicity.
  • Instant-read thermometer — For confirming cooked meat reaches safe internal temperatures. The smell test never applies to raw meat. Temperature does. Every time.
  • Airtight food storage containers — Proper sealing slows bacterial growth and prevents cross-contamination. Also, you can actually see what’s in them, which helps with the dating situation considerably.

As an Amazon affiliate, I earn from qualifying purchases. Thank you for supporting TumbleBump.

✨ The Bottom Line

Your nose is a fine nose. It has served you well in many situations. It has kept you from drinking sour milk and eating rancid butter and standing too close to certain people on public transportation.

It is not, however, a food safety system. It never was. It just got promoted into that role by default because nobody posted the actual rules on the fridge.

Now you have the actual rules. Date your containers. Know your fridge temperature. Respect the two-hour window. When in doubt, throw it out.

Your nose can have its old job back. It was never qualified for this one.

📚 Related Reads

TumbleBump is part of the John D Reinhart content family. Writer, illustrator, videographer, and accidental filmmaker — find the whole story at JohnDReinhart.com.

24002

©2026 John D Reinhart/TumbleBump.com – all rights reserved

The Egg and You: A Relationship Worth Fixing

Eggs are the most forgiving food on the planet — and the most abused. Here’s why they go wrong, and what to know before you crack another one.

You have been eating eggs your entire life. You have also, statistically speaking, been cooking them wrong for most of it. This is not an insult. It’s just math.

Eggs are the most democratic food in existence. Cheap, fast, endlessly versatile, available at every grocery store on the planet, and capable of being breakfast, lunch, dinner, or a snack depending entirely on your mood and what’s left in the fridge. They are also, somehow, one of the most consistently botched items in the home kitchen.

Rubbery scrambled eggs. Fried eggs with that weird white film over the yolk. Boiled eggs with the greenish ring of shame. Poached eggs that dissolved into the water like a sad little ghost. We’ve all been there. Most of us are still there.

The good news: eggs are extraordinarily forgiving once you understand what’s actually happening in the pan. And what’s happening is mostly about heat. Almost entirely about heat.

🔥 The Heat Problem (It’s Always the Heat)

Eggs are protein. Protein reacts to heat. Too much heat, too fast, and the proteins seize up, squeeze out moisture, and turn into something closer to a pencil eraser than food. This is why your scrambled eggs are rubbery. This is why your fried eggs have that leathery white with the still-cold yolk. You’re not a bad cook. You’re just running too hot.

The egg’s entire personality changes based on temperature. Low and slow produces something creamy and rich. High and fast produces something tight and dry. Neither is wrong if that’s what you wanted — but most people shooting for creamy are accidentally making dry, and then wondering why eggs aren’t their thing.

This is the one thing to carry into the kitchen: eggs want less heat than you think. Start there and everything else follows.

🍳 The Four Eggs and What They’re Actually About

There are four ways most people cook eggs at home. Each has its own logic, its own failure mode, and its own completely achievable version of right.

  • Scrambled. The failure mode is speed. Most people cook them like they’re in a hurry, which produces the rubbery result nobody wanted. The fix is patience and lower heat. YouTube will show you exactly what “slow fold” means in practice — it’s one of those techniques that makes no sense in words and total sense the second you see it.
  • Fried. The failure mode is uneven cooking — white still translucent, yolk already overdone, or vice versa. Heat management and knowing your yolk preference in advance fixes this. Sunny side up, over easy, over medium, over hard: these aren’t just restaurant terms, they’re a temperature map. Know where you’re going before you crack the egg.
  • Boiled. The failure mode is the green ring — that slightly sulfurous, grey-green halo around an overcooked yolk. It’s harmless but it means you went too long. Boiled eggs are a timing game, and the timer starts the moment the egg hits the water. Six minutes is a different universe from twelve. An ice bath immediately after stops the cooking. This is non-negotiable.
  • Poached. The failure mode is the egg dissolving into a sad white cloud. Fresh eggs hold together better than older ones — this is genuinely important and almost nobody knows it. Watch someone do it once on video and the mystery evaporates entirely.

💡 The Things Nobody Tells You

A few egg truths that make an immediate difference:

  • Salt early for scrambled, late for fried. Salt draws out moisture. For scrambled eggs, seasoning before cooking is fine — the moisture gets incorporated. For fried eggs, salting too early can make the whites weep and turn watery. Salt after plating.
  • Room temperature eggs behave better. Cold eggs straight from the fridge hit a hot pan unevenly. Ten minutes on the counter before cooking makes a noticeable difference, especially for frying and poaching.
  • Pull them off the heat early. Eggs keep cooking after they leave the pan. What looks slightly underdone is actually done. What looks done is already overdone. Trust the residual heat.
  • Fresh eggs for poaching, older eggs for boiling. Fresh eggs are harder to peel when boiled because the membrane clings. Eggs that have been in the fridge a week or more peel cleanly. This feels backwards and is completely true.

One universal truth above all: eat them immediately. Eggs do not improve with waiting. They are not a dish that gets better sitting on the counter while you finish your coffee. Eggs are the most impatient food in the kitchen. Respect the urgency.

🛒 The Gear That Actually Matters

Eggs don’t need much. But a couple of things make a real difference:

  • A good nonstick skillet — The difference between an egg that slides out and one you chisel out is entirely the pan. A quality nonstick is the one piece of egg equipment worth spending money on.
  • A silicone spatula — Flexible, gentle, and the right tool for scrambled egg folds. Also protects your nonstick surface from the scratches that end its useful life.
  • A slotted spoon — Essential for poaching and for pulling boiled eggs out of hot water without burning yourself or dropping them.
  • An egg timer — Boiled eggs live and die by timing. Your phone works fine. A dedicated egg timer is charming and slightly more satisfying for reasons that are hard to explain.

As an Amazon affiliate, I earn from qualifying purchases. Thank you for supporting TumbleBump.

✨ Go Watch Someone Do It

Eggs are a visual skill. The difference between the right scramble and the wrong one is something you see in the pan, not something you read in a description. The moment the curds start to form, the moment to pull them off heat — these things make sense instantly on video and take paragraphs to explain in words.

YouTube has approximately eleven million egg videos. Search “perfect scrambled eggs,” “how to fry an egg,” or “jammy soft boiled egg” and pick someone whose kitchen you like the look of. Watch the whole thing once without doing anything. Then do it.

You’ve been eating eggs your whole life. Time to actually nail them.

📚 Related Reads

TumbleBump is part of the John D Reinhart content family. Writer, illustrator, videographer, and accidental filmmaker — find the whole story at JohnDReinhart.com.

21007

©2026 John D Reinhart/TumbleBump.com – all rights reserved

The Case for Fancy Tuna

You’ve been grabbing the cheapest can and shrugging. Turns out there’s a whole world between “fine for the cat” and “why is this so good?” — and the upgrade costs less than you think.

You’ve stood in the canned fish aisle. You’ve looked at forty-seven nearly identical cans of tuna and grabbed the cheapest one because honestly, what’s the difference?

Quite a bit, actually. Canned tuna ranges from “fine for the cat” to “why is this so good?” and the gap between them is smaller than you think — in price, in effort, and in the number of decisions you have to make. You just need to know what you’re looking at.

Here’s the whole thing, from the can to the plate.

🫙 Decision One: Oil or Water?

This is the one that matters most and the one most people never think about. Water-packed tuna is leaner and more convenient. Oil-packed tuna tastes better. That’s the whole argument.

Water-packed: Lower in fat and calories. Milder flavor. Easier to drain and use in anything. The default for most people and perfectly respectable. Works well when the tuna is playing a supporting role — mixed into a casserole, stuffed into a sandwich with a lot going on.

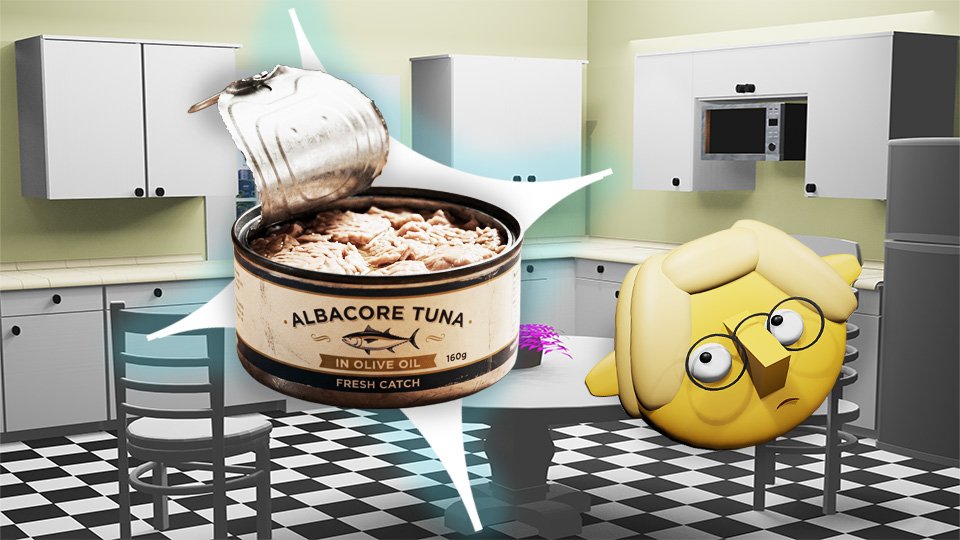
Oil-packed: Richer, silkier, more flavorful. The oil keeps the tuna moist and adds body to whatever you’re making. When the tuna is the star — tuna salad, a tuna melt, tuna on crackers — oil-packed is the one that makes people ask what you did differently.

Olive oil vs. vegetable oil: If you’re going oil-packed, go olive oil. Vegetable oil adds fat without adding flavor. Olive oil adds both, and in a tuna salad the difference is noticeable. Good olive oil-packed tuna — the kind worth eating straight from the can with a fork — is packed in decent olive oil.

And yes, you can use the olive oil from the can. Drizzle it on toast, use it in the dressing, stir it into the tuna salad. It’s already flavored. Don’t waste it.

📋 Decision Two: Solid, Chunk, or Flaked?

This is about texture, and texture matters depending on what you’re making.

  • Solid (or “solid white”): Large, intact pieces. The premium option. Best when you want visible chunks of tuna in the finished dish — a composed salad, a nice pasta, something where presentation counts for something.
  • Chunk: Smaller pieces, still recognizable as tuna. The most common and most versatile. Great for tuna salad, melts, casseroles — anywhere the tuna gets mixed with other things. This is the everyday workhorse.
  • Flaked: Very fine, almost paste-like. Best for dips or anywhere you want the tuna to disappear into the mixture. Less common, less necessary.

🐟 Decision Three: Which Tuna?

The label says “tuna” but the species varies, and species affects both flavor and mercury content.

  • Albacore (white tuna): Mild, firm, pale. The most popular variety in the U.S. Slightly higher in mercury than skipjack, so the FDA suggests limiting it if you’re eating canned tuna several times a week.
  • Skipjack (light tuna): Darker, stronger flavor, softer texture. Lower in mercury. The “chunk light” on most shelves is skipjack. Cheaper, more sustainable, and perfectly delicious in anything that’s getting seasoned and mixed anyway.

For everyday tuna salad and melts: chunk light skipjack in olive oil. For something you want to look beautiful on a plate: solid white albacore. That’s the simple version of the whole decision.

🎯 So What Should You Actually Buy?

The Costco aisle shrug is understandable. Here’s a quick orientation:

  • Everyday use: Store brand chunk light in olive oil. Cheap, solid, does the job. If your store doesn’t carry olive oil-packed, Starkist or Bumblebee chunk light in water is the fallback.
  • Step up: Wild Planet Wild Albacore or Wild Skipjack. Pole-and-line caught, no fillers or broth added, just tuna and olive oil (or water). The difference in flavor over standard supermarket tuna is real and the price difference is modest.
  • Fancy occasion: Tonnino or Ortiz. Jarred, olive oil-packed, solid tuna. The kind you put on a charcuterie board and act casual about. Also extraordinary in a tuna melt if you want to feel unreasonably smug about lunch.

The Best Way to Drain Tuna

Open the can, but don’t throw the lid into the recycle bin yet. Instead, hold it flat over the tuna while you turn the can upside down to let the liquid out.

  • Water: this can go down the kitchen sink.
  • Olive Oil: drain it into a bowl to use in a different salad, or you can drain it into the trash can.
  • Vegetable Oil: drain it straight into the trash can.

You don’t want to send the oil down the kitchen sink because it can gum up the drain and cause it to clog.

🥪 Now Make Something

Three things worth knowing how to make, in ascending order of effort:

Classic Tuna Salad

Drain one can of tuna. Mix with a spoonful of mayonnaise, a squeeze of lemon, a little Dijon, salt, pepper. Taste and adjust. That’s it. Add celery, red onion, or capers if you want texture and bite. Eat on toast, crackers, or a lettuce leaf if you’re feeling virtuous.

Oil-packed tuna needs less mayo because the oil is already doing the work. Start with less and add more if needed.

The Tuna Melt

Make the tuna salad above. Pile it on an open-faced bun, English muffin, or thick slice of bread. Cover with a slice of Swiss, cheddar, or provolone. Put it on a sheet pan and put that in the broiler for three to four minutes until the cheese bubbles and begins to brown. Watch it — broilers are fast and merciless.

Olive oil-packed tuna + good cheese + thirty seconds longer under the broiler than you think you need = the tuna melt that ruins all other tuna melts.

Tuna on Pasta (Five Minutes, Seriously)

Drain the tuna.

Cook the pasta. If you’re new to making pasta, this post will help: The Nuts and Bolts of Making Pasta.

While it drains in the colander, warm a glug of olive oil in the pasta pan, add a clove of garlic, cook thirty seconds. Add the drained tuna, break it up gently, add a squeeze of lemon and a handful of parsley if you have it.

Pour in the cooked pasta and toss everything together. A little salt and pepper, done. This is the weeknight dinner that sounds like nothing and tastes like you did something.

🌊 Where Tuna Comes From

Before it’s in a can on your shelf, tuna is one of the most extraordinary animals in the ocean — and almost nobody knows this.

Tuna are built for speed. Unlike most fish, which are cold-blooded and sluggish in cold water, tuna are warm-blooded — they regulate their own body temperature, which means their muscles stay warm and powerful regardless of what the ocean is doing around them. A bluefin tuna can hit 40 miles per hour. They are, in every meaningful sense, the cheetahs of the sea.

They’re also built to never stop moving. Tuna breathe by swimming — they push water over their gills by moving forward, which means if they stop, they suffocate. A tuna swims every moment of its life, from birth until it ends up in your tuna salad. This constant motion is exactly why tuna meat is so dense, dark, and flavorful compared to a fish that spends its days drifting around a reef.

Tuna are open-ocean hunters. They travel in schools, covering thousands of miles across entire ocean basins — Atlantic, Pacific, Indian — following prey and warm currents. They eat smaller fish, squid, and crustaceans, and they eat aggressively, because fueling a warm-blooded, perpetually-moving, 40-mph torpedo takes considerable effort.

The skipjack in your everyday can is a smaller, faster-maturing species — typically two to three feet long and a few pounds. The albacore is larger and milder. The bluefin, the one you’re paying for at a sushi bar, can exceed ten feet and a thousand pounds. Same family. Very different price point.

What ends up in the can is the loin — the dense, flavorful muscle along the fish’s side that did all that swimming. Which is why good tuna, simply packed in good olive oil, needs almost nothing else. It already did the work.

🛒 Gear Worth Having

As an Amazon affiliate, I earn from qualified purchases. Thank you for supporting TumbleBump.

📚 Related Reads


Posted on TumbleBump | GOODS Category

TumbleBump is part of the John D Reinhart content family. Writer, illustrator, videographer, and accidental filmmaker — find the whole story at JohnDReinhart.com.

27011

©2026 John D Reinhart/TumbleBump.com – all rights reserved

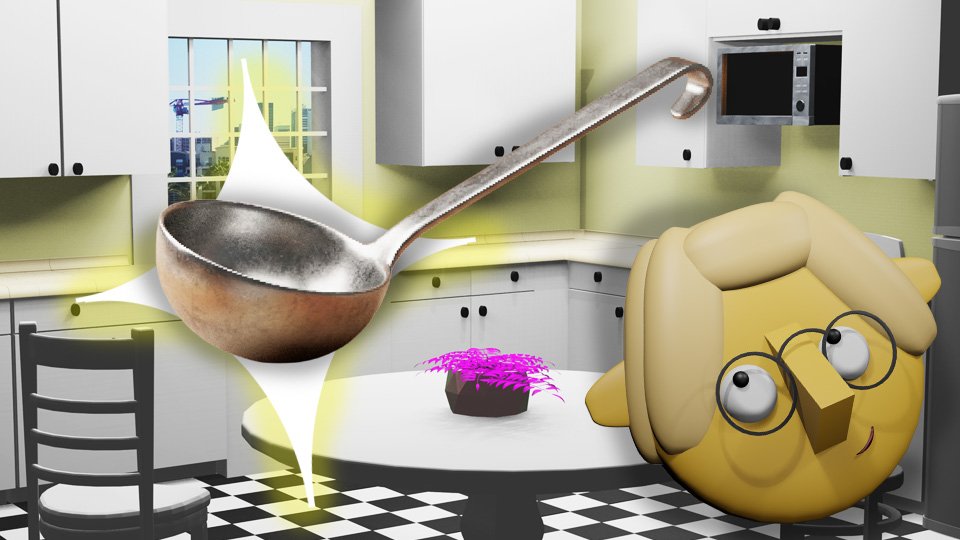
From Ladles to Spatulas: Essential Kitchen Tools

Beyond knives and pans, your kitchen needs a supporting cast of tools that handle everything from flipping to straining to basting. Here’s the complete guide to the essential non-knife, non-cookware kitchen tools — what they do, what to look for, and which ones are worth spending money on.

The best kitchen tools are the ones you reach for every day without thinking. They’re sized right, feel comfortable, and do their job without drama. Building a collection of these tools — deliberately, rather than by accumulation — means your kitchen works with you rather than against you.

Here’s the full supporting cast beyond knives and cookware.


The Mixing and Prep Tools

Mixing bowls (nesting set, 3–5 sizes) The workhorses of prep. You need small (for beaten eggs, small mixes), medium (for most batters and doughs), and large (for big salads, bread dough, batch mixing). Stainless steel nests efficiently, is dishwasher-safe, and lasts forever. Glass is heavier but see-through and microwave-safe.

Look for: flat bottoms for stability, a pour spout on at least one bowl, non-slip base.

Whisk (balloon and/or flat) A balloon whisk incorporates air — for eggs, cream, vinaigrettes, and sauces. A flat whisk (also called a roux whisk) works across the bottom of a saucepan without lifting — better for sauces and gravies. One of each is ideal; a balloon whisk alone covers 80% of needs.

Measuring cups and spoons Dry and liquid measuring cups are not interchangeable. Dry cups (fill and level) for flour, sugar, and dry ingredients. Liquid measuring cups (Pyrex glass) for anything pourable — set them on the counter and read from the side at eye level for an accurate pour. Measuring spoons for small quantities of both. This is the basics set — every kitchen needs it.


The Lifting and Moving Tools

Fish spatula (thin, flexible, slotted stainless) For flipping delicate items that would break with a thicker tool: fish fillets, pancakes, fried eggs, latkes. The offset angle keeps the hand away from the heat; the thin, flexible head slides under food without breaking it.

Solid spatula (wide, heat-safe) For pressing burgers, flipping pancakes in bulk, transferring larger items. Slightly more rigid than the fish spatula.

Long-handled tongs (12-inch, locking) For reaching into pots and pans, turning proteins at the grill, serving salads, and picking up things that are too hot or too awkward to handle otherwise. The locking mechanism keeps them closed for storage.

Slotted spoon (large, stainless) For lifting solids out of liquids. Poached eggs from water, dumplings from broth, vegetables from blanching liquid. Nothing substitutes for a good slotted spoon in this role.


The Straining and Sifting Tools

Colander (large, stainless or silicone) For draining pasta, rinsing produce, draining blanched vegetables. A large colander (5+ quart) handles everything without overflow. Stainless lasts forever; silicone is foldable and storage-efficient.

Fine mesh strainer (medium, stainless) For straining stocks and sauces, sifting flour and powdered sugar, rinsing small grains like quinoa, and creating smooth sauces. The fine mesh catches small particles that a colander passes. Versatile and underrated.


The Measuring and Monitoring Tools

Kitchen scale (digital) For accurate baking (weight is always more precise than volume for flour), for portioning, and for following recipes by weight (most professional recipes and many good cookbooks use grams). A $15–25 kitchen scale changes baking outcomes immediately.

Instant-read thermometer The most important single monitoring tool in the kitchen. Covered in full in the dedicated post called The Digital Instant-Read Thermometer .


The Specialty Tools Worth Having

Bench scraper (metal) For sweeping cutting board debris into a bowl or trash, for dividing dough, for cleaning surfaces. One of the most used and least celebrated kitchen tools.

Microplane grater For grating citrus zest, parmesan, garlic, fresh ginger, nutmeg, and hard spices. The fine razor-sharp teeth produce a feather-light result that a box grater cannot. One Microplane per kitchen, used constantly.

Vegetable peeler (Y-peeler) The Y-shaped swivel peeler removes less material than the classic straight peeler and works faster in most people’s hands.


🛒 Gear Worth Having

As an Amazon affiliate, I earn from qualified purchases. 


Posted on TumbleBump | INVESTS Category

TumbleBump is part of the John D Reinhart content family. Writer, illustrator, videographer, and accidental filmmaker — find the whole story at JohnDReinhart.com.

25003

©2026 John D Reinhart/TumbleBump.com – all rights reserved

Kitchen Shears: The “Extra Hand”

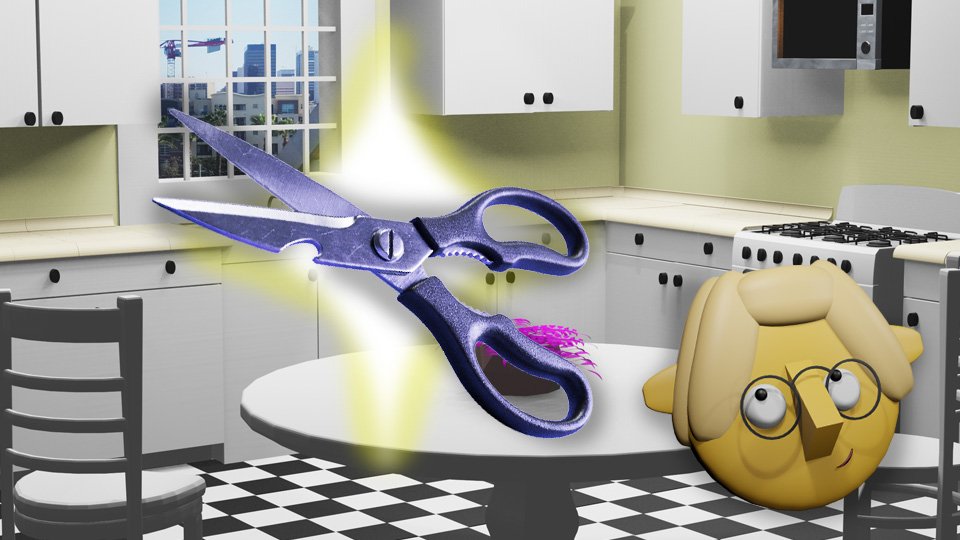
Kitchen shears are the most underused tool in most kitchens and the first thing professional cooks reach for in a surprisingly large number of situations. Here’s what they actually do, why they’re better than a knife for specific tasks, and what makes a good pair.

Kitchen shears live in a drawer in most homes and come out primarily for opening packages. This is a waste of a very good tool.

Professional cooks reach for kitchen shears constantly — for tasks where scissors do the job faster, more safely, or more precisely than a knife. Once you start using kitchen shears the way cooks use them, you’ll wonder what took you so long and reach for them reflexively for the rest of your cooking life.


What Kitchen Shears Actually Do (That Knives Don’t)

Breaking down a chicken: Spatchcocking (butterflying) a whole chicken requires cutting through the backbone. Kitchen shears do this in under a minute. A knife requires a confident cleaver and some force. For most home cooks, shears are safer, faster, and produce better results. There are approximately a zillion YouTube videos on how to do it.

Cutting fresh herbs directly into a dish: Hold the herb bunch over the pot, bowl, or plate, and snip. Chiffonading basil with a knife on a cutting board takes a minute and a second dirty surface. Shears take 10 seconds and leave only the shears.

(FYI -chiffonade is a knife technique where you stack leafy greens or herbs, roll them tightly into a cylinder, then slice across the roll into thin ribbons. You end up with those pretty, delicate shreds you see on salads or as garnishes. Basil is the classic example — it’s probably the most common herb prepared that way.)

Cutting pizza: Pizza shears (or just kitchen shears) cut through pizza in a controlled way that doesn’t drag toppings the way a rocking pizza cutter can.

Trimming fat and connective tissue: Precision trimming of raw proteins without the awkward angles that knives require on curved or irregular surfaces.

Cutting dried fruit and sticky ingredients: Scissors coated with a little cooking spray glide through dates, figs, dried apricots, and gummy candies without the sticking and pulling that plagues knives.

Cutting green onions, canned tomatoes, canned whole tomatoes: Straight into the pot or bowl. No cutting board, no knife, immediate.

Opening packages: The one thing everyone already uses them for, and they’re genuinely better at it than knives.

Cutting bread without a bread knife: Coarse cuts of bread, rolls, biscuits, naan — shears work cleanly and quickly.

Children’s food: Cutting pasta, noodles, meat, and vegetables into manageable pieces for small children — shears are faster and safer than a knife at the dinner table.


What Makes a Good Pair

Separable blades: The key feature for cleaning. Kitchen shears that come apart at the pivot point can be washed individually — no crevices for food to hide in. If the shears can’t be separated, they can’t be properly cleaned, which is a meaningful hygiene concern given the raw proteins they often touch.

Micro-serration on one blade: A fine serration on one blade prevents food from slipping during cutting. Most quality shears have this.

Heavy-gauge steel blades: Thin blades flex and don’t cut cleanly. Forged or heavy-gauge stamped blades hold their edge longer and cut with authority.

Spring action: Quality shears spring open after each cut, reducing hand fatigue during extended use.

Comfortable handles: Large enough for large hands, with some grip material. All-metal handles are slippery when wet. Some rubber or textured grip is worth having.

The bottle opener and other features: Many kitchen shears include a bottle cap opener, a nut cracker, and sometimes a bone notch in the blade for cracking. These are useful additions, not gimmicks, in good shears.


Care and Maintenance

Wash after every use involving raw protein. Separate the blades, wash both pieces with hot soapy water, dry immediately. Like knives, kitchen shears don’t go in the dishwasher — the heat and moisture degrade the steel and the handles.

Occasionally sharpen. Kitchen shears dull over time like any blade. A sharpening stone, a dedicated scissor sharpener, or a professional sharpening service restores them. Alternatively: running each blade through a quality knife honing steel at an angle works for light maintenance.

Store dry. Moisture leads to rust at the pivot. Dry thoroughly before storage and consider a light coat of food-safe oil on the pivot point occasionally.


🛒 Gear Worth Having

As an Amazon affiliate, I earn from qualified purchases.


Related Reads

Posted on TumbleBump | INVESTS Category

TumbleBump is part of the John D Reinhart content family. Writer, illustrator, videographer, and accidental filmmaker — find the whole story at JohnDReinhart.com.

25015

©2026 John D Reinhart/TumbleBump.com – all rights reserved

The Essential Kitchen Knives

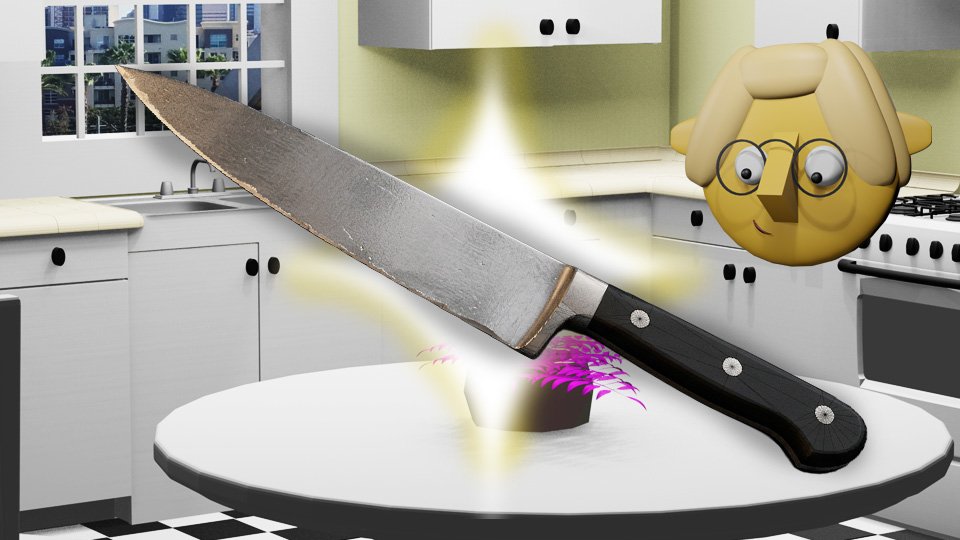
A kitchen full of knives sounds impressive and is mostly unnecessary. The truth is you need three knives — possibly two — and the right ones cover 99% of what any home cook will ever do. Here’s which ones they are and what makes each essential.

Meta Excerpt: 


The knife block that came with your last apartment or was gifted at a wedding contains anywhere from 6 to 14 pieces. Most of them see the light of day approximately never. The bread knife comes out for bread. The chef’s knife does everything else, and the rest sit in the block looking decorative.

This is fine — having knives you don’t use isn’t a problem. But if you’re building a kitchen intentionally, here’s the honest list of what you actually need, in order of importance.


Knife One: The Chef’s Knife (8–10 inch)

The chef’s knife is the kitchen’s workhorse. It dices, chops, slices, and minces. It breaks down vegetables, portions raw proteins, and handles the vast majority of cutting tasks in any kitchen. If you have one knife, it is this one.

Blade length: 8 inches is the sweet spot for most cooks — long enough to slice through large vegetables and proteins, maneuverable enough for detail work. 10 inches for large-handed cooks or those who process large quantities. 6 inches for those who prefer lighter, more nimble tools.

Style: – German-style (Wüsthof, Henckels): heavier, more curved belly, designed for rocking cuts. More forgiving and durable, harder to chip. – Japanese-style (MAC, Miyabi, Shun): thinner, harder steel, designed for push cuts. Sharper out of the box, holds an edge longer, more prone to chipping if used carelessly.

Neither is objectively better. Choose based on your cooking style and how much knife maintenance you want to do.

Budget: – Entry-level excellent: Victorinox Fibrox 8-inch ($40) — the best knife for the money, full stop. – Mid-range: MAC MTH-80 ($145), Wüsthof Classic ($150–170) – Premium: Shun Classic ($180+), Miyabi Birchwood ($300+)


Knife Two: The Paring Knife (3–4 inch)

The paring knife does the detail work the chef’s knife can’t — peeling, trimming, coring, cutting small vegetables in the hand (carefully, with the claw grip). It’s the knife you use when the cutting board feels like overkill or the item is too small for a large blade.

This post, Knife Safety for the Nervous, explains the claw grip in detail.

You don’t need a paring knife as desperately as the chef’s knife — a small chef’s knife or a chef’s knife with care handles most tasks. But a paring knife costs $15–30 and earns its place.

What to look for: A blade that’s stiff rather than flexible (most tasks require precision, not flexibility), comfortable in the hand for extended close work, a sharp point.

Recommendation: Victorinox 3.25-inch paring knife ($10) is the standard. A Wüsthof or Henckels classic paring knife steps it up modestly.


Knife Three: The Bread Knife (Serrated, 8–10 inch)

A serrated knife cuts through crusty bread without crushing the soft interior — the serrations grip the crust while the thin blade slides through. No other knife type does this as well.

The bread knife is also excellent for: slicing ripe tomatoes (the serrations bite through skin that resists a straight edge), cutting cakes and layered pastries, and slicing any food with a firm exterior and soft interior.

You won’t use this as often as the chef’s knife, but when you need it, nothing substitutes for it.

What to look for: Length (10 inches allows full-stroke cutting without sawing); offset handle (the handle sits above the blade, preventing knuckles from hitting the cutting board); flexible vs. stiff (for bread, a semi-stiff blade is correct).

Recommendation: Wüsthof Classic 10-inch bread knife, or the surprisingly excellent Victorinox 10.25-inch serrated bread knife ($40).


What About the Rest?

Santoku (7-inch): A Japanese-style alternative to the chef’s knife. Shorter, slightly different cutting geometry, excellent for produce and fish. Not an addition — a substitution. If you prefer the santoku style, get one instead of a chef’s knife.

Boning and fillet knives: For specific tasks (deboning a chicken, filleting whole fish). Not essential unless you do these tasks regularly.

Honing steel (not a knife, but essential): The honing steel maintains every knife you own. Buy one and use it before every cooking session.

Kitchen shears: Not a knife, but essential. See the dedicated post.


🛒 Gear Worth Having

As an Amazon affiliate, I earn from qualifying purchases.


Related Reads


Posted on TumbleBump | INVESTS Category

TumbleBump is part of the John D Reinhart content family. Writer, illustrator, videographer, and accidental filmmaker — find the whole story at JohnDReinhart.com.

25004

©2026 John D Reinhart/TumbleBump.com – all rights reserved