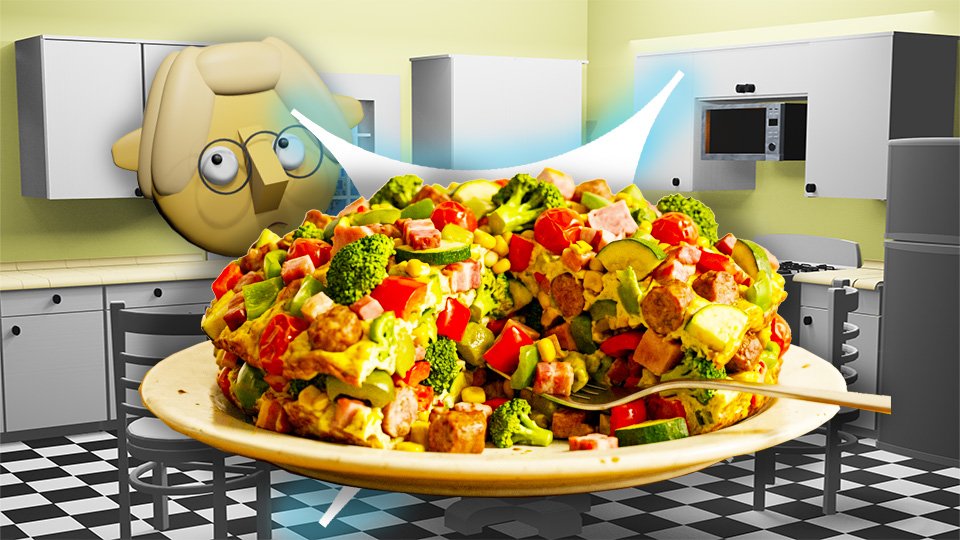
The Everything Frittata (Or: Why Your Sad Refrigerator Odds and Ends Are Actually Dinner)

Half an onion, some wilting spinach, and cheese from two different blocks aren’t the ingredients of defeat. They’re the ingredients of a frittata.

You know the moment. The refrigerator contains a collection of things that don’t obviously add up to a meal. Half an onion. Some wilting spinach. Three mushrooms. A bit of cheese from two different blocks. Some roasted vegetables from Tuesday, looking a little tired but not actually gone bad.

These are not the ingredients of defeat. These are the ingredients of a frittata.

The frittata is Italian in origin, egg-based in nature, and essentially unlimited in what it’ll accept. It’s the Everything Dish β€” the kitchen equivalent of a conversation with someone who’s genuinely interested in whatever you happen to bring up, no matter how random.

🍳 What a Frittata Actually Is

A frittata is an open-faced Italian egg dish β€” eggs mixed with fillings, cooked until set. It’s essentially an un-folded omelette, and that’s the whole secret to why it’s so much friendlier than an omelette to begin with. Folding an omelette at the right moment, with the right heat, is a genuine skill that takes practice to get right. A frittata skips that moment entirely. It just sets, top to bottom, and gets sliced into wedges once it’s done β€” no fold, no flip, no moment of truth.

πŸ₯š Why Eggs Can Hold So Much

Eggs are a custard in disguise β€” proteins that, once heated, link together into a structure firm enough to suspend whatever’s sitting inside it. That’s the actual mechanism behind a frittata’s flexibility: it’s not that eggs happen to taste fine with almost anything, it’s that the protein structure they form is physically capable of holding vegetables, cheese, meat, even leftover pasta, all in place at once. A quiche does something similar with a crust involved; a frittata does it with nothing standing between the eggs and the pan at all, which is exactly why it’s the faster, lower-commitment version of the same idea.

πŸ”₯ Why the Pan Matters More Than the Recipe

A frittata’s defining move is starting on the stovetop and finishing in the oven or under the broiler β€” bottom sets first, top sets last, no stirring in between. That’s why an oven-safe skillet, cast iron especially, is the actual star of the process rather than any specific filling. The pan needs to survive the transition from direct stovetop heat to oven heat without missing a beat, and it needs to release the finished frittata cleanly once it’s done. Get the pan right, and the eggs mostly take care of themselves.

🧊 Why It’s the Fridge’s Best Friend

By midweek, most refrigerators accumulate a genuine assortment of things that are still perfectly good but no longer add up to an obvious meal on their own. A frittata doesn’t need them to add up to anything. It just needs them cooked if they need cooking, warmed if they’re already cooked, and folded into eggs. This is the frittata’s actual highest calling β€” not a recipe you plan around, but a plan you never had to make, built entirely out of what was already sitting there.

🌑️ Why It’s Just as Good Cold

Most egg dishes suffer the moment they cool β€” the texture tightens, the appeal drops. A frittata is a genuine exception, and it comes back to that same custard structure: once it’s set, it holds its shape and texture whether it’s fresh out of the oven or pulled cold from the fridge the next morning. That’s not a workaround or a compromise. A cold slice of frittata is a legitimately good breakfast, lunch, or picnic contribution on its own terms, not just leftovers being tolerated.

🎬 Where the Actual Steps Live

The technique itself β€” whisking, arranging fillings, timing the stovetop-to-oven handoff, judging when the center’s set instead of jiggly β€” is worth watching rather than reading. A few minutes of video showing someone’s hands managing that transition will teach the timing faster than any written instructions could. This post is about why the dish works and why it’s worth trusting with whatever’s in the fridge; the how is a quick search away.

πŸ›’ Gear Worth Having

Lodge 10-Inch Cast Iron Skillet β€” Goes from stovetop to oven without a second thought, which is the entire mechanical trick a frittata depends on.

OXO Good Grips Flexible Turner Spatula β€” Slides cleanly under a set frittata to loosen it from the pan, which matters more than it sounds like it should.

Salt Fat Acid Heat by Samin Nosrat β€” Understanding the egg is understanding the frittata, and Nosrat explains eggs better than almost anyone writing about food today.

As an Amazon affiliate, I earn from qualifying purchases. Thank you for supporting TumbleBump.

πŸ“– Related Reads


TumbleBump is part of the John D Reinhart content family. Writer, illustrator, videographer, and accidental filmmaker β€” find the whole story at JohnDReinhart.com.

24012

Β©2026 John D Reinhart/TumbleBump.com β€” All rights reserved

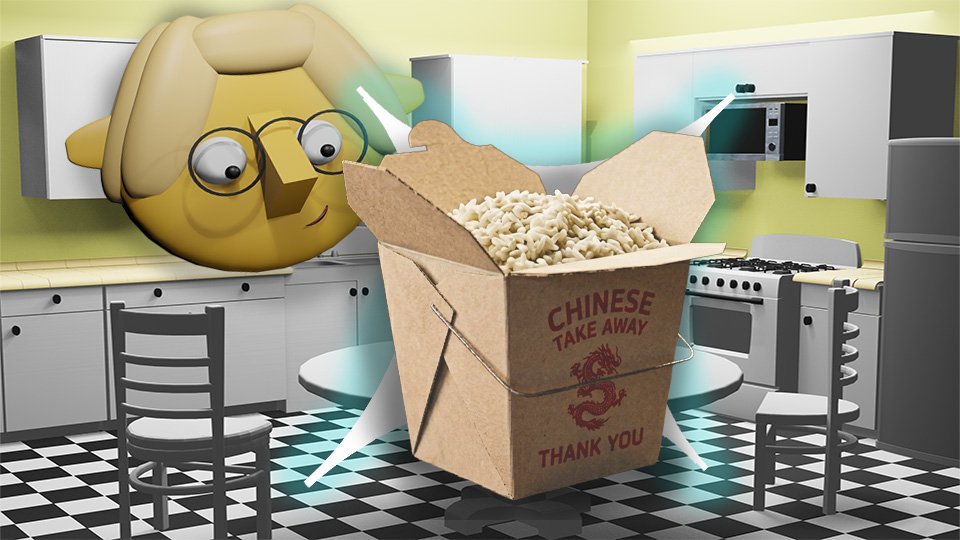
The Rice in the Back of the Fridge Is Better Than the Rice You Just Made

Leftover rice is not a consolation prize. It is secretly the superior ingredient. Here’s why day-old rice is better than fresh β€” and what it wants to become next.

There is a container of rice in your refrigerator right now. It has been there since Tuesday. You are eyeing it with mild suspicion, trying to decide whether it’s still good and whether anyone is going to eat it.

Here is the thing about that rice: it is not a problem to solve. It is an upgrade waiting to happen.

Day-old rice is genuinely better than fresh rice for certain applications β€” not β€œbetter for leftovers” in the way people say things are β€œnot bad” when they mean mediocre. Actually better. Chemically, structurally, culinarily better. The restaurant fried rice you’ve been trying to replicate at home and failing? The secret ingredient is old rice.

πŸ€” Why Old Rice Is Better (The Actual Science)

Fresh rice is full of surface moisture. That moisture is great when you want fluffy steamed rice. It is the enemy when you want fried rice, because wet rice steams in the pan instead of frying. The grains clump together. Nothing crisps. The result is soft, heavy, and nothing like what you ordered at the restaurant.

Day-old rice has lost that surface moisture. The grains have dried and separated. When they hit a screaming hot pan they fry β€” actually fry β€” developing a slight crust and that characteristic crackling texture that makes fried rice worth eating.

This is not a workaround or a trick. This is how fried rice is supposed to be made. Every restaurant that produces excellent fried rice is using rice that was cooked earlier. The leftover container in your fridge is the correct starting point, not a compromise.

🍳 What Leftover Rice Wants to Become

Day-old rice has a short list of second acts, and they are not consolation meals. They are genuinely excellent things:

  • Fried rice. The obvious one and the best one. High heat, cold rice, a few pantry staples, eight minutes. The technique is straightforward once you understand why the heat and the cold rice matter β€” YouTube has dozens of excellent demonstrations of exactly what β€œhigh heat” looks like and what to do when. Watch one before you cook one.
  • Congee. Rice simmered in a large amount of broth until it breaks down into something thick, warm, and deeply comforting. The rice equivalent of chicken soup. Day-old rice gets there faster than fresh rice and the result is identical. It is the meal for a difficult day, a cold evening, or a Tuesday that has not been going well.
  • Rice bowls. Warmed leftover rice as a base for whatever else is in the fridge. A fried egg, some roasted vegetables, a drizzle of something β€” soy sauce, hot sauce, anything. Five minutes. Feels like a complete meal because rice is one of those bases that makes everything served on it seem intentional.
  • Arancini. Fried rice balls with cheese in the center. A project rather than a weeknight meal, but the result is spectacular enough to be worth occasional effort. If you have leftover risotto specifically, this is its correct destiny. YouTube will show you exactly how.
  • Stuffed peppers or tomatoes. Rice mixed with whatever protein and vegetables are available, stuffed into a vegetable, baked. A complete meal that looks considerably more deliberate than the ingredients would suggest.

🚧 The One Actual Rule About Leftover Rice

Leftover rice has a food safety consideration worth knowing. Rice can harbor Bacillus cereus, a bacteria that produces heat-resistant toxins in rice left at room temperature for extended periods. This is one of the genuine cases where β€œit looks fine” is not reliable guidance.

The rule is simple: cool leftover rice quickly after cooking, refrigerate it within two hours, and keep it for no more than four days. Reheat it thoroughly when you use it.

This sounds alarming but is actually very manageable. The risk is in rice left sitting at room temperature for hours β€” the classic covered pot on the stovetop situation. Rice that goes from pot to fridge within two hours is fine. Rice that sat out all evening is the concern.

Cool it fast. Refrigerate promptly. Use within four days. That’s the whole food safety conversation for leftover rice.

πŸ›’ Gear Worth Having

  • Zojirushi rice cooker β€” Makes perfect rice and keeps it warm without overcooking. The appliance that makes batch rice cooking entirely painless β€” and batch rice cooking is how you always have day-old rice available when you want fried rice.
  • Carbon steel wok β€” The correct pan for fried rice. Gets hot enough to actually fry rather than steam the rice. A regular skillet can work but a wok works better. This is one of those tool-matters situations.
  • Kikkoman soy sauce β€” The fried rice seasoning workhorse. Keep a bottle in the fridge. Use it on rice bowls, congee, and anything that needs a savory hit without much effort.
  • Sesame oil β€” The finishing oil that makes fried rice taste like the restaurant version. A few drops at the end of cooking. Not for the heat β€” it burns β€” just for the flavor.

As an Amazon affiliate, I earn from each qualified purchase. Thank you for supporting TumbleBump.

✨ The Short Version

The rice in the back of your fridge is not a leftover problem. It is a better ingredient than the rice you made on Tuesday evening, specifically because it has had time to dry out and separate.

Fried rice, congee, rice bowls, arancini, stuffed vegetables β€” all of them start here. Cool it fast, refrigerate within two hours, use within four days, and let YouTube show you what high heat actually looks like before you start.

The restaurant has been using day-old rice the whole time. Now so do you.

πŸ“š Related Reads


TumbleBump is part of the John D. Reinhart content family. Writer, illustrator, videographer, and accidental filmmaker β€” find the whole story at JohnDReinhart.com.

24008

Β©2026 John D. Reinhart / TumbleBump.com. All rights reserved.

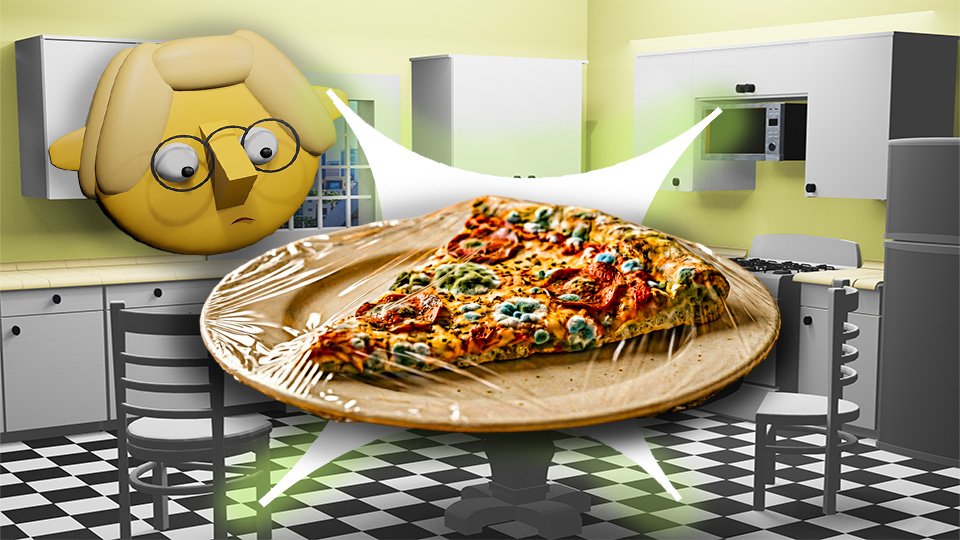
How Old Does a Leftover Have to Get?

Four days. That’s the number. But there’s more to it than that β€” because some things last longer, some shorter, and “four days” assumes your fridge is the right temperature and the food was stored correctly from the start. Here’s the complete, honest leftover timeline.

The question everybody asks β€” quietly, usually standing in front of the open refrigerator β€” is: is this still okay?

The container has been in there for a few days. It still looks fine. It smells fine. The date was… probably Sunday? Or was it Monday?

Here’s the answer, with more specificity than “use your nose” and more nuance than a single blanket number.


The Four-Day Rule (And Where It Comes From)

The USDA’s general guideline for most cooked leftovers is 3–4 days refrigerated at 40Β°F or below. This isn’t arbitrary β€” it’s based on the growth rates of common bacterial pathogens at refrigerator temperatures and the point at which populations can reach levels that cause illness.

Four days is a conservative, reliable number that accounts for typical home refrigerators and typical storage conditions. It’s the right number to default to when you’re uncertain.

The important caveats:

  • It assumes the food was refrigerated within two hours of cooking (one hour if ambient temperature was above 90Β°F).
  • It assumes your refrigerator is actually running at 40Β°F or below (many aren’t β€” measure yours).
  • It assumes the food is in an airtight container rather than uncovered or loosely wrapped.

Leftovers that violated any of these conditions on the way in are on a shorter clock than four days suggests.


The Actual Timelines by Food Type

Not all leftovers are equal. Here are the more specific windows:

3–4 Days (The Standard Window): – Cooked chicken, turkey, other poultry – Cooked beef, pork, lamb – Cooked fish and shellfish – Soups and stews – Cooked egg dishes (frittata, scrambled, quiche) – Cooked pasta and pasta dishes – Cooked rice and grains (with a note β€” see below) – Pizza (store in an airtight container) – Casseroles and baked dishes (lasagna, shepherd’s pie)

3–5 Days: – Cooked beans and lentils – Cooked vegetables and vegetable dishes – Deli meats (opened package)

5–7 Days: – Hard-boiled eggs (in shell, unpeeled) β€” the shell protects them – Opened canned goods transferred to containers (beans, tomatoes, tuna)

1–2 Days: – Raw ground meat (should be cooked or frozen immediately) – Raw whole poultry – Raw fish and shellfish (buy the day of or freeze) – Oysters and live shellfish


The Rice Situation (A Special Case)

Cooked rice deserves specific mention because the risk is slightly different from most cooked foods.

Bacillus cereus spores β€” heat-resistant, common in the environment β€” can survive cooking and germinate in cooked rice stored at room temperature. The toxins this bacterium produces can cause illness.

This is not unique to rice (any starchy food can carry it), but rice is particularly associated with it because it’s so commonly left out to cool slowly or stored without refrigeration.

The rules for rice: refrigerate within one hour of cooking, in a shallow container that cools quickly. Eat within 4–5 days. Reheat thoroughly β€” above 165Β°F β€” before eating. Never leave cooked rice out overnight.


Reading the Signs (What the Nose Tells You and Doesn’t)

As covered in the “Your Nose is Not a Food Safety Inspector” post: the four-day guideline exists precisely because many dangerous bacteria produce no smell. “It smells fine on day 6” is not a reliable safety assessment.

That said, smell is still useful for catching obvious spoilage. If something smells off, sour, fermented, or in any way wrong β€” even within the four-day window β€” don’t eat it.

The framework: four-day rule is the clock. Smell is an additional alarm. Both matter. Neither alone is sufficient.


The Honest Assessment of What Actually Happens

Here’s the thing most food safety guidance doesn’t say directly: many people have eaten five-day-old leftovers and been fine. Many people have eaten two-day-old leftovers that were improperly stored and gotten sick. The timeline guidelines are probabilistic, not absolute.

What the four-day rule gives you is a reasonable safety margin that accounts for the range of typical home storage conditions. Operating within it consistently means you are almost never in the risky zone. Operating past it consistently means you’re taking on increasing odds of an unpleasant experience.

The math of food safety is also about the cost of being wrong. A foodborne illness ranges from miserable-but-fine to genuinely dangerous depending on the pathogen, the individual, and the dose. The cost of throwing out a four-day-old container of soup is low. The cost of getting seriously ill from keeping it is high. The four-day rule is not paranoia β€” it’s favorable arithmetic.


The Freezer Exit Strategy

When you realize something is reaching the end of its refrigerator window β€” day 3 and you won’t eat it by day 4 β€” freeze it. Today. Before it reaches the limit.

Food frozen at its quality peak is infinitely better than food that limped to the limit and then went in the trash. The freezer is not the end of the road. It’s a reset button.


πŸ›’ Gear Worth Having

  • Refrigerator Thermometer β€” Confirms you’re actually at 40Β°F. This is the most important piece of information for accurate leftover timing.
  • Dry-Erase Refrigerator Labels β€” Write the date on every container before it goes in the fridge. Makes the four-day rule automatic.
  • OXO Airtight Containers Set β€” Proper sealing slows bacterial growth and keeps food at its quality longer within the window.
  • ThermoWorks Thermapen β€” For confirming reheated leftovers reach 165Β°F internal temperature before eating.
  • USDA FoodKeeper App β€” A free, comprehensive reference for storage times by food type. The authoritative answer to every “how long does this last” question.

As an Amazon affiliate, I earn from each qualifying purchase. Thank you for supporting TumbleBump.


Recommended Reads


Posted on TumbleBump | SAVES Category

TumbleBump is part of the John D. Reinhart content family. Writer, illustrator, videographer, and accidental filmmaker β€” find the whole story at JohnDReinhart.com.

24000

Β©2026 John D Reinhart/TumbleBump.com – all rights reserved

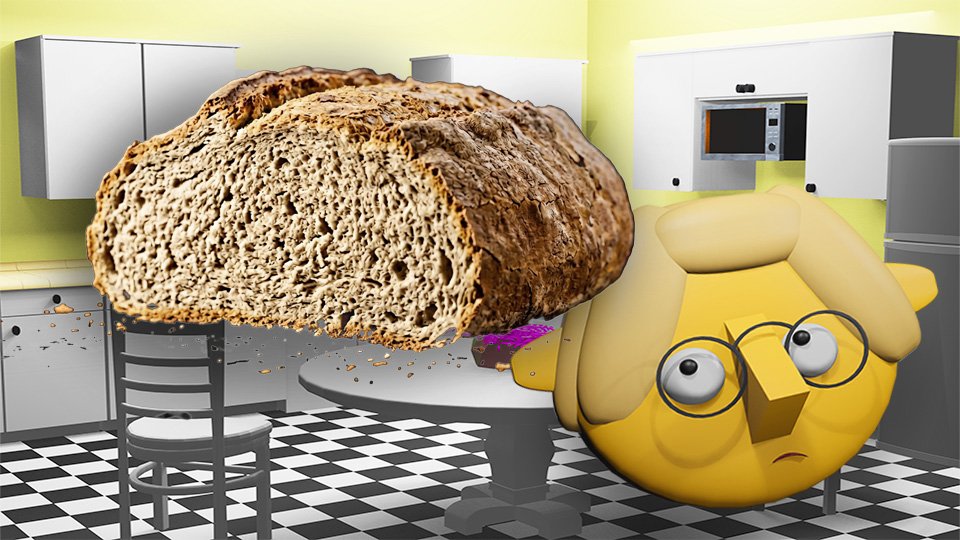
Bread’s Second Act (And Third, And Fourth)

Bread doesn’t go bad. It goes somewhere else. Here’s the whole beautiful arc from fresh loaf to last crouton β€” and why stale bread is secretly the more interesting ingredient.

Somewhere in your kitchen right now, there is bread that has passed its peak moment. It’s not bad. It’s not moldy. It’s just no longer the soft, yielding, tear-it-with-your-hands loaf it was two days ago. And because it no longer meets that specific standard, there is a real chance it ends up in the trash.

This would be a mistake. Not a moral failure β€” just a waste of something that hasn’t finished being useful yet.

Bread doesn’t go bad so much as it goes somewhere else. Fresh bread has one destiny. Day-old bread has different ones β€” and in many cases, genuinely better ones. The croΓ»ton, the breadcrumb, the bread pudding: these aren’t consolation prizes for bread that didn’t make it. They’re the whole point. Entire classic dishes were invented specifically to use bread at this stage. The Italians have been doing this for centuries and they are not wrong.

Here’s the whole arc. From the first slice to the last crouton, nothing has to be wasted.

✨ Days One and Two: Peak Bread

This is bread at its most itself. Soft interior, crackling crust, the kind of loaf you tear rather than slice if nobody’s watching. Eat it as-is. Make sandwiches. Dip it in soup. Toast it. This is what bread was born to do and it does it magnificently for about 48 hours.

Storage: A bread box on the counter, or wrapped loosely in a clean cloth. Room temperature, not the fridge.

Why not the fridge? This is the one that surprises people. Refrigeration actually accelerates staling β€” the cold causes the starch in bread to recrystallize faster, which is exactly what makes bread go stale. The fridge is bread’s enemy, not its friend. The one exception: a hot, humid kitchen where mold is a faster problem than staleness. In that case, refrigerate and accept the trade-off.

🍞 Days Three and Four: Day-Old and Getting Interesting

The crumb is tightening. The crust has softened slightly as it draws moisture from the interior. It’s less pleasant to eat straight and hasn’t lost a bit of flavor. This is the moment to pivot.

Why does day-old bread work better for certain things? Because moisture is the variable. Fresh bread is full of it. When you make French toast with fresh bread, it absorbs the egg custard too fast, goes soggy, and falls apart. Day-old bread absorbs it at exactly the right rate, cooks up custardy inside and golden outside, and holds together beautifully. The staleness is doing structural work.

Same logic applies to bread pudding, to panzanella (the Tuscan bread salad where stale bread gets soaked, squeezed out, and tossed with tomatoes and olive oil), and to bruschetta, where day-old bread toasts to a firmer, more satisfying base than fresh ever would.

Toast from slightly stale bread is also, quietly, better than toast from fresh. The toaster drives out remaining moisture and re-crisps everything. Fresh bread toasts soft in the center. Stale bread toasts all the way through. File this away.

πŸ§€ Day Five and Beyond: Crouton Country

This is genuinely good territory and most people don’t know it.

  • Croutons. Bread cut or torn into chunks, tossed with olive oil and seasoning, baked until golden and fully crispy. The irregular shapes of torn croutons have better texture than the uniform cubes of the store-bought kind. Homemade croutons are not just cheaper β€” they’re actually better. This is one of those kitchen upgrades that takes 20 minutes and produces something meaningfully superior to anything in a bag.
  • Breadcrumbs. Stale bread in a food processor, pulsed to whatever coarseness you want. Fresh breadcrumbs for topping casseroles and binding meatballs. Toasted breadcrumbs β€” pangrattato β€” cooked in olive oil and garlic until deeply golden, then scattered over pasta, soup, or eggs. The Italians call this β€œpoor man’s parmesan.” It provides crunch, richness, and a savory nuttiness that genuinely earns that description.
  • Ribollita. The Tuscan bread and bean soup where stale bread is the thickening agent β€” chunks added to a thick vegetable and white bean broth, left to soak, swell, and dissolve into something rich and magnificent. Peasant food at its most intentional. YouTube will show you exactly how it’s done.

❄️ The Freezer: The Pause Button

At any point in this arc β€” day one, day three, day five β€” the freezer stops the clock. Slice before freezing so you can pull individual pieces. Toast directly from frozen. The result is excellent and the bread has just bought itself months of useful life.

This is the move for any loaf you know you won’t finish before it stales. Don’t watch it age on the counter. Freeze it and use it on your schedule, not bread’s.

πŸ›’ Gear Worth Having

  • A bread box β€” The correct bread storage. Maintains the right humidity, prevents mold better than open air, extends fresh life by days. Worth every inch of counter space it occupies.
  • A small food processor β€” Turns stale bread into breadcrumbs in about ten seconds. One of those tools that earns its place every single week.
  • A half sheet pan β€” The crouton-baking surface. Even heat, good browning, the right size for a full loaf’s worth of croutons in one go.
  • Airtight storage containers β€” For keeping finished croutons and breadcrumbs crispy. A week of excellent croutons starts with a good lid.
  • Ziploc freezer bags β€” For sliced bread going into the freezer. The airtight seal is everything. Freezer burn is just slow disappointment.

As an Amazon affiliate, I earn from each qualifying purchase. Thank you for supporting TumbleBump.

✨ The Short Version

Fresh bread has one great day. Day-old bread has several more useful ones. Stale bread becomes croutons, breadcrumbs, and the base of dishes that specifically require it. Frozen bread waits patiently until you need it.

Nothing has to be wasted. The loaf just needs a plan.

The trash is not the next step. The toaster is.

πŸ“š Related Reads

TumbleBump is part of the John D. Reinhart content family. Writer, illustrator, videographer, and accidental filmmaker β€” find the whole story at JohnDReinhart.com.

24005

Β©2026 John D Reinhart/TumbleBump.com – all rights reserved

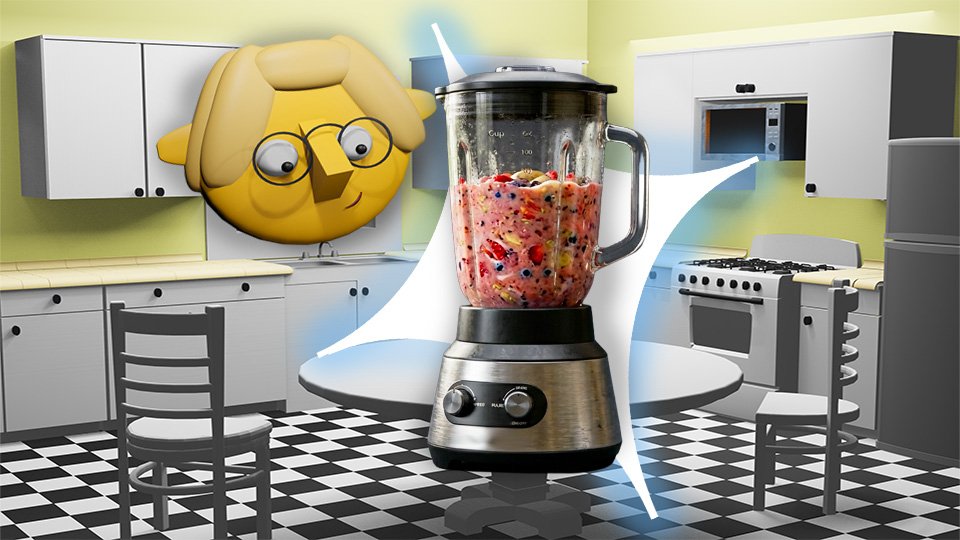
Soft Fruit Is “Smoothie Fruit”

Overripe fruit isn’t food waste. It’s smoothie fuel, jam potential, and baking gold β€” waiting patiently on your counter for you to recognize its second calling. Here’s the complete guide to what to do with fruit that’s past its prime but nowhere near the trash.

There is a specific window in the life of most fruits during which they are perfect: firm enough to hold their shape, sweet enough to be satisfying, with the right balance of flavor. This window is, depending on the fruit, approximately 36 to 72 hours long. Then it closes.

What’s on the other side of that window is not garbage. It’s a different ingredient.

Soft fruit has more concentrated sugar, more intense flavor, and less structural integrity. These are not failures. These are features β€” for different applications. The trick is knowing which application applies to which fruit, and acting before the fruit crosses the line from “past peak” to “actually finished.”


The Smoothie Destination

The fastest, easiest save for soft fruit of almost any type: freeze it and make smoothies.

The process: Cut away any truly bad spots (mold, major bruising that’s gone dark and funky). Peel if necessary. Slice into chunks. Freeze on a sheet pan for an hour, then transfer to a bag or container. Label it “smoothie fruit.”

Frozen soft fruit is actually better for smoothies than fresh fruit β€” it chills the smoothie without watering it down with ice, and the texture difference (soft vs. firm) is completely irrelevant once blended.

What works for smoothies: Bananas (peel before freezing), mangoes, peaches, nectarines, plums, strawberries, blueberries, raspberries, blackberries, cherries (pit them), melon (cut from the rind), kiwi (peel), pineapple, papaya.

What doesn’t work well: Citrus (too much membrane and pith for pleasant blending), grapes (fine but require pitting and can be seedy), watermelon (mostly water, produces a thin result).


The Baking Destination

Soft fruit is, in many cases, superior for baking to fresh fruit. The concentrated sweetness and softened texture integrate better into batters and fillings.

Overripe bananas: The blacker, the better for banana bread. Black bananas have more sugar and more banana flavor than yellow ones. This is the correct destination for every banana that’s gone too far.

Soft peaches and nectarines: Perfect for cobblers, crisps, and muffins. The soft texture means they don’t need to be pre-cooked for most applications.

Overripe berries: Fold into muffins, quick breads, or pancake batter. The cell structure has already broken down, which means they distribute more evenly through the batter.

Soft pears: Excellent in cakes and crumbles. Pear and ginger. Pear and almond. Pear and blue cheese (in a savory tart). All excellent.


The Jam and Compote Destination

You don’t need a canning operation to turn soft fruit into something preserved and spreadable. A quick compote takes 15 minutes and lasts a week in the refrigerator.

Quick compote method: Put soft fruit (roughly chopped, pits and cores removed) in a small saucepan with a tablespoon of sugar and a squeeze of lemon juice. Cook over medium heat, stirring occasionally, until the fruit breaks down into a chunky sauce β€” about 10–15 minutes. That’s it.

Use it on yogurt, oatmeal, toast, pancakes, or ice cream. Store in the fridge for up to a week.


The Savory Destination

Soft fruit, particularly stone fruits and berries, can be used in savory applications where their intense sweetness and acidity are assets.

  • Soft peaches or nectarines: Pan sauce for pork chops or chicken. Chutney with onion, ginger, and vinegar.
  • Overripe tomatoes: The best tomatoes for sauce are slightly soft ones. They have more concentrated flavor and less water content than peak-firm tomatoes.
  • Soft citrus: Zest before the fruit goes too far, freeze the zest. The juice of a slightly past-prime orange or lemon is still excellent for cooking.

The Line You Cannot Cross

Soft is a stage. Moldy, fermenting, or foul-smelling is a different stage entirely. If the fruit has visible mold spreading across its surface, smells alcoholic or off, or has turned to liquid in spots, it has crossed the line. Some molds on produce produce mycotoxins that can penetrate beneath the visible surface, so “cut away the moldy bit” is less reliable than it is for, say, hard cheese.

When in doubt on mold: if it’s soft fruit, toss it. The rule of thumb is that mold in soft/wet items (berries, peaches, tomatoes) means the whole thing; mold in hard/dry items (hard cheese, firm carrots) can sometimes be cut away with a generous margin.


πŸ›’ Gear Worth Having

As an Amazon affiliate, I earn from each qualifying purchase. Thank you for supporting TumbleBump.


Related Reads


Posted on TumbleBump | SAVES Category

TumbleBump is part of the John D. Reinhart content family. Writer, illustrator, videographer, and accidental filmmaker β€” find the whole story at JohnDReinhart.com.

24011

Β©2026 John D Reinhart/TumbleBump.com – all rights reserved

Your Nose Is Not a Food Safety Inspector

Your nose is a liar. A well-meaning, occasionally useful liar β€” but a liar. Here’s what the smell test actually tells you, and the system that keeps you off the bathroom floor.

It goes like this: you open the fridge, locate a container of unknown age, pop the lid, and lean in for the sniff test. Your nose reports back. You make a decision. You have been doing this your entire adult life and you consider it a reliable system.

Here is the problem with your system: your nose has no idea what Salmonella smells like. Neither does it know E. coli, or Listeria, or any of the other invisible freeloaders that cause the kind of food poisoning that clears your entire social calendar for three days.

Your nose is excellent at detecting things that smell bad. It is completely useless at detecting things that will make you sick. These are not the same category of problem, and the gap between them is where food poisoning lives.

Your nose is not lying to you, exactly. It’s just working its own job description, which was never β€œfood safety inspector.” It’s more of a β€œdoes this smell weird” consultant with a very limited contract.

βœ… What Your Nose Is Actually Good At

Credit where it’s due. Your nose does handle some things reliably:

  • Rancid fats. Old butter, stale nuts, cooking oil that’s been sitting since the last administration β€” oxidized fat has a sharp, almost crayon-like smell that your nose catches every time. Won’t kill you. Will taste terrible. Nose wins.
  • Souring. Milk that’s turned, over-fermented yogurt, produce going fizzy in the back of the drawer. Your nose identifies sourness reliably. In early stages this is more unpleasant than dangerous, but the signal is real.
  • Meat that’s gone off. Putrefaction β€” the smell of protein properly decomposing β€” is one of the most unmistakable smells on earth. If your chicken smells like that, your nose has done its job. No further consultation required.
  • Mold. Musty, earthy, sharp. Often detectable before you can see it. Your nose here is actually ahead of your eyes, which is a rare compliment.

So yes. Your nose has a skill set. It’s just a very specific skill set, and β€œdetecting dangerous pathogens” is not on the list.

❌ What Your Nose Cannot Detect (The Actual Problem)

This is the part worth paying attention to. The bacteria responsible for the most serious foodborne illness are, almost without exception, completely odorless.

  • Salmonella β€” no smell, no visible change, no taste difference. Chicken that looks perfect, smells perfect, and tastes fine can be fully loaded with it. This is why β€œcook to temperature” is not optional advice.
  • E. coli O157:H7 β€” the strain behind serious outbreak headlines produces nothing detectable in contaminated ground beef. Smells fine. Is not fine.
  • Listeria β€” the overachiever of food pathogens. Not only odorless, but capable of multiplying in your refrigerator. Most bacteria slow down in the cold. Listeria treats your fridge like a comfortable apartment.
  • Staph toxins β€” here’s the truly annoying one. Staphylococcus aureus produces toxins that are odorless, tasteless, and heat-stable. Meaning you can cook the bacteria out of the food and still have a problem, because the toxins they left behind are not going anywhere. The smell test and the cooking step both miss this one entirely.

The pattern: the things your nose catches are mostly unpleasant. The things your nose misses are the ones that put you in bed for three days. The smell test is a comfort, not a verdict.

🌑️ The Actual System: Time and Temperature

Food safety runs on two variables and two variables only: time and temperature. Your nose is not one of them.

  • The Danger Zone β€” bacteria multiply rapidly between 40Β°F and 140Β°F. Food sitting in that range is accumulating a bacterial load whether it smells like anything or not.
  • The Two-Hour Rule β€” cooked food left at room temperature for more than two hours is in risky territory. Above 90Β°F (hot kitchen, summer cookout), that window shrinks to one hour. Your nose will not alert you when the clock runs out.
  • Your refrigerator temperature β€” which should be 40Β°F or below. Many refrigerators run warmer than their settings suggest. A $10 thermometer tells you the truth your fridge dial is not necessarily telling you.

How long is stuff actually safe in the fridge? Here’s the honest guide:

FoodSafe Refrigerator Time
Cooked meat, poultry, fish3–4 days
Cooked eggs3–4 days
Soups and stews3–4 days
Cooked rice and grains4–5 days
Cooked pasta3–5 days
Deli meats (opened)3–5 days
Hard-boiled eggs (in shell)1 week
Raw ground meat1–2 days
Raw whole poultry1–2 days
Raw fish1–2 days

These are conservative guidelines from actual food safety authorities, not optimistic estimates from someone who doesn’t want to throw out the leftover chicken.

πŸ€” The Right Way to Use Your Nose

Your nose isn’t fired. It’s just been reassigned to a supporting role.

Use it for what it’s good at: catching obvious off smells, rancidity, sourness, and the unmistakable signal of meat that has genuinely turned. Those are real signals worth heeding.

Then apply the time-temperature framework as the actual decision: How long has this been in the fridge? Was it refrigerated promptly? Do I actually know when this went in, or am I just hoping?

β€œIt smells fine” is supporting evidence. The date on the container is the verdict.

And when the date is uncertain, when the storage history is murky, when you’re standing there genuinely unsure β€” the professional food safety answer is throw it out. Not because it’s definitely dangerous. Because the cost of guessing wrong is a very bad 48 hours, and leftovers are not worth that math.

πŸ›’ The Gear That Replaces the Guesswork

  • Refrigerator thermometer β€” Confirms your fridge is actually running at 40Β°F or below. Many aren’t. Ten dollars, removes all doubt, immediately more useful than your nose.
  • Dry-erase fridge labels β€” Write the date on every container that goes in the fridge. The smell test becomes completely unnecessary when you know exactly how old something is. Revolutionary in its simplicity.
  • Instant-read thermometer β€” For confirming cooked meat reaches safe internal temperatures. The smell test never applies to raw meat. Temperature does. Every time.
  • Airtight food storage containers β€” Proper sealing slows bacterial growth and prevents cross-contamination. Also, you can actually see what’s in them, which helps with the dating situation considerably.

As an Amazon affiliate, I earn from qualifying purchases. Thank you for supporting TumbleBump.

✨ The Bottom Line

Your nose is a fine nose. It has served you well in many situations. It has kept you from drinking sour milk and eating rancid butter and standing too close to certain people on public transportation.

It is not, however, a food safety system. It never was. It just got promoted into that role by default because nobody posted the actual rules on the fridge.

Now you have the actual rules. Date your containers. Know your fridge temperature. Respect the two-hour window. When in doubt, throw it out.

Your nose can have its old job back. It was never qualified for this one.

πŸ“š Related Reads

TumbleBump is part of the John D Reinhart content family. Writer, illustrator, videographer, and accidental filmmaker β€” find the whole story at JohnDReinhart.com.

24002

Β©2026 John D Reinhart/TumbleBump.com – all rights reserved

Turning the “Bottom of the Jar” into Dressing

When the mustard, tahini, honey, or jam is almost gone, don’t wash the jar. Add vinegar, oil, and a pinch of salt, shake hard, and watch it become the best dressing you’ll make this week. Here’s the complete guide to jar dressings β€” one of the most satisfying kitchen hacks in existence.

There is a moment in the life of most condiment jars when the contents are technically “gone” β€” scraped out to the best of the human hand’s ability β€” but the jar still holds a meaningful coating of flavor on every interior surface.

This coating is not a cleaning problem. It is a dressing problem, and it has an elegant solution.

Add an acid. Add an oil. Add a pinch of salt. Put the lid on. Shake vigorously for ten seconds. You now have a small-batch dressing made in a container that is already perfectly portioned, airtight, and requires zero bowls or measuring.

This is one of the most satisfying kitchen moments available to a person who cooks regularly. Here’s how to do it with every jar in your pantry.


The Mustard Jar Dressing

Dijon mustard is perhaps the greatest jar dressing base, because Dijon is already a vinaigrette ingredient β€” it’s an emulsifier that binds oil and vinegar together into a stable, creamy dressing.

What’s left in the jar: The thin coating of Dijon on every interior surface, worth roughly a teaspoon.

What to add: 1 tablespoon red wine vinegar or lemon juice. 3 tablespoons good olive oil. A pinch of salt and pepper. Optional: a small spoonful of honey, a clove of garlic if you want to let it sit.

Shake: Hard. For 15 seconds. The mustard emulsifies the oil and vinegar into a cohesive, slightly creamy vinaigrette.

Use: On a salad immediately, or refrigerate for up to a week.


The Tahini Jar Dressing

What’s left: The thick paste coating a tahini jar, worth a tablespoon or two.

What to add: 2 tablespoons lemon juice. 1 tablespoon water. 1 tablespoon olive oil. A pinch of salt. Optional: a tiny clove of garlic, a pinch of cumin.

Shake: The tahini will seize up when the lemon juice hits it, then relax and emulsify as you add more liquid and shake. This is normal.

Use: On grain bowls, roasted vegetables, falafel, or as a general drizzle on anything that sounds good with sesame.


The Jam or Honey Jar Dressing

What’s left: A sweet, fruity or floral coating worth a spoonful.

What to add: 1 tablespoon apple cider vinegar or white wine vinegar. 3 tablespoons olive oil. A pinch of salt. Optional: a small amount of Dijon if you have a separate open jar.

Shake: The residual sweetness balances the vinegar into a bright, lightly sweet vinaigrette. This is particularly good on bitter greens like arugula or radicchio, where the sweetness is a counterpoint.


The Hot Sauce Jar Dressing

What’s left: The coating of vinegar-forward hot sauce on the interior.

What to add: 1 tablespoon lime juice. 2 tablespoons olive oil or neutral oil. A pinch of salt. Optional: a small spoonful of honey for a honey-hot situation.

Shake: Produces a tangy, spicy vinaigrette that works well on taco salads, roasted vegetables, or anything that benefits from a kick.


The Pickle Brine Enhancement (A Related Move)

When the pickles are gone, don’t pour the brine down the drain. It’s acidic, salty, and deeply flavored β€” a ready-made vinaigrette acid component.

Add a few tablespoons of pickle brine directly to olive oil, shake, and you have a quick dressing. Or use the brine anywhere you’d use vinegar: deglazing a pan, in a marinade, in a potato salad dressing.


The Peanut Butter Jar Sauce

A jar of nearly-empty peanut butter becomes a quick peanut sauce for noodles or a dipping sauce for spring rolls.

What to add: 2 tablespoons soy sauce. 1 tablespoon lime juice. 1 tablespoon warm water. Optional: a few drops of sesame oil, a small piece of ginger, a squeeze of honey.

Shake: The peanut butter loosens with the liquid and emulsifies into a smooth, spreadable sauce.


The General Formula

Any jar with residual contents + acid (vinegar, citrus juice) + fat (olive oil, neutral oil) + salt = a dressing. The jar’s contents provide the flavor variable. The formula is constant.

Start with roughly a 3:1 ratio of oil to acid β€” 3 parts oil, 1 part acid β€” and adjust from there based on taste. Saltier jar contents (like pickle brine or soy sauce) need less additional salt. Sweeter contents (jam, honey) benefit from more acid.


πŸ›’ Gear Worth Having

As an Amazon affiliate, I earn from qualified purchases. 


Related Reads

Posted on TumbleBump | SAVES Category

TumbleBump is part of the John D Reinhart content family. Writer, illustrator, videographer, and accidental filmmaker β€” find the whole story at JohnDReinhart.com.

24007

Β©2026 John D Reinhart/TumbleBump.com – all rights reserved

Resurrecting Tuesday’s Lasagna

Cold leftover lasagna reheated wrong is a dense, rubbery, vaguely sad experience. Reheated right, it’s almost better than it was on Tuesday β€” with a crust on the bottom that didn’t exist the first time around. Here’s how to properly reheat any layered, baked, or sauced leftover dish.

Tuesday’s lasagna deserves better than what most people do to it.

What most people do: pull it out of the fridge cold, put it directly in the microwave, blast it on high for three minutes, and serve something that is searing hot on the outside and still cold in the center, with a rubber layer of pasta and a layer of grease sitting on top of it.

What Tuesday’s lasagna deserves: a proper reheat that brings it back to temperature gently, lets the cheese melt through again, and produces something that is actually as good as the original. Or, with the right technique, better.

This post is about leftover lasagna specifically β€” but the principles apply to every layered, baked, or sauced leftover: pasta bakes, moussaka, enchiladas, shepherd’s pie, cassoulet. Anything that went into the oven the first time benefits from going back in.


The Oven Method: The Right Way

The oven is the correct tool for reheating baked dishes. It heats gently and evenly, allows the cheese to re-melt properly, and β€” if you want it β€” produces a slightly crispy bottom and top that didn’t exist the first time.

The method:

  1. Let the lasagna come toward room temperature for 20–30 minutes on the counter before reheating. Not mandatory, but it means shorter oven time and more even heating.
  2. Preheat your oven to 350Β°F.
  3. Add a tablespoon or two of water or tomato sauce to the top of the portion before covering. This steam prevents the pasta from drying out during reheating. Don’t skip this.
  4. Cover tightly with foil. The trapped steam is what rehydrates the pasta layers.
  5. Bake for 20–30 minutes (for a single portion or small section). A full pan takes longer β€” 45 minutes to an hour.
  6. Remove the foil for the last 5–10 minutes if you want a slightly browned, bubbling top. Optional but recommended.
  7. Let it sit for 5 minutes before serving. The interior keeps cooking and the temperature equalizes.

Temperature check: The internal temperature should reach 165Β°F. A thermometer removes any guesswork.


The Skillet Method: The Crispy Bottom Upgrade

This method applies specifically to individual slices of lasagna or similar baked pasta, and it produces something the original didn’t have: a crackling, golden, slightly fried bottom crust.

  1. Heat a non-stick or cast iron skillet over medium-low heat. Add a small amount of olive oil or butter.
  2. Place the cold lasagna slice in the skillet.
  3. Add a tablespoon of water to the pan and immediately cover with a lid. The steam heats the interior; the pan crisps the bottom.
  4. Cook over medium-low heat for 8–10 minutes. The bottom will brown; the interior will heat through.
  5. Uncover for the last 2 minutes to let the steam escape and the bottom crisp further.

This is, with some justification, better than the original. A fried lasagna bottom is a different and excellent thing.


The Microwave Method: For When Speed Is the Priority

The microwave is not ideal for lasagna, but it’s not catastrophic if done correctly.

  1. Use a microwave-safe cover or damp paper towel over the portion. This creates steam and prevents the pasta from drying out.
  2. Heat at medium power (50–70%), not full blast. Full power heats unevenly β€” boiling some parts while others remain cold. Medium power heats more gradually and evenly.
  3. Heat in 90-second intervals, checking between each. Stir sauce or rearrange if possible.
  4. Let it sit for 90 seconds after the last interval. The carry-over heat finishes the job.

The microwave produces acceptable results with these adjustments. It doesn’t produce the skillet version’s crust or the oven version’s even melt, but it gets food hot in 5 minutes.


The Universal Leftover Reheat Principles

These apply beyond lasagna to most baked or sauced leftovers:

Add moisture before reheating. Baked dishes lose moisture in storage. A tablespoon of water, broth, or sauce added before covering prevents drying out.

Cover while reheating. Whether foil in the oven or a damp paper towel in the microwave β€” covering traps steam and heats evenly.

Reheat low and slow. High heat scorches the outside before the inside is warm. Moderate heat (350Β°F in the oven, medium-low in a skillet, medium power in a microwave) is consistently better.

Rest after reheating. The 5 minutes of rest after oven heating isn’t a formality β€” the center is still warming during that time. Cutting immediately produces cold centers and wasted heat.


πŸ›’ Gear Worth Having

As an Amazon affiliate, I earn from qualified purchases.


Related Reads


Posted on TumbleBump | SAVES Category

TumbleBump is part of the John D Reinhart content family. Writer, illustrator, videographer, and accidental filmmaker β€” find the whole story at JohnDReinhart.com.

24003

Β©2026 John D Reinhart/TumbleBump.com – all rights reserved

The Three-Act Staple: Why You’re Cooking for Future You

Boiling a pot of rice isn’t a side dish β€” it’s launching a trilogy. Here’s why cooking a staple once can feed you three completely different ways.

Standing in the kitchen at 6:00 PM, the goal usually feels simple: feed me now. But the real win in home cooking comes from looking a little further down the road. Boil a pot of rice, a pound of pasta, or a bag of beans, and you’re not just making tonight’s side dish. You’re launching a trilogy.

🎬 The Logistics of the Big Pot

It takes almost the same amount of time and energy to boil two cups of rice as it does to boil four β€” the water’s already at a boil either way, and the extra volume barely changes the math. Doubling the batch isn’t more work. It’s the same work, done once, paying out three times over. The one real rule: keep the staple neutral. Don’t season the whole pot with taco spices on night one β€” plain, clean, and unseasoned is what lets it evolve into something completely different two nights later.

🎭 The Anatomy of the Trilogy

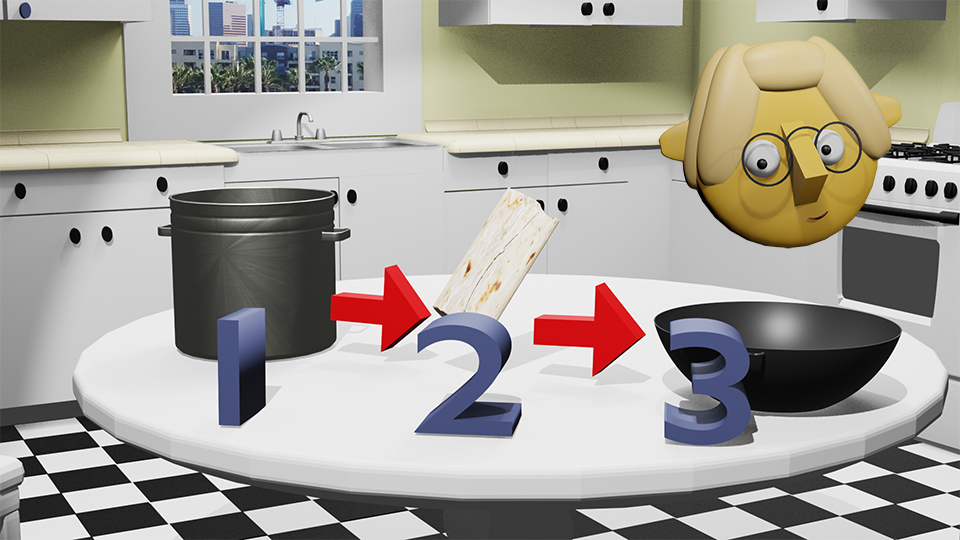
Act 1, the fresh lead: tonight, the staple is the star β€” hot rice under a piece of chicken, warm pasta tossed in butter, enjoyed for exactly what it is. The leftover goes into the fridge. Act 2, the ensemble player: tomorrow, a portion of that cold staple gets folded into something else entirely β€” a soup, a cold salad, a wrap β€” playing supporting cast to round the meal out. The leftover goes back into the fridge again. Act 3, the transformation: by night three, the texture’s changed enough that high heat or a heavier sauce is the right move β€” fried, baked into a casserole, tossed into a pan with eggs. One pot, cooked once, feeding three genuinely different meals.

🧠 Why This Is a Planning Win

Knowing Sunday’s rice is also Tuesday’s stir-fry and Thursday’s burrito filler eliminates decision fatigue for three nights out of seven. There’s no “what’s for dinner” moment to dread, because the foundation is already sitting in the fridge, waiting for its cue. Cook with the road ahead in mind, and the kitchen stops being a nightly negotiation. You’re not just cooking. You’re directing.

πŸ›’ Gear Worth Having

Rice Cooker with Keep-Warm Function β€” Handles a doubled batch without babysitting the stove, and keeps Act 1’s portion at serving temperature while the rest cools for later.

Glass Meal Prep Containers with Lids β€” Keeps each act of the trilogy visible and portioned in the fridge, instead of one giant pot getting slowly picked apart and forgotten.

Large Stockpot with Lid β€” Big enough to double a batch of beans or pasta in one pass, which is the entire logistics trick this post is built on.

As an Amazon affiliate, I earn from qualifying purchases. Thank you for supporting TumbleBump.

πŸ“– Related Reads


TumbleBump is part of the John D Reinhart content family. Writer, illustrator, videographer, and accidental filmmaker β€” find the whole story at JohnDReinhart.com.

24014

Β©2026 John D Reinhart/TumbleBump.com β€” All rights reserved