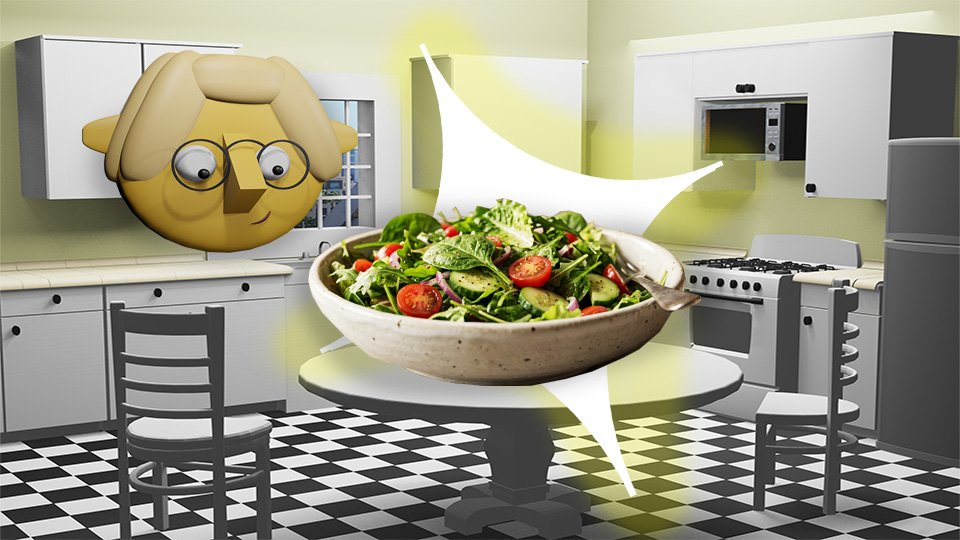
How Salad Actually Works

You’ve never burned a salad. Here’s how to make one worth eating — the ratio, the dressing formula, and the clean-out-the-fridge move that saves lunch every time.

Nobody ever burned a salad. Nobody ever undercooked one, overcooked one, or set off a smoke alarm making one. Salad is fast, cheap, endlessly flexible, and requires zero cooking — which makes it the single most underrated meal in the home cook’s repertoire.

The reason most homemade salads are disappointing has nothing to do with skill. It’s a ratio problem, a dressing problem, or both. Fix those two things and salad stops being a sad bowl of leaves and starts being a meal.

Here’s how it actually works.

🥗 The Ratio

A good salad has three layers: a base, something interesting on top, and a dressing that ties them together. The proportions matter.

Base (greens or grains): About two-thirds of the bowl. Romaine, spinach, arugula, mixed greens, shredded cabbage, cooked farro, cooked quinoa — anything that gives the salad structure and volume.

Toppings: About one-third. This is where the interest lives — vegetables, proteins, cheese, nuts, croutons, fruit, beans. More on this below.

Dressing: Enough to coat, not drown. Two tablespoons of dressing per two large handfuls of greens is a starting point. Toss, taste, add more if needed.

🌶️ The Dressing Formula

Bottled dressing is fine. But once you know the formula, making your own takes about ninety seconds and tastes significantly better.

The formula: 3 parts oil + 1 part acid + something to emulsify + salt and pepper.

  • Oil: Olive oil for most vinaigrettes. Neutral oil (vegetable, avocado) for creamier or Asian-style dressings.
  • Acid: Red wine vinegar, lemon juice, balsamic, apple cider vinegar, rice vinegar. The acid is what wakes everything up.
  • Emulsifier: A small spoonful of Dijon mustard or honey. This keeps the oil and acid from immediately separating and rounds out the flavor at the same time.

Shake it in a jar, whisk it in a bowl, or just pour it straight onto the salad and toss. The jar is easiest because it doubles as storage — it keeps in the fridge for a week.

Example: 3 tablespoons olive oil + 1 tablespoon red wine vinegar + 1 teaspoon Dijon + pinch of salt + grind of pepper. That’s a vinaigrette. Adjust the ratio to your taste and you’ve got a house dressing.

🍱 Turn It Into a Meal

A side salad is greens and dressing. A meal salad adds protein and enough toppings to make it filling. The options are fast and cheap:

  • Rotisserie chicken: Pull it apart and pile it on. Three minutes of work, done.
  • Canned beans: Chickpeas, black beans, white beans. Rinse, drain, add. High protein, low cost, no cooking.
  • A fried or hard-boiled egg: On top of almost any salad, an egg makes it a meal. Sliced hard-boiled eggs are lunch. A fried egg on warm greens is dinner.
  • Canned tuna or salmon: Open, drain, add. Inexpensive protein, zero prep.
  • Cheese: Feta, parmesan, shredded cheddar, crumbled goat cheese. A little goes a long way toward making a salad feel substantial.

🍻 The Clean-Out-the-Fridge Salad

This is the move. Open the fridge, look at what’s in there, and put it on greens with a dressing. The rules are loose:

  • Leftover roasted vegetables? On the salad.
  • Last night’s cooked grain? Toss it in as the base.
  • Half an avocado? Slice it on top.
  • Random cheese, a handful of nuts, a couple of olives? All of it.
  • Croutons from stale bread? Cut it into cubes, toss with olive oil and salt, toast in a pan or oven for ten minutes. Better than store-bought.

The clean-out-the-fridge salad wastes nothing, costs almost nothing beyond what you already paid for, and is different every time. Once this becomes a habit, food waste drops noticeably.

📦 The Big Batch Salad

Greens wilt the moment they meet dressing. That’s the problem with prepping a salad for the week. The solution: build the salad without the dressing, and use a base that holds up.

Grain-based salads are the move here. Cooked farro, quinoa, or brown rice holds up for four to five days in the fridge without getting soggy. Layer in roasted vegetables, beans, a protein if you like, and whatever else is around. Keep the dressing separate and add it when you eat.

Cook a batch of grains on Sunday. Make the dressing in a jar. Pack lunch for four days without thinking about it again. This is meal planning for people who don’t like meal planning.

If greens are your base, keep them dry and undressed in the container. Add a paper towel on top to absorb moisture. They’ll stay crisp for three to four days.

⚡ A Few Things That Make Salad Better

  • Dry your greens. Wet greens repel dressing. Spin them or pat them dry and dressing actually sticks.
  • Season the greens, not just the dressing. A pinch of salt directly on the greens before tossing makes a surprising difference.
  • Add something crunchy. Toasted nuts, croutons, seeds, fried shallots. Texture is what separates a salad that’s interesting from one that isn’t.
  • Taste it before serving. Too bland? More salt or acid. Too sharp? A drizzle more oil or a pinch of sugar.
  • Big bowl, small portions. Toss the salad in a bowl larger than you think you need. Everything distributes evenly without greens escaping onto the counter.

🛒 Gear Worth Having

As an Amazon affiliate, I earn from qualified purchases. Thank you for supporting TumbleBump.

Recommended Reads

Posted on TumbleBump | COOKS Category

TumbleBump is part of the John D Reinhart content family. Writer, illustrator, videographer, and accidental filmmaker — find the whole story at JohnDReinhart.com.

21014

©2026 John D Reinhart/TumbleBump.com – all rights reserved
Stop Driving to the Coffee Shop. Make Great Coffee at Home.

You don’t need a barista. You need five minutes and the right gear. Here’s how to make genuinely great coffee at home — every single morning.

Somewhere out there, someone is driving across town to pick up a coffee.

They left the house. They got in the car. They are now sitting in a drive-through line behind seven other people who also left their houses and got in their cars. They will return in approximately thirty-five minutes, coffee in hand, slightly smug, slightly later than they needed to be.

This does not have to be anyone’s morning.

Great coffee — genuinely, actually great coffee — is achievable at home, in about five minutes, for a fraction of the cost of whatever the barista just handed through the window. You just need to know a few things.

Let’s sort it out.

☕ The Secret Is Embarrassingly Simple

Fresh beans. Ground right before brewing. Hot (but not boiling) water. The right ratio.

That’s it. That’s the whole secret. The fancy equipment helps, but those four things are responsible for ninety percent of what separates a great cup from a mediocre one.

The barista your family is so devoted to? They’re doing those four things. You can do them too. In your kitchen. In your pajamas.

🫘 Start With Good Beans

Pre-ground coffee from a can is the enemy of great coffee. By the time it reaches your cup, most of the flavor has already escaped into the atmosphere. Coffee starts losing its best qualities within about fifteen minutes of being ground.

What to Look For

  • Whole beans, always. Grind them yourself.
  • A roast date on the bag. Not a ‘best by’ date — a roast date. Look for beans roasted within the last two to four weeks.
  • Single-origin or quality blends from a local roaster, Trader Joe’s, Whole Foods, or a reputable online source.
  • Light to medium roast for brighter, more complex flavor. Dark roasts are bold but can taste bitter if brewed poorly.

💡  Ignore the impressive-sounding blends with names like ‘Midnight Thunder Reserve.’ Check the roast date. That number matters more than the name.

⚙️ Get a Grinder

This is the single most impactful purchase you can make for your coffee. A burr grinder — not a blade grinder — produces a consistent grind that extracts evenly and tastes dramatically better.

Burr vs. Blade

  • Blade grinders chop beans unevenly, producing a mix of powder and chunks that brews inconsistently. They’re cheap, and you get what you pay for.
  • Burr grinders crush beans between two surfaces to a uniform size. Consistent grind = consistent extraction = better taste.

☕  A decent burr grinder in the $40-80 range will transform your morning cup more than any other single upgrade. It’s the best coffee investment you can make.

💧 Water Temperature and Ratio

Temperature

Boiling water (212°F) scorches coffee. You want water between 195°F and 205°F — just off the boil. If you don’t have a thermometer, boil the water and let it sit for thirty seconds. Done.

The Golden Ratio

The standard starting point is one to two tablespoons of ground coffee per six ounces of water. Most people use too little coffee and wonder why their cup tastes weak. Measure it, at least until you find your sweet spot.

📏  One tablespoon per six ounces is weak. Two tablespoons per six ounces is strong. Start in the middle and adjust from there. Your taste buds are the final authority.

🔧 Pick Your Method

Different brewing methods produce genuinely different tasting cups. Here’s a quick field guide:

Drip Coffee Maker

The easiest. A good drip machine with a thermal carafe keeps coffee hot without burning it. Use fresh-ground beans and a good filter and you’ll be surprised how good it gets.

Best for: households, anyone who wants coffee ready when they wake up.

Pour Over

You pour hot water slowly over grounds in a filter cone. It takes about four minutes and produces a clean, bright, extraordinarily flavorful cup. It’s also deeply satisfying in a slightly fussy way that some people find therapeutic.

Best for: one or two cups, people who like a ritual with their morning.

French Press

Grounds steep directly in hot water for four minutes, then you press a plunger down to separate them. Produces a rich, full-bodied cup with more texture than a drip or pour over. No paper filter means more of the coffee’s natural oils make it into your cup.

Best for: people who like bold, rich coffee. Requires a coarser grind.

AeroPress

A plastic cylinder that brews coffee under gentle pressure. Fast (about two minutes), forgiving, easy to clean, and produces a concentrated, smooth cup that’s remarkably versatile. The cult following is real and it’s earned.

Best for: anyone. Seriously. It’s almost impossible to make a bad cup with an AeroPress.

🏆  If you’re new to all this and want one recommendation: get an AeroPress and a decent burr grinder. You’ll make better coffee than most cafes within a week.

📋 Your Five-Minute Morning Coffee Routine

  1. Boil your water. Let it sit thirty seconds.
  2. Measure your beans. Two tablespoons per six ounces of water you’re making.
  3. Grind them fresh. Medium grind for drip or pour over, coarser for French press.
  4. Brew using your method of choice.
  5. Pour it. Drink it. Feel smug. You did not drive anywhere.

🛒 What to Get

The Essentials

  • Burr Coffee Grinder — The single most important upgrade. A consistent grind changes everything.
  • AeroPress Coffee Maker — Fast, forgiving, and produces a genuinely excellent cup. The easiest entry into great home coffee.
  • Pour Over Coffee Dripper — For a cleaner, brighter cup with more nuance. Hario V60 or Chemex are the classics.
  • French Press — Bold, rich, and satisfying. Bodum makes a reliable one at a very reasonable price.

Nice to Have

  • Gooseneck Kettle — For pour over, the slow controlled pour matters. A gooseneck gives you that control.
  • Coffee Scale — Measuring by weight rather than volume is more accurate and more consistent. Coffee nerds swear by it.
  • Coffee Thermometer — Water temperature matters. A simple instant-read thermometer keeps you in the right zone.
  • Thermal Coffee Carafe — Keeps coffee hot without a warming plate, which slowly burns your coffee. Worth every penny.
  • Airtight Coffee Canister — Store your beans here, away from light and air. Freshness preserved, flavor intact.

As an Amazon Associate, I earn from qualifying purchases. Thank you for supporting TumbleBump.

🔗 Related Reads

TumbleBump is part of the John D Reinhart content family. Writer, illustrator, videographer, and accidental filmmaker — find the whole story at JohnDReinhart.com.

21013

©2026 John D Reinhart/TumbleBump.com — All rights reserved

The Nuts and Bolts of Making Pasta

Pasta is the most forgiving, fastest, most satisfying thing you can cook on a weeknight — but a few small mistakes keep most home cooks from getting it quite right. Here’s everything you need to know, including the one ingredient that makes all the difference.

Pasta is the meal most people make when they don’t know what to cook. This makes it both the most familiar and the most underestimated dish in the home cook’s repertoire.

Because here’s the thing: good pasta is not just pasta with sauce poured on top. It’s a dish where the pasta and sauce become a unified thing — where they’re cooked together, where starchy pasta water binds everything, where the result is silky and cohesive rather than a pile of noodles with a pool of sauce underneath.

The difference between pasta-with-sauce-on-top and real pasta is a few small technique shifts. Here they are.


The Water: More Than You Think

Use more water than you think you need — at least 4–5 quarts for a pound of pasta. Pasta needs room to move around as it cooks; crowded pasta clumps.

Salt the water aggressively. This is the step most home cooks undertake too timidly. The water should be “salty like the sea” — a common instruction that means a tablespoon or more of salt per quart of water. Pasta absorbs flavor as it cooks; this is your only opportunity to season the pasta itself. Water that isn’t well-salted produces pasta that tastes of nothing no matter how good your sauce is.

Bring the water to a full rolling boil before adding pasta.


The Pasta: Shapes Have Reasons

Pasta shapes exist for reasons, not just aesthetic variety. Different shapes are designed to work with different sauce textures.

Long, thin pasta (spaghetti, linguine, fettuccine): Best with smooth or lightly textured sauces — aglio e olio, carbonara, light tomato sauces, simple cream sauces. The sauce coats the strands.

Short, tubular pasta (penne, rigatoni, paccheri): Best with chunky sauces or meaty ragùs. The sauce gets inside the tubes and catches in the ridges.

Small pasta (fusilli, farfalle, orecchiette): Best with chunky vegetable sauces, sausage-based sauces, or pesto. Small pastas catch chunky bits.

Large, wide pasta (pappardelle, wide egg noodles): Best with rich, hearty, braised meat sauces. The broad surface carries big flavors.

You don’t need to be rigid about this. But matching shape to sauce makes a difference you’ll taste.


The Cook: Al Dente Is a Specific Thing

Al dente means “to the tooth” in Italian — a pasta that is cooked through but retains a slight resistance when you bite it. It should be tender but not soft. There should be the faintest bit of chew in the very center.

Cook it less than the box says. Start tasting 2 minutes before the package minimum. Fish out a piece and bite it. If you see a white line in the cross-section, it needs more time. When the white line is gone but there’s still a tiny bit of resistance, you’re there.

Don’t rinse your pasta. Rinsing washes off the surface starch that helps sauce adhere. Drain it, don’t rinse it.


Pasta Water: Liquid Gold

Before you drain your pasta, scoop out a cup or two of the cooking water. This pasta water is starchy, salty, and slightly thick — it’s the secret ingredient that makes restaurant pasta sauces silky and cohesive.

When you combine pasta with sauce, adding a splash of pasta water helps the sauce cling to the noodles and creates an emulsified, glossy result instead of a separated, greasy, or watery one.

Add it sparingly, a few tablespoons at a time. You usually won’t use the whole cup — but you’ll almost always need some of it.


Finishing in the Sauce: The Critical Step

Most home cooks drain pasta completely, then add sauce to the bowl or plate. This is fine, but it produces that characteristic “pasta with sauce on top” quality.

The restaurant approach: undercook the pasta by 1–2 minutes, then finish cooking it directly in the sauce.

  1. Remove pasta from water slightly before it’s done (still very al dente)
  2. Transfer directly into the pan with warm sauce (a ladle of pasta water goes with it)
  3. Toss over medium heat for 1–2 minutes

The pasta finishes cooking in the sauce. It absorbs the sauce’s flavors. The sauce thickens slightly from the starch in the pasta. The whole thing comes together as a unified dish.

This is the single biggest improvement most home pasta cooks can make.


The Simplest Sauces That Are Also the Best

Aglio e Olio (Garlic and Oil): Spaghetti + good olive oil + plenty of garlic (thinly sliced, not minced, cooked gently) + red pepper flakes + parsley + pasta water. That’s it. It takes 20 minutes and costs almost nothing.

Cacio e Pepe: Pasta + pecorino romano cheese + black pepper + pasta water. Three ingredients. Notoriously tricky to get smooth (the cheese can clump) but deeply satisfying when it works.

Simple Tomato Sauce: Crushed canned tomatoes (San Marzano if you can find them) + olive oil + garlic + salt + a little basil at the end. Simmer for 20 minutes. This is the sauce of Italian grandmothers and it is unbeatable.

Pasta with Butter and Parmesan: Drained pasta + a few tablespoons of good butter + grated parmesan + pasta water to make it silky. Dinner for one, late at night, quietly excellent.


A Note on Fresh vs. Dried

Dried pasta is not inferior to fresh pasta — they’re just different products for different dishes. Fresh pasta (made from egg dough) is silkier, richer, cooks faster, and suits delicate sauces and stuffed pasta shapes. Dried pasta (made from semolina and water) is heartier, has better texture for al dente, and is better for robust sauces.

Both are good. Dried pasta from a good brand (De Cecco, Barilla, Rummo) is excellent and costs almost nothing. Don’t feel you need to make fresh pasta to cook pasta well.


🛒 Gear Worth Having

As an Amazon affiliate, I earn from qualifying purchases. Click through the links above to support TumbleBump.


Recommended Reads


Posted on TumbleBump | COOKS Category

TumbleBump is part of the John D Reinhart content family. Writer, illustrator, videographer, and accidental filmmaker — find the whole story at JohnDReinhart.com.

21000

©2026 John D Reinhart/TumbleBump.com – all rights reserved
The Maillard Reaction: Why Browned Food Tastes Better

Your food isn’t just getting hot — it’s getting interesting. Here’s the science behind browning, why it matters, and how to get more of it every time you cook.

META DESCRIPTION:

You’ve noticed it. The sear on a steak. The crust on a loaf of bread. The golden edge of a grilled cheese sandwich. The way roasted vegetables taste completely different from steamed ones, even if you started with the exact same vegetable.

That’s not just heat doing its thing. That’s chemistry. Specifically, it’s the Maillard Reaction — and once you understand it, you’ll never look at a pale, gray piece of chicken the same way again.

🔥 What Is the Maillard Reaction?

In 1912, a French chemist named Louis-Camille Maillard noticed something interesting: when you heat amino acids (from proteins) alongside sugars, they react with each other. Hundreds of new flavor compounds form. Color develops. Aromas bloom. The food becomes something it wasn’t before.

This reaction — named after him, because that’s how science works — is what’s responsible for:

  • The brown crust on a seared steak
  • The toasty exterior of bread
  • The golden color of roasted vegetables
  • The complex flavor of coffee and chocolate
  • The irresistible smell of bacon in the morning

It is not caramelization — that’s a different reaction involving only sugars. The Maillard Reaction needs both protein and sugar. It also needs heat: it starts happening around 280°F (140°C) and really gets going above 300°F (150°C).

🍳 Why It Matters in Your Kitchen

Simple: browned food tastes better. Not because we’re used to it. Because the Maillard Reaction is literally creating new flavor molecules that weren’t there before. A raw chicken breast has maybe a handful of flavor compounds. A seared one has hundreds.

This is why a steak from a screaming-hot cast iron pan tastes fundamentally different from one that was cooked low-and-slow the whole way. Why roasted carrots taste almost sweet and complex while boiled carrots taste like… water with a vegetable in it.

The Maillard Reaction is the difference between “cooked” and “delicious.”

⭐ How to Get More of It

Dry the surface. Moisture is the enemy. Water on the surface of meat or vegetables has to boil off before the temperature can climb high enough for browning to begin. Pat things dry before they hit the pan. Seriously. Use a paper towel. Be thorough.

Use high heat. Below 280°F, the Maillard Reaction barely happens. Preheat your pan until it’s properly hot before food goes in. If it doesn’t sizzle, it’s not ready.

Don’t crowd the pan. Too much food at once drops the pan temperature and releases steam. Now you’re steaming, not browning. Cook in batches if you have to. Your patience will be rewarded.

Use fat wisely. Oil and butter conduct heat to the food’s surface evenly. They also carry fat-soluble flavor compounds, amplifying the browning effect. A dry pan produces dry results.

Let it sit. Move food too soon and you interrupt the reaction before it has time to develop. A properly preheated pan will release the food naturally when a good crust has formed. If it’s sticking, it’s not done yet.

Salt after, not before (for some things). Salt draws moisture out. On a steak going straight to the pan, last-minute salting keeps the surface drier. (Salt well in advance — 45+ minutes — and the moisture reabsorbs. Either works. Right before is the mistake.)

⚠️ When You Don’t Want It

Sometimes pale is correct. Poached eggs. Braised meats. White sauces. Delicate fish. In these cases, you’re after tenderness and moisture retention, not a crust. The Maillard Reaction doesn’t happen in water (water maxes out at 212°F, below the threshold), which is why poaching and braising produce a completely different result.

Knowing what you’re going for — brown or pale — is half the battle.

🛒 Gear Worth Having

As an Amazon affiliate, I earn from qualified purchases.

Related Reads

Posted on TumbleBump.com | COOKS Category

TumbleBump is part of the John D Reinhart content family. Writer, illustrator, videographer, and accidental filmmaker — find the whole story at JohnDReinhart.com.

21012

©2026 John D Reinhart/TumbleBump.com – all rights reserved
What Recipes Assume You Already Know

Recipes are written by people who already know how to cook, for people who also already know how to cook — which is why they’re sometimes maddening. Here’s how to actually decode what they’re telling you (and what they forgot to mention).

Recipes are, in theory, a set of instructions. In practice, they are a set of instructions written by someone who has made this dish 40 times and has stopped noticing the parts that would confuse a beginner, because those parts have become as automatic as breathing.

This is not the recipe writer’s fault. It’s just how expertise works. But it does mean you need to read recipes with a specific kind of critical eye — catching the assumptions, translating the jargon, and planning ahead for the moments they forgot to mention.

Here’s how.


Step One: Read the Whole Thing Before You Start

This sounds obvious and is widely ignored. Read the entire recipe — ingredients and instructions — before you turn on a single burner.

Why? Because recipes contain surprises. “Leave to marinate overnight.” “Let the dough rest for 2 hours.” “Make the sauce first.” If you find these surprises after you’ve already started, you will have a bad time. If you find them before you start, you can plan around them.

Reading through first also shows you the overall shape of the dish — what order things happen in, what the goal is, what you’re building toward. This makes the individual steps make sense instead of feeling like arbitrary instructions from a stranger.


Step Two: Check the Ingredients for Prep Notes

Look carefully at how each ingredient is listed. There’s a difference between:

  • “1 cup mushrooms, sliced” (slice them before you start)
  • “1 cup sliced mushrooms” (this is just describing what you need)

The difference is that a cup of pre-sliced mushrooms has more mushrooms in it than the cup of un-sliced mushrooms. That little comma tells you to bring a whole cup of whole mushrooms to slice. Without the comma, bring a cup of mushroom slices. It can make quite a difference.

Similarly, while “2 cloves garlic, minced” means the garlic gets minced as part of your prep, “2 cloves of minced garlic” means you’re bringing the cloves pre-minced.

Other common prep notes to watch for:

  • Room temperature butter/eggs” — plan ahead by 30 minutes
  • “Divided” — this ingredient gets used in two different steps, don’t use it all at once
  • “Finely chopped” vs. “roughly chopped” — the texture difference matters more than you’d think

Step Three: Know What the Jargon Means

Recipes assume you know certain words. Here are the most common ones worth having in your vocabulary:

Heat levels: –

  • Sauté — cook in a little fat over medium-high heat, stirring occasionally  
  • Simmer — cook in liquid just below boiling (small bubbles, gentle movement)  
  • Blanch — briefly boil, then immediately plunge into ice water to stop cooking

Cutting terms:

  •  Mince — as small as possible (garlic, herbs)
  • Dice — small, even cubes (about ½ inch)
  • Julienne — thin matchstick strips
  • Chiffonade — stack leaves, roll, and slice into thin ribbons (usually herbs or leafy greens)

Other terms: 

  • Fold — gently combine to preserve the air bubbles that give whipped eggs, cream, and delicate batters their light texture. Stirring or overmixing collapses those bubbles and flattens the result.
  • Deglaze — add liquid to a hot pan to lift the browned bits off the bottom (this is flavor, don’t skip it)
  • Season to taste — add salt and pepper until it tastes right to you, not to some abstract standard
  • Rest — leave cooked meat alone for a few minutes so the juices redistribute

Step Four: Notice What the Recipe Doesn’t Tell You

Good recipes have gaps. Here are common ones:

“Cook until golden.” Golden means what, exactly? Look for actual browning, not just color change. The Maillard reaction (the science of browning) is where flavor lives.

“Season to taste.” This is instruction to actually taste the food and add salt/pepper until it tastes good. It’s not a get-out-of-jail-free card — it’s an active step.

Prep time estimates. “Prep: 15 minutes” was written by someone who can dice an onion in 45 seconds. Double or triple it until you’re experienced.

“A splash” / “a handful” / “a knob of butter.” These are vibes, not measurements. A splash is about a tablespoon of liquid. A handful of herbs is about ¼ cup loosely packed. A knob of butter is roughly a tablespoon.


Step Five: Set Up Your Mise en Place

Fancy French phrase, practical concept: mise en place means “everything in its place.” Before you start cooking, measure, chop, prep, and organize everything the recipe calls for. Put each ingredient in its own small bowl or measuring cup.

Then, when you start cooking, you just reach for things instead of scrambling to chop garlic with one hand while something is burning in the pan.

This is the single biggest difference between a stressful cooking experience and a calm one.


Step Six: Trust Your Senses More Than the Recipe

The recipe says cook for 20 minutes. If it’s browning heavily at 12, check it. If it looks pale at 20, give it more time.

Recipes are written for an average oven, an average stove, and average ingredients. Your kitchen is specific. Your oven runs hot or cool. Your onions might be bigger or smaller than the writer’s. Cooking times are guidelines, not commandments.

Look. Smell. Taste. Touch. These are your real instruments. The recipe is just the sheet music.


🛒 Gear Worth Having

As an Amazon affiliate, I earn from qualified purchases.


Related Reads

Posted on TumbleBump | COOKS Category

TumbleBump is part of the John D Reinhart content family. Writer, illustrator, videographer, and accidental filmmaker — find the whole story at JohnDReinhart.com.

21006

©2026 John D Reinhart/TumbleBump.com – all rights reserved
The “Is It Done?” Checklist

You’re staring at the steak. The steak is staring back. Neither of you knows if it’s done. Here’s the checklist that ends the staring contest — for eggs, meat, pasta, veggies, and everything else that’s ever made you anxious at the stove.

The question haunts every cook, from the brand-new to the pretty-experienced: is it done?

You peer into the pan. You poke it a little. You cut a tiny corner off and squint at it. You put it back. You wait two more minutes and check again. You are, at this point, more committed to uncertainty than to the actual cooking.

Here’s a checklist — food by food, category by category — so you can stop guessing and start knowing.


🥚 Eggs

Scrambled: Done when they look almost done. Pull them off heat while they still look slightly wet — they’ll finish from residual heat and you’ll avoid the rubbery fate.

Fried (sunny side up): The whites should be fully set and opaque. The yolk should still jiggle when you shake the pan.

Fried (over easy/medium/hard): Easy = yolk runs freely. Medium = yolk is jammy, moves slowly. Hard = yolk is fully set, no movement.

Boiled: – Soft boil: 6–7 minutes from boiling water – Medium: 9 minutes – Hard: 12 minutes Then immediately into ice water to stop cooking.

Baked / oven dishes with egg: Set around the edges, barely jiggly in the center. It’ll firm up as it cools.


🍗 Chicken

The gold standard: Internal temperature of 165°F (74°C) at the thickest part, not touching bone.

Visual cues (less reliable, but useful): – Juices run clear (not pink) when pierced – No pink visible when cut at the thickest point – The meat feels firm, not squishy, when pressed

Pro tip: Chicken breast goes from done to dry very quickly. Pull it at 160°F — it’ll coast up to 165°F while resting.


🥩 Beef & Pork

Steak internal temps: – Rare: 120–125°F (very red center) – Medium rare: 130–135°F (warm red center) – Medium: 140–145°F (pink center) – Medium well: 150–155°F (slightly pink) – Well done: 160°F+ (no pink, godspeed)

Ground beef: Always cook to 160°F. No exceptions — ground meat is a different animal than whole cuts, literally.

Pork: 145°F for whole cuts (a little pink is fine and correct). 160°F for ground.

The press test (rough guide): Poke your cooked steak. Rare feels like pressing the meaty base of your thumb when your hand is relaxed. Medium rare feels like pressing it with your hand half-closed. Well done feels firm, like pressing it with a full fist. It takes practice, but it works.


🍝 Pasta

The only test that matters: Fish out a piece and bite it. You want it tender but with a tiny bit of resistance in the very center — that’s al dente. If it’s soft all the way through, it’s overdone. If it snaps, it needs more time.

Ignore the box timing as gospel. Use it as a starting point and start tasting 2 minutes before the minimum.

Bonus tip: Pasta continues cooking for a minute after you drain it, especially if you’re adding it to a hot sauce. Pull it slightly early.


🥦 Vegetables

Roasted: Fork-tender and golden at the edges. If they’re fork-tender but pale, give them more time for color — that’s where the flavor is.

Sautéed: Bright in color (green veg turns vivid before it fades to army green — army green means overdone), tender when poked, still with a little texture.

Steamed/boiled: Pierce the thickest part with a knife tip. It should go in without resistance but not feel mushy.

When in doubt: Taste it. This is always allowed.


🍞 Bread & Baked Goods

Bread: Tap the bottom — it should sound hollow. Internal temp of 190–210°F depending on the type.

Muffins/cupcakes: A toothpick inserted in the center comes out clean or with just a couple of dry crumbs. Wet batter = more time.

Cake: Same toothpick test. Also, the edges should pull slightly away from the pan sides, and the top should spring back when pressed lightly.

Cookies: Pull them when they look underdone. Seriously. They continue cooking on the hot pan. The “done” moment at the oven is always one minute before you think it is.


🍲 Soups, Stews & Sauces

Proteins within: Follow the meat rules above.

Vegetables within: Stab them with a fork. They should be tender.

Stews/braises: When the meat falls apart when pressed with a spoon, it’s done. This is one category where overdone is actually the goal.

Sauces: Done when they coat the back of a spoon and a line drawn through it holds. (This is the “nappe” test and you may now feel fancy.)


🌡️ The One Tool That Eliminates All Guessing

Get a meat thermometer. A good instant-read thermometer costs about $15-30 and removes all uncertainty from meat, fish, bread, and anything else temperature-sensitive. It is the single most useful kitchen tool you are probably not using.


🛒 Gear Worth Having

As an Amazon affiliate, I earn from qualified purchases.


Related Reads

Posted on TumbleBump.com | COOKS Category

TumbleBump is part of the John D Reinhart content family. Writer, illustrator, videographer, and accidental filmmaker — find the whole story at JohnDReinhart.com.

21008

©2026 John D Reinhart/TumbleBump.com – all rights reserved
Five Meal Ideas That Are Faster Than Fast Food

Stop idling in the drive-thru! Discover five delicious, home-cooked meal ideas that go from pantry to plate faster than a “value meal” delivery. Save your sanity and your wallet with these TumbleBump kitchen sprints.

We’ve all been there. It’s 6:00 PM, the fridge is staring back blankly, and the siren song of the drive-thru starts wailing. It’ll be faster just to grab a burger, you think.

Except look at the actual math. By the time you find your keys, navigate the lights, sit behind sixteen idling SUVs, and discover they forgot the dipping sauce, you’ve spent forty-five minutes and twenty-five dollars. Several home-cooked meals beat that math without even trying — and they’re not fast because they’re simple shortcuts. They’re fast because of actual physics.

⚡ Why Some Foods Cook Fast, and Others Just Don’t

Cooking speed comes down to how quickly heat can reach the center of what you’re eating. Thin, small, or already-processed ingredients let heat arrive almost instantly. Thick, dense, or raw-from-scratch ingredients make heat travel further before anything’s actually done. Every meal below is fast for a specific physical reason, not because it’s cutting a corner.

🫓 Why the Quesadilla Wins

A folded tortilla creates enormous surface contact between food and pan at once — the whole flattened package touches heat simultaneously, rather than heat working through a single thick piece of meat or vegetable. Cheese acts as both flavor and glue, binding whatever’s inside without needing its own separate cooking time, since it’s already made and just needs to melt. That’s why a quesadilla scales to almost any leftover: the format does the fast-cooking work, not the specific filling.

🍝 Why Aglio e Olio Is Basically Free Speed

Thin pasta shapes have far more surface area relative to their volume than thick ones, which is why they cook in minutes rather than the better part of an hour a dense cut of meat might need. The real trick behind this dish, though, is parallel processing: garlic infuses into oil over low heat in almost exactly the time pasta takes to boil, so two separate cooking processes finish at the same moment without either one waiting on the other.

🥚 Why Eggs Are the Fastest Protein on the Planet

Eggs have very little water locked inside their structure compared to most proteins, and no connective tissue that needs long, slow heat to break down the way a tough cut of meat does. The proteins simply coagulate — firm up — the moment they hit heat, with nothing else standing in the way. That’s the entire reason a scramble finishes in minutes while a roast needs hours: there’s just less internal work for the heat to do.

🦐 Why Shrimp Basically Cooks Itself

Shrimp is small and genuinely lean, which means heat reaches the center almost instantly — the same property that makes it so fast is exactly why it overcooks just as fast if it’s left a beat too long. A shrimp that’s translucent and grey turns opaque and pink within roughly ninety seconds of real heat, and that speed is the whole reason it reads as a restaurant-level protein for weeknight effort.

🫓 Why Naan Skips the Slow Part of Pizza

Traditional pizza dough needs time to rise before it ever sees an oven — that waiting is most of what makes homemade pizza a project rather than a quick dinner. Naan or flatbread arrives already leavened and already baked once, so all that’s left is melting cheese and re-crisping the surface under a broiler. The bread did its slow work at the bakery. Dinner just inherits the shortcut.

🛒 Gear Worth Having

Large Nonstick Skillet, 12-Inch — Big enough surface for a folded quesadilla or a seared batch of shrimp without crowding either one into steaming instead of browning.

Digital Instant-Read Thermometer — Takes the guesswork out of shrimp and egg doneness, which matters most on the proteins that go from perfect to overcooked in seconds.

Large Stockpot with Strainer Insert — Boils pasta and drains it in one motion, which shaves real time off the one step in this whole list that can’t be rushed by physics alone.

As an Amazon affiliate, I earn from qualifying purchases. Thank you for supporting TumbleBump.

📖 Related Reads


TumbleBump is part of the John D Reinhart content family. Writer, illustrator, videographer, and accidental filmmaker — find the whole story at JohnDReinhart.com.

21005

©2026 John D Reinhart/TumbleBump.com — All rights reserved